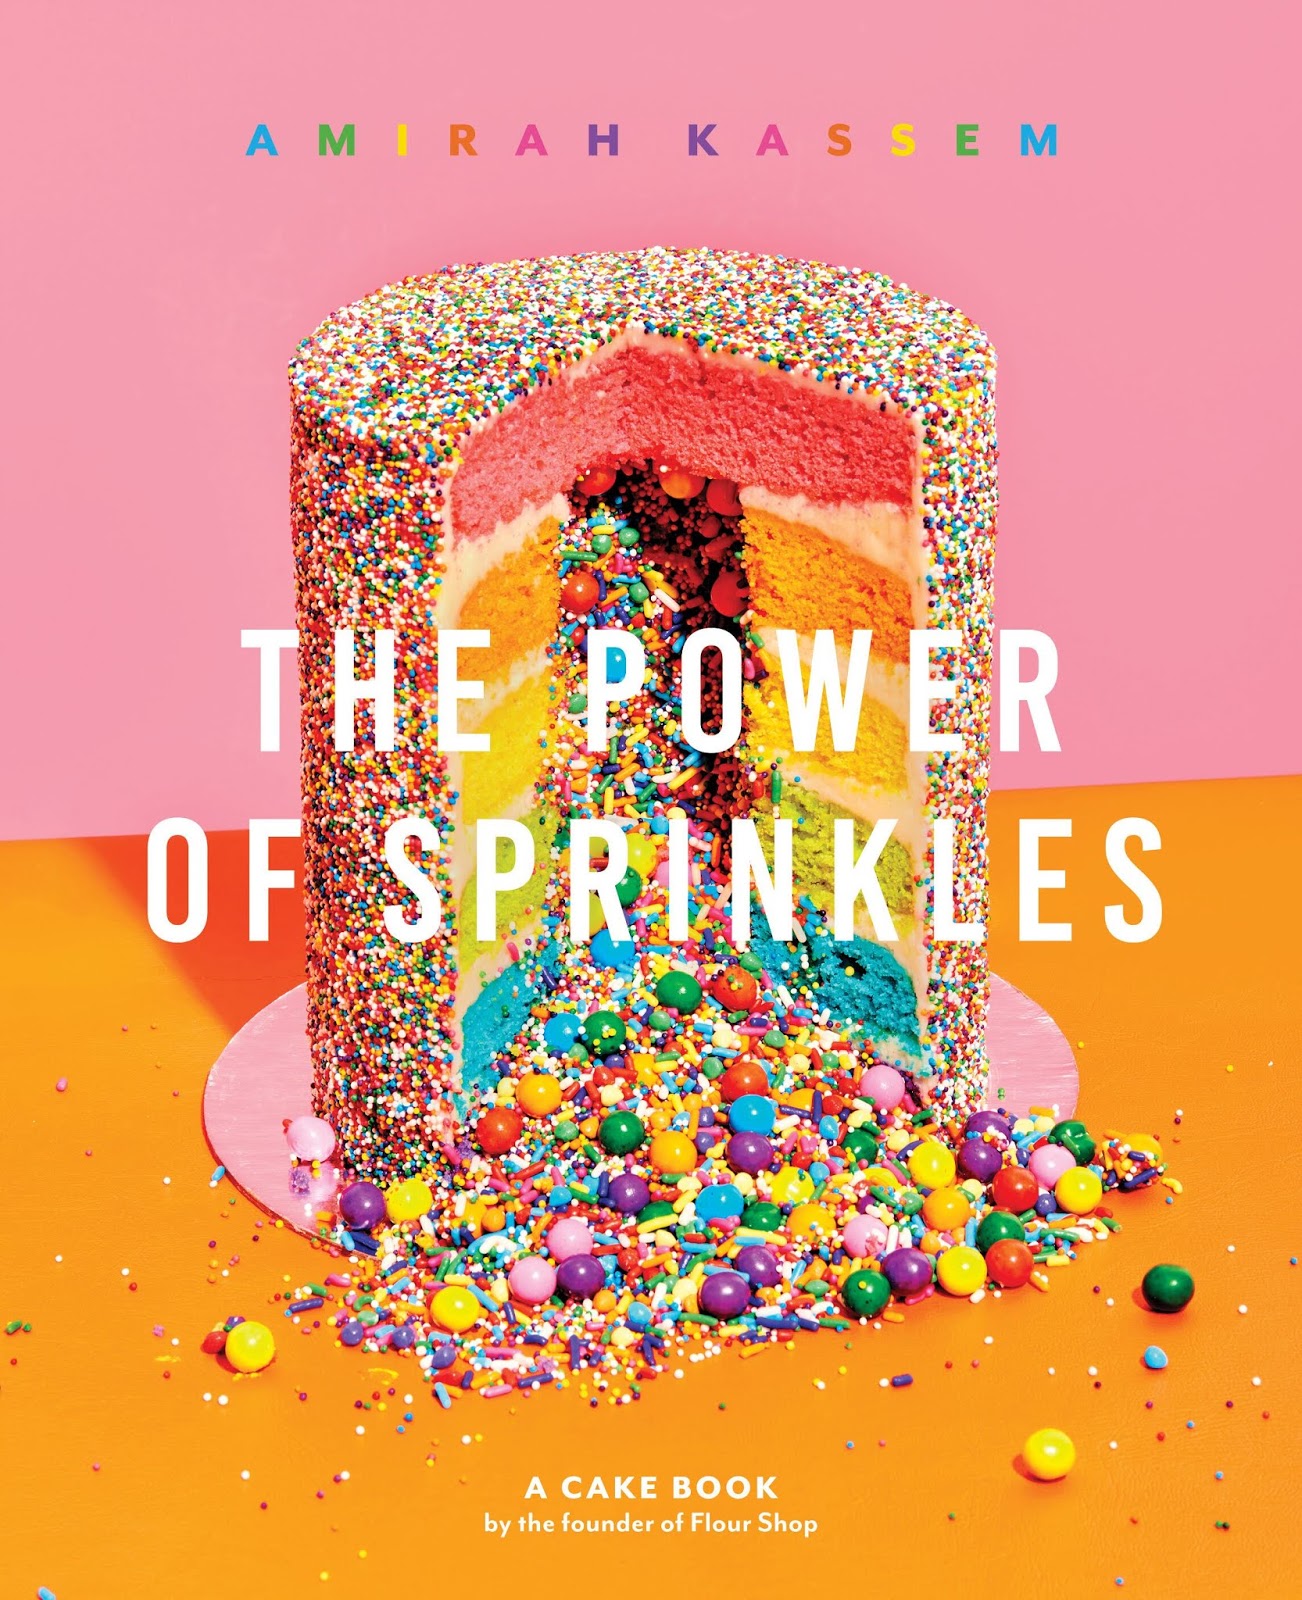
I have had this cake cookbook on my pile for a while to try and finally pulled all the pieces together! Amirah Kassem is the personality, baker, and cake decorator behind the sprinkle explosion cakes at Flour Shop. Her new book, The Power of Sprinkles, shows the method behind making the cake. Really The Power of Sprinkles is more of a decorating book, because it only contains one cake and one frosting recipe, but then goes on to demonstrate a bunch of variations, from the unicorn cakes to the sushi cakes to the cakes that look like other things (pizza, pancakes, etc.) Because of the one recipe issue, I am not including it in this post; please take a look at the cookbook!
It felt to me like sprinkles were the important thing, so I decided to make a small explosion cake. I had ordered fancy sprinkles already! I used the basic suggestions for the sushi roll cakes, which divided one cake recipe into two 9x13 pans (two colors) and used a half recipe of the icing. Amirah has very clear directions in her book, with pictures for each step. This is how I remembered to put holes in my cakes but not the top layer, and to remember to fill the cake with sprinkles before putting that top layer on! She also has helpful recommendations for timing, scaling up or down, or other variations.
I had been poking around the cake decorating part of the internet (a huge rabbit hole) and decided to try out the watercolor technique on the outside.
I definitely used too much food coloring in the watercolor stage, but liked how this technique required less icing (I was worried I shouldn't have halved the batch!) and lets you use up all the dregs in the watercolor process, which is basically random blops that get smoothed to a vaguely abstract look (or in my case - almost smoothed. I really need a cake turner!)
This post is sponsored by ABRAMS Books, as part of the ABRAMS Dinner Party.
The Power of Sprinkles came out April 9, 2019.
You can use the book for a whole host of ideas for seasonal parties or fun themes, or even just as a jumping off point for your own creative ventures. The cake I made is not exactly pictured, but I pulled inspiration from some of her versions and used her primary cake and frosting recipes.
Check out her website and Instagram too, which may be the two most colorful places on the internet!
Monday, April 29, 2019
Monday, April 22, 2019
Double Dark Chocolate Banana Muffins
I follow a bunch of bakers and other foodie types in Instagram, and one of my favorite is the Table for Two account. Her daily espresso stir into milk is mesmerizing (watch her stories, you'll see what I mean.) I saw these muffins come up the other day, was home for the day, and totally craving chocolate. I also had a lone wonky banana that wasn't going to make it to the weekend. These muffins start with a trick that makes a big difference - high heat to lift the height of the muffins. Please visit the Table for Two blog for answers to FAQ about this recipe, detailed picture instructions, and all her other content. (This is not a paid advertisement by the way, I just like this account a lot.)
Double Dark Chocolate Banana Muffins
(from Julie Wampler at the Table for Two blog)
3 ripe bananas, mashed
4 tablespoons maple syrup
1 teaspoon vanilla extract
1 large egg, room temperature
1/4 cup coconut oil, melted
1/2 cup plain greek yogurt, room temperature
1 cup whole wheat flour
1 1/4 teaspoon baking soda
1/2 cup dark cocoa powder, sifted
1/2 teaspoon kosher salt
2/3 cup dark chocolate chips, more for topping
Instructions
Preheat oven to 425 degrees Fahrenheit. Line a muffin pan with muffin liners and lightly spray them with cooking spray. Set aside.
In a large bowl, mix together bananas, maple syrup, vanilla extract, egg, coconut oil, and greek yogurt. Set aside.
In a medium bowl whisk together flour, baking soda, cocoa powder, and salt.
Carefully pour in the dry ingredients into the wet ingredients and mix until just incorporated and no flour is left at the bottom.
Fold in the chocolate chips.
Using a large cookie scoop (or ice cream scoop), fill the muffin cups 3/4 full and add additional chocolate chips on top, if desired. Repeat until all the batter is used up. You may get more than a dozen, that's okay.
Bake for 5 minutes at 425 degrees Fahrenheit then turn down the oven to 375 degrees Fahrenheit and finish baking for 12 minutes, or until a toothpick inserted into the center of the muffin comes out clean.
Remove from oven and let cool in the muffin pan for 5 minutes before transferring to a wire rack to cool completely.
Store in an airtight container for up to 5 days.
Notes from JennyBakes:
Julie at the Table for Two blog is pretty adamant that you can use a neutral oil like avocado or grapeseed instead of coconut, but says not to use olive or canola or vegetable. I didn't want to wait for my other cold ingredients to warm to room temperature (necessary when working with coconut oil, otherwise it resolidifies) - I used vegetable oil, and thought it was fine.
I used regular flour instead of whole wheat.
I used sour cream instead of yogurt.
I made 1/3 of the recipe because I had 1 banana!
Double Dark Chocolate Banana Muffins
(from Julie Wampler at the Table for Two blog)
3 ripe bananas, mashed
4 tablespoons maple syrup
1 teaspoon vanilla extract
1 large egg, room temperature
1/4 cup coconut oil, melted
1/2 cup plain greek yogurt, room temperature
1 cup whole wheat flour
1 1/4 teaspoon baking soda
1/2 cup dark cocoa powder, sifted
1/2 teaspoon kosher salt
2/3 cup dark chocolate chips, more for topping
Instructions
Preheat oven to 425 degrees Fahrenheit. Line a muffin pan with muffin liners and lightly spray them with cooking spray. Set aside.
In a large bowl, mix together bananas, maple syrup, vanilla extract, egg, coconut oil, and greek yogurt. Set aside.
In a medium bowl whisk together flour, baking soda, cocoa powder, and salt.
Carefully pour in the dry ingredients into the wet ingredients and mix until just incorporated and no flour is left at the bottom.
Fold in the chocolate chips.
Using a large cookie scoop (or ice cream scoop), fill the muffin cups 3/4 full and add additional chocolate chips on top, if desired. Repeat until all the batter is used up. You may get more than a dozen, that's okay.
Bake for 5 minutes at 425 degrees Fahrenheit then turn down the oven to 375 degrees Fahrenheit and finish baking for 12 minutes, or until a toothpick inserted into the center of the muffin comes out clean.
Remove from oven and let cool in the muffin pan for 5 minutes before transferring to a wire rack to cool completely.
Store in an airtight container for up to 5 days.
Notes from JennyBakes:
Julie at the Table for Two blog is pretty adamant that you can use a neutral oil like avocado or grapeseed instead of coconut, but says not to use olive or canola or vegetable. I didn't want to wait for my other cold ingredients to warm to room temperature (necessary when working with coconut oil, otherwise it resolidifies) - I used vegetable oil, and thought it was fine.
I used regular flour instead of whole wheat.
I used sour cream instead of yogurt.
I made 1/3 of the recipe because I had 1 banana!
Monday, April 15, 2019
Whole-wheat spelt, date, and molasses scones
I served these scones as an accompaniment to another recipe from A Modern Cook's Year: More than 250 Vibrant Vegetarian Recipes to Get You Through the Seasons, which I will discuss below. It was a good decision because these are not very sweet, but add a nice contrast to the dish I prepared. I didn't have quite a full cup of spelt flour so I used a little bit of all-purpose in the same amount, and it worked just fine. You can actually substitute all-purpose flour entirely, but the texture will be a bit denser.
Whole-wheat spelt, date, and molasses scones
Makes 6
1 cup (125 g) pitted dates
5 fluid oz (150 ml) freshly brewed strong black or earl grey tea
1 cup (125 g) whole-wheat spelt flour
2 tsp baking powder
1/4 tsp ground allspice
1/4 tsp flaky sea salt
2 tbsp (30 g) cold unsalted butter, cubed
1 tbsp molasses
1/3 cup (75 g) buttermilk or thin natural yogurt
For the glaze:
1 organic or free range egg
1 tbsp milk
a pinch of sea salt
a handful of rolled oats
Preheat the oven to 395 F (200 C.)
Line a baking sheet with parchment paper.
Soak the dates in the hot tea for 15 minutes, until the tea has cooled a little. Mix together the flour, baking powder, allspice, and sea salt with your fingertips, then add the butter until the mix looks like bread crumbs. You could also do this by pulsing it in a food processor.
Drain, then roughly chop the dates and add them to the mix, along with the molasses and buttermilk. Mix slowly and lightly until the mixture forms a soft but not too sticky dough. Shape into a rough round ball, place on a prepared baking sheet, and use a knife to score across the top, to mark out six portions, stopping before the knife reaches the baking sheet. It should look a bit like a loaf of soda bread.
Mix the egg and milk for the glaze with a pinch of salt and brush it over the top, then sprinkle with the oats, pressing them into the dough lightly to stick them down.
Bake for 15 minutes, then turn the baking sheet and reduce the heat to 360 F (180 C) and continue to bake for about 10 more minutes, until the top is a dark golden brown and when you turn the scone over and tap it, it sounds hollow. Serve warm from the oven and break up as required.
I served this scone loaf with Cauliflower rice with eggs and green chutney from the same cookbook. As skeptical as I have been about cauliflower pretending to be other things, this treatment of it was delicious and we will have it again!
A Modern Cook's Year: More than 250 Vibrant Vegetarian Recipes to Get You Through the Seasons by Anna Jones is one of the books from ABRAMS that I've been procrastinating on because it has so many recipes I want to make! As a former vegetarian still married to one, I know the suffering of most vegetarian options at restaurants and even the offerings in vegetarian cookbooks - so many pastas, and so many portabella "steaks."
This cookbook comes from a different philosophy. First of all it is very seasonal, but it is also British in all the best ways. The recipes feel like they come from a country garden with rotating seasonal produce but also influenced by current eating trends and international cuisines. Sometimes Anna Jones provides a recipe, but other times she provides a formula. There are two pages of curry formulas that I can't wait to try, and the springtime dishes have me searching for ramps already. This is definitely going on my permanent shelf for endless inspiration.
This post is sponsored by ABRAMS Books, as part of the ABRAMS Dinner Party.
Whole-wheat spelt, date, and molasses scones
Makes 6
1 cup (125 g) pitted dates
5 fluid oz (150 ml) freshly brewed strong black or earl grey tea
1 cup (125 g) whole-wheat spelt flour
2 tsp baking powder
1/4 tsp ground allspice
1/4 tsp flaky sea salt
2 tbsp (30 g) cold unsalted butter, cubed
1 tbsp molasses
1/3 cup (75 g) buttermilk or thin natural yogurt
For the glaze:
1 organic or free range egg
1 tbsp milk
a pinch of sea salt
a handful of rolled oats
Preheat the oven to 395 F (200 C.)
Line a baking sheet with parchment paper.
Soak the dates in the hot tea for 15 minutes, until the tea has cooled a little. Mix together the flour, baking powder, allspice, and sea salt with your fingertips, then add the butter until the mix looks like bread crumbs. You could also do this by pulsing it in a food processor.
Drain, then roughly chop the dates and add them to the mix, along with the molasses and buttermilk. Mix slowly and lightly until the mixture forms a soft but not too sticky dough. Shape into a rough round ball, place on a prepared baking sheet, and use a knife to score across the top, to mark out six portions, stopping before the knife reaches the baking sheet. It should look a bit like a loaf of soda bread.
Mix the egg and milk for the glaze with a pinch of salt and brush it over the top, then sprinkle with the oats, pressing them into the dough lightly to stick them down.
Bake for 15 minutes, then turn the baking sheet and reduce the heat to 360 F (180 C) and continue to bake for about 10 more minutes, until the top is a dark golden brown and when you turn the scone over and tap it, it sounds hollow. Serve warm from the oven and break up as required.
I served this scone loaf with Cauliflower rice with eggs and green chutney from the same cookbook. As skeptical as I have been about cauliflower pretending to be other things, this treatment of it was delicious and we will have it again!
A Modern Cook's Year: More than 250 Vibrant Vegetarian Recipes to Get You Through the Seasons by Anna Jones is one of the books from ABRAMS that I've been procrastinating on because it has so many recipes I want to make! As a former vegetarian still married to one, I know the suffering of most vegetarian options at restaurants and even the offerings in vegetarian cookbooks - so many pastas, and so many portabella "steaks."
This cookbook comes from a different philosophy. First of all it is very seasonal, but it is also British in all the best ways. The recipes feel like they come from a country garden with rotating seasonal produce but also influenced by current eating trends and international cuisines. Sometimes Anna Jones provides a recipe, but other times she provides a formula. There are two pages of curry formulas that I can't wait to try, and the springtime dishes have me searching for ramps already. This is definitely going on my permanent shelf for endless inspiration.
This post is sponsored by ABRAMS Books, as part of the ABRAMS Dinner Party.
Monday, April 08, 2019
Banana Pancakes with Cardamom Spiced Berries from Pescan
I made Spicy Buffalo Tofu Fingers from the Pescan Cookbook last month, but I had a few more pages marked to try. One morning we had berries in the fridge and bananas that were past their prime, and I remembered this recipe.
Banana Pancakes with Cardamom Spiced Berries
Spiced Berries
1 cup blackberries
1 cup raspberries
1 tbsp filtered water
2 tbsp maple syrup
1/4 tsp ground cardamom
Pancakes
2 ripe bananas
1/2 cup almond milk
1/2 cup filtered water
1 cup old-fashioned or gluten-free rolled oats
1/2 cup almond meal
2 tsp baking powder
1/2 tsp vanilla extract
1/2 tsp ground cinnamon
1/4 tsp kosher sea salt
2 tbsp chia seeds or 1 large egg
2 tsp coconut oil
Make the spiced berries. Place the blackberries, raspberries, and water in an 8-inch pan. Cook the berries over medium heat, stirring occasionally, until the raspberries begin to break down, about 3 minutes. Stir in the maple syrup and cardamom, lower the heat to medium-low, and cook for about 3 minutes more, until the raspberries have broken down into a sauce. The blackberries may stay intact depending on how firm they are. The sauce will continue to thicken as it sits.
Make the pancakes. In a blender, combine the bananas, milk, water, oats, almond meal, baking powder, vanilla, cinnamon, salt, and chia seeds or egg. Blend, starting on low, then bringing it up to medium-high speed, until smooth, 30 seconds to 1 minute.
Heat a large nonstick skillet or griddle over medium heat, add 1 tsp of the coconut oil, and swirl to coat the bottom of the pan. When the pan is hot, after about 1 minute, make 2 pancakes using half of the batter (about 1/2 cup each), spreading the batter out with the back of a tablespoon. Cook until set on the bottom and a few bubbles appear on the surface, about 2 minutes, then flip and cook on the second side until lightly browned on the bottom, about another 2 minutes. Transfer the pancakes to a plate. Swirl the remaining teaspoon oil into the pan and repeat with the remaining batter.
Meanwhile, reheat the berry sauce over medium-low heat. Transfer the pancakes from the pan onto individual serving plates and top each with one quarter of the berry sauce. Reheat the first two pancakes in the pan over medium heat for 30 seconds per side, then transfer to serving plates and top with the rest of the berry sauce. Finish with a bit of softened coconut butter on top.
This post is sponsored by ABRAMS Books, as part of the ABRAMS Dinner Party.
Pescan is available March 26, 2019.
Banana Pancakes with Cardamom Spiced Berries
Spiced Berries
1 cup blackberries
1 cup raspberries
1 tbsp filtered water
2 tbsp maple syrup
1/4 tsp ground cardamom
Pancakes
2 ripe bananas
1/2 cup almond milk
1/2 cup filtered water
1 cup old-fashioned or gluten-free rolled oats
1/2 cup almond meal
2 tsp baking powder
1/2 tsp vanilla extract
1/2 tsp ground cinnamon
1/4 tsp kosher sea salt
2 tbsp chia seeds or 1 large egg
2 tsp coconut oil
Make the spiced berries. Place the blackberries, raspberries, and water in an 8-inch pan. Cook the berries over medium heat, stirring occasionally, until the raspberries begin to break down, about 3 minutes. Stir in the maple syrup and cardamom, lower the heat to medium-low, and cook for about 3 minutes more, until the raspberries have broken down into a sauce. The blackberries may stay intact depending on how firm they are. The sauce will continue to thicken as it sits.
Make the pancakes. In a blender, combine the bananas, milk, water, oats, almond meal, baking powder, vanilla, cinnamon, salt, and chia seeds or egg. Blend, starting on low, then bringing it up to medium-high speed, until smooth, 30 seconds to 1 minute.
Heat a large nonstick skillet or griddle over medium heat, add 1 tsp of the coconut oil, and swirl to coat the bottom of the pan. When the pan is hot, after about 1 minute, make 2 pancakes using half of the batter (about 1/2 cup each), spreading the batter out with the back of a tablespoon. Cook until set on the bottom and a few bubbles appear on the surface, about 2 minutes, then flip and cook on the second side until lightly browned on the bottom, about another 2 minutes. Transfer the pancakes to a plate. Swirl the remaining teaspoon oil into the pan and repeat with the remaining batter.
Meanwhile, reheat the berry sauce over medium-low heat. Transfer the pancakes from the pan onto individual serving plates and top each with one quarter of the berry sauce. Reheat the first two pancakes in the pan over medium heat for 30 seconds per side, then transfer to serving plates and top with the rest of the berry sauce. Finish with a bit of softened coconut butter on top.
This post is sponsored by ABRAMS Books, as part of the ABRAMS Dinner Party.
Pescan is available March 26, 2019.
Monday, April 01, 2019
Funfetti Cookie Dough Cake from Cake Confidence
Funfetti Cookie Dough Cake
Funfetti Cake
3/4 cup buttermilk
2/3 cup sour cream
1/3 cup vegetable oil
4 egg whites
1 Tbsp. Mexican vanilla
1 box Duncan Hines white cake mix
1/2 cup rainbow jimmies
Eggless Cookie Dough
1/2 cup butter, slightly softened
1/2 cup sugar
1/2 cup light brown sugar
2 Tbsp. milk
2 Tbsp. vanilla extract
1 cup flour
1/4 tsp. salt
1/2 cup mini chocolate chips
1/2 cup rainbow jimmies
White Chocolate Ganache
1 cup "Very white" Wilton or Guittard white chocolate
1/4 cup heavy cream
Vanilla Buttercream
1 cup (2 sticks) unsalted butter
pinch of salt
1 Tbsp. Mexican vanilla
1/4 cup heavy cream
5-7 cups powdered sugar, sifted
Garnishes
cookie dough balls
rainbow jimmies
![]() |
| Sara and her cake (photo by Libby Young) |
Funfetti Cake
- Preheat the oven to 350 degrees. Prep 6-inch cake rounds with a wipe of shortening and dust of flour.
- Set aside. In a medium bowl, whisk together the buttermilk, sour cream, vegetable oil, egg whites, and vanilla until combined. Sift in white cake mix and sprinkles and stir until just combined. Don't overmix!
- Bake for 25-27 minutes until center is baked through - don't overbake! Remove from oven, let cool in pan for 5 minutes, then flip out onto a cooling rack until room temperature.
- After the cake is finished baking, clean out the pans you used for the cake rounds, and press two layers of plastic wrap in an "x" in two of the pans, remembering to press the plastic wrap into the corners, and leaving about a few inches of overhang on all sides. Set aside. This will help you shape the cookie dough layer into the same size round as your cake.
- In the bowl of your stand mixer fitted with the paddle attachment, cream the butter and sugars together until light and fluffy, which should take about 3 minutes.
- Add the milk and vanilla and mix for about 30 seconds.
- Add in the flour, salt, chocolate chips, and jimmies. The dough will be slightly sticky. Add in flour by the tablespoon as needed.
- Roll the dough into tiny balls (think marbles or a tad larger) for the top decor of your cake. Store those in a plastic bag or small Tupperware with lid. Set aside.
- Divide the remaining dough into two separate balls and press one ball in the two prepared cake pans. Using the bottom of a 1 cup measuring cup or the bottom of a drinking glass helps a lot! The dough should be 1/4-1/2 inch thick. Wrap the overhang over the dough and refrigerate for at least 20 minutes.
White Chocolate Ganache
- In a small glass bowl, add in chocolate melts and heavy cream. Microwave for 30 seconds, then stir with a small whisk until smooth. Add to a squeeze bottle for ganache drip on the side of the cake.
Vanilla Buttercream
- In a stand mixer fitted with a paddle attachment, whip up butter for about a minute until light and fluffy. Scrape down the sides of the bowl.
- Add the salt, vanilla, and heavy cream until combined. Slowly add in powdered sugar, about a half cup at a time. Add in more heavy cream if needed for a thinner consistency.
- Add in pink coloring if desired. Whip on high for 1 minute to create a soft buttercream.
- On a cake turntable, tape a 6-inch cardboard round on top of an 8-inch cardboard round. Top with a small amount of buttercream and spread it around to act like "glue" for holding the cake onto the board.
- Place on first cake round and carefully top with the first cookie dough layer. Add on about a cup of buttercream, spread it flat with an offset cake spatula. Add on next layer of cake, and repeat with remaining two layers.
- Crumb coat the cake, place in the fridge to set for about 5 minutes.
- Add sprinkle rim on the bottom, freeze for a minute or so to set, then add on ganache drip.
- Place the cake in the freezer for 5 minutes to allow the ganache to firm before adding on the buttercream decor and topping them off with cookie dough balls.
- I don't have 6" cake rounds. I baked this cake in 2 9" cake rounds and made only one cookie dough layer. I made my tiny balls too big so almost didn't have enough for that layer.
- Because of time, even though I had the ingredients, I skipped the white chocolate ganache step.
- I had ordered a set of Fancy Sprinkles, so had to separate them out a bit before using them in this recipe. I tried to keep the tiny balls and jimmies for the cake batter and cookie dough and used the larger pieces on the outside and top.
- I do not like this buttercream and if I made this cake again would use one of my old standbyes that have a more silky texture. Once you go Italian/Swiss buttercream there is just no use for powdered sugar buttercreams in my opinion.
- Even with all my modifications and less than perfect execution, this was hugely popular among my co-workers, who called it a unicorn cake and princess cake. The cookie dough inside really is a treat.
Monday, March 25, 2019
Spicy Buffalo Tofu Fingers from Pescan
A southern restaurant chain used to have buffalo tofu on the menu, and we would drive out of our way just to have some. A few years later they opened a restaurant in our town, but by then, they had removed the buffalo tofu from the menu. As I looked through Pescan: A Feel Good Cookbook by Abbie Cornish and Jacqueline King Schiller, several recipes caught my eye, but when I hit this recipe in the last section ("Party Food,") I knew what I would try first.
The entire cookbook is plant-based and dairy-free (with the addition of seafood in some of the recipes.) I did not make the Avocado Ranch Dressing they have listed with this recipe because I did not have immediate access to nutritional yeast at my grocery store (this is still considered a specialty ingredient here in the south.) Instead I bought commercial Avocado Ranch that does contain dairy, and also made a sour cream blue cheese dip since that is what I think of with buffalo flavor. Please consult the cookbook for that part of the recipe.
Tofu can sometimes be a struggle, and I've had a hard time bringing flavor into baked tofu. I really like the technique in this recipe, and would probably adopt it with other marinades/sauces as well. The only step I added was using my tofu press to remove even more moisture from the blocks of tofu.
Spicy Buffalo Tofu Fingers
(from Pescan)
2 (16-oz) packages super-firm tofu (I used extra-firm)
1/4 cup virgin coconut oil
1/4 cup hot sauce (any that lists vinegar as an ingredient; I used Frank's)
1/4 cup sriracha
3 tbsp honey*
2 tbsp fresh cilantro leaves
Preheat the oven to 400 F and line a baking sheet with parchment paper. Cut the tofu into fingers about 3/4 inch wide on all side and 3 inches long. Lay the fingers on the baking sheet so there is a little space between each one and bake for 15 minutes.
Meanwhile, in a small pot, melt the oil over medium-low heat. Add the hot sauce, sriracha, and honey and whisk to combine. Turn off the heat. Remove the tofu from the oven and brush with the sauce on all sides. Bake for 15 minutes more.
Turn the tofu fingers in the oven and brush with any remaining sauce. Bake for a final 15 minutes, or until lightly browned. If the tofu has not browned after 45 minutes, you can place it under the broiler 2-4 minutes before serving.
*The cookbook is plant-based and dairy-free but I'm noting that honey is still present. If you are completely vegan you of course will want a different ingredient here, maybe molasses or agave.
Pescan: A Feel Good Cookbook
I like this way of cooking, and having seafood in the mix means the recipes include everything we eat in my house. The pictures in the cookbook are vibrant and really invite you in. Some seem to require a better juicer/blender than I have, and I would probably be more likely to buy nut milks than make my own, but I like the from-scratch mentality for sure.
Other recipes I have my eye on:
Golden Tea for Two
Strawberry-Lemon Chia Seed Jam
Banana Pancakes with Cardamom Spiced Berries
Spring Salad with Green Goddess Dressing
White Bean and Celery Salad with Pesto Grilled Shrimp
This post is sponsored by ABRAMS Books, as part of the ABRAMS Dinner Party.
Pescan is available March 26, 2019.
The entire cookbook is plant-based and dairy-free (with the addition of seafood in some of the recipes.) I did not make the Avocado Ranch Dressing they have listed with this recipe because I did not have immediate access to nutritional yeast at my grocery store (this is still considered a specialty ingredient here in the south.) Instead I bought commercial Avocado Ranch that does contain dairy, and also made a sour cream blue cheese dip since that is what I think of with buffalo flavor. Please consult the cookbook for that part of the recipe.
Tofu can sometimes be a struggle, and I've had a hard time bringing flavor into baked tofu. I really like the technique in this recipe, and would probably adopt it with other marinades/sauces as well. The only step I added was using my tofu press to remove even more moisture from the blocks of tofu.
Spicy Buffalo Tofu Fingers
(from Pescan)
2 (16-oz) packages super-firm tofu (I used extra-firm)
1/4 cup virgin coconut oil
1/4 cup hot sauce (any that lists vinegar as an ingredient; I used Frank's)
1/4 cup sriracha
3 tbsp honey*
2 tbsp fresh cilantro leaves
Preheat the oven to 400 F and line a baking sheet with parchment paper. Cut the tofu into fingers about 3/4 inch wide on all side and 3 inches long. Lay the fingers on the baking sheet so there is a little space between each one and bake for 15 minutes.
Meanwhile, in a small pot, melt the oil over medium-low heat. Add the hot sauce, sriracha, and honey and whisk to combine. Turn off the heat. Remove the tofu from the oven and brush with the sauce on all sides. Bake for 15 minutes more.
Turn the tofu fingers in the oven and brush with any remaining sauce. Bake for a final 15 minutes, or until lightly browned. If the tofu has not browned after 45 minutes, you can place it under the broiler 2-4 minutes before serving.
*The cookbook is plant-based and dairy-free but I'm noting that honey is still present. If you are completely vegan you of course will want a different ingredient here, maybe molasses or agave.
Pescan: A Feel Good Cookbook
I like this way of cooking, and having seafood in the mix means the recipes include everything we eat in my house. The pictures in the cookbook are vibrant and really invite you in. Some seem to require a better juicer/blender than I have, and I would probably be more likely to buy nut milks than make my own, but I like the from-scratch mentality for sure.
Other recipes I have my eye on:
Golden Tea for Two
Strawberry-Lemon Chia Seed Jam
Banana Pancakes with Cardamom Spiced Berries
Spring Salad with Green Goddess Dressing
White Bean and Celery Salad with Pesto Grilled Shrimp
This post is sponsored by ABRAMS Books, as part of the ABRAMS Dinner Party.
Pescan is available March 26, 2019.
Monday, March 18, 2019
Chocolate Cake with Mascarpone and Praline
I recently read Save Me the Plums: My Gourmet Memoir by Ruth Reichl (this comes out on April 2,) about her years as Editor in Chief at Gourmet Magazine. It fits nicely between her other memoirs, and goes up until Conde Nast closes the magazine with little warning.
Early on in her time there, as she was building relationships with the staff, they were working on a chocolate cake recipe for a YAFI (or a "You Asked For It") feature. She recognized the cake and was able to show them she really knew her stuff in that moment.
Of course I wanted to make the cake. It's a bit of an unusual technique, with boiling fats, water, and cocoa powder together first, then mixing those with sugar and chocolate, then letting the batter cool before doing more with it. I didn't have a high enough round pan so I baked it in an 8" square, and it worked just fine.
-I used all hazelnuts because that's what I had... I also made shards from my praline instead of smaller pieces
-I used Guittard bittersweet chocolate discs
-I added an extra egg based on a discussion Ruth relayed in the book
Early on in her time there, as she was building relationships with the staff, they were working on a chocolate cake recipe for a YAFI (or a "You Asked For It") feature. She recognized the cake and was able to show them she really knew her stuff in that moment.
Of course I wanted to make the cake. It's a bit of an unusual technique, with boiling fats, water, and cocoa powder together first, then mixing those with sugar and chocolate, then letting the batter cool before doing more with it. I didn't have a high enough round pan so I baked it in an 8" square, and it worked just fine.
This recipe is more of a one-shot, make for a dinner party cake. If you assemble it too early, the praline will go soft, the mascarpone will need to be chilled, and the cake will dry out in the fridge. To bring it to my co-workers tomorrow, I'll bring everything separately.
Chocolate Cake with Mascarpone and Praline
(recipe from Gourmet Magazine, April 1999, now available at Epicurious.com, originally from Cafe Mezzo in London. Recipe is also included in forthcoming memoir.)
Ingredients
- For praline
- 1/2 cup whole blanched almonds
- 1/2 cup hazelnuts
- 3/4 cup sugar
- 1/4 cup water
- For cake
- 3 ounces fine-quality bittersweet chocolate (not unsweetened)
- 1/3 cup unsweetened cocoa powder (not Dutch process)
- 5 tablespoons unsalted butter
- 1/3 cup vegetable oil
- 2/3 cup water
- 1 cup plus 2 tablespoons sugar
- 1 large egg
- 1 1/4 cups all-purpose flour
- 2 teaspoons baking powder
- 1/3 cup well-shaken buttermilk
- 8 ounces mascarpone cheese (about 1 cup) at room temperature
- 1 1/2 tablespoons sugar
Preparation
- Make praline:
- Preheat oven to 350°F.
- In a baking pan toast nuts in one layer in middle of oven 10 minutes, or until almonds are lightly colored and hazelnut skins are blistered. Wrap nuts in a kitchen towel and let steam 1 minute. Rub nuts in towel to remove any loose hazelnut skins (do not worry about skins that do not come off) and cool completely.
- Line a baking sheet with foil. In a small heavy saucepan bring sugar and water to a boil, stirring until sugar is dissolved. Boil syrup, without stirring, washing down any sugar crystals that cling to side of pan with a pastry brush dipped in cold water, until it begins to turn golden. Swirl pan until syrup is deep golden and remove from heat. Stir in nuts and pour praline onto baking sheet, spreading evenly. Cool praline completely and break into pieces. Transfer praline to a sealable plastic bag and with a rolling pin coarsely crush.
- Make cake:
- Preheat oven to 300°F. Generously butter a 9-inch round cake pan (at least 2 inches deep) and line bottom with wax or parchment paper. Butter paper and dust pan with flour, knocking out excess.
- Finely chop chocolate. In a small saucepan combine cocoa powder, butter, oil, and water. Bring mixture to a boil, stirring until smooth, and remove pan from heat. Add chocolate and sugar, whisking until smooth, and transfer to a bowl. Cool chocolate mixture completely and whisk in egg. Sift flour and baking powder over chocolate mixture and whisk until just combined. Whisk in buttermilk and pour batter into cake pan, spreading evenly. Bake cake in middle of oven 45 to 50 minutes, or until a tester comes out clean, and cool in pan on a rack 5 minutes. Run a thin knife around edge of pan and invert cake onto rack. Discard paper. Cool cake completely and transfer to a plate. In a bowl stir together mascarpone and sugar. Spread mixture over top of cake and generously sprinkle with praline.
-I used all hazelnuts because that's what I had... I also made shards from my praline instead of smaller pieces
-I used Guittard bittersweet chocolate discs
-I added an extra egg based on a discussion Ruth relayed in the book
Monday, March 11, 2019
Brown Butter Blondies
I needed a recipe to use up some chocolate chunks, and went searching for a good blondie recipe. The flavor of the brown butter elevates these cookies to possibly the best thing ever, ever, ever. Ahem. Make these. Add chocolate chips or chunks or don't but make them today.
Brown Butter Blondies
(recipe courtesy of Carrie Vasios Mullins on Serious Eats)
Ingredients
- 8 tablespoons (1 stick) unsalted butter
- 1 cup flour
- 1/2 teaspoon baking powder
- 1/4 teaspoon salt
- 1 cup brown sugar
- 1 egg
- 1 teaspoon vanilla
Directions
- Adjust oven rack to middle position and preheat oven to 350°F. Grease pan with butter.
- Place butter in a small saucepan over medium heat. Cook, stirring occasionally, until melted. Continue to cook (the butter will foam) until it is fragrant and a nutty brown color. Take off the heat and pour through a sieve into a large bowl. Let cool to room temperature.
- In a small bowl, whisk together flour, baking powder, and salt; set aside.
- Add brown sugar to bowl with butter and whisk until smooth. Add egg and vanilla and whisk to combine. Stir in dry ingredients until just incorporated. Pour batter into pan and smooth top. Bake until a cake tester inserted into the middle comes out clean, 20-30 minutes. Let cool at least 15 minutes before cutting.
Monday, March 04, 2019
Salted Peanut Bars
I was feeling baking ennui and came across an Instagram story from Deb at Smitten Kitchen about everyone making her salted peanut tart, in tart or bars form. I went through my mental inventory and realized I had all the ingredients, even the plain sour cream she recommends serving with it. Unlike the other recipes I'd encountered in books that would require a trip to the store for one essential ingredient each, this would only require me walking to the kitchen. Sold!
I made one random change - I have this giant bag of peanut flour that I bought ages ago to try out as another option for lower carb baking. I replaced half the flour with it, and it made everything extra peanutty, but I actually found that distracted from the top layer's flavor. I used golden syrup and light brown sugar because that's what I had on hand, along with exactly two cups of roasted salted peanuts!
Salted Peanut Tart
(recipe from Smitten Kitchen, with gorgeous step by step photos you should check out)- Servings: 8 to 10
- Source: Smitten Kitchen, but inspired by Houseman Restaurant
You could also make this tart
as bars! Line an 8×8-inch square baking pan with two pieces of parchment
paper, each extending up two sides. Press the crust dough evenly across
the bottom and 1/4-inch up the sides of this pan. Parbake at 350 (no
weights or freezing required) for 15 minutes, until very pale golden.
Continue with topping as written; topping baking time is the same as
tart. Once cool, cut into 16 square bars.
- 1 cup plus 2 tablespoons (150 grams) all-purpose flour
- 1/4 teaspoon fine sea or table salt
- 1/3 cup (40 grams) powdered sugar
- 1/2 cup (4 ounces or 115 grams) unsalted butter, cold is fine, cut into a few chunks
- 1/2 teaspoon vanilla extract
- 4 tablespoons (2 ounces or 55 grams) unsalted butter
- 2/3 cup (125 grams) packed light or dark brown sugar
- 1/3 cup (110 grams) honey or golden syrup
- 1/2 teaspoon apple cider vinegar (optional)
- 1/2 teaspoon vanilla extract
- 2 large eggs
- 2 cups (about 10 ounces or 285 grams) salted peanuts
- Flaky sea salt and plain sour cream to finish (optional)
Crust
Filling
Heat oven to 350°F (175°C).
Make the crust: Combine the flour, salt, and sugar in the bowl of a
food processor. Add butter and vanilla to the bowl, then run the machine
until the mixture forms large clumps — just keep running it; it might
take another 30 seconds for it to come together, but it will. Set a
marble or two of dough aside, and transfer the rest of it to a 9-inch
round tart pan with a removable bottom set on a large baking sheet (for
drips and stability of use) and press the dough evenly across the bottom
and up the sides. Transfer to freezer for 15 minutes, until solid.
Parbake crust: Once firm, prick all over with a fork. Coat a piece of foil with nonstick spray, and press it oiled-side-down tightly against the frozen crust, so it is fully molded to the shape. Bake tart with foil (no pie weights needed) for 15 minutes, then carefully, gently, a little at a time, peel back foil and discard. If cracks have formed, use the marbles of dough you set aside to patch it. Return to oven for 5 minutes, until just barely golden at edges and dry to the touch. Set aside.
Meanwhile, make filling: In a medium saucepan, melt butter over medium heat and continue cooking it, stirring frequently, until it smells nutty and brown bits form at the bottom of the pot. Whisk in brown sugar and golden syrup or honey and cook at a simmer, whisking constantly, for one minute. Pour into a large bowl, scraping out all of the browned bits from the pot that you can, and place in the fridge or, as I did, on your very cold patio, for 10 minutes, until it has cooled somewhat. Whisk in apple cider vinegar (with cuts the sweetness and adds complexity, not a vinegary flavor, promise), vanilla, and eggs, one at a time, then stir in peanuts.
Bake tart: Pour filling into prepared tart shell, top with a little flaky salt, if you wish, and bake for 23 to 28 minutes, until just faintly jiggly in the center and golden brown all over. Cool on a rack to room temperature, or, like me, you can rush this along in the fridge, but don’t let it fully chill.
Serve: Decorate (if you wish) with powdered sugar. Serve in wedges at room temperature (not cold, which can be too firm) with a dollop of sour cream.
Parbake crust: Once firm, prick all over with a fork. Coat a piece of foil with nonstick spray, and press it oiled-side-down tightly against the frozen crust, so it is fully molded to the shape. Bake tart with foil (no pie weights needed) for 15 minutes, then carefully, gently, a little at a time, peel back foil and discard. If cracks have formed, use the marbles of dough you set aside to patch it. Return to oven for 5 minutes, until just barely golden at edges and dry to the touch. Set aside.
Meanwhile, make filling: In a medium saucepan, melt butter over medium heat and continue cooking it, stirring frequently, until it smells nutty and brown bits form at the bottom of the pot. Whisk in brown sugar and golden syrup or honey and cook at a simmer, whisking constantly, for one minute. Pour into a large bowl, scraping out all of the browned bits from the pot that you can, and place in the fridge or, as I did, on your very cold patio, for 10 minutes, until it has cooled somewhat. Whisk in apple cider vinegar (with cuts the sweetness and adds complexity, not a vinegary flavor, promise), vanilla, and eggs, one at a time, then stir in peanuts.
Bake tart: Pour filling into prepared tart shell, top with a little flaky salt, if you wish, and bake for 23 to 28 minutes, until just faintly jiggly in the center and golden brown all over. Cool on a rack to room temperature, or, like me, you can rush this along in the fridge, but don’t let it fully chill.
Serve: Decorate (if you wish) with powdered sugar. Serve in wedges at room temperature (not cold, which can be too firm) with a dollop of sour cream.
Monday, February 25, 2019
Scallion Pancakes
One of my favorite things to order at our local Chinese restaurant is the scallion pancake. Flaky, greasy, salty, delicious. I had a review copy of the Double Awesome Chinese Food cookbook and out of all the recipes, could not pass up the chance to try my hand at scallion pancakes. The recipe is below, but in the cookbook, there are very helpful step by step photos for the recipes.
This is my second attempt making scallion pancakes. The first attempt was cong you bing back in 2012, which I definitely did not master. These are much thinner and flakier and closer to how they should be, but still not quite there. Someday I hope to visit China and take our friend's Old-Shanghai Breakfast Food Tour and taste the real deal.
Scallion Pancakes
1 recipe Hot Water Dough (see below), rested
1/4 cup (52 g) toasted sesame oil
1 1/3 cups (80 g) thinly sliced scallions
neutral oil, such as canola, for cooking
kosher salt
soy vinegar dipping sauce (I used just straight soy sauce!)
Make the pancakes.
Cut the dough into 4 equal pieces. Take one piece and cover the rest with a damp cloth. Roll the piece into a ball, flatten it slightly, then use a rolling pin to flatten it into a circle about 8 inches in diameter. Use a brush (or your fingers) to cover the dough circle with 1 tbsp of the sesmae oil, then sprinkle with 1/3 cup of the scallions.
Roll up the circle into a snake, then twist the snake into a snail-like spiral and tuck the end underneath. Flatten slightly with your hand, then use the rolling pin to roll out again into an 8-inch circle. Repeat with the remaining dough to make 4 pancakes.
Cook the pancakes.
Heat a thin layer of neutral oil in a large skillet over medium-high heat until shimmering. Don't skimp on the oil; ample oil is part of the charm of this dish. Carefully slide the pancake into the pan and fry on each side until golden brown, about 3 minutes per side.* Sprinkle lightly with salt and place on a paper towel to cool. Repeat with the remaining pancakes. Cut into wedges and serve with soy vinegar dipping sauce.
Hot Water Dough
2 cups (240 g) all-purpose flour
1/4 tsp (1 g) kosher salt
1 cup (240 g) water, boiled and let cool for about 1 minute
Mix the flour and salt in a large bowl. Using a wooden spoon, slowly stir in 3/4 cup (180 g) of the hot water until a ball is formed and all the flour is incorporated. If the flour in the bottom of the bowl is not sticking to the ball, slowly drizzle in more water 1 teaspoon at a time and continue to stir.
When all the flour has come together into a ball and the dough is cool enough to handle, place on a lightly floured surface and knead until smooth and elastic, 3-5 minutes. If necessary, add a sprinkle of flour to keep the dough from sticking to your hands or work surface. Place back in the bowl, cover with a damp cloth, and leave to rest for 30 to 60 minutes so the gluten can relax and the dough is easier to shape. When making in advance, the dough can rest in the fridge a day or two wrapped in lightly oiled plastic wrap. Bring to room temperature before using.
*Jenny's notes - the instructions say you can repeat the snail roll out for even more flaky layers, but my pancakes were flakiest if I only did it one time. (My dough was a bit dry though.) I tried medium-high heat for 3 minutes but on my electric stovetop, this was too hot and too long. I ended up on medium heat for 1-1.5 minutes per side.
I received a review copy of this cookbook from the publisher through NetGalley. It came out February 5, 2019.
Other recipes I am interested in trying:
-Dan Dan Noodles with Crispy Pork Belly and Brussels Sprouts
-Carrot Coconut Soup
-Hot and Sour Borscht
-Harvest Moon Curry
This is my second attempt making scallion pancakes. The first attempt was cong you bing back in 2012, which I definitely did not master. These are much thinner and flakier and closer to how they should be, but still not quite there. Someday I hope to visit China and take our friend's Old-Shanghai Breakfast Food Tour and taste the real deal.
Scallion Pancakes
1 recipe Hot Water Dough (see below), rested
1/4 cup (52 g) toasted sesame oil
1 1/3 cups (80 g) thinly sliced scallions
neutral oil, such as canola, for cooking
kosher salt
soy vinegar dipping sauce (I used just straight soy sauce!)
Make the pancakes.
Cut the dough into 4 equal pieces. Take one piece and cover the rest with a damp cloth. Roll the piece into a ball, flatten it slightly, then use a rolling pin to flatten it into a circle about 8 inches in diameter. Use a brush (or your fingers) to cover the dough circle with 1 tbsp of the sesmae oil, then sprinkle with 1/3 cup of the scallions.
Roll up the circle into a snake, then twist the snake into a snail-like spiral and tuck the end underneath. Flatten slightly with your hand, then use the rolling pin to roll out again into an 8-inch circle. Repeat with the remaining dough to make 4 pancakes.
Cook the pancakes.
Heat a thin layer of neutral oil in a large skillet over medium-high heat until shimmering. Don't skimp on the oil; ample oil is part of the charm of this dish. Carefully slide the pancake into the pan and fry on each side until golden brown, about 3 minutes per side.* Sprinkle lightly with salt and place on a paper towel to cool. Repeat with the remaining pancakes. Cut into wedges and serve with soy vinegar dipping sauce.
Hot Water Dough
2 cups (240 g) all-purpose flour
1/4 tsp (1 g) kosher salt
1 cup (240 g) water, boiled and let cool for about 1 minute
Mix the flour and salt in a large bowl. Using a wooden spoon, slowly stir in 3/4 cup (180 g) of the hot water until a ball is formed and all the flour is incorporated. If the flour in the bottom of the bowl is not sticking to the ball, slowly drizzle in more water 1 teaspoon at a time and continue to stir.
When all the flour has come together into a ball and the dough is cool enough to handle, place on a lightly floured surface and knead until smooth and elastic, 3-5 minutes. If necessary, add a sprinkle of flour to keep the dough from sticking to your hands or work surface. Place back in the bowl, cover with a damp cloth, and leave to rest for 30 to 60 minutes so the gluten can relax and the dough is easier to shape. When making in advance, the dough can rest in the fridge a day or two wrapped in lightly oiled plastic wrap. Bring to room temperature before using.
*Jenny's notes - the instructions say you can repeat the snail roll out for even more flaky layers, but my pancakes were flakiest if I only did it one time. (My dough was a bit dry though.) I tried medium-high heat for 3 minutes but on my electric stovetop, this was too hot and too long. I ended up on medium heat for 1-1.5 minutes per side.
Other recipes I am interested in trying:
-Dan Dan Noodles with Crispy Pork Belly and Brussels Sprouts
-Carrot Coconut Soup
-Hot and Sour Borscht
-Harvest Moon Curry
Monday, February 18, 2019
Chocolate Mascarpone Bundt Cake
I originally bought mascarpone for a meringue roll cake I intended to make over the holidays, but never did. In searching for a recipe that used the exact amount I had on hand, I came across this recipe. I fear I overbaked it, or perhaps I should have used oil instead of butter, because it was a bit dry. But tasty just the same.
Chocolate Mascarpone Bundt Cake
(Recipe from The Baking Fairy)
2/3 cup (10.5 tbsp) unsalted butter, at room temperature
1 3/4 cup granulated sugar
2 eggs
8 oz mascarpone cheese (about 3/4 cup)
1 1/4 cup sour cream
1 tsp vanilla extract
3/4 cup cocoa powder
1 3/4 cup all purpose flour
1 1/2 tsp baking soda
1/2 tsp salt
1 cup semisweet chocolate chips
Chocolate Mascarpone Bundt Cake
(Recipe from The Baking Fairy)
2/3 cup (10.5 tbsp) unsalted butter, at room temperature
1 3/4 cup granulated sugar
2 eggs
8 oz mascarpone cheese (about 3/4 cup)
1 1/4 cup sour cream
1 tsp vanilla extract
3/4 cup cocoa powder
1 3/4 cup all purpose flour
1 1/2 tsp baking soda
1/2 tsp salt
1 cup semisweet chocolate chips
- Preheat the oven to 350 F. Butter and flour a bundt cake pan very well.
- In the bowl of a stand mixer, beat together the butter and sugar until creamy.
- Add in the eggs and vanilla, and beat until fluffy. Stir in the sour cream and mascarpone, and mix until combined.
- Add in the flour, cocoa, baking soda, and salt, and beat until creamy and fluffy.
- Finally, stir in the chocolate chips.
- Pour the batter* into the prepared bundt pan, and bake for 60-70 minutes, until a toothpick inserted in the center comes out clean.
- Let cake cool slightly in the pan, then invert onto a serving platter. Sprinkle with powdered sugar before serving.
Monday, February 11, 2019
Top Pot Doughnuts (Seattle, WA)
"Begun in February 2002 out of a small brick storefront on north Capitol
Hill in Seattle, Top Pot pair[s] a vintage aesthetic with a gourmet
spin on the traditional coffee and doughnuts pairing." (I stole this description from their website.)
I was recently in Seattle for the ALA Midwinter Meeting, and my Mom came up to stay with me a bit. I always like to go on some kind of bakery or baked goods adventure, and found Top Pot Doughnuts. The 5th Street location was charmingly lined with books (happy librarian here!) and had an additional layer of seating upstairs.
I was pleased to find the variety of both glazed and cake varieties, and happily without the silly trends of ingredients like breakfast cereal that you can find a few hours south at Voodoo (see my previous posts of Portlanders Standing in Line for Donuts episode 1 and episode 2.) Also impressive - the shop was busy but not over busy. We didn't have to stand in line or wait for a seat.
Maple bars are one of my favorite doughnuts but I swear they can't be found outside the northwest. Maple doesn't come from there, it's a northeast thing. But still, maple bars are a standard traditional doughnut everywhere you go for doughnuts in the northwest. Why? No idea. But I couldn't even take a picture before taking a bite, very satisfying.
My other favorite doughnut is a really good chocolate cake. Top priority is coconut, but without coconut, I'll go for glazed. Top Pot had both "old fashioned" (pictured, half eaten, whoops), and a more standard variety. This was an incredibly tender and chocolatey doughnut and I was a happy doughnut wanderer.
The latte I had was fine but not the star of the show. It was... fine. I used to think of Seattle as the best coffee city but I'm going to say that isn't true in 2018. Half the places I went served Counter Culture, and I like Counter Culture just fine but it is prevalent in the south as well. And Starbucks really dominates everything to an extent that it is difficult to find non-Starbucks places. At last Top Pot had their own!
I was recently in Seattle for the ALA Midwinter Meeting, and my Mom came up to stay with me a bit. I always like to go on some kind of bakery or baked goods adventure, and found Top Pot Doughnuts. The 5th Street location was charmingly lined with books (happy librarian here!) and had an additional layer of seating upstairs.
I was pleased to find the variety of both glazed and cake varieties, and happily without the silly trends of ingredients like breakfast cereal that you can find a few hours south at Voodoo (see my previous posts of Portlanders Standing in Line for Donuts episode 1 and episode 2.) Also impressive - the shop was busy but not over busy. We didn't have to stand in line or wait for a seat.
Maple bars are one of my favorite doughnuts but I swear they can't be found outside the northwest. Maple doesn't come from there, it's a northeast thing. But still, maple bars are a standard traditional doughnut everywhere you go for doughnuts in the northwest. Why? No idea. But I couldn't even take a picture before taking a bite, very satisfying.
My other favorite doughnut is a really good chocolate cake. Top priority is coconut, but without coconut, I'll go for glazed. Top Pot had both "old fashioned" (pictured, half eaten, whoops), and a more standard variety. This was an incredibly tender and chocolatey doughnut and I was a happy doughnut wanderer.
The latte I had was fine but not the star of the show. It was... fine. I used to think of Seattle as the best coffee city but I'm going to say that isn't true in 2018. Half the places I went served Counter Culture, and I like Counter Culture just fine but it is prevalent in the south as well. And Starbucks really dominates everything to an extent that it is difficult to find non-Starbucks places. At last Top Pot had their own!
Monday, February 04, 2019
Kauk Mote | Crepes with red beans and coconut (Burma/Myanmar)
I'm reading books from Asia this year, and alongside that will be baking and cooking some new recipes from various countries. For Burma/Myanmar, the three most frequently mentioned dishes are the tea (see at the end of this post!), fermented tea leaf salad (difficult to track down in the states,) and mohinga, a seafood-curry-noodle soup that is frequently consumed for breakfast. I struggled to find the right ingredients so I decided to make this interesting crepe, a street food often found in this region. It could have had more ingredients in the filling, like coconut cream, chopped roasted peanuts, or savory ingredients, but I went with the red bean and coconut.
The original recipe I found, which is copied elsewhere on the internet, has a major flaw. If you use self-rising flour, you should omit the additional salt and baking soda included in the recipe, which I imagine someone wrote down as what to add to flour to make it the equivalent of self-rising flour. I ignored my instincts and went ahead and added it, and the pancake/crepe batter was awful.
Pictured is one of the books I'm reading right now, about a man who grew up in a traditional way and made it all the way to the UK to study English.
Kaku Mote
(recipe from Hsa*ba, also posted on World of Crepes)
Ingredients:
160g of self rising flour (.70 cup)
80g rice of flour (.35 cup)
1/2 teaspoon of salt [DO NOT ADD WITH SELF RISING FLOUR]
1 teaspoon bicarbonate of soda [DO NOT ADD WITH SELF RISING FLOUR]
2 tablespoons sugar
100ml coconut milk (almost half a cup)
300ml water (1.25 cups)
oil for frying
Filling:
200g sweetened red (azuki) beans or red bean paste
80g fresh grated coconut
pinch of salt
Put the dry pancake ingredients in a mixing bowl. Add the coconut milk and water, stirring to form a runny batter. Rest for at least 30 minutes, preferably a couple of hours.
Lightly grease a pan with a little oil and heat on moderate heat. Using a ladle pour the batter carefully. The idea is to have an even layer of batter to cover the pan. To spread the batter, tilt the pan.
Cover and leave for a few of minutes. When bubbles appear on the surface, carefully spread the red beans and grated coconut. Remember to mix a pinch of salt with the coconut first. Cover the pan again and allow the pancake to cook for a further minute or two until the edges are golden in color.
Using a flat spatula, fold the pancake into half and ease onto a plate. Serve while warm. The outside should have a lovely crispiness and the inside soft with the filling oozing out.
Pictured with the tea is a book of folktales from Burma, highly recommended.
Myanmar/Burmese Tea (bonus recipe!)
Brew a black tea double strength, or strong, anyway.
For every 6 oz tea, add 1 oz condensed milk and 1 oz evaporated milk. Or adjust to taste.
Delicious! I've made it three times since 2019 began!
The original recipe I found, which is copied elsewhere on the internet, has a major flaw. If you use self-rising flour, you should omit the additional salt and baking soda included in the recipe, which I imagine someone wrote down as what to add to flour to make it the equivalent of self-rising flour. I ignored my instincts and went ahead and added it, and the pancake/crepe batter was awful.
Pictured is one of the books I'm reading right now, about a man who grew up in a traditional way and made it all the way to the UK to study English.
Kaku Mote
(recipe from Hsa*ba, also posted on World of Crepes)
Ingredients:
160g of self rising flour (.70 cup)
80g rice of flour (.35 cup)
1/2 teaspoon of salt [DO NOT ADD WITH SELF RISING FLOUR]
1 teaspoon bicarbonate of soda [DO NOT ADD WITH SELF RISING FLOUR]
2 tablespoons sugar
100ml coconut milk (almost half a cup)
300ml water (1.25 cups)
oil for frying
Filling:
200g sweetened red (azuki) beans or red bean paste
80g fresh grated coconut
pinch of salt
Put the dry pancake ingredients in a mixing bowl. Add the coconut milk and water, stirring to form a runny batter. Rest for at least 30 minutes, preferably a couple of hours.
Lightly grease a pan with a little oil and heat on moderate heat. Using a ladle pour the batter carefully. The idea is to have an even layer of batter to cover the pan. To spread the batter, tilt the pan.
Cover and leave for a few of minutes. When bubbles appear on the surface, carefully spread the red beans and grated coconut. Remember to mix a pinch of salt with the coconut first. Cover the pan again and allow the pancake to cook for a further minute or two until the edges are golden in color.
Using a flat spatula, fold the pancake into half and ease onto a plate. Serve while warm. The outside should have a lovely crispiness and the inside soft with the filling oozing out.
Pictured with the tea is a book of folktales from Burma, highly recommended.
Myanmar/Burmese Tea (bonus recipe!)
Brew a black tea double strength, or strong, anyway.
For every 6 oz tea, add 1 oz condensed milk and 1 oz evaporated milk. Or adjust to taste.
Delicious! I've made it three times since 2019 began!
Monday, January 21, 2019
Jam Crumble Wedges
I was poking around Instagram the other day and came across Almond Flour Strawberry Crumble Bars from Joy the Baker. It seemed like the perfect pantry clearing baked good, and I had everything on hand with a few adaptations (which I will indicate with asterisks.) Recipe and instructions are all Joy, and this recipe appeared to be in process even for her, so follow the link above for her marvelous photography and extra instructions.
-I could have used 2 cups almond flour, but I also have some aging spelt flour so I went half and half.
-I had a half jar of lingonberry jam and used this instead of strawberry.
-I used a tart pan, which saved me having to chill or invert as described in step 8.
Almond Flour Strawberry Crumble Bars (which I renamed to Jam Crumble Wedges!)
(from Joy the Baker)
Prep Time: 20 minutes
Cook Time: 30 minutes
Yield: 12 wedges
Ingredients
- 1 large egg egg
- 1/3 cup pure maple syrup
- 1/2 cup old-fashioned oats (gluten free if that's a concern for you)
- 2 cups almond flour*
- 2 tablespoons coconut flour
- ½ teaspoon ground cinnamon
- 1/2 teaspoon salt
- ¼ cup melted unsalted butter (or melted coconut oil if dairy is a concern for you)
- 1/2 cup good quality strawberry jam*
- powdered sugar for dusting (optional)
Instructions
- Preheat oven to 350 degrees F. Line an 8-inch round pan* with parchment paper and generously grease. Set aside.
- To make the base and crumble topping, in a medium bowl whisk together egg and maple syrup until well combined.
- Stir in almond flour, oats, coconut flour, cinnamon and salt until well combined.
- Pour melted butter into the crumble and use a fork to evenly distribute and stir together until clumps begin to form.
- Place 2/3 of the mixture into prepared pan (the remaining mixture will be used for the topping).
- Use your fingers to evenly press dough to the bottom. Set the remaining dough aside for just a bit.
- Spread jam in an even layer across the bottom crust.
- Crumble the remaining oat mixture evenly over the strawberry jam. Bake for 30 to 35 minutes or until filling is bubbly and topping is lightly golden. Allow crumble to cool completely on a wire rack before transferring to the refrigerator to chill for 20 minutes.* Once chilled, carefully invert the crumble, remove the paper, and slice into wedges.*
- Slices are delicious at room temperature, lightly dusted with powdered sugar.
-I could have used 2 cups almond flour, but I also have some aging spelt flour so I went half and half.
-I had a half jar of lingonberry jam and used this instead of strawberry.
-I used a tart pan, which saved me having to chill or invert as described in step 8.
Monday, January 07, 2019
The Spicy Cowgirl
January can be rough for baked goods, a combination of an attempt to leave behind the indulgent holiday eating ways, and just burnout from all the baking of the holidays. So while I had a few ideas for weekend baking (a cake for book club, scones for work, a savory tart from a cookbook I need to review), I just could not make it happen.
However I did make this iced coffee concoction happen, after finally purchasing chile syrup online. I included Ree's formula for cold brew coffee but I make mine much stronger (8 quarts cold water to 1 pound ground coffee? I use 4 quarts to a pound) using the New York Times iced coffee formula. This kind of recipe is great because I regularly have cold brew on hand, so it's nice to have a few ways to dress it up.
The Spicy Cowgirl
(recipe from Ree Drummond via The Food Network)Ingredients
1/4 cup heavy cream
1 ounce vanilla syrup
6 ounces store-bought or homemade cold brew coffee, recipe follows
4 ounces whole milk
1 ounce chile syrup (or simple syrup with hot chiles infused for 24 hours)
1 ounce chocolate sauce
1/2 teaspoon ground cinnamon
1/2 teaspoon cayenne pepper
Cold Brew Coffee:
1 pound ground coffee (a good, rich roast)
8 quarts cold water
Directions
- Lightly whip the cream with the vanilla syrup in a bowl and have on standby.
- In a cocktail shaker, combine the cold brew coffee, milk, chile syrup, chocolate sauce and ice, then shake until frothed and combined. Pour into an ice-filled glass, top with vanilla whipped cream to cover and dust with the cinnamon and cayenne pepper.
Cold Brew Coffee:
- Mix the ground coffee with the water in a large container. Cover and allow to sit at room temperature for 8 hours or overnight.
- Line a fine-mesh strainer with cheesecloth and set over a pitcher or other container. Pour the coffee/water mixture through the strainer, allowing all the liquid to run through. Discard the grounds. Refrigerate and use as needed.
Monday, December 31, 2018
Kaiserschmarrn or The Emperor's Mess
This recipe comes to you via a long internet rabbit hole! We were watching the Great Baking Challenge, Holiday Edition, on Netflix. It's the Great British Bakeoff but brought to America, with the addition of judge Sherry Yard. Sherry Yard.. I knew I recognized her name, wasn't she the pastry chef for Wolfgang Puck? So I started poking around, and discovered, yes! She is also the three-time James Beard Award winning pastry chef Sherry Yard. Her Wikipedia page lists her accomplishments and also in a one-sentence paragraph, "Yard has stated that her signature dessert is Kaiserschmarrn.
I had never heard of Kaiserschmarrn, so I looked it up, and watched endless videos in German featuring people making it, and it is one of those recipes that people make in a variety of ways. A video in Tiroli claiming to have the original recipe makes it more like a flat pancake which gets broken into pieces. Other recipes separate the eggs and beat the whites, and bake it in the oven more like a souffle. Whatever the technic, it all ends up on the plate in messy pieces, caramelized somewhat with butter and sugar, and served with plum or lingonberry.
I am going to start with the recipe from the Austrian National Tourist Office and go from there. Many of the recipes used raisins, and some of them had soaked the raisins in rum. I didn't have raisins, but I did have candied orange peel, so I soaked a few tablespoons in a little bit of an apple brandy we have in the pantry, having no rum either. I'm not sure the dish needs it, it almost distracts from the lusciousness that ends up on the plate.
And yeah, it's messy. But it's delicious. Its' closest cousin is probably the pannukakku, the delicious oven pancake from Finland that is more custardy than most German/Dutch oven pancakes. But with added caramelization (meaning added flavor) and more prescribed toppings.
Kaiserschmarrn or The Emperor's Mess
Ingredients
Beat the egg whites together with the sugar and a small pinch of salt until it forms a firm peak, and fold into the batter mix. Pre-heat the oven to 350°F.
Melt the butter in a heatproof (coated) dish. Pour in the mixture and after 1–2 minutes sprinkle the soaked raisins over the top. Cook the underside until light brown, turn over using a spatula and bake for 6–8 minutes in the pre-heated oven until golden brown.*
Tear the ‘Schmarren’ into small pieces, using two forks. Sprinkle the butter shavings over the top, add some crystal sugar, and caramelize in the broiler under high top heat.**
Remove from the oven and arrange on pre-heated plates. Dust with confectioners sugar and cinnamon.
Serve with baked plums, a berry or fruit compote.
*Because I had seen it made so many ways, I did not turn over the pancake before putting it in the oven. But after 8 minutes it hadn't cooked through. I cut it into quarters, turned it over in messy fashion, and finished cooking it on the stovetop. I do think the oven helps with the rise of the batter.
**I just tossed in the pan on the stove until everything was cooked through enough and some parts were browning. I only ended up with one piece that seemed too dark.
Over all, the pan I chose didn't quite fit all of the batter, so some adjustment may need to be made (or just leave some out!
Speaking of pancakes...
Like pancakes? I seem to make them from around the world! Check out the Finnish pannukakku, Icelandic pönnukökur, Papua New Guinean banana pancakes, the Danish ebleskiver, the Hungarian palacsintas, the Swedish pancakes from Alaska, and what we call the German oven apple pancake. I also made ratio pancakes from Michael Ruhlman's book, which we can call American.
I had never heard of Kaiserschmarrn, so I looked it up, and watched endless videos in German featuring people making it, and it is one of those recipes that people make in a variety of ways. A video in Tiroli claiming to have the original recipe makes it more like a flat pancake which gets broken into pieces. Other recipes separate the eggs and beat the whites, and bake it in the oven more like a souffle. Whatever the technic, it all ends up on the plate in messy pieces, caramelized somewhat with butter and sugar, and served with plum or lingonberry.
I am going to start with the recipe from the Austrian National Tourist Office and go from there. Many of the recipes used raisins, and some of them had soaked the raisins in rum. I didn't have raisins, but I did have candied orange peel, so I soaked a few tablespoons in a little bit of an apple brandy we have in the pantry, having no rum either. I'm not sure the dish needs it, it almost distracts from the lusciousness that ends up on the plate.
And yeah, it's messy. But it's delicious. Its' closest cousin is probably the pannukakku, the delicious oven pancake from Finland that is more custardy than most German/Dutch oven pancakes. But with added caramelization (meaning added flavor) and more prescribed toppings.
Kaiserschmarrn or The Emperor's Mess
Ingredients
- 6 eggs
- 12 oz milk
- 1 cup all-purpose flour
- 2 tbsp raisins or other dried fruit
- 1tsp vanilla
- a dash of rum or other liqueur
- a pinch of salt
- 1/4 cup granulated sugar (for egg whites)
- 2-4 Tbsp unsalted butter
- 1 tbsp of butter shavings and granulated sugar, for caramelizing
- powdered sugar for dusting
Beat the egg whites together with the sugar and a small pinch of salt until it forms a firm peak, and fold into the batter mix. Pre-heat the oven to 350°F.
Melt the butter in a heatproof (coated) dish. Pour in the mixture and after 1–2 minutes sprinkle the soaked raisins over the top. Cook the underside until light brown, turn over using a spatula and bake for 6–8 minutes in the pre-heated oven until golden brown.*
Tear the ‘Schmarren’ into small pieces, using two forks. Sprinkle the butter shavings over the top, add some crystal sugar, and caramelize in the broiler under high top heat.**
Remove from the oven and arrange on pre-heated plates. Dust with confectioners sugar and cinnamon.
Serve with baked plums, a berry or fruit compote.
*Because I had seen it made so many ways, I did not turn over the pancake before putting it in the oven. But after 8 minutes it hadn't cooked through. I cut it into quarters, turned it over in messy fashion, and finished cooking it on the stovetop. I do think the oven helps with the rise of the batter.
**I just tossed in the pan on the stove until everything was cooked through enough and some parts were browning. I only ended up with one piece that seemed too dark.
Over all, the pan I chose didn't quite fit all of the batter, so some adjustment may need to be made (or just leave some out!
Speaking of pancakes...
Monday, December 24, 2018
Christmas Cranberry Buckle
Usually my workplace has a holiday luncheon, where all of us bring in dishes to share. I usually make a dessert (see Buche de Noel (2007), gingerbread house (2009), stollen (2010), lemon gingerbread wonderland cake (2012), cocoa pomegranate pavlova (2013), wintermint cake (2015), and fresh pear cake (2016).)
This year because the school year ended so late, and today was the actual last day we were even open, we went with brunch instead. I hemmed and hawed over what to make and ended up with a coffee cake idea. I've had this cranberry buckle on my to-make list for a while, I had 1.5 bags of fresh cranberries in the fridge, and it was just the perfect time.
Christmas Cranberry Buckle
(recipe from Wicked Good Kitchen)
Prepare the Sugar Cookie Streusel: In a large bowl, whisk together the flour and sugar. Using a pastry blender, cut in the butter until mixture resembles a coarse meal. Set aside.
Arrange oven rack in lower third of oven and preheat oven to 350ºF (177ºC). Grease 9-inch (23 cm) round nonstick springform pan with shortening and dust with flour, tapping out the excess. If using insulated cake strips, don’t forget to prepare the pan per manufacturer’s directions with the exception of using two (as shown in the article above). Set aside.
Prepare the Cake: In a medium bowl, whisk together flour, baking powder, salt and spices until well combined. Using an electric stand mixer fitted with paddle attachment, or handheld mixer and large bowl, cream together butter and sugar until light and fluffy, about 3 minutes. Add lemon zest and vanilla; beat until combined.
Add the eggs, one at a time, blending well after each addition on medium speed scraping sides and bottom of bowl as necessary. (Mixture may look slightly separated. Don’t worry. It will pull together with the addition of flour.) Add flour gradually while mixing at low speed until mixture is just blended. Do not overmix. (Batter will be thick and very heavy.) Using rubber spatula, carefully fold in spiked candied fruit and cranberries until distributed evenly.
Using rubber spatula, scrape batter into prepared pan. With spatula, spread batter evenly to pan edges and smooth the top. Use hand to clump portions of streusel by squeezing and use fingers to sprinkle small clumps of streusel evenly over top of batter. Repeat process with remaining streusel.
Bake in preheated oven until toothpick inserted into center comes out clean, about 55 to 60 minutes. Remove cake from oven and place on wire cooling rack. Immediately, sprinkle sugar over the top of cake and run thin metal icing spatula around edge of pan to loosen cake from sides of pan. This will prevent the cranberries from sticking to the sides of pan and will make removing easier. Cool for 15 minutes.
To Unmold Cake: If using, remove insulated cake strips. Unmold cake by removing sides of pan. Cool until just warm or to room temperature, about 1 hour. Slice into wedges and serve.
Yield: Makes one 9-inch (23 cm) cake, serving 8 to 10.
Notes from JennyBakes:
-When I tried to go to the liquor store, there was a sign up that said "Be right back," but it was pouring down rain and I just wanted to go home. So instead of an orange flavor, I used kirsch, since I had some on hand.
-I no longer have a working 9" springform so I just used a 9" square pyrex, and that fit the cake perfectly. I did not have any burning issues as described by the original baker.
This year because the school year ended so late, and today was the actual last day we were even open, we went with brunch instead. I hemmed and hawed over what to make and ended up with a coffee cake idea. I've had this cranberry buckle on my to-make list for a while, I had 1.5 bags of fresh cranberries in the fridge, and it was just the perfect time.
Christmas Cranberry Buckle
(recipe from Wicked Good Kitchen)
Ingredients
For the Spiked Candied Fruit- 3 tablespoons (34 g) finely chopped candied orange peel
- 3 tablespoons (34 g) finely chopped crystallized ginger
- 1 tablespoon (15 ml) orange liqueur
- ¾ cup (98 g) unbleached all-purpose flour
- 6 tablespoons (75 g) granulated sugar
- 6 tablespoons (85 g) salted butter, cut into bits
- 1½ cups (195 g) unbleached all-purpose flour, plus extra for cake pan
- 1½ teaspoons (7 g) baking powder
- ¾ teaspoon (3.6 g) fine-grain sea salt
- ½ teaspoon (1.25 g) ground cinnamon
- ¼ teaspoon (.65 g) freshly grated whole nutmeg
- 10 tablespoons (about 141 g) unsalted butter, softened
- ¾ cup (150 g) granulated sugar
- 2 teaspoons (4 g) grated lemon zest, from 1 medium lemon
- 2 teaspoons (10 ml) pure vanilla extract
- 2 large eggs (mine weighted 112 g w/o shells), room temperature
- 3½ cups (14 oz or about 350 g) fresh cranberries, rinsed & dried
- Shortening or favorite cooking oil, for greasing cake pan
- 1½ to 2 teaspoons (6 to 8 g) granulated sugar
- One 9-inch (23 cm) round nonstick springform pan
- Two insulated cake strips, such as Wilton® Small Bake Even Strips (Set of 2)
- Cake Lifter, helpful but not necessary
Directions
Prepare the Spiked Candied Fruit: In a small bowl, combine candied orange peel, crystallized ginger and orange liqueur. Cover and let stand for several hours or overnight at room temperature.Prepare the Sugar Cookie Streusel: In a large bowl, whisk together the flour and sugar. Using a pastry blender, cut in the butter until mixture resembles a coarse meal. Set aside.
Arrange oven rack in lower third of oven and preheat oven to 350ºF (177ºC). Grease 9-inch (23 cm) round nonstick springform pan with shortening and dust with flour, tapping out the excess. If using insulated cake strips, don’t forget to prepare the pan per manufacturer’s directions with the exception of using two (as shown in the article above). Set aside.
Prepare the Cake: In a medium bowl, whisk together flour, baking powder, salt and spices until well combined. Using an electric stand mixer fitted with paddle attachment, or handheld mixer and large bowl, cream together butter and sugar until light and fluffy, about 3 minutes. Add lemon zest and vanilla; beat until combined.
Add the eggs, one at a time, blending well after each addition on medium speed scraping sides and bottom of bowl as necessary. (Mixture may look slightly separated. Don’t worry. It will pull together with the addition of flour.) Add flour gradually while mixing at low speed until mixture is just blended. Do not overmix. (Batter will be thick and very heavy.) Using rubber spatula, carefully fold in spiked candied fruit and cranberries until distributed evenly.
Using rubber spatula, scrape batter into prepared pan. With spatula, spread batter evenly to pan edges and smooth the top. Use hand to clump portions of streusel by squeezing and use fingers to sprinkle small clumps of streusel evenly over top of batter. Repeat process with remaining streusel.
Bake in preheated oven until toothpick inserted into center comes out clean, about 55 to 60 minutes. Remove cake from oven and place on wire cooling rack. Immediately, sprinkle sugar over the top of cake and run thin metal icing spatula around edge of pan to loosen cake from sides of pan. This will prevent the cranberries from sticking to the sides of pan and will make removing easier. Cool for 15 minutes.
To Unmold Cake: If using, remove insulated cake strips. Unmold cake by removing sides of pan. Cool until just warm or to room temperature, about 1 hour. Slice into wedges and serve.
Yield: Makes one 9-inch (23 cm) cake, serving 8 to 10.
Notes from JennyBakes:
-When I tried to go to the liquor store, there was a sign up that said "Be right back," but it was pouring down rain and I just wanted to go home. So instead of an orange flavor, I used kirsch, since I had some on hand.
-I no longer have a working 9" springform so I just used a 9" square pyrex, and that fit the cake perfectly. I did not have any burning issues as described by the original baker.
Monday, December 17, 2018
Georgia Cookie Candy
I love peanut butter balls during the holidays, or the regional version known as Buckeyes. But the rolling into balls and the dipping into chocolate is so much work, and messy work. And mine always look knobbly and never neat. So when I saw this recipe, which is basically peanut butter balls in bar form, I knew I had to try it. Georgia is trying to claim it for itself, but who knows where they really originated. You get slightly less chocolate in this variety, so I added more than what the recipe called for, but then came the difficulty of cutting it into squares. I should have either done it earlier before the chocolate set completely, or used a warmed up knife. So mine are not perfect, but possibly slightly more perfect than the ball form?
And to my co-worker who doesn't care for chocolate and peanut butter together, I really do hope I can eventually make something with a different flavor profile this holiday season. Sorry!!
Georgia Cookie Candy
(recipe from Food Network)Ingredients
1 cup (2 sticks) butter or margarine, softened
1 cup crunchy peanut butter
3 cups confectioners' sugar, sifted
1 1/2 cups graham cracker crumbs
1 1/2 cups semisweet chocolate chips
Directions
- Line a 13 by 9 by 2-inch pan with foil.
- Combine the butter, peanut butter, sugar, and graham cracker crumbs in a food processor. Process until the mixture forms a ball. Press into the foil-lined pan using your hands or a spatula.
- Melt the chocolate chips in a double boiler over simmering water or in a microwave-safe glass dish in the microwave for 1 minute on high (100%). Stir. If the chocolate has not completely melted, microwave for 10 seconds more, then stir. Spread evenly over the cookie layer with a spatula. Chill for several hours.
- When ready to serve, allow the candy to come to room temperature before cutting into pieces. Store in an airtight container in the refrigerator.
Subscribe to:
Posts (Atom)