Monday, December 24, 2007

Triple-Chocolate Cake with Chocolate Peppermint Filling

My husband has the misfortune of having a Christmas Eve birthday, making the stretch from the 24th and 25th of December full of gifts, sweets, and events. Wait, maybe misfortune is not quite the right term to use!

It is his tradition to get a mint chocolate chip log roll cake from Baskin Robbins every year, and I kept pestering him, telling him I could make something better, and this year he decided to let me have a shot.

I'm not sure I met the challenge. There were a few issues with this recipe that made me wish I had done a trial run, but between surgery and other holiday baking I just didn't have a chance!

I made the Triple-Chocolate Cake with Chocolate Peppermint Filling from epicurious.com, after an extensive cookbook and internet search for something chocolate minty. The filling is a soft ganache made with milk chocolate, the cake batter has cocoa powder and mini chocolate chips, and the glaze has semisweet/bittersweet chocolate (I used a mixture of both). Now when I count that, I get four chocolates, but maybe that name was taken.

My biggest complaint is the cake itself. It could be my fault, but I overcooked it way too much. I think part of the reason is the mini chocolate chips, which increase the cooking temperature of the cake far past a normal cake would cook once it is taken out of the oven. So because the cake was practically crusty on the outside, the gloss was not as smooth as I would have liked (in fact, this first picture shows some of the ganache peeking through).

Triple-Chocolate Cake with Chocolate Peppermint Filling

Flavor wise, it was pretty good, but I was too distracted by the dryness of the cake. The filling was possibly the best part, and I also substituted one of the teaspoons of vanilla for peppermint extract in the cake, so it was all quite pepperminty.

I'm having a hard time deciding if this was even what I would consider "good" or not. Peppermint is something I enjoy but doesn't really rank in my top dessert flavors (unless we're talking mochas, in which case peppermint is my #1) so I could take or leave this cake.

I served this with Ben & Jerry's Mint Chocolate Cookie ice cream, which upped the mint even more. What I am wishing now is that I had tried to replicate the original Baskin Robbins cake, and just make an improved version. I think that was my intent before I started recipe hunting, and then it turned into a completely different animal.

Categories: Cake, Chocolate, Mint

Saturday, December 22, 2007

Buche de Noel - Daring Bakers December 2007 Challenge


Yule Log 2007
Originally uploaded by watchjennybake.
I have wanted to make a Buche de Noel, or yule log cake, for several years now but never got around to it. When it came out as the Daring Bakers Challenge for December, I was excited, to say the least. I knew I had a tree trimming party to go to and planned to make it for that day. The day of the party, it was pouring down rain, the kind of day that makes you want to lock the door, make a pot of tea, and watch movies or read books all day long.

I was actually worried it was going to be "one of those days" when I went to the post office to send holiday gifts (the day after the deadline, of course), and then to the grocery store. The only thing I needed was parchment paper, and guess what I forgot? Which meant I was going BACK out in the rain to hunt down parchment paper - which by the way, in my town, neither Walgreens nor CVS deemed important enough to carry - so I didn't get started until around 1 pm. I don't mind having a disastrous baking day (see last month's Daring Bakers Challenge) but was desperate not to have this day be one of them.

Chocolate genoise cake layer

The first step is baking the genoise layer. I decided to do a chocolate version, and altered the recipe based on Nick Malgieri's suggestions on the old episode of Sara's Secrets (where he bakes this cake!). I watched that episode twice before I delved into this project.

Unfrosted yule log
I slightly overbaked the cake, knowingly, because it told me to start on the buttercream once the cake was in the oven, but then I had egg whites whisking on the stove when the cake was over and I freaked out a little. So later on, the cake cracked when it rolled up, but it was still all good.

Creamy buttercream
I was worried that my buttercream would break after reading some stories of the other Daring Bakers, but I had my fears put to rest by Nick Malgieri, who said once the mixture had cooled completely down in the mixer, you could just throw the softened butter in one stick at a time and beat it until it came together - so I did, and it was wonderfully creamy and SO delicious. This is not the buttercream you make by mixing powdered sugar and butter. I didn't have rum or brandy, so I used Kahlua, which really amped the coffee flavor in this.

Meringue mushrooms

While the rolled cake and buttercream chilled, I went to work making meringue mushrooms. I have made meringue a zillion times -back in my tearoom days we had to have lemon meringue pies every Thursday (and oh look, I even made meringue earlier this month)- but I have never made meringue mushrooms. Lacking a pastry bag, I used a gallon ziploc and it worked pretty well.

The mushrooms added the most mystery to the cake - a lot of people at the party thought they were "actual" mushrooms and I had to prove they weren't by cutting them apart. The cocoa powder applied before baking really added a touch of realism.

I didn't do much to decorate the cake other than add fork marks (after the pictures were taken, ha!). I was late to the party, it was pouring down rain, and I realized too late that I had no covered dish large enough to transport the cake. So I used the umbrella on the cake and ended up at the front door looking like a drowned rat, but the cake was dry!

Daring Bakers Blue Logo
The recipe can be found on either blog of this month's challenge hosts - Ivonne and Lisa. All the Daring Bakers (I believe we're over 300 strong now) can be seen in the list here.


Categories: Buttercream, Cake, Chocolate, Coffee, Daring Bakers, Holiday, Meringue

Monday, December 17, 2007

Gifts from the Kitchen

I often make baked goods as gifts for the holidays, and this year was no exception. I have been wanting to make biscotti for years but this was the first time I had tried it. I'll do it again, they were so easy. I won't include the recipe, because it is just another one from The Baker's Field Guide to Christmas Cookies, and I've given you enough of those. It's like my cookbook of the month.

These biscotti, though, are perfect for the holidays. The red of the cranberry, the slight green of the pistachio.... the dough is fragrant with vanilla and lemon, and they had a lot more flavor than I expected. I originally meant to get some white chocolate to dip the ends in but forgot. Without it they were probably easier to dip in coffee or tea though. For some of my friends, I made little tea gifts with loose tea, disposable/fillable tea bags, and biscotti; a type of relaxation gift. Biscotti have a long shelf life, and would probably ship well, but mine got consumed too quickly to test that theory out. The dough has eggs but no fat, so that plus the baking twice gives them a dry consistency that is perfect for dunking.

Peanut Butter Biscuits
The second recipe is for the dogs, literally. My husband's stepmother is mother to some basset hounds and foster parent to even more. The Daily Drool is a web site for basset hound owners and fans, and that is the source of this recipe. Bailey, my beagle, can smell these a mile a way and highly recommends them. This year I made these for friends with dogs and sent them off, much to Bailey's chagrin. Luckily he received some from Janice so he didn't suffer much!

Daily Drool Peanut Butter Basset Biscuits
4 cups whole wheat flour
2 cups oatmeal
1/2 to 3/4 cup chunky peanut butter
2 1/2 cups hot water

Mix all ingredients, adding more hot water if dough is too sticky. Knead well. Roll out to 1/4 inch and cut into shapes with cookie cutter. Bake on greased cookie sheet at 350 degrees for 40 minutes. Turn off heat and let cool in oven overnight.

Jenny's notes: Bailey wanted me to make sure to mention that cat and bone shaped treats are the best.

I usually make a half batch of this, which fills one cookie sheet perfectly. These can go bad quickly if not fully dried out, so definitely don't skip the step of leaving them in the oven overnight. Then store them in an airtight container.

Categories: Biscotti, Cranberry, Dog Treats, Peanut Butter, Pistachio

Monday, December 10, 2007

Cranberry Snowdrift Bars


Cranberry Snowdrift Bars
Originally uploaded by watchjennybake.
A lot of the recipes I make during the holidays are family traditions or recent standards - wagon wheel cookies, peanut butter balls, various fudges, and my recently discovered seven layer bars. I am trying to add a few new recipes to the repertoire. This one comes from the book I mentioned last week, A Baker's Field Guide to Christmas Cookies. Can I just say again that I highly recommend this cookbook? I haven't made an unsuccessful recipe from it yet.

I really liked these - they capture the flavor (cranberry) of the season as well as a weather reference (meringue), although if you live in South Carolina like I do you have been experiencing weather that is the opposite of snowy - today it got to 77 degrees! So we sometimes have to create a feeling with our baking if nothing else cooperates.

Cranberry Snowdrift Bars

Crust:
1 1/4 cups all purpose flour
Pinch of salt
1/2 cup (1 stick) unsalted butter, softened
1/4 cup granulated sugar
1/4 tsp vanilla extract

Filling and topping:
1 cup whole-berry cranberry sauce, not jellied
2 large egg whites
1/8 tsp cream of tartar
1/2 cup granulated sugar
1/4 tsp vanilla extract

1. Coat an 8-inch square baking pan with nonstick spray.

2. Whisk flour and salt together in a small bowl.

3. In a large bowl with an electric mixer on medium-high speed, beat butter until creamy, about 3 minutes. Add sugar gradually, beating on high speed until light and fluffy. This may take as long as 8 minutes. Do not rush; mixture should be almost white in color. Beat in vanilla. Add in 1/3 of the flour and mix on low speed. Gradually add remaining flour, mixing just until blended. Pat crust in an even layer in baking pan. Refrigerate at least 30 minutes or overnight. Wash and dry beaters of mixer.

4. Preheat oven to 350 degrees F. Bake crust until completely dry to touch and a pale golden brown, about 40 minutes. The edges will be a bit darker. Place pan on rack to cool 5 minutes, then spread cranberry sauce evenly over crust using a small offset spatula or back of a spoon.

5. To make topping, whip egg whites until foamy in a medium clean, grease-free bowl with mixer on high speed. Add cream of tartar and whip until soft peaks form. Add sugar gradually, whipping until stiff but not dry peaks form. Beat in vanilla. Spread meringue evenly over cranberry layer. Use back of teaspoon to make peaks and swirls in meringue.

6. Bake until meringue is a light golden brown, about 25 minutes. Place pan on rack to cool. Cut into 20 bars (4 x 5).

Fluffy pillow of meringue

Jenny's notes: Definitely let egg whites come to room temperature before beating, and the meringue will go much more easily. I also doubled this recipe. Why do all the work and only have an 8x8 pan to show for it, when you can use up the entire can of cranberry sauce that way?


Categories: Cookie, Cranberry, Holiday, Meringue, Shortbread

Monday, December 03, 2007

Fun with Sugar Cookie Dough

I have this great cookbook called A Baker's Field Guide to Christmas Cookies, and I pick a few recipes out of it to try every year. I've been eyeing the "Yuletide Mocha Orange Patchwork, Pinwheel, and Marbled Cookies" recipe for several years and decided to try it for the first holiday cookies of the 2007 season.

Mocha Orange Pinwheel and Marbled Cookies
This recipe could be replicated with any combination of flavored, firm sugar cookie dough. This time around in the recipe the orange dough was crumbly - I may have miscounted the flour when I measured, because the mocha dough was perfection.

If you are going to mix up sugar cookies, you might as well make two batches!

Yuletide Mocha Orange Patchwork, Pinwheel, and Marbled Cookies
from A Baker's Field Guide to Christmas Cookies

Yield: 100 pinwheels or 50 assorted 3- to 4-inch patchwork cookies; yield of marbled cookies varies

Ingredients

Orange dough:
3 cups all-purpose flour
1/2 tsp baking soda
1/4 tsp salt
1 cup (2 sticks) unsalted butter, softened
1 cup granulated sugar
2 tsp finely grated orange zest
1 tsp vanilla extract
1 large egg

Mocha dough:
2 1/2 cups all-purpose flour
1/2 cup Dutch-processed unsweetened cocoa powder
1/2 tsp baking soda
1/4 tsp salt
1 cup (2 sticks) unsalted butter, softened
1 cup granulated sugar
1 tsp instant espresso or coffee
1 tsp vanilla extract
1 egg

1. For orange dough, whisk flour, baking soda, and salt together in a small bowl. In a large bowl with an electric mixer, beat butter until creamy, about 2 minutes. Add sugar gradually, beating until light and fluffy, about 3 minutes; beat in orange zest and vanilla. Beat in egg. Add about one-third of flour mixture and mix on low speed. Gradually add remaining flour, mixing until just blended. Scrape dough onto large piece of plastic wrap. Use wrap to help shape into a large, flat disc, then cover completely with wrap. Refrigerate until firm enough to roll out, at least 2 hours or overnight.

2. For mocha dough, whisk flour, cocoa, baking soda, and salt together in a small bowl. In a large bowl with an electric mixer on medium-high speed, beat butter until creamy, about 2 minutes. Add sugar gradually, beating until light and fluffy, about 3 minutes. Dissolve instant espresso into vanilla, then beat into dough. Beat in egg. Add about one-third of the flour mixture and mix on low speed. Gradually add remaining flour, mixing until just blended. Scrape dough onto large piece of plastic wrap. Use wrap to help shape into a large, flat disc, then cover completely with wrap. Refrigerate until firm enough to roll out, at least 2 hours or overnight.

3. Line 2 cookie sheets with parchment paper.

4. For patchwork cookies: Choose two compatible cookie cutters, large and small, such as a large and small star or bell or a large gingerbread person and a small heart. The only absolute is that the small cookie cutter must fit within the larger one with a border of dough all around. Roll both doughs out to 1/4-inch thickness on lightly floured surface. I will use stars as our example: Cut out a large orange star and place on cookie sheet. Cut out a large mocha star and place 2 inches away on the same sheet. Now cut out a small star out of the larger orange star and a small mocha star out of the large mocha star. Place small mocha star inside larger orange star (in void created by removing small orange star) and vice versa. Be as creative as you like, but keep similarly sized cookies on same sheet for even baking times. When pan is filled with cookies, place in freezer for 15 minutes or refrigerator for 30 minutes.

For Pinwheel Cookies:
Cut each flavored dough in half. Roll half of orange dough out to 1/4-inch thickness on lightly floured surface to a rectangle about 14x16 inches. Roll half of mocha dough out in the same manner. Place orange dough on top of mocha dough and square off the four sides by trimming with a pizza cutter or sharp knife. Starting at one short end, roll both doughs up together as tightly as possible. Your roll should be about 2 inches in diameter. Carefully cover rolled dough with plastic wrap. Repeat with remaining dough halves. Freeze 30 minutes or refrigerate for 1 hour, until very firm. (Rolls may be frozen at this point for up to 1 month). Trim ends of roll so that spiral design is flat. Cut 1/4-inch-thick slices off roll and place 2 inches apart on cookie sheets.

For Marbled Cookies:
Briefly knead all the scraps left from both flavors of dough together to create a marbled effect, roll out as described above, and cut out cookies as you wish; they will look marbled.

5. Preheat oven to 350 degrees F. Bake until dry to touch and edges are just beginning to color, about 12 minutes for cookies 2 inches across. Lift up a cookie; it should lift without breaking, and bottom will be slightly colored. Adjust baking time up or down accordingly if cookies are much smaller or larger. Slide parchment onto racks to cool cookies completely.

Categories: Chocolate, Cookies, Holiday, Mocha, Orange

Monday, November 26, 2007

Daring Bakers November Challenge - Potato Bread


Potato Bread Loaf
Originally uploaded by watchjennybake.
A little back story first. I had my gallbladder removed on November 6th. I am feeling GREAT. Thanksgiving was the first day I really got back into the kitchen, and it felt great too. I baked that day. And the next day. And the next day. And the next day I had to attempt the Daring Bakers challenge.

I should have quit while I was ahead.

Potato What?
There were two puzzling parts to this recipe. The first involved potatoes. I guesstimated at ounces and ended up cooking three rather large russet potatoes. At this point in the recipe, where you add butter and salt, I was seriously considering just eating the mashed potatoes and calling it good. Perhaps I should have gone with that instinct.

Dough before kneading
The instructions tell you to add 4 cups of white flour and 1 cup of whole wheat before putting on the board to knead. That is what the dough looked like at that point. It's supposed to suck up another 2 1/2 - 4 cups of flour through the kneading process, but the recipe also says the dough should be a "soft" dough. Not someone who bakes a lot of bread, I assumed soft really meant soft. I don't have a sense how much additional flour actually was added.

The Dough After Kneading
But here's the thing that stumps me - I have done enough baking to know what well kneaded dough is supposed to look like - a little puckery, holds an indent, and this is what that was! This is dough post-kneading but pre-rising. Yes, it was a little soft, but seemed a good texture. I put it aside to rise.

The Dough Also Rises
This picture is a reflection of how long I waited to do this challenge. I like to take pictures in daylight so I don't get these bright reflections, but by the time the dough had risen, the daylight was gone. Should have started sooner. But what is this beast rising out of the bowl?

Dough after rising
Here is where I began to suspect that this recipe might not be turning out the way I'd hoped. The dough that was formerly firm and tender became soupy and unmanageable. I didn't know what to do. So I bravely pushed on, forcing it across a cookie sheet for foccacia and into a bread pan for bread.

Baked Foccacia... Kind Of
I baked the foccacia. And baked it. And baked it. The dough was just too moist, it never would bake all the way through.

The bread (picture at top) held its shape better, but still had too much moisture to comfortably be called bread.

In the past, I have worked at a Daring Baker Challenge until I perfected it. This time, I'm just happy to be back baking at all, to be honest. I'm not sure this recipe is one I can feel confident in attempting again. To me, the unknowns (how much potato EXACTLY and what exactly is a "soft" dough) are too great to feel very confident. Next month I will start earlier so I can try the recipe more than once. Can't wait!

Daring Bakers Orange Logo
This recipe has been brought to you by the Daring Bakers, a group of now over 100 bakers across the world who attempt the same recipe in secret every month. To read other entries, please go to the Daring Bakers Blogroll. To see the original recipe, please visit this month's hostess's own blog, My Kitchen in Half Cups. Thanks for picking a savory recipe, Tanna. I hope to do future challenges more justice!


Categories: Bread, Daring Bakers, Disaster, Potato

Tuesday, October 16, 2007

Evil brownies of doom


Irish Cream Brownies
Originally uploaded by watchjennybake.
Normally I would blog about the recipe I made, or describe the process (easy) or the end result (fudgy, rich, and delicious) but instead I should warn you - if you have a lazy gallbladder, this is NOT the treat to eat.

I haven't decided what to do. I need to have my gallbladder removed probably, but the health process takes a long time. I went to the emergency room last night/ this morning after 6 hours of pain... all because I ate one of these little guys. Usually the pain subsides after four hours or so, but it was not going to happen. They gave me demerol and sent me home.

So what does a baking blogger do when anything with too much sugar, fat, or eggs will make her be in excruciating pain? I think I may take a break from this blog, until I can face the end result again.

Monday, October 08, 2007

Cinnamon Cardamom Orange Rolls

During last week's blur of baking blogs all making sticky buns and cinnamon rolls, I learned that October 4th is Cinnamon Bun Day in Sweden. In celebration of a country creating a holiday for baked goods, I made another version of last week's recipe - this time with cinnamon, cardamom, and orange zest in the middle, with an orange glaze.

I wouldn't say this is my favorite cinnamon roll recipe ever, but they were still delicious.

Lately I've been making recipes I've already blogged about, like harvest muffins and apple cake. But sometimes certain times of year demand old favorites to be made! I can't help it! Hopefully I'll do something more creative with apples or pumpkin in the upcoming weeks.

Categories: Cinnamon, Orange,Pastry, Yeast

Sunday, September 30, 2007

Daring Bakers September Challenge - Sticky Buns


Busy mixer
Originally uploaded by watchjennybake.
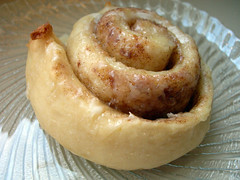
When I saw cinnamon rolls and/or sticky buns announced as the September Daring Bakers challenge, I have to admit to sighing in relief. I have made cinnamon rolls many times, of many varieties, and it didn't look like I'd have to wrestle with caramel this time around. I read through the recipe, decided to make sticky buns, and realized... oops, still caramel. Darn! The recipe made it seem easy, but caramel has some kind of vendetta against me. I don't know why!

Rather than copying and pasting the recipe, please visit the blog of Marce, this month's hostess, to see the recipe. It comes from The Bread Baker's Apprentice, a cookbook I have long contemplated buying, and I enjoyed how some of the steps of the recipe were illustrated, and there wasn't just a picture of what the final result should look like.

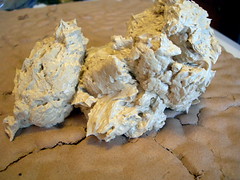
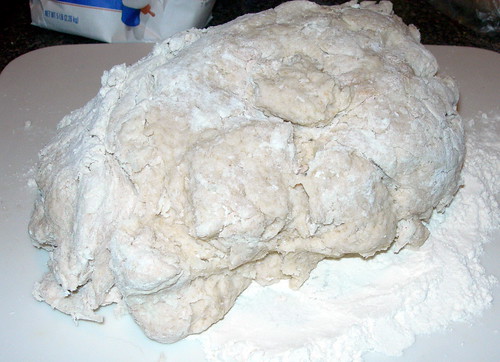
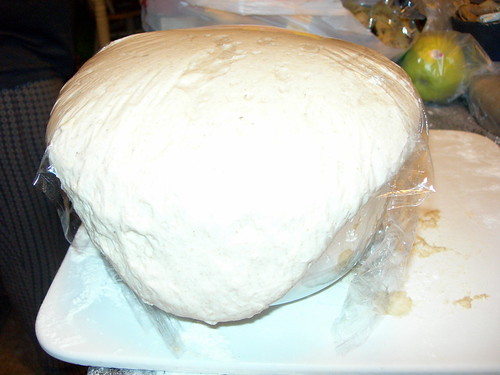
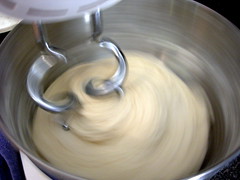
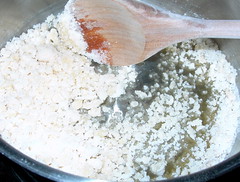
The first picture (above) shows my Sunbeam mixer trying to knead the dough. It was making such a ruckus and trying to jump off the counter, that at first I put a towel underneath it, and then decided to knead by hand. My poor Sunbeam has been challenged severely, although the worst thing I did to it was make divinity, which almost burned out the motor. Eventually I want to get a Kitchenaid with a snazzy color but I enjoy kneading by hand so much I didn't mind helping my mixer out. I could get the dough to feel quite right, and wish I had added a little less flour.

Caramel mixture
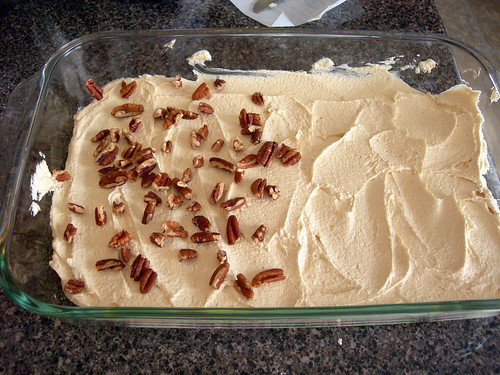
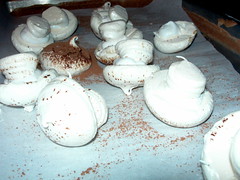
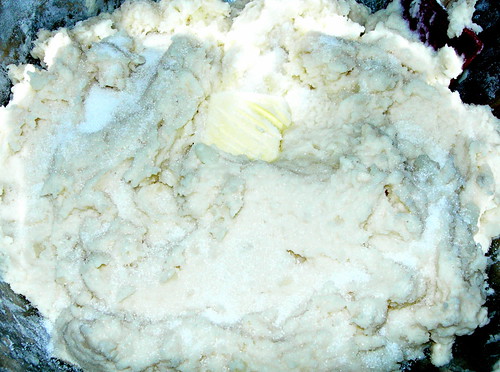
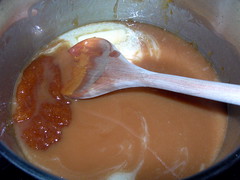
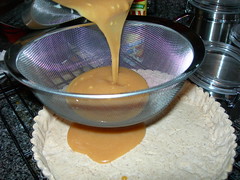
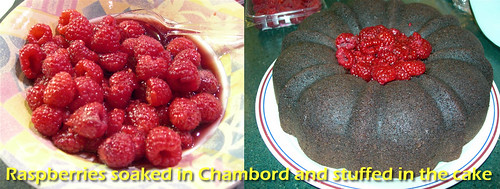
While the dough rose in an oiled bowl, I prepared the caramel mixture. I was happy to see that I didn't have to cook anything on the stove, just mix butter and sugar and syrup together in the mixer and spread it into the pan I would bake the buns in. The recipe said corn syrup but that you could substitute golden syrup - I had a bunch of golden syrup leftover from making treacle tart, and happily used it. Now this is where following the recipe exactly would have been helpful. It said to spread 1/4" of the caramel mixture on the bottom of the pan. I did, and thought it looked scarce, and had a bunch left over, so I scraped all of it into the pan. Little did I know the regret this would cause later on.

You may also notice that only half the caramel is sprinkled with nuts - we have one nut lover and one nut apathetic in my house. I made a little for each of us.

Dough with cinnamon sugar
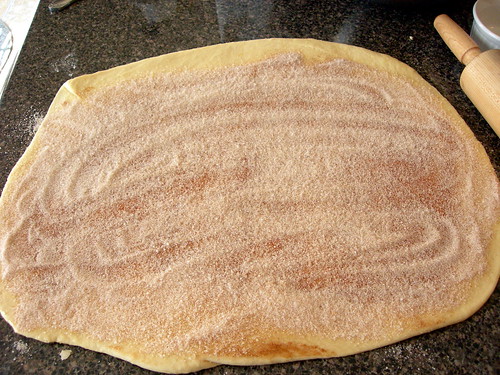
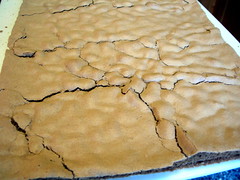
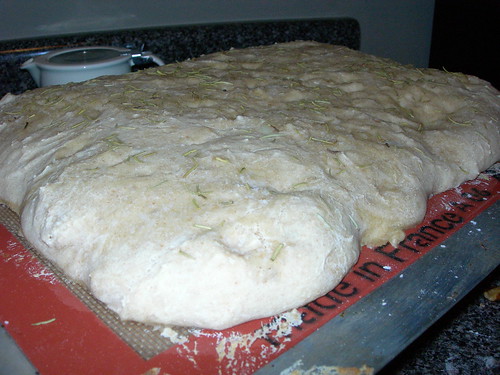
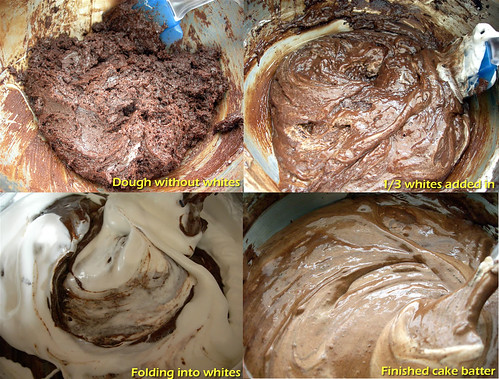
After the dough had risen, it gets rolled out and sprinkled with cinnamon sugar. This step was the same for both the regular cinnamon rolls and the sticky buns. A step very familiar to me, although I was surprised the recipe didn't instruct me to leave a space to seal the rolls off (but I just did what it said). I also left all items resembling dried fruit out, since this was one of the ingredients we could omit if we pleased. If I had left them in, I would have been facing an entire pan of sticky buns to eat on my own. Yikes! The dough at this point was still not the texture I wanted - I made this recipe the first weekend of September and after reading other posts about it, it sounds like people let the dough rise longer if it wasn't quite ready. Well, I was anxious, and the rising time was soooo long already!!

Sliced buns
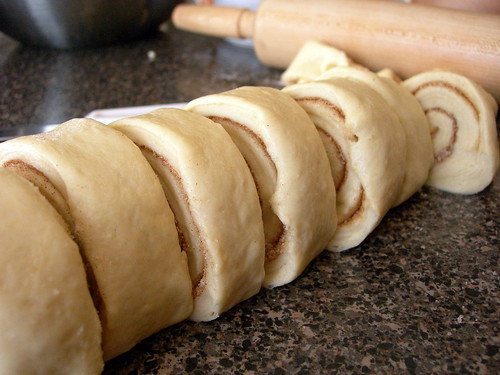
The next step is rolling the dough into a log and slicing into 12-16 equal slices. I learned long ago that the best knife to use when slicing dough such as this is a bread knife, and was happy to easily make nice slices of the buns. I went with 12 buns because I wanted to bake everything in one pan.

Sticky buns after rising
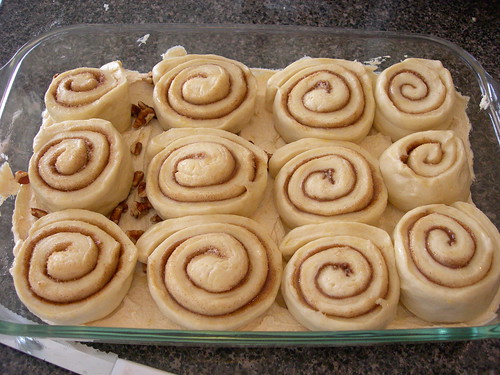
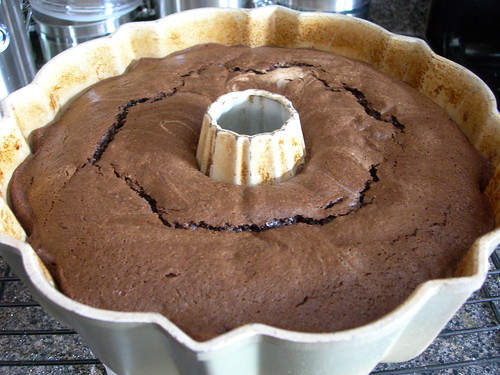
The buns get laid into the caramel, covered, and left to rise a second time. If I had made them the night before, this is the stage I could have put them into the fridge, but I didn't plan that far ahead. This is another place where I should have allowed for extra time to rise, but I looked at them, saw they had proofed slightly, told them "Time's up!" and stuck them in the oven. At this point the process had taken 3-4 hours, the house smelled like Cinnabon, and we were starving!!

Finished product in the pan
The buns smelled amazing while baking, well, until about 15 minutes before they were supposed to be finished. I opened the door and smoke started pouring out. You remember that extra caramel I lavished on the pan? Well, the reason you only put 1/4" on the bottom is that otherwise it bubbles over into the bottom of your stove. I had to take the buns out before I was really ready, and they were slightly underdone (not noticably, but not perfectly to my liking). I couldn't decide what to do about the oven for days - thanks to the advice from several Daring Bakers, I used lemon juice and baking soda, and it worked miracles (thanks everyone!!).

Sticky bun
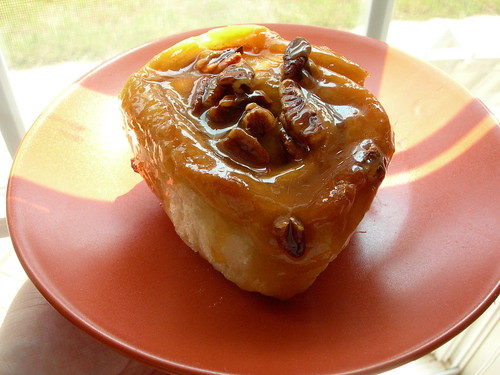
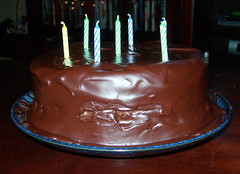
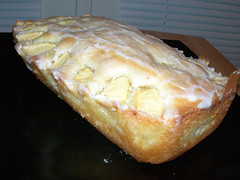
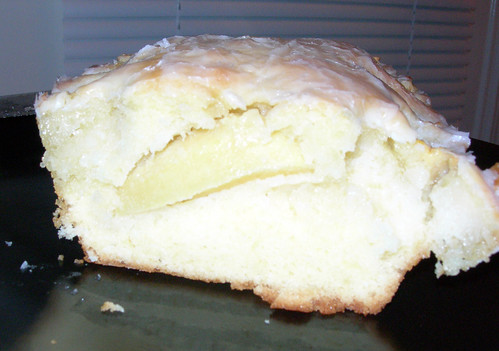
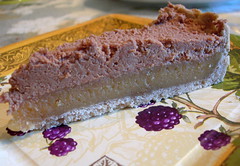
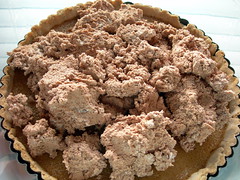
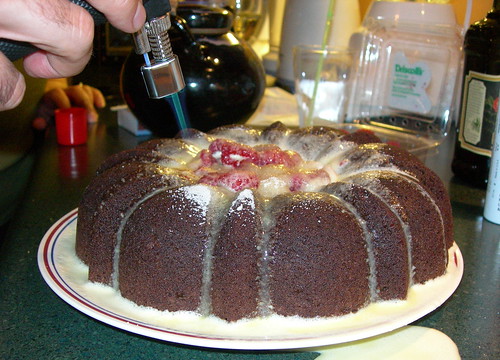
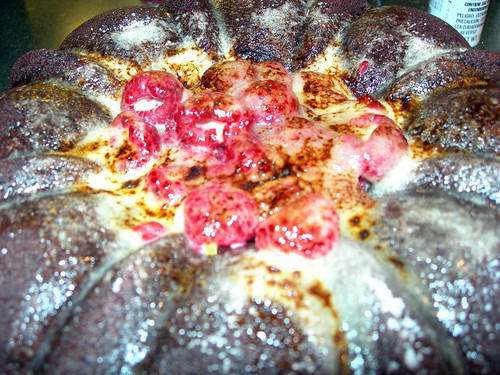
The finished product was delicious. Despite my rushing of the proofing, I felt like the dough was light and not that weird-sweet flavor of dough that has not risen correctly. The sticky bun part was tasty, but I think a little too sweet for me. The use of golden syrup lent a slight molasses taste to the buns which I think added a nice flavor dimension. On the other hand I felt the lemon zest was slightly overpowering, and might add less next time. I did like the way the caramel baked on its own, which technically should have meant less problems. I had plans to try an apple or orange version but never got around to it, but this recipe goes into my file as one I would make again. I would definitely do most of this the night before I wanted to eat them, however. 1 PM is a little late for breakfast!

Daring Bakers Blue Logo
Since this recipe is brought to you by the Daring Bakers, you can check out the other versions of this recipe by clicking on the blogroll on the left column of this blog. I have to warn you - there are now over 100 of us! I'll probably be spending the next few days reading and commenting on them!

Categories: Caramel, Cinnamon, Pastry, Yeast

Monday, September 24, 2007

Apple Cake


Apple Cake
Originally uploaded by watchjennybake.
I've had Simply Sensational Desserts by Francois Payard for some time now but most times I would thumb through it, I would not have all the ingredients I needed. I had been eyeing the apples on my kitchen table, knowing I would need to bake with them soon.

For this blog, I couldn't make my Grandma's apple cake, although I've already made it once this season. (See last October's blog if you missed that episode). I saw the apple cake recipe in this book and was surprised that it was both simple and limited ingredients.

The only thing I didn't have was apricot jam, so I made a quick glaze with powdered sugar for the top. The taste of this is okay - more like an apple bread, and I'd be more likely to serve it for breakfast than dessert - but that doesn't mean I didn't like it. It just... isn't Grandma's, you know?

Apple cake side view

Apple Cake
from Simply Sensational Desserts by Francois Payard

1/2 cup (60 grams) raisins
3 tbsp (42 grams) dark rum, such as Myers
1 scant cup (136 grams) all-purpose flour
3/4 tsp (3 grams) baking powder
8 tbsp (1 stick) (113 grams) unsalted butter, softened
1 cup (115 grams) confectioner's sugar
3 large eggs
2 apples, such as Fuji or Rome, peeled and cored
1/4 cup (60 grams) Apricot glaze (pg 33 of book)

1. Preheat the oven to 325 F. Butter an 8 1/2 x 4 1/2 x 2 1/2 inch loaf pan. Dust the pan with flour, tapping out the excess.
2. Bring a small pan of water to a boil, add the raisins, and boil 1 minute. Drain and repeat the process. Drain the raisins well a second time and place in a small bowl with the rum; stir and set aside.
3. Sift together the flour and baking powder.
4. In the bowl of an electric mixer fitted with the paddle attachment, mix together the butter and confectioner's sugar on medium speed. Add the eggs one at a time, beating well after each addition. Scrape down the side of the bowl with a rubber spatula. Mix in the raisins and rum. Add the dry ingredients and mix on low speed until blended. Spoon half of the batter into the pan and smooth into an even layer.
5. Cut one apple into 12 wedges and arrange them over the batter, down the center of the pan, so their sides touch and the domed side of each wedge is on the top. Spoon the rest of the batter over and around the apples and smooth the top. Cut the other apples into 8 wedges and then cut each wedge in half crosswise. Arrange the wedges in a single row along each long side of the pan, pressing the center-cut sides of the apples against the sides of the pan. There will be two rows of apple slices, with their points toward the center of the pan and exposed batter in the center. Gently push the apples into the batter, leaving the top of the apples exposed.
6. Bake the cake for 60-65 minutes, until the top is golden brown and a toothpick inserted in the center comes out clean. Cool the cake in the pan on a wire rack for 15 minutes. Unmold the cake and turn it rightside up. Gently brush the apricot glaze over the top of the hot cake. Allow the cake to cool completely before cutting it into slices.

Jenny's notes: I didn't do the raisin thing, merely added the rum to the batter as is. I also tried to follow the apple cutting directions but they would have been fine anywhere in the cake. I wish I had the suggested apples but only had Golden Delicious.

Categories: Apple, Cake

Monday, September 17, 2007

The Great Apple Cider Donut Quest


Apple Cider Donuts
Originally uploaded by watchjennybake.
When I lived in Indiana (from 2000-2006), I remember reading an autobiography where the author, who was a Hoosier, pontificated about apple cider donuts. I was intrigued and tried finding some within a daytrip distance from where I lived, but never could. The closest I could find were in Michigan, at least 3.5 hours away.

Now I live in South Carolina, and the thought occurred to me the other day that I had not yet taken up my quest since moving. I did a search and came across the Windy Hill Orchard & Cider Mill, past Spartanburg but well within an easy drive of home. They are basically open two months a year and that's it! The quest began.

Windy Hill Orchard
I have to say, the Windy Hill Orchard isn't nearly the tourist attraction or as large as Sky Top Orchard in North Carolina where we went last year. But you can pick apples, buy donuts, apple bread, apple cider, Wassail, and pumpkins.

Windy Hill Orchard stash
I picked up a jug of Wassail to drink on Halloween or Thanksgiving, if it lasts that long. The donuts were good - we got the kind that had been rolled in cinnamon-sugar. Even better warmed up a little.

Another week without something I actually baked, but I like to feature local places from time to time. This isn't a bakery exactly, but a cider mill that bakes donuts? Clearly can't be ignored.

Categories: Apples, Bakery, Donuts, Local Food

Tuesday, September 11, 2007

Taking a week off

I won't be making a baking post this week but I have a quotation to share. I realized today that baking is one of the few things that I don't quit even when I continually have setbacks and failures.

Julia Child would be proud, I think.

"Cooking is one failure after another - that's how you learn." - Julia Child

Monday, September 03, 2007

Melba Peach Pie


Melba Peach Pie
Originally uploaded by watchjennybake.
I live in South Carolina, where peaches are usually one of our best and brightest crops. Unfortunately, a frost late in the year (as frosts go) destroyed something like 75% of the crop. Where last year you couldn't drive a mile without someone selling peaches along the road, this year I have had to intentionally seek peaches out. Only one farm was selling them at the farmer's market last weekend, so I bought one bag to make one pie.

If this sounds pitiful, that's how I feel! Last summer I was swimming in peaches, and there is just nothing like fresh local fruit. Of course I could buy peaches at the grocery store but they are the kind that is from a different country, picked green, and stored chilled.

I also had some leftover raspberries in the fridge, so when deciding on a recipe, I thought combining the two would be nice. I picked the Melba Peach Pie from the Almost Home Tearoom Cookbook.

The Almost Home Tearoom is a restaurant in Greencastle, Indiana, that serves lunch and dinner. I worked there for a year making desserts, and had so much freedom. Besides having to make sure there was enough strawberry pizza (their signature dessert) and lemon meringue pie on Thursdays, the rest of the dessert selections were up to me. That was a great year and sometimes I really miss the huge industrial kitchen with all the ingredients I could ever use and the thrill of needing to make enough dessert to feed 250 people every day, but in small batches so they had more variety.

This dessert calls for a homemade Melba Sauce, but I had some leftover raspberry syrup in the fridge so I used that. I suspect you could also melt down some raspberry jam. Just don't let the idea of making a sauce in addition to a pie stop you from trying this!

Melba Peach Pie

Prepare: Pastry for 9" double-crusted pie
Line a 9" pie plate with half of pastry dough
Place in bottom of pastry shell: A few whole red raspberries

Combine:
4 cups peeled and sliced fresh peaches
1 1/4 cups sugar
1/8 tsp nutmeg
3 1/2 tbsp cornstarch
1/8 tsp salt
1/8 tsp almond extract

Pour over raspberries.

Dot with: 1-2 tbsp butter
Cover with pastry, seal, and crimp edges.
Brush top with cream, and sprinkle with sugar.

Slit 5-6 vent holes in the top.

Bake at 425 degrees fahrenheit for 10-15 minutes, then at 375 degrees for 40-45 minutes or until bubbly and golden brown.

Serve with a dip of vanilla ice cream and the following Melba Sauce.

Melba Sauce
Combine in a glass cup:
1/4 cup sugar
1 tbsp cornstarch
Stir in: 3/4 cup red raspberry juice
Microwave on high for 1 minute 15 seconds; stir and microwave 30 seconds more. (Mixture may be placed in a suaucepan and cooked until boiling, stirring constantly).

Yields 6-8 servings

Jenny's notes: I would let this cool completely before serving to allow the cornstarch to do its job. And I'm not sure it needed quite this much sugar - next time I would try a cup or less. I was out of nutmeg, so chose to use cinnamon instead.

Categories: Peaches, Pie, Raspberries, Sauce

Wednesday, August 29, 2007

Milk Chocolate Caramel Tart

For the August Daring Baker challenge, we were given the Milk Chocolate Caramel Tart recipe from Eric Kayser’s Sweet and Savory tarts. I was invited to lunch at a co-worker's home with a bunch of other women fairly early in the month, so I decided to attempt this recipe for the luncheon.

For the recipe, please see the related entry in Veronica's Test Kitchen, one of the hostesses for this month's challenge.

Tarts can look deceptively easy, particularly when dealing with caramel, and dry caramel at that. This recipe caused some frustration, but no tears this time. Just laughter - at myself, at the potential ruin of yet another pan, and realizing that it was probably wise to pick librarianship over baking as a career path.

For my first feat, I tried making a crust recipe in a food processor that was about 4 cups too small. I forget that I don't have the biggest one and that most recipes are probably written for a larger bowl. Halfway through I had to dump everything into a bowl and mix it by hand. It seemed to work okay, but was pretty dry. After chilling the dough, it didn't want to roll out very easily - I was able to make most pieces equally thin at least, as you can see in the crust, but had to piece it together quite a bit. One benefit to this recipe was the use of hazelnuts - I had a few cups of hazelnuts in the freezer, left over from the annual bag my Mom sends me from Oregon so I can make holiday treats with the same flavors I grew up with. It was nice to have a reason to use them, although lately I've been sneaking handfuls for snacking, so I imagine the rest won't last long.

Caramel (batch #1)
For my first batch of caramel, I did as the recipe instructed and didn't stir the sugar. Since there was an entire cup, the bottom of the sugar got extremely hot before it all dissolved. As a result, adding the cream made the mixture seize up. I knew it was possible that continuing to stir the mixture might bring it back together, but I decided to quit while I was ahead. Batch #1 - in the trash.


Caramel (batch #2)
This batch of caramel goes in the "I should have known" category. Promptly after washing the pan and wooden spoon, I went about trying another batch of caramel, but the spoon still had water in it. Hello, sugar crystals. Another batch bites the dust.


Straining the caramel
At this point I decided it couldn't hurt to try one more time. I didn't have any karo syrup so I couldn't try the "wet" method of making caramel that one of the Daring Bakers had suggested. So this time I used a different utensil, stirred a little at the beginning, got a few crystals, but simply strained them out as I poured the mixture into the pan. The color seemed right, a golden brown, so I decided to try baking it.


Baked Caramel
To my pleasure, the caramel layer seemed to bake up nicely. The crust also didn't get too brown, which was nice.


Milk chocolate mousse

The next step was making a milk chocolate mousse. So many good chocolates are out there to select from, and this time I used Lindt Extra Creamy. I was making this tart the night before, and didn't want the crust to get soggy. I decided to make the mousse ahead of time and store it in the fridge until the next day, which unfortunately meant that it set up a great deal. Here you see the texture of the mousse the next morning as I tried spreading it on the tart. It eventually warmed to the touch of my fingertips and I was able to press it down somewhat smoothly, but it lacked the creamy texture it would have had if I had spread it right after making it. It still tasted really good!


Milk Chocolate Caramel Tart

The end result was a pretty tart, which I cut into 16 pieces to serve. I agree with the other Daring Bakers about the cinnamon in the crust being overpowering. One co-worker friend said that she thought the slightly browned sugar taste in the caramel added a lot of depth to the taste, and I would agree. Another co-worker said that if I had added peanuts to the caramel layer, it would have tasted like a Snickers bar.

My original intent was to make a dark chocolate version, but I was not impressed with the crust, and the event I was planning to bring it for was cancelled. So for this one, only one whole dessert, but three batches of caramel!

Daring Bakers Orange Logo
This entry was brought to you by the Daring Bakers. Please check out other renditions of this tart by going to the blogroll listed on the left menu of my blog.

Categories: Caramel, Chocolate, Daring Bakers, Mousse, Tart

Sunday, August 19, 2007

Creme Bruleed Chocolate Chiffon Bundt Cake

I have been hearing about this recipe from my co-worker for several months now, so when it came time to pick a dessert to bring for our French-themed International Dinner Night, it was a no-brainer.

The book Baking With Julia is a cookbook I think everyone should have, particularly aspiring bakers, so I'm not going to copy the recipe here. (Ha HA!). I think the end result was good enough to try for the actual recipe, but you could probably mimic it with recipes you already have and end up with a similar result.

The first step is to make a custard, similar to what you would make for creme brulee, only not broiling or toasting it on its own. The egg yolks and sugar are cooked over simmering water until thick and creamy.
Custard
I made the custard a day ahead.

The cake batter is a typical chiffon cake, where you fold in whipped egg whites at the end. I am the proud owner of a new mesh strainer so I was all over sifting the dry ingredients. I usually skip this step but it definitely helps create a nice texture.
Dry ingredients

To help the egg whites not loose their volume, they have to be gradually folded into the batter. Only about 1/3 is added at first, to lighten the batter, and then the batter is folded into the egg whites. I took pictures of every step, just for kicks.
Batter steps

I smiled when I took the cake out of the oven, because the recipe said it should have a crack on the top and be just starting to pull away from the edges. Check! You'll also see my well-used bundt pan that I found for 50 cents at a garage sale - the same day I bought a $1 cake saver. Love garage sales for baking supplies.
Cake out of the oven

After the cake has cooled, and right before serving, raspberries have to be tossed with Chambord and spooned into the middle of the cake. Chambord is SO yummy with chocolate, and using fresh raspberries really kicks up the flavor of the liquor.
Raspberry Steps

The custard comes into play now, as it gets poured over the berries and over the sides of the cake. As you can tell, mine was probably not quite thick enough, and drained through the berries pretty quickly. The hostess at the party had a culinary torch, so the resident chef (NOT me) did the broiling of the sugar on the top of the custard. It didn't matter ultimately that the custard sunk through - you can put sugar on anything and broil it!
Torching the sugar


Here is a bigger picture of the finished project. It may have looked more impressive with a thicker custard, but I like seeing the raspberries peeking through.
Creme Bruleed Chocolate Chiffon Bundt Cake

The recipe says to serve it right away, and I did. With the number of people there, we quickly made it disappear.
All gone

I would make this recipe again. It wasn't difficult, it is just time consuming and some things need to be done ahead of time. The cake had an amazing flavor and was nice and light.

Categories: Cake, Chocolate, Custard, Raspberries