When I posted about Emirati pancakes, I mentioned that everyone has a different version of that recipe, well that is also going to be true about Balaleet. I have seen so many YouTube videos of a variety of techniques that I will be sharing more of a method, even though I used the recipe from Feast like last time. Wikipedia says balaleet "traditionally consists of vermicelli sweetened with
sugar, cardamom, rose water and saffron, and served with an overlying
egg omelette." Vermicelli is a kind of pasta, it's true, but in this case, it is served partially sweet. I believe this is influenced by Indian cuisine that traveled to this region because you can find vermicelli in sweet rice puddings and even sweet drinks like falooda.
Just to get my initial impressions out of the way, I find it impossible to think of a sweet pasta without immediately thinking of Buddy the Elf as immortalized by Will Farrell. He adds candy and maple syrup to his spaghetti. I fully expected this dish to be sweet like that, but it really isn't.
Some recipes toast the vermicelli to a golden brown. Some toast half and keep half untoasted. Some don't toast the vermicelli and darken it with saffron or fake saffron coloring. I think the toasting would add more flavor, and I ended up wishing I'd done more of that. I've seen some recipes that also include toasted nuts. I had soaked my saffron in rosewater and added all the required spices but it had less flavor than I thought it would. I felt I could kind of take it or leave it, and it was a lot of work to have that impression.
To me what was really tasty and I'd love to make again is the eggs! I've never added spices to scrambled eggs, and I liked both the coriander from the recipe and the cardamom that came over from the noodles in with the eggs. It reminded me of how my Mom would cook up the last of the french toast milky eggs after making french toast, so maybe it's more the nostalgia element than anything else.
Monday, June 29, 2020
Monday, June 22, 2020
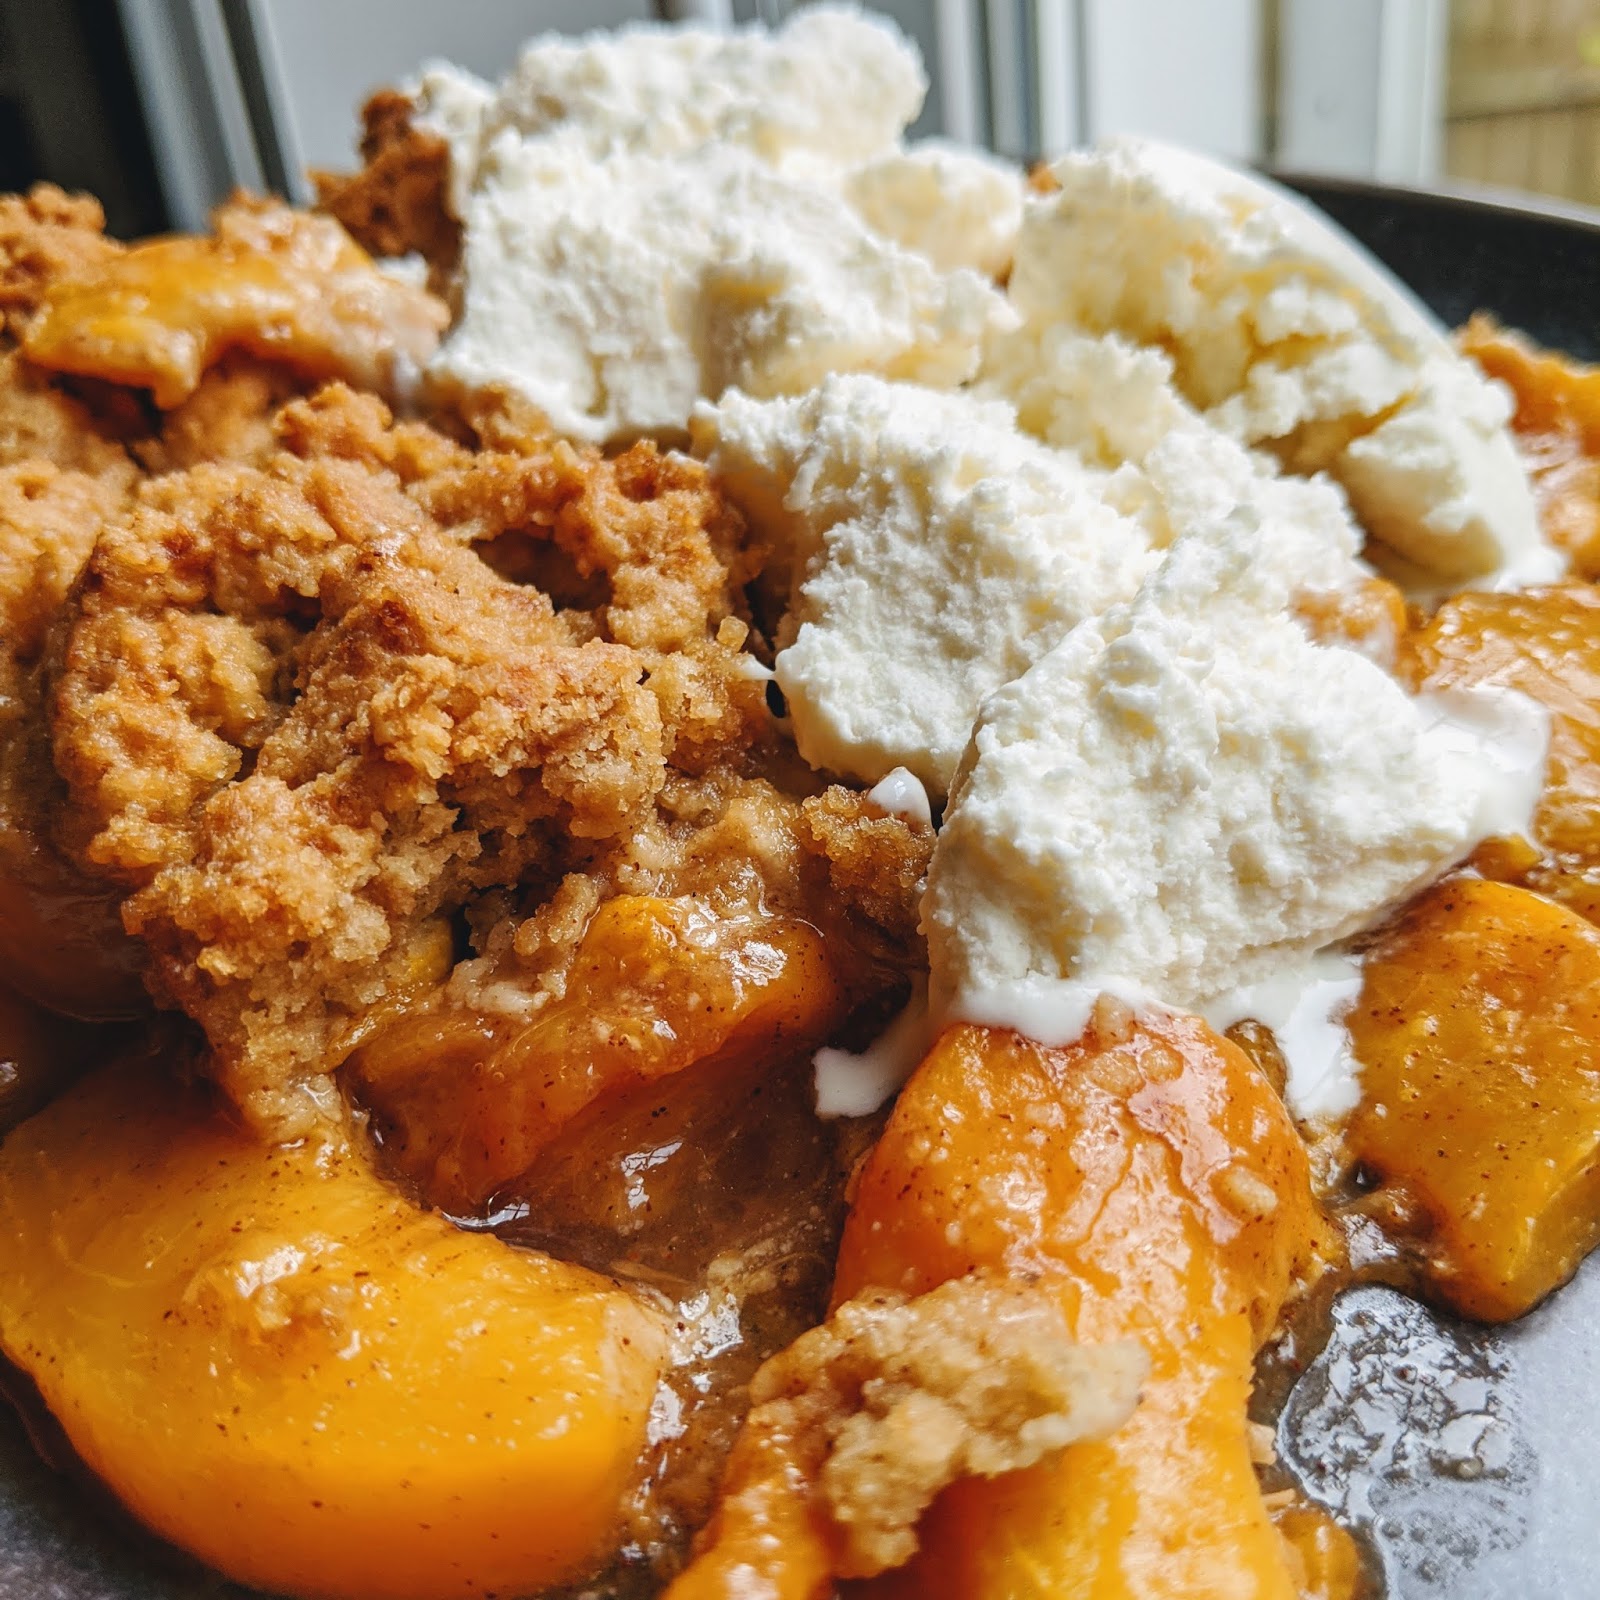
Grain-Free Peach Cobbler
I had a bag of peaches going toward overripe that I needed to use stat! So I went looking for a paleo, lower sugar, some such variety of recipes. I came across this "Guilt Free Paleo Peach Cobbler" from Fearless Dining and adapted it only slightly for what I had on hand.
I suspect this is because of my own substitutions (coconut sugar for honey, tapioca flour for arrowroot powder) but the cobbler top was almost like bran muffins in texture and not necessarily in a bad way. We topped it with a keto vanilla "ice cream" that to me has the texture of cold compressed sand more than it tastes like ice cream. HA. The second time we ate some my husband asked for more cinnamon, so you can add more than what is in the recipe. I already had doubled the amount in the fruit.
Grain-Free Peach Cobbler
(adapted from Fearless Dining)
Ingredients
8 fresh peaches, sliced
1/2 cup coconut sugar
1/2 teaspoon cinnamon
1 tablespoon coconut oil, melted
1 tablespoon arrowroot starch
For the Crust:
2 1/2 cups almond flour
3/4 cup arrowroot starch
1/4 cup cold butter or ghee
3 tablespoons honey
2 large eggs
1/4 teaspoon salt
1/2 teaspoon baking soda
Instructions
Preheat the oven to 350F degrees.
Add the biscuit ingredients into a food processor and mix well until the dough forms.
Slice the peaches and add to a bowl. Add the coconut sugar, arrowroot, and coconut oil. Mix well.
Use a slotted spoon to move the peaches mixture (but not all of its moisture) into an 8x8 baking pan. Spread the biscuit mixture on top and bake for 30 minutes or until biscuit mixture seems cooked through. Serve hot or cold with ice cream or whipped cream.
I suspect this is because of my own substitutions (coconut sugar for honey, tapioca flour for arrowroot powder) but the cobbler top was almost like bran muffins in texture and not necessarily in a bad way. We topped it with a keto vanilla "ice cream" that to me has the texture of cold compressed sand more than it tastes like ice cream. HA. The second time we ate some my husband asked for more cinnamon, so you can add more than what is in the recipe. I already had doubled the amount in the fruit.
Grain-Free Peach Cobbler
(adapted from Fearless Dining)
Ingredients
8 fresh peaches, sliced
1/2 cup coconut sugar
1/2 teaspoon cinnamon
1 tablespoon coconut oil, melted
1 tablespoon arrowroot starch
For the Crust:
2 1/2 cups almond flour
3/4 cup arrowroot starch
1/4 cup cold butter or ghee
3 tablespoons honey
2 large eggs
1/4 teaspoon salt
1/2 teaspoon baking soda
Instructions
Preheat the oven to 350F degrees.
Add the biscuit ingredients into a food processor and mix well until the dough forms.
Slice the peaches and add to a bowl. Add the coconut sugar, arrowroot, and coconut oil. Mix well.
Use a slotted spoon to move the peaches mixture (but not all of its moisture) into an 8x8 baking pan. Spread the biscuit mixture on top and bake for 30 minutes or until biscuit mixture seems cooked through. Serve hot or cold with ice cream or whipped cream.
Monday, June 15, 2020
Orange Poppyseed Yogurt Cake
Loaf cake is the cake of the pandemic. I know some of you out there are feeding your sourdough beasts but I found myself with more work to do, not less, and needed quick bakes. After having to make multiple tries for the lemon drizzle cake, I had read a lot of loaf cake recipes online. I was intrigued by the Grapefruit Greek Yogurt Cake recipe from Sally's Baking Addiction, but my order for grapefruits was thwarted and showed up as oranges instead. I had seen so many lemon poppyseed cakes that I had them in my head as well, and a bunch of Icelandic yogurt in the fridge, so I adapted Sally's recipe to make an orange poppyseed yogurt cake. And it was good. Scroll to the bottom for a bonus dog creeper picture.
Orange Poppyseed Yogurt Cake
1 1/2 cups all-purpose flour
1 tbsp poppy seeds
1 1/2 tsp baking powder
1/2 tsp salt
3 large eggs
3/4 cup Greek yogurt
1 cup packed light brown sugar
1/2 cup vegetable or canola oil
1/4 cup freshly squeezed orange juice
1 1/2 tbsp orange zest
1 tsp vanilla extract
Orange glaze
1 cup confectioners' sugar
2 tbsp orange juice
1/4 tsp vanilla extract
Orange Poppyseed Yogurt Cake
1 1/2 cups all-purpose flour
1 tbsp poppy seeds
1 1/2 tsp baking powder
1/2 tsp salt
3 large eggs
3/4 cup Greek yogurt
1 cup packed light brown sugar
1/2 cup vegetable or canola oil
1/4 cup freshly squeezed orange juice
1 1/2 tbsp orange zest
1 tsp vanilla extract
Orange glaze
1 cup confectioners' sugar
2 tbsp orange juice
1/4 tsp vanilla extract
- Preheat the oven to 350 and grease a 9x5 inch loaf pan.
- Whisk the flour, poppy seeds, baking powder, and salt together in a large bowl. In a medium bowl, whisk the eggs. Once combined, whisk in the yogurt, brown sugar, oil, orange juice, zest, and vanilla. Pour the wet ingredients into the dry ingredients and mix with a large wooden spoon or rubber spatula until combined. Avoid overmixing.
- Spread batter into the prepared loaf pan. Bake for 45-50 minutes. The cake is done when a toothpick inserted into the center comes out clean.
- Remove the cake from the oven and set on a wire rack. Allow to cool before drizzling with glaze.
- For the glaze, simply whisk the ingredients together and drizzle over cake. Slice and serve. Cover and store leftover cake at room temperature for up to 5 days.
![]() |
| Do you see Doyle? |
Monday, June 08, 2020
Arabian Pancakes or Khobz Al-Jbab
My reading focus is on the Middle East this year so when I read Temporary People*, set in the UAE, I went looking for a recipe from there. Feast: Food from the Islamic World has been very useful in placing regional dishes, but the Romanization she gives is never how I find it elsewhere online. I can find references to khobz that seems to be bread, in Morocco. Jiibab is a garment. Pancakes in UAE are often written as chibab or chebab or even chabab but of course I know this doesn't really matter because in UAE it would be in Arabic. They are basically just... pancakes, although there is a little yeast, a little saffron, and it does seem to be typical most of the time that they are served with date syrup. Sometimes they are tiny, sometimes they are the size of the plate, but they do all seem to have the saffron-yeast-date syrup ingredients in common. Quite often, the syrup is served on the side for dipping the pancake in, rather than drizzling or pouring it over as I have done. I've seen other videos around the same area where pancakes are spread with cheese and folded in half, or filled with a sweet nut mixture and deep fried, then topped with a sugar syrup, but that last iteration seems to be specific to holiday celebrations like Eid. This recipe is more of an everyday pancake.
Arabian Pancakes
(recipe from Feast)
1 2/3 cups (200 g) unbleached all-purpose flour
3/4 tbsp whole milk powder**
1/4 tsp instant (fast-acting) yeast
1/4 tsp baking powder
pinch of salt
1 egg
1/4 cup raw cane sugar
pinch of saffron threads
unsalted butter, melted, for the skillet
1/2 cup (65 g) sesame seeds
Date syrup for serving
** In the United States, if you want milk powder you have to buy a big bulky box of it, and I always only need a few spoonfuls. Most of what I read online said you can just use the same amount of milk and add it with the liquid, so I did.
Speaking of pancakes...
Like pancakes? I seem to make them from around the world! Check out the Finnish pannukakku, Icelandic pönnukökur, Papua New Guinean banana pancakes, the Danish ebleskiver, the Hungarian palacsintas, the Kaiserschmarrn or "Emperor's Mess" from Austria, the Swedish pancakes from Alaska, and what we call the German oven apple pancake. I also made ratio pancakes from Michael Ruhlman's book, which we can call American. I've made several more American pancakes, like the recipe from Rosa Parks held by the National Archives, another variation on lemon ricotta pancakes, and kauk moto from Myanmar. Pancakes can also be savory, like scallion pancakes from China (also called cong you bing.)
Arabian Pancakes
(recipe from Feast)
1 2/3 cups (200 g) unbleached all-purpose flour
3/4 tbsp whole milk powder**
1/4 tsp instant (fast-acting) yeast
1/4 tsp baking powder
pinch of salt
1 egg
1/4 cup raw cane sugar
pinch of saffron threads
unsalted butter, melted, for the skillet
1/2 cup (65 g) sesame seeds
Date syrup for serving
- Mix the flour, milk powder, yeast, baking powder, and salt in a bowl and make a well in the center.
- Whisk together the egg, sugar, saffron, and 1 1/4 cups warm water (310 ml) in a bowl until the sugar is dissolved.
- Add the sweet egg mixture to the flour mixture and gradually whisk it in until you have a batter that is thicker than crepe batter but thinner than pancake batter. Cover with plastic wrap and let sit for about 45 minutes to let the batter ferment.
- Brush a large nonstick skillet with a little melted butter and place over medium heat. When the pan is hot, scoop out a ladleful of the batter and pour into the pan, tilting the pan to spread the batter evenly. Sprinkle with some sesame seeds and cook for 2 minutes, or until the bottom is golden. Flip the jbab and cook the other side for 2 minutes, or until it is the same color. You may want to slip a knob of butter underneath the jbab after you flip it. Sprinkle the top with some more sesame seeds.
- Cook the remaining jbab the same way, and serve hot or warm drizzled with date or maple syrup.
** In the United States, if you want milk powder you have to buy a big bulky box of it, and I always only need a few spoonfuls. Most of what I read online said you can just use the same amount of milk and add it with the liquid, so I did.
Speaking of pancakes...
Monday, June 01, 2020
Uzbek Sambusa and My Cooking Class with the League of Kitchens
A few weeks ago, I got to participate in an online cooking class from League of Kitchens. LoK is an organization in New York that works with women from many different countries to teach how to cook their food. The class my husband bought for me was with Damira, from Uzbekistan. For a long time, these classes were taught in person, but our current situation forced them to move the classes online, which also opened them up for a wider audience. Lucky for me, who lives far from New York. I had been following them in Instagram already, just because I was hoping they would come out with a cookbook, since many of the women are from places I have been reading about and trying to learn how to cook from.
Last year, I read a novel from Uzbekistan in my year of the Stans (The Devil's Dance by Hamid Ismailov), and at Thanksgiving I tried to make a dumpling that was similar to the ingredients of the recipe we made together in this class, but not the final result.
For courtesy sake, I will not be posting the recipe here, but I encourage you to check out their website (not a paid advertisement) and take a class yourself. They are super organized - they sent the recipe, background information, and an ingredient list ahead of time, telling you what to prep and what to leave alone. There is a person who isn't the teacher running all the technology so the cook can focus on those instructions. She checked in with us and continually made sure we were ready to move on to the next phase, and weighed in on whether or not our sambusas were cooked enough. The class was long enough for us to prep and cook the meal, and there is even time at the end to eat together. In the class I took, some family members were sharing the experience from different states.
Uzbekistan was part of the very well known silk road, an important avenue for travel and trade. It should not be too surprising that the sambusa is related to the samosa and many other dishes of similar names.
The dough was interesting because it was possibly more similar to cong you bing, the Chinese scallion pancake I had previously attempted. It is made in a way that makes a quick lamination which results in flaky, crispy dough in under an hour. I was impressed with myself! The filling was butternut squash, onion, and cumin seed. I did not know if it would cook but it was perfect, not crunchy at all (again, unlike my Thanksgiving dumplings from Turkmenistan that failed.)
We made a radish and yogurt salad with a lot of herbs in it to go on the side. I ended up scooping some up on my sambusas because they went well together. I think the filling options are endless for these, and I hope to make them again soon.
Last year, I read a novel from Uzbekistan in my year of the Stans (The Devil's Dance by Hamid Ismailov), and at Thanksgiving I tried to make a dumpling that was similar to the ingredients of the recipe we made together in this class, but not the final result.
For courtesy sake, I will not be posting the recipe here, but I encourage you to check out their website (not a paid advertisement) and take a class yourself. They are super organized - they sent the recipe, background information, and an ingredient list ahead of time, telling you what to prep and what to leave alone. There is a person who isn't the teacher running all the technology so the cook can focus on those instructions. She checked in with us and continually made sure we were ready to move on to the next phase, and weighed in on whether or not our sambusas were cooked enough. The class was long enough for us to prep and cook the meal, and there is even time at the end to eat together. In the class I took, some family members were sharing the experience from different states.
The dough was interesting because it was possibly more similar to cong you bing, the Chinese scallion pancake I had previously attempted. It is made in a way that makes a quick lamination which results in flaky, crispy dough in under an hour. I was impressed with myself! The filling was butternut squash, onion, and cumin seed. I did not know if it would cook but it was perfect, not crunchy at all (again, unlike my Thanksgiving dumplings from Turkmenistan that failed.)
We made a radish and yogurt salad with a lot of herbs in it to go on the side. I ended up scooping some up on my sambusas because they went well together. I think the filling options are endless for these, and I hope to make them again soon.
Monday, May 25, 2020
Classic Apple Tarte Tatin - now with more nemesis
This post is really long, but it's all in service to this recipe, and isn't just a random story about what I watched on tv or anything like that.
Caramel has long been a problem in the JennyBakes kitchen, from failed cakes to frustrating tarts. But caramel is a key element in a tarte tatin, and I couldn't read Ducks, Newburyport, whose narrator thinks frequently about tartes tatin, without making the attempt. Not to mention that she specifically uses Pink Lady apples and the Instacart person picking my apples for me had ended up bringing me a 3-lb bag of the same kind of apple!
The other appeal to the recipe I decided to use as my basis was that it made use of a "rough puff" for the puff pastry. Anyone who has sat through a season of the Great British Bakeoff (aka Great British Baking Show in the states) knows about a rough puff. But yet I had never had the opportunity to make one. I'll be honest that I was most excited about that!
I will share what I am certain is a lovely recipe outside of user error, and then discuss my thoughts on the recipe.
Tarte Tatin with Homemade Rough Puff Pastry Dough
(recipe from Brooklyn Supper, with great detail and lovely pictures, please refer to that site)
Ingredients
Rough Puff Pastry
Notes from JennyBakes:
Reader, there are so many places I made mistakes.
First, I decided to make a half recipe. I would be the only person in my house eating it and I figured I could just cut everything in half and use a smaller skillet.
The rough puff was going fine, and fit the skillet I had chosen, but...
The caramel followed the steps described in step 5, but by the time the mixture started to bubble and spit after separating, it was already a pretty dark reddish brown which quickly turned to BLACK BLACK BLACK hahahaha. I definitely over cooked it but to be fair, that was prior to even 10 minutes. Perhaps the lower amounts, perhaps using a nonstick pan, perhaps my infernal electric flattop stove.
So I pressed on. I did not cook the apples long, just arranged them and tried covering them with caramel at least partially (it had the texture of pulled sugar and I definitely knew it was already over but for SOME REASON I decided not to start over.
I had it all arranged in the 6-inch skillet and on a cookie sheet but I kept having this niggling thought in my head... nonstick skillet...plastic handle... IF I PUT THIS IN THE OVEN IT WILL MELT.
So I quickly and sloppily transferred the concoction to a lovely but oval-shaped ceramic baking pan. There were no longer exactly the right number of apples, and the puff pastry was no longer the right shape and covering everything. Yet I pressed on.
There was just no coming back for the caramel. And the lack of heat in the apples I didn't cook plus the late-in-the-game relocation of the puff pastry didn't do it in any favors and I didn't see the layering like I thought I should (in a few select pieces it was perfect and lovely but most of the time it was a lump of unscorched delight in a pool of burned and blackened apple-shaped corpses.
Will I try this recipe again? Oh probably not. I'm not sure it's worth the end result. I'd much rather have an apple pie or apple crisp, one of which is easier to make than a tarte tatin. I take some consolation in remembering Julia Child's episode of the French Chef where she turned her tarte tatin over and it fell apart and loosely spread beyond her serving platter. And she just tucked it all back in and declared it good enough. I suspect she had the opposite problem of me - not enough carmelization! Plus her apple choices seemed a bit willy-nilly and it's clear from the narrator in Ducks, Newburyport, who bakes for a living, that the apple matters. I enjoyed the Pink Lady apples in their slightly baked manner, once the charred caramel was cut off.
I might make the rough puff again, but of course anyone who bakes probably knows that once you see how much butter puff pastry has in it, you don't particularly want to eat it.
Caramel has long been a problem in the JennyBakes kitchen, from failed cakes to frustrating tarts. But caramel is a key element in a tarte tatin, and I couldn't read Ducks, Newburyport, whose narrator thinks frequently about tartes tatin, without making the attempt. Not to mention that she specifically uses Pink Lady apples and the Instacart person picking my apples for me had ended up bringing me a 3-lb bag of the same kind of apple!
The other appeal to the recipe I decided to use as my basis was that it made use of a "rough puff" for the puff pastry. Anyone who has sat through a season of the Great British Bakeoff (aka Great British Baking Show in the states) knows about a rough puff. But yet I had never had the opportunity to make one. I'll be honest that I was most excited about that!
I will share what I am certain is a lovely recipe outside of user error, and then discuss my thoughts on the recipe.
Tarte Tatin with Homemade Rough Puff Pastry Dough
(recipe from Brooklyn Supper, with great detail and lovely pictures, please refer to that site)
Ingredients
Rough Puff Pastry
- 1 1/4 cups all-purpose flour
- 8 tablespoons (1 stick) unsalted butter, frozen
- 1/4 teaspoon fine grain sea salt
- 6 tablespoons ice water
Tarte Tatin
- 6 medium apples, peeled and quartered with cores cut out (go with a crisp, flavorful variety like Jonagold or MacIntosh)
- 1 1/4 cups white granulated sugar , divided
- 1 tablespoon fresh squeezed lemon juice
- 6 tablespoons unsalted butter
- 1/4 teaspoon sea salt
- 1 recipe puff pastry (above)
Instructions
-
To make rough puff pastry dough, use a fork to blend flour and sea salt. Grate in frozen butter. Use fingertips to rub butter into flour, though not as thoroughly as you might for a traditional pie dough. Drizzle in half the ice water, turn dough until it’s absorbed. Add remaining water, turning dough once more. Gather dough into a loose mound; there will be a few dry bits, but that’s fine. Turn mound out onto a sheet of plastic, form a loose disc, and wrap tightly. Set in refrigerator and chill for 30 minutes.
-
On a very lightly floured sheet of parchment, roll the disc out into an 8 x 15-inch rectangle. Dough will still be quite crumbly; just do your best. Fold sheet of dough into thirds, folding each third into the center, so you have something resembling an envelope (pictured above). Press an indentation into the upper corner of envelope with your fingertip, to indicate one turn. Wrap tightly with plastic and chill 30 - 45 minutes.
-
Continue this process of rolling, folding into thirds, marking number of turns with a fingertip, wrapping, and chilling, for a total of 5 turns. As you can imagine, it’s best to give yourself a day when you can make this ahead. When you’ve completed the fifth turn, wrap dough and chill until needed for the tarte.
-
Use a sharp knife to trim angled edges from the apple quarters, so they’ll sit flat, with the rounded side facing up. Toss prepared apples with lemon juice and 1/4 cup sugar, and set aside to co-mingle for 20 – 30 minutes.
-
To make caramel, set a 9-inch, deep-sided heavy-bottomed skillet over medium heat. Add butter, and once melted, the remaining cup of sugar. Keep a close eye and stir constantly. First, things will hold together, then slowly, the mixture will darken and butter will begin to separate. Stay strong. Next, sugar mixture will bubble and spit a little. You may want to edge heat down slightly here, as you’re going for a light caramel color and things still have a ways to cook. Finally, caramel will come back together, smooth out, and cook quickly. As soon as you have an even, light caramel, remove pan from heat, about 10 - 15 minutes total.
-
Preheat oven to 400 degrees F.
-
Toss apples one more time, and then carefully spoon into hot caramel. Things are going to spit and bubble a little, so go slowly. If there’s a lot of excess juice (it varies according to the kinds of apples), leave it behind. Set caramel and apples back over medium, or slightly medium-low heat, and cook 15 minutes or so, stirring frequently to turn apples in the caramel mixture. Apples and caramel are ready when the apples have taken on color without being mushy and the caramel is a dark, golden brown.
-
Arrange apples with rounded sides facing down in a nice circle, with several apples more in center.
-
Roll the prepared puff pastry into a 10-inch circle, about 1/4-inch thick. Set on top of apples and tuck sides down into edges of the pan. Cut four 1-inch vents in center with a sharp knife.
-
Set pan on a rimmed baking sheet and slide into oven.
-
Cook tarte for about 25 minutes, or until the pastry has puffed up and is a nice golden brown.
-
Set tarte aside to cool for a minute, then cover with a large plate, and use two potholders to flip. Slice and serve immediately.
Reader, there are so many places I made mistakes.
First, I decided to make a half recipe. I would be the only person in my house eating it and I figured I could just cut everything in half and use a smaller skillet.
The rough puff was going fine, and fit the skillet I had chosen, but...
The caramel followed the steps described in step 5, but by the time the mixture started to bubble and spit after separating, it was already a pretty dark reddish brown which quickly turned to BLACK BLACK BLACK hahahaha. I definitely over cooked it but to be fair, that was prior to even 10 minutes. Perhaps the lower amounts, perhaps using a nonstick pan, perhaps my infernal electric flattop stove.
So I pressed on. I did not cook the apples long, just arranged them and tried covering them with caramel at least partially (it had the texture of pulled sugar and I definitely knew it was already over but for SOME REASON I decided not to start over.
I had it all arranged in the 6-inch skillet and on a cookie sheet but I kept having this niggling thought in my head... nonstick skillet...plastic handle... IF I PUT THIS IN THE OVEN IT WILL MELT.
So I quickly and sloppily transferred the concoction to a lovely but oval-shaped ceramic baking pan. There were no longer exactly the right number of apples, and the puff pastry was no longer the right shape and covering everything. Yet I pressed on.
There was just no coming back for the caramel. And the lack of heat in the apples I didn't cook plus the late-in-the-game relocation of the puff pastry didn't do it in any favors and I didn't see the layering like I thought I should (in a few select pieces it was perfect and lovely but most of the time it was a lump of unscorched delight in a pool of burned and blackened apple-shaped corpses.
Will I try this recipe again? Oh probably not. I'm not sure it's worth the end result. I'd much rather have an apple pie or apple crisp, one of which is easier to make than a tarte tatin. I take some consolation in remembering Julia Child's episode of the French Chef where she turned her tarte tatin over and it fell apart and loosely spread beyond her serving platter. And she just tucked it all back in and declared it good enough. I suspect she had the opposite problem of me - not enough carmelization! Plus her apple choices seemed a bit willy-nilly and it's clear from the narrator in Ducks, Newburyport, who bakes for a living, that the apple matters. I enjoyed the Pink Lady apples in their slightly baked manner, once the charred caramel was cut off.
I might make the rough puff again, but of course anyone who bakes probably knows that once you see how much butter puff pastry has in it, you don't particularly want to eat it.
Monday, May 18, 2020
Lemon Drizzle Cake Disaster
I have been hosting a readalong of Ducks, Newburyport by Lucy Ellmann. It is a stream of consciousness type book of over 1000 pages with very little sentence breaks. The narrator is a mother and bakes pies and cakes for a living. She kept going on about lemon drizzle cakes so I had to do some research.
Well I will not be defeated by a simple loaf cake. So I bought more lemons and tried again. This is when I noticed that the recipe is equal weight eggs, flour, sugar, and butter - which means this is a pound cake recipe - which means I probably won't like it made correctly. To me pound cakes are just too dry. But I made the thing, I used baking powder with the flour, I followed the recipe... I didn't think it was great. Like the narrator in Ducks, Newburyport, I was agonizing over a cake recipe that wasn't even one I particularly cared for to start with.
But I do think my attempts at finding cup equivalencies is about right. You can refer back to the original recipe if you prefer to weigh your ingredients. I'm a bad baker; I just can't be talked into finding the scale for a stir and bake recipe.
Lemon Drizzle Cake
(recipe from The Londoner, adapted by me)
Cake:
3 large eggs
1 1/2 cups all-purpose flour
2 tsp baking powder
3/4 tsp salt
3/4 cup granulated sugar
3/4 cup (12 tbsp/6 oz) butter, at room temperature
Zest of 2 lemons (rubbed into the sugar, if you want)
Drizzle:
Juice of 2 lemons (the ones you zested)
1 cup powdered sugar
Line a 9x4 cake pan with parchment paper and preheat your oven to 350F.
Cream together your cake ingredients until you’re left with a nice smooth cake batter. Pour into your pan and bake for about 30-35 minutes.* While you’re waiting, mix together the powdered sugar and lemon juice until totally smooth. After 30 minutes, check the cake by inserting a skewer into the middle, if it comes out clean, it’s done. If not, give it a few minutes more. As soon as it's removed from the oven, use a skewer to poke holes all over the cake, all the way down to the bottom. Pour over the lemon glaze and leave to cool.
*I found I had to bake at least 40 to get the middle baked but then it felt overbaked. This is an ongoing issue with loaf cakes. Maybe it's my oven?
“I was delivering my cakes to the coffee shop in New Philadelphia, and that manager guy, Mark, accused me of changing my lemon drizzle cake recipe and said he liked them better before, the fact that I never felt so insulted, the fact that I left there almost in tears, the fact that I felt so mad he didn’t like my lemon drizzle cakes anymore, … the fact that my recipe let me down and I had to change it, lemon drizzle cake disaster….” (page 388)The entire first page of results for a recipe were all UK websites, which means recipes with grams and self-rising flour. I took the one that looked the best to me and decided to adapt it which resulted in a few problems. I was double checking substitutions on a webpage, just picked one at random, and while it said you would use 1.5 tsp baking powder and .5 tsp salt for every cup of regular flour, when it listed cake flour it said baking soda... and even though I know better, I hesitated and instead of using my brain took this random website as somehow knowing more than me (where are my librarian skills!?) and so of course the first lemon drizzle cake really was a lemon drizzle cake disaster. The soda instead of powder meant the cake sank instead of rising, and all together it had a bit of a savory character to it. I'm sure cake flour wasn't the right choice either but I had some and have been trying to use little of the all purpose flour in case I can't get any more!
“I internalized something negative about my drizzle cakes and that’s what’s stuck… it’s made me hate making lemon drizzle cake…” (pages 389-90)
Well I will not be defeated by a simple loaf cake. So I bought more lemons and tried again. This is when I noticed that the recipe is equal weight eggs, flour, sugar, and butter - which means this is a pound cake recipe - which means I probably won't like it made correctly. To me pound cakes are just too dry. But I made the thing, I used baking powder with the flour, I followed the recipe... I didn't think it was great. Like the narrator in Ducks, Newburyport, I was agonizing over a cake recipe that wasn't even one I particularly cared for to start with.
But I do think my attempts at finding cup equivalencies is about right. You can refer back to the original recipe if you prefer to weigh your ingredients. I'm a bad baker; I just can't be talked into finding the scale for a stir and bake recipe.
Lemon Drizzle Cake
(recipe from The Londoner, adapted by me)
Cake:
3 large eggs
1 1/2 cups all-purpose flour
2 tsp baking powder
3/4 tsp salt
3/4 cup granulated sugar
3/4 cup (12 tbsp/6 oz) butter, at room temperature
Zest of 2 lemons (rubbed into the sugar, if you want)
Drizzle:
Juice of 2 lemons (the ones you zested)
1 cup powdered sugar
Line a 9x4 cake pan with parchment paper and preheat your oven to 350F.
Cream together your cake ingredients until you’re left with a nice smooth cake batter. Pour into your pan and bake for about 30-35 minutes.* While you’re waiting, mix together the powdered sugar and lemon juice until totally smooth. After 30 minutes, check the cake by inserting a skewer into the middle, if it comes out clean, it’s done. If not, give it a few minutes more. As soon as it's removed from the oven, use a skewer to poke holes all over the cake, all the way down to the bottom. Pour over the lemon glaze and leave to cool.
*I found I had to bake at least 40 to get the middle baked but then it felt overbaked. This is an ongoing issue with loaf cakes. Maybe it's my oven?
Monday, May 11, 2020
DoubleTree Cookie Recipe
When it comes to trending recipes, I'm a sheeple, I'm a lemming. If 99 bakers jumped off a bridge, I would too. So it should come as a shock to nobody that I also made these DoubleTree cookies! I have stayed at many Hampton and Hilton hotels, but I don't think I've stayed at a DoubleTree, so I don't have the memory of these cookies to compare anything to. The recipe looked like the standard Toll House recipe with a little lemon juice, cinnamon, and oats added, and yet I had to make it! You also bake them at a lower temperature than most cookies, and for longer - I think if I made these again I'd just do the normal 350 for 10-12 minutes, as I didn't see any advantage to lower and longer.
I tried to use the original recipe as published by Hilton because I've also encountered many "takes" on the recipe, so it gets confusing. One person blitzed the oats, rendering them more like a flour (this is the territory of a previous internet cookie legend, the Neiman Marcus cookie. So I followed this recipe to a T except where I didn't... I didn't chop the walnut halves (making them super obvious in the cookie, and I only had mini chips, so used the same amount of minis, which was a LOT.)
½ pound butter, softened (2 sticks)
¾ cup + 1 tablespoon granulated sugar
¾ cup packed light brown sugar
2 large eggs
1 ¼ teaspoons vanilla extract
¼ teaspoon freshly squeezed lemon juice
2 ¼ cups flour
1/2 cup rolled oats
1 teaspoon baking soda
1 teaspoon salt
Pinch cinnamon
2 2/3 cups Nestle Tollhouse semi-sweet chocolate chips
1 3/4 cups chopped walnuts
Cream butter, sugar and brown sugar in the bowl of a stand mixer on medium speed for about 2 minutes.
Add eggs, vanilla and lemon juice, blending with mixer on low speed for 30 seconds, then medium speed for about 2 minutes, or until light and fluffy, scraping down bowl.
With mixer on low speed, add flour, oats, baking soda, salt and cinnamon, blending for about 45 seconds. Don’t overmix.
Remove bowl from mixer and stir in chocolate chips and walnuts.
Portion dough with a scoop (about 3 tablespoons) onto a baking sheet lined with parchment paper about 2 inches apart.
Preheat oven to 300°F. Bake for 20 to 23 minutes, or until edges are golden brown and center is still soft.
Remove from oven and cool on baking sheet for about 1 hour.
Cook’s note: You can freeze the unbaked cookies, and there’s no need to thaw. Preheat oven to 300°F and place frozen cookies on parchment paper-lined baking sheet about 2 inches apart. Bake until edges are golden brown and center is still soft.
I tried to use the original recipe as published by Hilton because I've also encountered many "takes" on the recipe, so it gets confusing. One person blitzed the oats, rendering them more like a flour (this is the territory of a previous internet cookie legend, the Neiman Marcus cookie. So I followed this recipe to a T except where I didn't... I didn't chop the walnut halves (making them super obvious in the cookie, and I only had mini chips, so used the same amount of minis, which was a LOT.)
DoubleTree Signature Cookie Recipe
(from the source)
Makes 26 cookies½ pound butter, softened (2 sticks)
¾ cup + 1 tablespoon granulated sugar
¾ cup packed light brown sugar
2 large eggs
1 ¼ teaspoons vanilla extract
¼ teaspoon freshly squeezed lemon juice
2 ¼ cups flour
1/2 cup rolled oats
1 teaspoon baking soda
1 teaspoon salt
Pinch cinnamon
2 2/3 cups Nestle Tollhouse semi-sweet chocolate chips
1 3/4 cups chopped walnuts
Cream butter, sugar and brown sugar in the bowl of a stand mixer on medium speed for about 2 minutes.
Add eggs, vanilla and lemon juice, blending with mixer on low speed for 30 seconds, then medium speed for about 2 minutes, or until light and fluffy, scraping down bowl.
With mixer on low speed, add flour, oats, baking soda, salt and cinnamon, blending for about 45 seconds. Don’t overmix.
Remove bowl from mixer and stir in chocolate chips and walnuts.
Portion dough with a scoop (about 3 tablespoons) onto a baking sheet lined with parchment paper about 2 inches apart.
Preheat oven to 300°F. Bake for 20 to 23 minutes, or until edges are golden brown and center is still soft.
Remove from oven and cool on baking sheet for about 1 hour.
Cook’s note: You can freeze the unbaked cookies, and there’s no need to thaw. Preheat oven to 300°F and place frozen cookies on parchment paper-lined baking sheet about 2 inches apart. Bake until edges are golden brown and center is still soft.
Monday, May 04, 2020
Fudgy Veggie Packed Brownies
I've discovered another great source for recipes that bakes similarly to how I bake for us at home - grain free, lower-sugar options, etc. It's Gather and Feast out of Melbourne, Australia. I came across one of their recipes from another blog and down the rabbit hole I went. I came out with these veggie-packed brownies, which they originally made with zucchini, sweet potato, and beet. Since quarantine baking is the name of the game these days, I didn't have a beet so I substituted a carrot. And I would do it again, these are super chocolatey and moist.
Brownie
Chocolate Ganache (optional)*
Chocolate Ganache (optional)
Fudgy Veggie Packed Brownies
(recipe from Gather and Feast)Brownie
- 130g coconut oil, softened or melted & cooled
- 2 cups coconut sugar -OR- 1½ cups if don’t mind it less sweet*
- 1 tbs vanilla paste or extract
- 2 large eggs
- 200g raw sweet potato, finely grated*
- 150g raw zucchini, finely grated*
- 100g raw beetroot, finely grated
- 1 cup almond meal
- ¼ cup buckwheat flour
- 1 tsp baking powder
- 1 tsp flaked sea salt
- 1 cup raw cacao powder
- ½ cup dark & rich dutch processed cocoa powder
- ¾ cup thick cultured coconut yogurt -OR- thick greek yogurt*
- Extra cocoa powder for dusting
Chocolate Ganache (optional)*
- 200g dark chocolate, roughly chopped
- ¾ cup coconut cream
- 3 tbs coconut oil
- 1 tsp vanilla
- Pinch sea salt
- Veggie chips
- Cacao nibs
- Freeze dried strawberries
Method
Brownie- Preheat your oven to 180C/350F.
- Whisk the coconut oil and sugar until combined.
- Add the eggs and vanilla and whisk for 2-3 minutes.
- Add the grated veggies and fold through.
- Next, add the dry ingredients and stir to combine.
- Fold through the yogurt.
- Line a 20cm brownie pan with baking paper.
- Pour the brownie mixture into the pan smoothing it out with a spatula or spoon.
- Bake at 180C/350F for 30 minutes.
- Remove from the oven and set aside to cool.
- Once cool, remove the brownie from the pan, cut into pieces, and dust with cocoa powder and top with desired toppings -OR- top with the ganache and place in the fridge for about 30 minutes to set - then cut into pieces.
- Store in an airtight container in the fridge. Enjoy!
Chocolate Ganache (optional)
- Place all ingredients into a medium sized saucepan and melt over low heat.
- I used 1 1/2 cups and found it to be just fine
- I didn't measure my veggies, just went with one of each... as such ended up with 4 cups shredded veggies which felt like too much. More than anything I wish I'd left out the zucchini seeds because they added so much moisture!
- I had Icelandic style plain yogurt which is definitely thick, and worked well here.
- I used a 9x13 pan because I don't have a "brownie pan"
- I didn't make a ganache or put toppings. They didn't seem to need it. They look pretty that way.
- I cut mine into rather large pieces and would have gone smaller if I was bringing them somewhere.
- I neglected to store mine in the fridge and the last two molded. There is a lot of moistness in these brownies!
Monday, April 27, 2020
Quinoa Chocolate Cake (lower-sugar, grain-free)
Some recipes sink into my brain and won't let go until I've tried them, and this quinoa chocolate cake is one of those. It uses no flour, but pre-cooked quinoa is pureed/blended along with dry ingredients to make the base. The recipe developer also said it was gluten-free and refined sugar-free, which of course is an asset in my house. I was also drawn in by the beautiful presentation and photography over on her website so please check it out - she makes 2.5x this recipe, all in 6-inch rounds, and creates quite the party cake. I just baked one batch and did it in a 8x8 square pan, making it more of a snacking cake. Save your leftover quinoa, kids. You only need a cup for this cake.
Chocolate Quinoa Cake
(from The Kitchen McCabe)
FOR THE CAKE:
FOR THE CAKE:
Chocolate Quinoa Cake
(from The Kitchen McCabe)
FOR THE CAKE:
- 1 cup Quinoa (cooked)
- 2 large Eggs
- ½ cup Unsalted Butter, melted
- ⅛ cup Milk (plant based milks work great)
- 1 teaspoon Vanilla
- ¾ cup Coconut Palm Sugar
- ½ cup Dark Cocoa Powder
- ¼ teaspoon Salt
- ¾ teaspoon Baking Powder
- ½ teaspoon Baking Soda
- 1 cup Chocolate Chips(preferably 60% cacao content or higher)
- ¾ cup Heavy Cream (coconut cream can also be used)
Instructions
FOR THE CAKE:
- Preheat the oven to 350 degrees f.
- Grease the sides of two 6" round baking pans and line the bottoms with circles of parchment paper.
- Place the quinoa, eggs, melted butter, milk, and vanilla in a high speed blender and process on high speed until smooth - quinoa should be undetectable.
- Add the sugar, cocoa powder, salt, baking powder, and baking soda to the blender and process just until combined.
- Divide the batter evenly between the two prepared pans.
- Bake in preheated oven for 18-20 minutes, or until a tester inserted in the center of the cake comes out clean.
- Remove from oven and let cool completely. Remove from pans, peel off parchment, wrap in plastic wrap, and refrigerate for 2 hours, or until chilled.
- Place the chocolate in a bowl.
- Heat the cream in a saucepan over medium high heat until it begins to steam. Pour over the chocolate and let sit for two minutes. Whisk until all of the chocolate is melted and mixture is smooth. Let sit for 30 minutes to firm up a bit.
- Unwrap cake layers. Place on layer on a plate and spread a bit of ganache evenly across the top. Place the second cake layer on top of the first and use the remaining ganache to frost the top and sides of the cake.
- Serve in slices cut with a hot, wet knife for cleanest cuts.
- Keep refrigerated. Will keep, covered, for up to a week.
Monday, April 20, 2020
Peanut Butter Cookies (grain-free, gluten-free, lower-carb)
Recently Deb of Smitten Kitchen posted a peanut butter cookie recipe that she originally blogged about in 2007, an adaptation of a recipe from Magnolia Bakery. Well I took Deb's recipe and used lower-carb ingredients to see if I could satisfy my husband's low-carb sweet tooth. He liked them! I tolerated them but ultimately I'm just too aware of the taste of the sugar substitutes, if I'm being honest. If they do not bother you, I bring you this cookie.
1 1/4 cups almond flour
3/4 teaspoon baking soda
1/2 teaspoon baking powder
1/4 teaspoon salt
1/2 cup (4 oz, 1 stick) unsalted butter, softened
1 cup peanut butter at room temperature
1/2 cup Swerve granulated sugar substitute
1/2 cup Swerve or Splenda brown sugar substitute
1 large egg, at room temperature
1 tablespoon milk
1 teaspoon vanilla extract
1/2 cup chocolate chips (we use Lily dark chocolate Stevia-sweetened)
Preheat oven to 350 degrees. In a large bowl, combine the almond flour, the baking soda, the baking powder, and the salt. Set aside.
In a large bowl, beat the butter and the peanut butter together until fluffy. Add the sugar substitutes and beat until smooth. Add the egg and mix well. Add the milk and the vanilla extract. Add the flour mixture and beat thoroughly. Stir in the chocolate chips. Drop by rounded teaspoonfuls onto ungreased cookie sheets, leaving several inches between for expansion. Using a fork, lightly indent with a crisss-cross pattern, but do not overly flatten cookies. Bake for 10 to 12 minutes. Do not overbake. Cookies may appear to be underdone, but they are not.
Cool the cookies on the sheets for 1 minute, then remove to a rack to cool completely.
Peanut Butter Cookies
1 1/4 cups almond flour
3/4 teaspoon baking soda
1/2 teaspoon baking powder
1/4 teaspoon salt
1/2 cup (4 oz, 1 stick) unsalted butter, softened
1 cup peanut butter at room temperature
1/2 cup Swerve granulated sugar substitute
1/2 cup Swerve or Splenda brown sugar substitute
1 large egg, at room temperature
1 tablespoon milk
1 teaspoon vanilla extract
1/2 cup chocolate chips (we use Lily dark chocolate Stevia-sweetened)
Preheat oven to 350 degrees. In a large bowl, combine the almond flour, the baking soda, the baking powder, and the salt. Set aside.
In a large bowl, beat the butter and the peanut butter together until fluffy. Add the sugar substitutes and beat until smooth. Add the egg and mix well. Add the milk and the vanilla extract. Add the flour mixture and beat thoroughly. Stir in the chocolate chips. Drop by rounded teaspoonfuls onto ungreased cookie sheets, leaving several inches between for expansion. Using a fork, lightly indent with a crisss-cross pattern, but do not overly flatten cookies. Bake for 10 to 12 minutes. Do not overbake. Cookies may appear to be underdone, but they are not.
Cool the cookies on the sheets for 1 minute, then remove to a rack to cool completely.
Monday, April 13, 2020
Made-in-the-Pan Chocolate Cake
This cake has a long history and is often referred to as wacky cake, from the Depression era when people often didn't have eggs or milk to spare. It uses neither and is technically a vegan cake. The New York Times decided for some reason to mix it in the pan as well, which works fine but is not as easy as mixing in a bowl. This was another experiment in pantry baking while stores were out of flour but I still had some on hand. I topped it with leftover jam and bottom of the squirty can whipped cream.
Time: 45 minutes
1 ¼ cups/160 grams all-purpose flour
1 cup/200 grams granulated sugar
⅓ cup/30 grams unsweetened cocoa powder
¾ teaspoon baking soda
½ teaspoon kosher salt
⅓ cup/80 milliliters canola oil
1 teaspoon vanilla extract
1 teaspoon apple cider vinegar or white vinegar
2 tablespoons semisweet or vegan chocolate chips (optional)
Confectioners’ sugar, for dusting on top (optional)
Made-in-the-Pan Chocolate Cake (aka "Wacky Cake")
Yield: 9 to 12 servingsTime: 45 minutes
Ingredients
1 ¼ cups/160 grams all-purpose flour
1 cup/200 grams granulated sugar
⅓ cup/30 grams unsweetened cocoa powder
¾ teaspoon baking soda
½ teaspoon kosher salt
⅓ cup/80 milliliters canola oil
1 teaspoon vanilla extract
1 teaspoon apple cider vinegar or white vinegar
2 tablespoons semisweet or vegan chocolate chips (optional)
Confectioners’ sugar, for dusting on top (optional)
Preparation
- Heat oven to 325 degrees. Add the flour, sugar, cocoa powder, baking soda and salt to an 8-by-8-inch square glass or metal baking dish. Whisk the mixture together until uniform in color. Use your fingers to break apart any lumps.
- Add 1 cup water along with the oil, vanilla extract and vinegar. Stir slowly with a fork or a whisk in small circles to blend. Mash, scrape and stir with a fork and spoon until the mixture becomes a smooth and uniform batter.
- Scrape the sides of the baking dish with a rubber spatula and spread the batter in an even layer. Sprinkle with chocolate chips, if using.
- Use a damp paper towel to wipe the edges of the baking dish clean. Carefully transfer the dish to the oven and bake until a toothpick inserted into the center of the batter comes out mostly clean, 28 to 33 minutes. (Instead of looking like you dipped the toothpick in chocolate frosting, it should look like it has some chocolate cake crumbs clinging to it.)
- Remove from the oven, let cool, then cut the cake into squares. If you’re feeling fancy, this tastes good (and looks pretty) with some confectioners’ sugar dusted on top.
Monday, April 06, 2020
Lemony Turmeric Tea Cake
Once I saw this cake and its name, I knew I was destined to make it. It's so bright! So cheery! And what will turmeric taste like with lemon? The description says, "Just slicing into it makes a bad day better..." and couldn't we use a little bit of that right now!
I felt like I overbaked it a little to get the middle to finish baking. I used yogurt instead of sour cream (both options are given) because I had previously made a citrusy cake that used yogurt. This has a somewhat strange order of ingredients in that the butter is folded in last; I'm not sure what this accomplishes. The sliced lemons on top aren't super edible but I liked sucking the insides out for a little sour boost before eating a bite of cake (I might be a weirdo.) I couldn't taste the turmeric but it does lend a brilliant color to the cake.
Lemony Turmeric Tea Cake
(from NYT Cooking, recipe from Alison Roman)
Ingredients
Nonstick cooking spray or butter, for greasing the pan
1 ½ cups/215 grams all-purpose flour
2 teaspoons baking powder
1 teaspoon kosher salt
¾ teaspoon ground turmeric
2 lemons
1 cup/200 grams granulated sugar, plus 2 tablespoons for sprinkling
¾ cup/180 milliliters sour cream or full-fat Greek yogurt, plus more for serving (optional)
2 large eggs
½ cup/115 grams unsalted butter (1 stick), melted
Whipped cream (optional)
Preparation
I felt like I overbaked it a little to get the middle to finish baking. I used yogurt instead of sour cream (both options are given) because I had previously made a citrusy cake that used yogurt. This has a somewhat strange order of ingredients in that the butter is folded in last; I'm not sure what this accomplishes. The sliced lemons on top aren't super edible but I liked sucking the insides out for a little sour boost before eating a bite of cake (I might be a weirdo.) I couldn't taste the turmeric but it does lend a brilliant color to the cake.
Lemony Turmeric Tea Cake
(from NYT Cooking, recipe from Alison Roman)
Ingredients
Nonstick cooking spray or butter, for greasing the pan
1 ½ cups/215 grams all-purpose flour
2 teaspoons baking powder
1 teaspoon kosher salt
¾ teaspoon ground turmeric
2 lemons
1 cup/200 grams granulated sugar, plus 2 tablespoons for sprinkling
¾ cup/180 milliliters sour cream or full-fat Greek yogurt, plus more for serving (optional)
2 large eggs
½ cup/115 grams unsalted butter (1 stick), melted
Whipped cream (optional)
Preparation
- Heat the oven to 350 degrees. Lightly grease a 4-by-9-inch loaf pan (see Tip) with nonstick cooking spray or butter, and line it with parchment, leaving some overhang on both of the longer sides so you’re able to easily lift the cake out after baking.
- Whisk the flour, baking powder, salt and turmeric in a large bowl.
- Grate 2 tablespoons zest from 1 lemon into a medium bowl. Halve the zested lemon and squeeze 2 tablespoons juice into a small bowl. Cut half the remaining whole lemon into thin rounds, discarding seeds (save the other half for another use).
- Add 1 cup sugar to the lemon zest in the medium bowl; rub together with your fingertips until the sugar is fragrant and tinted yellow. Whisk in the sour cream, eggs and the 2 tablespoons lemon juice until well blended.
- Using a spatula, add the wet mixture to the flour mixture, stirring just to blend. Fold in the melted butter. Scrape the batter into the prepared pan, smoothing the top. Scatter the top with the lemon slices and 2 tablespoons sugar.
- Bake until the top of the cake is golden brown, the edges pull away from the sides of the pan, and a tester inserted into the center comes out clean, 50 to 60 minutes. (If the lemons are getting too dark, lay a piece of foil on top to prevent burning.) Let cool before slicing. (Cake can be baked up to 5 days ahead, wrapped tightly, and stored at room temperature.) Serve with whipped cream, if desired.
Monday, March 30, 2020
Buckwheat Chocolate Chip Cookies
I've had buckwheat flour in my cupboards for a while, leftover from a gluten-free cookie recipe I made during the holidays. So considering the #coronabaking trending in Instagram and the pantry cooking/baking group I was invited to in Facebook, I decided to try to make something for which I already had ingredients on hand. I had half a bittersweet chocolate bar as well. I started with the Bon Appetit recipe but made half a recipe, decided to do half and half buckwheat flour and regular flour, and used 1 egg instead of having to figure out how to do half of an egg. So my cookies probably don't look quite the same as they are pictured in the original recipe; the recipe below is the original. I didn't add the extra salt either, as I found the dough to be salty enough.
Salty Buckwheat Chocolate Chunk Cookies
Ingredients
Steps
- Heat ½ cup (1 stick) butter in a small saucepan over the lowest heat possible until melted (you don’t want it to sputter or brown), about 5 minutes.
- Meanwhile, whisk 1 cup (125 grams) all-purpose flour, ½ cup (63 grams) buckwheat flour, ½ tsp. baking powder, ½ tsp. baking soda, and 1¼ tsp. Diamond Crystal or ¾ tsp. Morton kosher salt in a medium bowl.
- Coarsely chop 6 oz. bittersweet chocolate. Set aside a handful of chocolate in a small bowl.
- Scrape butter into a large bowl and add ⅔ cup (133 grams) brown sugar and ½ cup (100 grams) granulated sugar. Whisk vigorously until butter has been absorbed into the sugar and no big lumps remain, about 30 seconds.
- Add 1 large egg, then 2 large egg yolks, one at a time, whisking until fully combined after each addition. Whisk in 1 tsp. vanilla extract. At this point, your mixture should look much lighter in color and be smooth, almost creamy.
- Add dry ingredients and use a rubber spatula or wooden spoon to stir until just incorporated and almost no dry streaks remain. Add chopped chocolate (but not the chocolate you reserved in the small bowl) to batter. Gently mix just to distribute. Cover bowl with an airtight bowl cover, a kitchen towel, or plastic wrap and chill 2 hours. (If you’re crunched for time, 1 hour will do, but cookies will be best after 2.)
- Place racks in upper and lower thirds of oven; preheat to 375°. Using a tablespoon measuring spoon, scoop out scant 2-Tbsp. portions of dough (or, if you have a scoop, this is a leveled-off #30 or a heaping #40) until you have 10 portions divided between 2 parchment-lined baking sheets (you want five per sheet—these will spread a bit!). Roll portions into balls and gently press a piece or 2 of reserved chocolate into each one. It’s okay to cram the chocolate on there—some pieces can even be vertical. Cover and chill any remaining dough.
- Bake cookies, rotating baking sheets top to bottom and front to back halfway through, until edges are golden brown and centers are puffed, 8–10 minutes. (Pull at 8 if you like your cookies softer and want to guarantee they’re still soft the next day!)
- Working one at a time, pull baking sheets out of the oven and tap lightly on the stove to deflate cookies. Sprinkle with Diamond Crystal kosher salt (if you’re using Morton, skip it: the crystals are too large). Let cookies cool on baking sheets 5 minutes, then transfer to a wire rack and let cool completely. Let baking sheets cool (to do this fast, run them under cold water), then turn parchment paper over. Repeat process with remaining dough, dividing evenly between baking sheets, to make 6–8 more cookies.
- Do Ahead: Cookies can be baked 3 days ahead. Let cool; store airtight at room temperature.
Monday, March 23, 2020
Easy Scones
Inspired by our compliance with social distancing, one of the English faculty members suggested we all make the same recipe together this weekend - easy scones, allegedy from Mary Berry but posted on the Easy Online Baking Lessons website. So that means they are English style. I paid attention to the tips in the recipe because there are things that can make a scone not rise very high. I couldn't find a medium biscuit cutter, so I used a wine glass.
The one step of the recipe I disobeyed was when it said to let the butter come to room temperature? Never in my life have I heard that advice for scones or biscuits, it was always the colder the better. So I used butter straight from the fridge. I used oat milk because that was the only kind I had on hand. I also made a half recipe because let's be honest, I would be the only one in my house eating any.
I did get quite a rise on the scones, and pictured is my shining star. The instructions say to only glaze the very top, making sure it does not drip on the sides, and I definitely had one wonky scone where the glaze had dripped. Interesting!
Easy Scones
INGREDIENTS
450g Self-raising Flour OR (3 & 2/3 cups AP/Plain Flour plus 5 + 1/2 (level) tsp Baking powder + scant 1 tsp salt)
The one step of the recipe I disobeyed was when it said to let the butter come to room temperature? Never in my life have I heard that advice for scones or biscuits, it was always the colder the better. So I used butter straight from the fridge. I used oat milk because that was the only kind I had on hand. I also made a half recipe because let's be honest, I would be the only one in my house eating any.
I did get quite a rise on the scones, and pictured is my shining star. The instructions say to only glaze the very top, making sure it does not drip on the sides, and I definitely had one wonky scone where the glaze had dripped. Interesting!
Easy Scones
INGREDIENTS
450g Self-raising Flour OR (3 & 2/3 cups AP/Plain Flour plus 5 + 1/2 (level) tsp Baking powder + scant 1 tsp salt)
2 tsp Baking Powder
50g Castor Sugar (level ¼ cup*)
75g Butter, cubed & at room temp (level 2/3 stick or 1/3 cup)
2 Eggs
225ml Milk (up to 1 cup)
1. Weigh out the butter whilst cubing it and leave out to come to room temperature.
2. Lightly oil or grease the baking tray(s) and place baking/parchment paper on top.
3. Weigh or measure in the flour into the bowl, spoon in the baking powder, give it a mix through & drop in the butter.
4. Using your fingertips, rub the butter into the flour & continue to do this until the mixture resembles breadcrumbs, (very tiny pieces). Or use a pastry cutter.
5. Put the bowl back onto the scales and weigh in the sugar. Give it a good mix.
6. Beat the eggs in a jug and then top up to the 300ml (10 fl oz) mark with the milk, (depending on the size of the eggs, you might not need as much milk).
7. Give the liquid a good mix and then take 2 tbsp of it out and place in a small bowl to use later.
8. Gradually add the egg/milk mixture to the dry ingredients until a soft dough is formed. Be aware that the dough being a little sticky is good for the scones to rise. So only add enough of the liquid until just sticky.
9. Flour a pastry board or worktop or use some baking/parchment paper with a little flour on top.
10. Heat up the oven to: 220c/200c Fan Oven/425f/Gas Mark 6.
11. Meanwhile put the dough down and flatten gently with your hands until you have a level piece of dough about 1 inch (2.5cm) high. Try not to go smaller than this. Don’t be tempted to roll out the dough as this won’t help the scones to rise.
12. Flour the cutter or glass and cut out the scones. Push the cutter down and DO NOT TWIST the cutter. Use a spatula or knife to very carefully transfer to the prepared baking tray. (or let it fall onto the prepared tray). Try to touch the sides of the scones as little as possible.
13. Gently roll up the scraps of dough by hand and flatten out to cut out however more scones you can get, remembering not to knead and handle as little as possible.
14. Now using a pastry brush, very carefully brush the egg/milk liquid you reserved earlier onto the tops of the scones only. If the liquid goes down the sides, it can ruin the rise of the scones. So, the best way to avoid it is by shaking the brush before moving to the scone and starting to brush from the center and go outwards, so there is less liquid on the brush to spill down the sides.
15. Bake for 8-12 minutes until well risen and golden in color. Turn and rotate the baking trays between the shelves during baking, to ensure an even bake.
16. Cool a little on a cooling rack and enjoy warm with whatever fillings you enjoy.
**You can freeze these scones and once defrosted, heat a little in a warm oven.
50g Castor Sugar (level ¼ cup*)
75g Butter, cubed & at room temp (level 2/3 stick or 1/3 cup)
2 Eggs
225ml Milk (up to 1 cup)
1. Weigh out the butter whilst cubing it and leave out to come to room temperature.
2. Lightly oil or grease the baking tray(s) and place baking/parchment paper on top.
3. Weigh or measure in the flour into the bowl, spoon in the baking powder, give it a mix through & drop in the butter.
4. Using your fingertips, rub the butter into the flour & continue to do this until the mixture resembles breadcrumbs, (very tiny pieces). Or use a pastry cutter.
5. Put the bowl back onto the scales and weigh in the sugar. Give it a good mix.
6. Beat the eggs in a jug and then top up to the 300ml (10 fl oz) mark with the milk, (depending on the size of the eggs, you might not need as much milk).
7. Give the liquid a good mix and then take 2 tbsp of it out and place in a small bowl to use later.
8. Gradually add the egg/milk mixture to the dry ingredients until a soft dough is formed. Be aware that the dough being a little sticky is good for the scones to rise. So only add enough of the liquid until just sticky.
9. Flour a pastry board or worktop or use some baking/parchment paper with a little flour on top.
10. Heat up the oven to: 220c/200c Fan Oven/425f/Gas Mark 6.
11. Meanwhile put the dough down and flatten gently with your hands until you have a level piece of dough about 1 inch (2.5cm) high. Try not to go smaller than this. Don’t be tempted to roll out the dough as this won’t help the scones to rise.
12. Flour the cutter or glass and cut out the scones. Push the cutter down and DO NOT TWIST the cutter. Use a spatula or knife to very carefully transfer to the prepared baking tray. (or let it fall onto the prepared tray). Try to touch the sides of the scones as little as possible.
13. Gently roll up the scraps of dough by hand and flatten out to cut out however more scones you can get, remembering not to knead and handle as little as possible.
14. Now using a pastry brush, very carefully brush the egg/milk liquid you reserved earlier onto the tops of the scones only. If the liquid goes down the sides, it can ruin the rise of the scones. So, the best way to avoid it is by shaking the brush before moving to the scone and starting to brush from the center and go outwards, so there is less liquid on the brush to spill down the sides.
15. Bake for 8-12 minutes until well risen and golden in color. Turn and rotate the baking trays between the shelves during baking, to ensure an even bake.
16. Cool a little on a cooling rack and enjoy warm with whatever fillings you enjoy.
**You can freeze these scones and once defrosted, heat a little in a warm oven.
Monday, March 09, 2020
Farmhouse Buttermilk Cake
I took a brief pause from the blog but come back to you with a five-star recipe from King Arthur Flour for a buttermilk cake with a pecan glaze. I brought it to the Faulkner class I'm auditing because it felt like it had several southern elements. It was tasty although my cake rose higher than the picture on the KA website.
Instructions
-
Preheat the oven to 350°F. Lightly grease a 9" x 13" cake pan.
-
Beat the butter and brown sugar together till smooth.
-
Add the eggs, beating till smooth.
-
Stir in the buttermilk and vanilla extract.
-
Add the baking soda, salt, and flour to the wet ingredients, beating till thoroughly combined.
-
Pour the batter into the prepared pan.
-
Bake the cake for 35 minutes. Towards the end of the baking time, prepare the topping.
-
Stir the butter and the sugar together. Add the milk, pecans, and salt. The glaze will be thick but pourable.
-
Top the baked cake with the topping, and return to the oven for another 10 minutes.
-
Remove the cake from the oven. The topping will look very
runny. You can eat the cake hot, with the glaze still gooey; or let the
cake sit at room temperature for a few hours, by which time the glaze
will have set.
Monday, February 03, 2020
Za'atar Bread
I recently read a novel about Palestinian refugees living in America, and a few generations of children (A Woman is No Man by Etaf Rum.) Near the end, the granddaughter of the original refugees learns to make her mother's recipe for za'atar from her grandfather. Za'atar seems to be able to refer to the spice blend - thyme, oregano, sumac, sesame seed - but also the flatbread/pita type bread with the spice blend mixed with olive oil that can be spread on top. The book seemed to refer to both, so I went search for a good recipe, and came across one that just makes four at a time, which seemed like a good fit. Instead of blending the spices, I used a preblended zatar (seems to be an alternate spelling) that I just happened to have on hand (thanks Pita House.)
Za'atar Bread
(from Aashpazi.com)
1.5 Cup (8.5 oz / 240g) All Purpose Flour
1 Tbsp Olive Oil
1/4 Cup Olive Oil
1/4 Tsp Sugar
1 Tsp Yeast
1 Tbsp Sesame Seeds
1 Tbsp Dried Oregano
1 Tbsp Dried Basil
1 Tbsp Sumac
1/2 Tsp Salt
PREPARATIONS:
1- Heat 1/2 cup water to 110º F, 43º C for the dough.
DIRECTIONS:
DOUGH:
1- Combine sugar and yeast in a large bowl.
2- Add 1/2 cup warm water, stir and allow to rest for 10 minutes.
3- In a separate bowl, mix flour and 1/2 tsp salt.
4- Pour in 1 tbsp olive oil.
5- Gradually, Stir in the yeast mixture.
6- Knead the dough for 5 to 10 minutes. Note: Add more water if needed.
7- Cover the bowl with a lid or plastic bag and allow to rest for an hour at room temperature.
TOPPING:
8- Combine dried oregano, basil, sumac and sesame seeds.
9- Add 1/4 cup of olive oil and stir thoroughly.
BREAD:
10- Divide the dough in four and roll out into a thin round shape on a well floured working surface. 11- Top the dough with a thin layer of the topping.
12- Add a pinch of salt (Optional).
13- Preheat oven to 400º F (204º C), Place a flatbread pan and while preheating the oven.
14- Bake the bread for 8 minutes or as desired.
Notes from JennyBakes:
I added extra toasted sesame seeds and the recommended salt, and I would definitely do that again. I heated a flat cookie sheet in the oven when the oven preheated, and mine were small enough that I baked all four at once. (The video of the recipe shows them as a bit bigger than that.)
I ate one with my leftover carrot soup, a great combo.
Za'atar Bread
(from Aashpazi.com)
1.5 Cup (8.5 oz / 240g) All Purpose Flour
1 Tbsp Olive Oil
1/4 Cup Olive Oil
1/4 Tsp Sugar
1 Tsp Yeast
1 Tbsp Sesame Seeds
1 Tbsp Dried Oregano
1 Tbsp Dried Basil
1 Tbsp Sumac
1/2 Tsp Salt
PREPARATIONS:
1- Heat 1/2 cup water to 110º F, 43º C for the dough.
DIRECTIONS:
DOUGH:
1- Combine sugar and yeast in a large bowl.
2- Add 1/2 cup warm water, stir and allow to rest for 10 minutes.
3- In a separate bowl, mix flour and 1/2 tsp salt.
4- Pour in 1 tbsp olive oil.
5- Gradually, Stir in the yeast mixture.
6- Knead the dough for 5 to 10 minutes. Note: Add more water if needed.
7- Cover the bowl with a lid or plastic bag and allow to rest for an hour at room temperature.
TOPPING:
8- Combine dried oregano, basil, sumac and sesame seeds.
9- Add 1/4 cup of olive oil and stir thoroughly.
BREAD:
10- Divide the dough in four and roll out into a thin round shape on a well floured working surface. 11- Top the dough with a thin layer of the topping.
12- Add a pinch of salt (Optional).
13- Preheat oven to 400º F (204º C), Place a flatbread pan and while preheating the oven.
14- Bake the bread for 8 minutes or as desired.
Notes from JennyBakes:
I added extra toasted sesame seeds and the recommended salt, and I would definitely do that again. I heated a flat cookie sheet in the oven when the oven preheated, and mine were small enough that I baked all four at once. (The video of the recipe shows them as a bit bigger than that.)
I ate one with my leftover carrot soup, a great combo.
Monday, January 27, 2020
Hippy Banana Bread from Shutterbean
I came across this recipe following a link to pickled carrots. Ah, the internet. What I loved about this one is how it invites substitution - while the original calls for sunflower seeds, pepitas, nuts, and dried cherries, I used a combination of things I had on hand and needed to use up from the pantry, and it was still a success! I can imagine going a chocolate direction as well.
Hippy Banana Bread
(recipe from Shutterbean)
makes 1 loaf
Whisk together the flours, baking soda, salt and spices in a medium bowl. Set aside.
In a large bowl, whisk together the olive oil and brown sugar, breaking up any lumps. Add the maple syrup and vanilla, whisking until smooth. Add the eggs, one at a time and beat until fully incorporated. With a wooden spoon, stir in the bananas. Add the flour mixture to the liquids, stirring until just combined. Stir in the walnuts, cherries, sunflower seeds and pepitas until fully incorporated. Pour batter into prepared pan, evening out the top if necessary.
Place bread in the oven and bake until cake tester inserted in the middle of the loaf comes out clean, about 55-60 minutes. Remove from the oven, and leave the bread to cool in its pan for 10 minutes. Using the parchment sling, lift the bread out of the pan, unwrap and allow to cool completely on a wire rack.
Notes from JennyBakes:
I ran out of maple syrup so I ended up using 2 tbsp maple syrup and 2 tbsp dark Karo syrup.
I used dried orange-scented cranberries instead of cherries, because I had leftovers from the holidays.
I used shredded coconut instead of sunflower seeds because I had it on hand.
I did use walnuts and pepitas, because I happened to have them...
Hippy Banana Bread
(recipe from Shutterbean)
makes 1 loaf
- 1 cup all-purpose flour
- 1/2 cup almond flour
- 1 teaspoon baking soda
- 1 teaspoon salt
- 1/4 teaspoon ground cinnamon
- 1/2 cup olive oil
- 1/2 cup brown sugar, packed
- 1/4 cup maple syrup*
- 1 1/2 teaspoons pure vanilla extract
- 2 eggs
- 3 ripe bananas, mashed (about 1 cup puree)
- 1/2 cup chopped walnuts
- 1/2 cup dried cherries*
- 1/2 cup raw sunflower seeds*
- 1/2 cup raw pepitas
Whisk together the flours, baking soda, salt and spices in a medium bowl. Set aside.
In a large bowl, whisk together the olive oil and brown sugar, breaking up any lumps. Add the maple syrup and vanilla, whisking until smooth. Add the eggs, one at a time and beat until fully incorporated. With a wooden spoon, stir in the bananas. Add the flour mixture to the liquids, stirring until just combined. Stir in the walnuts, cherries, sunflower seeds and pepitas until fully incorporated. Pour batter into prepared pan, evening out the top if necessary.
Place bread in the oven and bake until cake tester inserted in the middle of the loaf comes out clean, about 55-60 minutes. Remove from the oven, and leave the bread to cool in its pan for 10 minutes. Using the parchment sling, lift the bread out of the pan, unwrap and allow to cool completely on a wire rack.
Notes from JennyBakes:
I ran out of maple syrup so I ended up using 2 tbsp maple syrup and 2 tbsp dark Karo syrup.
I used dried orange-scented cranberries instead of cherries, because I had leftovers from the holidays.
I used shredded coconut instead of sunflower seeds because I had it on hand.
I did use walnuts and pepitas, because I happened to have them...
Monday, January 20, 2020
Happy Wife, Happy Life Chocolate Cake
On Episode 171 of the Reading Envy Podcast, I spoke with Jen Nathan Orris about foodie recommendations - cookbooks, memoirs, and more. She brought up Julia Turshen, cookbook author and recipe developer extraordinaire, and recommended all of her cookbooks, particularly Small Victories. Julia actually appeared on Jen's podcast, Skillet, where she cooked Chicken Pelau. (I would later discover Turshen also has her own podcast called Keep Calm and Cook On, which is on brand for her reputation of making cooking accessible.)
I am always excited when I learn about an author or cook (or both) who I haven't heard of before, because it gives me an excuse to dive into something new. So of course I listened to the podcasts and hunted down the cookbooks. I would actually love to try making the chicken pelau at some point, because I am still feeling a bit tentative about cooking chicken and it has some unique techniques like starting with burned sugar.
I'm not sure if this happens to anyone else, but sometimes I will encounter a recipe in a blog, Instagram post, or cookbook, and it will stick with me. When I'm thinking of my grocery shopping lists it will come to mind again, and I'll make sure I have the ingredients in case I feel inspired to make it. This cake is one Turshen makes for her wife. I was intrigued by the simplicity of the recipe and the strange (to me) ingredients in the frosting. I liked that it tasted better cold. The combination of chocolate and raspberry probably moved it up a few notches. And then when I needed to bake something to burn off some nervous energy, this was the thing. My husband was called home to Oregon at the last minute, and I must admit I've been eating this cake for breakfast (but you know, happy wife and all that.)
Happy Wife, Happy Life Chocolate Cake
from Small Victories by Julia Turshen
Cake:
1 1/4 cups (150 g) all purpose flour
1 cup (200 g) sugar
3/4 cup (75 g) Dutch-processed cocoa powder (such as Guittard or Droste, sifted if lumpy)
1 tsp baking soda
1 tsp baking powder
1/2 tsp kosher salt
8 Tbsp (110 g) unsalted butter, melted and cooled
2 eggs, lightly beaten
1 cup (240 ml) strong black coffee, at room temperature
1 cup (240 ml) buttermilk or plain yogurt
1 tsp vanilla extract
Frosting:
3/4 cup (130 g) semisweet chocolate chips or roughly chopped semisweet chocolate
3/4 cup (180 ml) sour cream, at room temperature
1 Tbsp maple syrup
1/2 cup (160 g) raspberry jam (seeded or seedless, whatever your preference)
Raspberries for serving (optional)
To make the cake: Preheat your oven to 350 F (180 C). Use your hands to butter the bottom and sides of two 8-inch (20-cm) cake pans, then line the bottom of each with a circle of parchment paper. For good measure, butter the parchment paper. Set the pans aside.
In a large bowl, whisk together the flour, sugar, cocoa powder, baking soda, baking powder, and salt. Add the melted butter, eggs, coffee, buttermilk, and vanilla and whisk until the batter is smooth. Divide the batter evenly among the prepared cake pans.
Bake until the cakes are firm to the touch and a toothpick inserted in the centers comes out clean, about 30 minutes. Transfer the cakes, still in their pans, to a wire rack and let them cool completely. Once cool, use a dinner knife to loosen the edges of the cakes from the pans and invert them onto your work surface (you might need to give the pan a little whack). Peel off and discard the parchment.
To make the frosting: Meanwhile, bring a small pot of water to a boil and then lower the heat to a simmer. Put the chocolate chips in a large stainless steel or heatproof glass bowl and set it over the pot (the water should not touch the bowl - if it does, simply pour some out). Stir until the chocolate is melted. (Alternatively, you can melt the chocolate in a microwave in 15-second increments, stirring between increments.) Remove from the heat and whisk in the sour cream and maple syrup. The frosting should be smooth and quite silky. Refrigerate the frosting until the cakes have cooled. It will thicken as it cools (a good thing).
Once the cakes are cool, put one on a serving platter upside-down so that the flat side is facing up. Spread the jam over the top. Put the second cake on top of the jam-slathered cake, again flat-side up—this way you get a nice flat top. (If the jam makes the layers slip and slide a bit, use a couple of skewers to hold the layers together while you frost the sides and then remove the skewers to frost the top). Using a small offset spatula or a dinner knife, spread the frosting all over the sides and top of the cake. There’s no need to be perfect with this; I like it kind of rustic looking. But if you’re more of a type-A person, go ahead and smooth the top and sides (and you could even stick strips of parchment paper under the bottom of the cake before frosting it to keep your serving platter clean). Whatever makes you happy.
Let the cake sit for about 1 hour before serving. There’s something about letting each element get to know the others that serves this cake very well. In fact, I prefer to make it the day before and refrigerate it overnight, and serve it cold. Either way, slice and serve with some fresh raspberries alongside if you’d like.
Note: If you only own a single cake pan, fear not! Simply pour the batter into the pan and bake it until a toothpick tests clean (it will take 10 to 15 minutes longer in the oven than the two separate layers). Once the cake cools completely, use a serrated knife to cut it into two layers. Voilà.
Notes from JennyBakes:
I don't have a lot to say because the recipe is solid. I did specifically look for Dutch-processed cocoa at the store and even in the 21st century, I'd have to go to a specialty place for it, so I just went with a combination of the last of the Ecuadorian cocoa powder from Libby and the Ghiradelli I had in the cupboard. And it was fine. I also didn't wait for the coffee to cool and only quick thinking with the buttermilk saved my eggs from curdling, but all told this is a pretty forgiving recipe. The frosting was such an interesting texture from the start, and the tang of the sour cream is amazing with the raspberry.
I am always excited when I learn about an author or cook (or both) who I haven't heard of before, because it gives me an excuse to dive into something new. So of course I listened to the podcasts and hunted down the cookbooks. I would actually love to try making the chicken pelau at some point, because I am still feeling a bit tentative about cooking chicken and it has some unique techniques like starting with burned sugar.
I'm not sure if this happens to anyone else, but sometimes I will encounter a recipe in a blog, Instagram post, or cookbook, and it will stick with me. When I'm thinking of my grocery shopping lists it will come to mind again, and I'll make sure I have the ingredients in case I feel inspired to make it. This cake is one Turshen makes for her wife. I was intrigued by the simplicity of the recipe and the strange (to me) ingredients in the frosting. I liked that it tasted better cold. The combination of chocolate and raspberry probably moved it up a few notches. And then when I needed to bake something to burn off some nervous energy, this was the thing. My husband was called home to Oregon at the last minute, and I must admit I've been eating this cake for breakfast (but you know, happy wife and all that.)
Happy Wife, Happy Life Chocolate Cake
from Small Victories by Julia Turshen
Cake:
1 1/4 cups (150 g) all purpose flour
1 cup (200 g) sugar
3/4 cup (75 g) Dutch-processed cocoa powder (such as Guittard or Droste, sifted if lumpy)
1 tsp baking soda
1 tsp baking powder
1/2 tsp kosher salt
8 Tbsp (110 g) unsalted butter, melted and cooled
2 eggs, lightly beaten
1 cup (240 ml) strong black coffee, at room temperature
1 cup (240 ml) buttermilk or plain yogurt
1 tsp vanilla extract
Frosting:
3/4 cup (130 g) semisweet chocolate chips or roughly chopped semisweet chocolate
3/4 cup (180 ml) sour cream, at room temperature
1 Tbsp maple syrup
1/2 cup (160 g) raspberry jam (seeded or seedless, whatever your preference)
Raspberries for serving (optional)
To make the cake: Preheat your oven to 350 F (180 C). Use your hands to butter the bottom and sides of two 8-inch (20-cm) cake pans, then line the bottom of each with a circle of parchment paper. For good measure, butter the parchment paper. Set the pans aside.
In a large bowl, whisk together the flour, sugar, cocoa powder, baking soda, baking powder, and salt. Add the melted butter, eggs, coffee, buttermilk, and vanilla and whisk until the batter is smooth. Divide the batter evenly among the prepared cake pans.
Bake until the cakes are firm to the touch and a toothpick inserted in the centers comes out clean, about 30 minutes. Transfer the cakes, still in their pans, to a wire rack and let them cool completely. Once cool, use a dinner knife to loosen the edges of the cakes from the pans and invert them onto your work surface (you might need to give the pan a little whack). Peel off and discard the parchment.
To make the frosting: Meanwhile, bring a small pot of water to a boil and then lower the heat to a simmer. Put the chocolate chips in a large stainless steel or heatproof glass bowl and set it over the pot (the water should not touch the bowl - if it does, simply pour some out). Stir until the chocolate is melted. (Alternatively, you can melt the chocolate in a microwave in 15-second increments, stirring between increments.) Remove from the heat and whisk in the sour cream and maple syrup. The frosting should be smooth and quite silky. Refrigerate the frosting until the cakes have cooled. It will thicken as it cools (a good thing).
Once the cakes are cool, put one on a serving platter upside-down so that the flat side is facing up. Spread the jam over the top. Put the second cake on top of the jam-slathered cake, again flat-side up—this way you get a nice flat top. (If the jam makes the layers slip and slide a bit, use a couple of skewers to hold the layers together while you frost the sides and then remove the skewers to frost the top). Using a small offset spatula or a dinner knife, spread the frosting all over the sides and top of the cake. There’s no need to be perfect with this; I like it kind of rustic looking. But if you’re more of a type-A person, go ahead and smooth the top and sides (and you could even stick strips of parchment paper under the bottom of the cake before frosting it to keep your serving platter clean). Whatever makes you happy.
Let the cake sit for about 1 hour before serving. There’s something about letting each element get to know the others that serves this cake very well. In fact, I prefer to make it the day before and refrigerate it overnight, and serve it cold. Either way, slice and serve with some fresh raspberries alongside if you’d like.
Note: If you only own a single cake pan, fear not! Simply pour the batter into the pan and bake it until a toothpick tests clean (it will take 10 to 15 minutes longer in the oven than the two separate layers). Once the cake cools completely, use a serrated knife to cut it into two layers. Voilà.
Notes from JennyBakes:
I don't have a lot to say because the recipe is solid. I did specifically look for Dutch-processed cocoa at the store and even in the 21st century, I'd have to go to a specialty place for it, so I just went with a combination of the last of the Ecuadorian cocoa powder from Libby and the Ghiradelli I had in the cupboard. And it was fine. I also didn't wait for the coffee to cool and only quick thinking with the buttermilk saved my eggs from curdling, but all told this is a pretty forgiving recipe. The frosting was such an interesting texture from the start, and the tang of the sour cream is amazing with the raspberry.
Subscribe to:
Posts (Atom)