Monday, August 31, 2020

Sweet Potato Bebinca from Season by Nik Sharma

I thought I was done with this cookbook (Season by Nik Sharma) but every time I see someone in the Rainy Day Bites Cookbook Club (in Instagram) try another recipe from it, I am drawn back in to the other recipes I've marked. I baked the sweet potatoes for this before realizing I didn't have coconut milk, so this recipe was made over the period of a week. See beneath the recipe for a link to the cookbook as well as how I simplified the recipe process.

This is a take on a traditional Goan custard, but I found it to be more firm than I was expecting. To me the firmness was an asset. It makes it easier to cut, serve, store, and more. The flavor is divine. If any people actually gather for Thanksgiving, I volunteer to bring this! It's the flavors of a sweet potato dessert but easier than pie, and I think I like it better than pie texture. It could be dressed up with whipped cream and nuts or something but I don't think it needs it.


Sweet Potato Bebinca

(recipe is from Season by Nik Sharma but I'm taking this from the New York Times, which you should visit for more contextual info and a picture of a greater smooth texture than I achieved)

Ingredients

  • 2 to 3 medium to large sweet potatoes (1 1/4 pounds total)
  • 6 tablespoons/85 grams unsalted butter, melted, plus more for the pan
  • 6 large eggs
  • 1 cup/200 grams grated jaggery, muscovado, panela or dark brown sugar
  • ¼ cup/60 milliliters maple syrup
  • 1 teaspoon freshly grated nutmeg
  • ½ teaspoon ground turmeric
  • ¼ teaspoon fine sea salt
  • 1 (13.5-ounce/400-milliliter) can full-fat coconut milk
  • 1 cup/130 grams all-purpose flour

Preparation

  1. Heat the oven to 400 degrees. Rinse the sweet potatoes to remove any dirt, pat them dry with paper towels and poke several holes in them with a fork. Put the potatoes in a baking dish or on baking sheet lined with aluminum foil. Roast until completely tender, 35 to 45 minutes. Cool completely before handling. Peel the sweet potatoes, discard the skins, and purée the flesh in a food processor. Measure out 1 2/3 cups/400 grams and set aside, saving the rest for another purpose. (The sweet potatoes may be roasted 1 day ahead and stored in an airtight container in the refrigerator.)
  2. Reduce the oven temperature to 350 degrees.
  3. Line the bottom of a 9-inch round baking pan with 2-inch sides with parchment paper and grease lightly with butter. Put the pan on a baking sheet. In a large bowl, whisk together the cooled sweet potato purée, melted butter, eggs, sugar, maple syrup, nutmeg, turmeric and salt until smooth. Add the coconut milk and flour and whisk until the mixture is smooth, with no visible streaks of flour.
  4. Pour the batter into the prepared pan and put the pan, still on the baking sheet, in the oven. Bake for 55 to 60 minutes, rotating the baking sheet halfway through. The pudding should be firm to the touch in the center and light golden brown around the edges. Remove from the oven and cool completely in the pan on a wire rack. Wrap the pan with plastic wrap and refrigerate to set for at least 6 hours, preferably overnight.
  5. Once the bebinca has set, run a sharp knife around the sides of the pan, flip the pan onto a baking sheet lined with parchment paper, and tap gently to release. Peel the parchment off the top. Invert onto a serving dish, and peel off the second sheet of parchment paper.
  6. To serve, use a sharp serrated knife to cut the chilled bebinca into wedges. Store the leftover bebinca, wrapped in plastic wrap, in an airtight container in the refrigerator for up to 1 week.

Notes from JennyBakes

 I have no idea why the directions don't use a springform pan - half the steps described are unnecessary if you just use a springform pan. I guess there's a little bit of a ledge that forms on the bottom outside, but it's so much simpler! That's the only change I made. (This is also true about his chai masala apple cake which I made the day I'm writing this post - made the same change for that one, and it didn't sag on the edge at all.

I used brown sugar, just light, because that's what I have. I did some looking for jaggery and decided I didn't need to buy it when it wasn't required.

The recipe says to just use a whisk but my sweet potato was still pretty chunky and didn't completely incorporate, which you can really see in the second picture. This had little effect on end result or flavor but the full blend of the cookbook picture and the NYT photo does look slightly more impressive. Next time I'd either run the mixture through the food processor (not the blender or mixer as I don't think it would be wise to introduce more air into it necessarily) or better puree the sweet potato. I bet if you take it directly from the oven and it hadn't been in the fridge a few days, this may not be a problem.

THIS IS SO GOOD; MAKE IT TODAY.

Monday, August 24, 2020

Bombay Frittata from Season by Nik Sharma

I decided this baked egg dish belonged on JennyBakes because it is so delicious! It's actually the first thing I made from Season by Nik Sharma, the cookbook I mentioned last week for the Margherita Naan Pizza. It was the perfect light dinner with massive flavor.

Bombay Frittata

12 large eggs
1/2 cup (100 g) Crème Fráiche*
1/2 cup (70 g) finely chopped red onion*
2 scallions, thinly sliced (white and green parts)
2 garlic cloves, thinly sliced
4 Tbsp fresh cilantro leaves
1/2 tsp garam masala
1/2 tsp fine sea salt
1/2 tsp freshly ground black pepper
1/2 tsp ground turmeric
1/4 tsp dried red chili flakes
2 Tbsp Ghee or vegetable oil
1/4 cup (30 g) crumbled Paneer or feta*

Position a rack in the upper third of the oven and preheat the oven to 350 F (180 C).

In a large bowl, combine the eggs, crème fráiche, onion, scallions, garlic, cilantro, garam masala, salt, pepper, turmeric, and chili flakes and beat with a whisk or fork; do not overbeat. 

Heat the ghee in a 12 in (30.5 cm) ovenproof skillet, such as cast iron, over medium-high heat, tilting the skillet to coat evenly with the fat. When the ghee bubbles, pour the eggs into the center of the skillet, shaking to distribute evenly. Cook, undisturbed, until the frittata starts to firm up on the bottom and along the sides but is still slightly jiggly on top, about 5 minutes. Sprinkle with the paneer and transfer the skillet to the oven. Cook until golden brown, 20-25 minutes. Serve warm.

*Notes from JennyBakes: I used sour cream instead of crème fráiche and it worked just fine. I had shallots so used those in place of red onion, and feta for the paneer. I actually sauteed the onions and garlic a bit before adding the eggs because I didn't want them to have the "sharp bite" the cookbook author enjoys.


Season by Nik Sharma

Other recipes I have marked to try:

-Toasted Cumin and Lime Cucumber Salad (after seeing it on Deborah Balint's Instagram! Yum!)
-Cocoa-Spiced Bean and Lentil Soup
-Eggplant Pilaf
-Sweet Potato Bebinca
-Apple Masala Chai Cake
-Rhubarb, Cardamom, and Rose Water Sharbat
-Salted Tarragon Lassi
-Spiced Mango Milkshake

Recipes I've already made:

-Margherita Naan Pizza
-Egg Salad with Toasted Coriander
-Cardamom Iced Coffee with Coconut Milk

Monday, August 17, 2020

Margherita Naan Pizza from Season by Nik Sharma

 I invited myself along to the Rainy Day Bites Cookbook Club in Instagram and the August cookbook is Season by Nik Sharma. The recipes are Indian with some traditional elements and some spins on traditional recipes. The default is always from scratch and as fresh as possible, from roasting and grinding your own spices to making your own naan. That's what I did for this recipe, a week late or so, but I finally did it! I'll include the naan recipe but not the full pizza recipe; please see the cookbook for that! 

Naan pizza

I never feel quite comfortable with pizza. My stove isn't gas, I don't have a pizza stone, and I can't get quite to the crispness I would like. However I thought the end result was tasty flavor-wise. I ended up just making the two pizzas from the dough rather than making half into garlic naan, which was my original inclination.

Naan
(from Season, with far more directions and narrative and photos)

1/2 cup (120 ml) whole milk, heated to 105 to 115 F (41 to 46 C)
1 large egg
2 Tbsp plain full-fat Greek yogurt
1 Tbsp unsalted butter, melted
1 Tbsp sugar
1 tsp fine sea salt
1 Tbsp active dry yeast
2 cups (280 g) all-purpose flour or whole-wheat pastry flour, plus more for rolling out the naans

Using a fork, whisk the milk, egg, yogurt, butter, and salt in a small bowl. Sprinkle with the yeast and let it sit for 5 minutes. The mixture should be bubbly on the surface.

Put the flour in a large bowl or mound on a clean work surface and make a well in the center. Pour the yeast mixture into the middle of the well.* Using clean hands or a large wooden spoon, gradually mix the flour from the inside wall of the well into the liquid to form a sticky dough. Knead well for 4-5 minutes.

Fold the dough by grabbing it from the underside and stretching it and folding it back over itself. Rotate a quarter of a turn and repeat three or four times. Brush a large bowl with a little oil and put the dough in the bowl. Cover with plastic wrap and allow to rise in a dark, warm place until doubled in size, about 4 hours.

Divide the dough into four equal parts and shape into balls. On a clean, lightly floured work surface, use a rolling pin to roll out the balls of dough, one at a time, into circles about 1/8 in (4 mm) thick and about 6 in (15 cm) in diameter.

To cook the naan, heat a large skillet with a lid over medium-high heat. Slap a circle of dough into the hot skillet and cover the pan to trap the steam. Cook for 3-4 minutes, flip the dough, and turn the ehat to low. Cook, covered, until the naan blisters, with a few big bubbles, 1 to 2 minutes. Remove from the pan and wrap in a clean kitchen towel. Repeat with the remaining three circles of dough.

*If you are an amateur bread or pasta maker, this well concept might not be as easy as it sounds. I had a break in my wall and ended up with less of the flour and less of the yeast mixture than I started with. What a mess! I wish I'd used a bowl. 

Season by Nik Sharma

Other recipes I have marked to try:

-Toasted Cumin and Lime Cucumber Salad (after seeing it on Deborah Balint's Instagram! Yum!)
-Cocoa-Spiced Bean and Lentil Soup
-Eggplant Pilaf
-Bombay Frittata
-Sweet Potato Bebinca
-Apple Masala Chai Cake
-Rhubarb, Cardamom, and Rose Water Sharbat
-Salted Tarragon Lassi
-Spiced Mango Milkshake

Recipes I've already made:

-Egg Salad with Toasted Coriander
-Cardamom Iced Coffee with Coconut Milk


Monday, August 10, 2020

Gluten-Free Blueberry Muffins Made with Coconut Flour

I'm always on the hunt for the best blueberry muffin recipe that fits with the way we eat. I found one on King Arthur Flour that only used coconut flour, which was great because for a few weeks there I couldn't buy all-purpose flour or almond flour.

Thank goodness for companies like King Arthur Flour and Bob's Red Mill who make all these great alternative flours and then provide recipes as well. Coconut flour is really tricky and has to be handled differently. These were rather moist, but I may have been exuberant with my blueberry measuring. I usually have the opposite problem with coconut flour as it absorbs a considerable amount of liquid. I'd like to try this same base recipe again with chocolate chips or nuts.


Gluten-Free Blueberry Muffins Made with Coconut Flour
(from King Arthur Flour)

Ingredients: 
  • 1/4 cup (32g) coconut flour, sifted after measuring
  • 1/4 teaspoon baking powder
  • 3 large eggs
  • 3 tablespoons (43g) butter, melted
  • 3 tablespoons (64g) honey*
  • 1/4 teaspoon salt
  • 1/4 teaspoon vanilla extract
  • 1/8 teaspoon almond extract*
  • 1/2 cup (85g) blueberries (make sure they're thoroughly dry)
Directions:
  1. Preheat the oven to 400°F. Lightly grease six wells of a standard muffin pan, or line them with lightly greased muffin papers.
  2. Sift together the coconut flour and baking powder, and mix until well blended.
  3. Stir together the eggs, butter, honey, salt, and vanilla and almond extracts until smooth.
  4. Mix the dry ingredients into the wet ingredients until there are no lumps. Gently fold the blueberries into the batter until evenly incorporated.
  5. Scoop the batter into the prepared muffin cups, filling each about half full.
  6. Bake the muffins for about 16 to 18 minutes, or until a toothpick inserted into the center comes out clean. Let them cool for about 5 minutes in the pan, then transfer them to a rack to cool.
 *I did not use any almond extract, and subbed coconut sugar for the honey (and still they were very moist.)


The day I made these, it was an impulse Second Breakfast kind of bake. I had been looking through a cookbook I had for review called Good Drinks: Alcohol-Free Recipes for When You're Not Drinking for Whatever Reason by Julia Bainbridge. It comes out from Ten Speed Press on October 6, 2020. This adult version (but not too adult, as there is no alcohol, obviously) of an Orange Julius was easy and delicious - I actually left out the simple syrup so it just contained the sweetness of the orange juice and that was good enough!

Monday, August 03, 2020

Blueberry Hand Pies (grain-free)

I found this recipe when I went looking for blueberry recipes, and I was so intrigued by the technique in Ashley's Blueberry and Goat Cheese Hand Pies that I could not let it go, and made a version of them not long after. I didn't have any goat cheese on hand so went more in the direction of cooking down the blueberries a bit and adding cinnamon and coconut sugar.  But these really do crisp up and this technique would work well for all sorts of fillings. They are definitely best the day they are made. I've made little pie pasties before with pie crust and this technique is completely different from that. It might be helpful to watch her video with the peach version to see how she does it. It really does work.


Blueberry and Goat Cheese Hand Pies
(from Ashley at my heart beets)

Handheld Pie Crust:
  • ½ cup almond flour
  • ½ cup tapioca flour
  • 1 cup coconut milk, canned and full fat
  • egg wash
Filling
  • 1 cup frozen or fresh blueberries
  • 4 ounces chèvre
  • Drizzle of honey (or sweetener of choice)

Instructions
  1. In a bowl combine almond flour, tapioca flour, and coconut milk to form a batter.
  2. Pour ¼ cup of the batter onto a pre-heated non-stick pan over medium heat.
  3. Let the batter cook until the bottom of the flatbread is firm enough to move.
  4. Using a spatula, lift the bread and move it onto a parchment-lined baking sheet, flipping it over so that the sticky side is down.
  5. Repeat this until the batter is done – for a total of six hand pies.
  6. Spread goat cheese on one side of the flatbread, then add about 1 tablespoon of blueberries in the middle of the bread (or as many as will fit). Drizzle honey on top, then seal the pie shut with egg wash. Pinch the dough closed.
  7. Brush egg wash on the pie and repeat about five more times.
  8. Place baking sheet in oven at 350F for 30-40 minutes or until crispy outside.

Monday, July 27, 2020

Chocolate Chip Tahini Cookies

Edd Kimber recently published his first cookbook, One Tin Bakes, not yet available in the USA. He recently posted a picture from one of the recipe sin it - Salted Tahini Chocolate Chip Cookie Bars. If I know anything about recipes, it is that cooks tend to "borrow" from one another, intentionally or not. So I went looking, and found that Julia Moskin had posted Danielle Oron's Salted Tahini Chocolate Chip Cookies in New York Times Cooking about two years ago, which was a very popular recipe. Between cookie form and bar form, I'd be surprised if these two recipes had any differences. I found that David Lebovitz had also played with the NY Times recipe and made a few tweaks to the sugars and chocolate component. I decided to use his recipe for Chocolate Chip Tahini Cookies since it is available on his blog and isn't behind a pay wall.


One comment I saw frequently between David and Danielle's recipes was that people liked the dough more than the cookie itself, that the tahini flavor was not as apparent once the cookies were baked, etc. So I did some experimenting when I baked the cookies, like not adding salt to the top, or adding sesame seeds before baking. I found that my favorite of the three was just the plain cookie, no added salt or sesame. But the comments are also right in that the dough is pretty damn spectacular and I went with eating the dough rather than baking the cookies for probably half the batch. I'm not ashamed. I used bittersweet chocolate chips from Ghiradelli because it's what I had; David makes a big thing of using chocolate shards and I have no doubt those would be tasty, just not as easy for me to acquire.


(Salted) Tahini Chocolate Chip Cookies
(as adapted from Danielle Oron by David Lebovitz, please see his recipe for more recipe and ingredient information as well as other tips)
8 tablespoons (115g, 4 ounces) unsalted butter, at room temperature
1/2 cup (120ml) tahini, well stirred
1/2 cup (100g) granulated sugar
1/2 cup (90g) packed light brown sugar
1 large egg, at room temperature
1 large egg yolk
1 teaspoon vanilla extract
1 cup plus 2 tablespoons (150g) flour
3/4 teaspoon baking soda
1 teaspoon kosher or sea salt
2 cups (280g) bittersweet or semisweet chocolate chunks, or chocolate chips
flaky sea salt (optional)
1. In the bowl of a stand mixer, beat the butter, tahini, granulated sugar and brown sugar on medium speed for 2 to 3 minutes, until fluffy. (The dough can also be made in a large mixing bowl, stirred with a spatula.)
2. Stop the mixer and scrape down the sides. Add the egg, the yolk, and vanilla, and continue to mix for another minute, stopping the mixer to scrape down the sides of the bowl during mixing, to make sure the eggs are getting incorporated.
3. In a small bowl, whisk together the flour, baking soda, and kosher or sea salt. With the mixer on low speed, add the dry ingredients until just combined, then add the chocolate chips. Do not overmix. Cover the dough and refrigerate overnight.
4. Preheat the oven to 325ºF (160ºC). Line two baking sheets with parchment paper or silicone baking mats.
5. Form the cookies into rounds using an ice cream scoop, or your hands. For small cookies make each 1 1/2-inch (3,5cm), for larger cookies, make them 2-inches (5cm) round. Place them evenly spaced on the baking sheets, 3-inches (8cm) apart). Bake one sheet at a time, so you can keep an eye on them, in the middle rack of the oven.
6. Bake the cookies, turning the baking sheet in the oven midway during baking, until the cookies are golden brown around the edges but still pale in the center. For small cookies, about 12 minutes, for larger cookies, about 14 to 15 minutes. Remove from the oven, sprinkle cookies with a bit of flaky sea salt, and let the cookies cool on the baking sheet. Bake the remaining cookies the same way.
Storage: These cookies will keep for two or three days at room temperature, but are definitely better the same day they're baked. The unbaked dough can be refrigerated for up to one week, and frozen for up to two months.
 

Monday, July 20, 2020

Cornmeal Blueberry Cake (grain-free)

We have two blueberry plants in our backyard and they are producing a good number of blueberries (for some reason the birds don't seem interested this year.) I went looking for recipes that use berries and cake across Martha Stewart's Cornmeal-Berry Sheet Cake. I decided that since it's just in a 9x13 pan (not really a sheet pan) I could probably adapt it to be grain-free and slightly lower-sugar. So I did. Follow the links to the original recipe; my recipe is below. I baked this on July 4th but in reality we ate it for breakfast on July 5th.


Cornmeal Blueberry Cake
(a riff on Martha's Cornmeal-Berry Sheet Cake) 

Ingredients

1 1/2 sticks unsalted butter, room temperature, plus more for pan
1 1/2 cups almond flour
3/4 cup fine yellow cornmeal
1/4 cup tapioca flour (could also use arrowroot or leave out)
1 1/2 teaspoons baking powder
3/4 teaspoon coarse salt
1 1/2 cups coconut sugar
3 large eggs
1 1/2 teaspoons pure vanilla extract
3/4 cup buttermilk*
1 1/2-2 cups blueberries

Directions

Preheat oven to 325 degrees. Butter a 9-by-13-inch baking pan and line with parchment, leaving overhang on long sides. Butter parchment.

Whisk together flours, cornmeal, baking powder, and salt in a bowl.

Beat butter and sugar on medium-high speed until well combined, about 2 minutes. Add eggs, one at a time, beating well and scraping down sides of bowl as needed. Beat in vanilla. Add flour mixture in 3 batches, alternating with 2 batches of buttermilk and beating until just combined. Spread batter in prepared pan. (If using my adapted version here, batter is rather loose and soft, do not despair!)

Sprinkle berries over top or gently incorporate into batter. Bake until golden brown and a toothpick inserted into center comes out clean, about 1 hour. Let cool completely on a wire rack. Remove cake with parchment and cut into pieces (3 or 4 on short side, then 4 or 6 on long side).

Monday, July 13, 2020

Pupusas de Queso (Cheese Pupusas)

One of the last places we ate in "normal times" was a local pupuseria - a place that sells pupusas (and more). A pupusa is a corn griddle cake filled with a variety of ingredients. Since COVID-19 shut down the ability to go out to eat, we've been using our local delivery apps to try some of the random local restaurants. My husband loves all Latin American foods and would happily eat inside that cuisine every day, so we've tried everything from Dominican to Colombian to Salvadoran. (I seem to prefer Colombian the most, with the arepas and empandas.)


Both El Salvador and Honduras claim the pupusa, which is his absolute favorite, so much so that we declared Sunday to be Pupusa Sunday. Most of the time, we get them from a place that makes Salvadoran and Honduran food. I like the chicharron & frijol, Nathaniel usually gets hongos (mushroom) and espinaca (spinach.)


I hate long food blog intros but I promise this is all relevant. Two months ago, I noticed one of my Instagram friends posting food she'd made that was part of the "Rainy Day Bites Cookbook Club." I looked into it and it was started by Deborah Balint. She picks a cookbook each month and specific recipes and posting dates for the dishes. I loved this idea and invited myself along (it seems to work that way anyway) and meant to do the June cookbook but time got away from me. For July, though, I couldn't pass up a chance to make pupusas after everything I've explained previously.

The cookbook for July is We Are La Cocina. La Cocina is an "incubator kitchen" in San Francisco, a nonprofit working to provide commercial kitchen space for women, immigrants, and people of color. The cookbook is beautiful and contains profiles of women who have started business there, found a passion, etc. Most have at least one recipe; several have multiple, and the variety of backgrounds is reflective of that community. This is a cookbook to keep on my shelf for when I'm curious about a specific cuisine (there are a few recipes from the elusive filipino cuisine that I read about but haven't tasted, for instance.)

The pupusa recipe comes from Maria Del Carmen, who owns a business called Estrellita's Snacks.  She walked to California from El Salvador and ended up starting this successful business. I would love to try her pupusas someday, but for now I was happy to try her recipe. There are pictures in the cookbook showing the process but I found even more detailed steps on her Instagram account.

I won't include the recipe here because really, you should buy the cookbook of course, but so much of a pupusa recipe is about feel. I feel I may have not hydrated the corn flour enough, and totally meant to use beans in these but discovered we didn't have any after everything else was already ready. I clearly need to try the recipe again. I did make Maria's recipe for curtido, that's what looks a bit like coleslaw but is more of a quick pickled cabbage with a little bit of a kick from a pepper you can't see. Instead of the traditional (somewhat thin) salsa we always get from the restaurant, we prefer our pupusas with Cholula chipotle hot sauce (not a paid advertisement, we just like it.)

Before I tried the recipe for the first time, I also watched a bunch of YouTube videos since I usually learn a lot from real home cooks. One video is Curly and his Abuelita making pupusas together, another is all in Spanish but uses an unknown (to me) ingredient called loroco (which seems pretty popular on the internet for pupusas) and she makes them very differently from most Salvadorans I've watched, and then one that was really fun where three Salvadoran Moms try each other's pupusas and vote for the best. They have opinions!


Monday, July 06, 2020

Oatmeal Cranberry Walnut Cookies

If you have heard of the Levain Bakery, you will know of their giant, soft, thick cookies. I came across a recipe claiming to taste just like them and was intrigued - Melissa Stadler at Modern Honey has a made a number of varieties. I was looking for recipes to use up some dried cranberries and walnuts I had sitting around and decided the oatmeal raisin cookies would be the perfect chance. Please visit her site for all the tips and tricks - the method is really quite different from a regular cookie recipe so you will want to make sure you know what's up. I made a half recipe, only five cookies, since I was the only person who would end up eating them.


Oatmeal Raisin Cookies (Oatmeal Cranberry Walnut Cookies explained below)

Ingredients
  • 1 cup cold butter, cut into cubes
  • 1 cup + 2 Tbsp brown sugar
  • 1/2 cup granulated sugar
  • 2 eggs
  • 2 cups all-purpose flour
  • 1/2 cup cake flour*
  • 1 1/2 cup rolled oats
  • 1 tsp cornstarch*
  • 3/4 teaspoon baking soda
  • 1/2 teaspoon salt
  • 1/2 teaspoon cinnamon*
  • 1 1/2 cups raisins*
  • 1 cup walnuts, chopped (OPTIONAL)
Instructions*
  1. Preheat oven to 410 degrees.
  2. In a large bowl, cream together cold butter and sugars until light and fluffy, about 4 minutes. Add eggs one at a time, mixing well after each addition.
  3. Add cake flour, all-purpose flour, oats, cornstarch, baking soda, salt and cinnamon and stir until combined. Stir in raisins and walnuts (optional).
  4. Chill dough for 15 minutes.
  5. Separate dough into large balls and place on lightly colored cookie sheet. Lightly press on top of dough to smooth out. If you have a scale, you can make them anywhere from 4.5 ounces - 6 ounces. You will fit 4-6 cookies on one large cookie sheet. The dough makes 8-12 extra large cookies.
  6. Bake for 9-11 minutes or until golden brown on the top. Let them rest for at least 10-15 minutes to set.


*Notes from JennyBakes:

-I just used 1/4 cup more ap flour because I was out of cake flour
-I couldn't find any cornstarch in my cupboard and the Instacart person couldn't find any at the store (eyeroll) so I subbed tapioca flour and this seemed fine
-I doubled the cinnamon, always.
-I used dried cranberries instead
-These instructions seem crazy. 410?! Use cold butter?! Bake only 9-11 minutes? Just follow what she says and go against your instinct of when they are done. It pays off.

Monday, June 29, 2020

Emirati Balaleet

When I posted about Emirati pancakes, I mentioned that everyone has a different version of that recipe, well that is also going to be true about Balaleet. I have seen so many YouTube videos of a variety of techniques that I will be sharing more of a method, even though I used the recipe from Feast like last time. Wikipedia says balaleet "traditionally consists of vermicelli sweetened with sugar, cardamom, rose water and saffron, and served with an overlying egg omelette." Vermicelli is a kind of pasta, it's true, but in this case, it is served partially sweet. I believe this is influenced by Indian cuisine that traveled to this region because you can find vermicelli in sweet rice puddings and even sweet drinks like falooda


Just to get my initial impressions out of the way, I find it impossible to think of a sweet pasta without immediately thinking of Buddy the Elf as immortalized by Will Farrell. He adds candy and maple syrup to his spaghetti. I fully expected this dish to be sweet like that, but it really isn't.


Some recipes toast the vermicelli to a golden brown. Some toast half and keep half untoasted. Some don't toast the vermicelli and darken it with saffron or fake saffron coloring. I think the toasting would add more flavor, and I ended up wishing I'd done more of that. I've seen some recipes that also include toasted nuts. I had soaked my saffron in rosewater and added all the required spices but it had less flavor than I thought it would. I felt I could kind of take it or leave it, and it was a lot of work to have that impression.

To me what was really tasty and I'd love to make again is the eggs! I've never added spices to scrambled eggs, and I liked both the coriander from the recipe and the cardamom that came over from the noodles in with the eggs. It reminded me of how my Mom would cook up the last of the french toast milky eggs after making french toast, so maybe it's more the nostalgia element than anything else.

Monday, June 22, 2020

Grain-Free Peach Cobbler

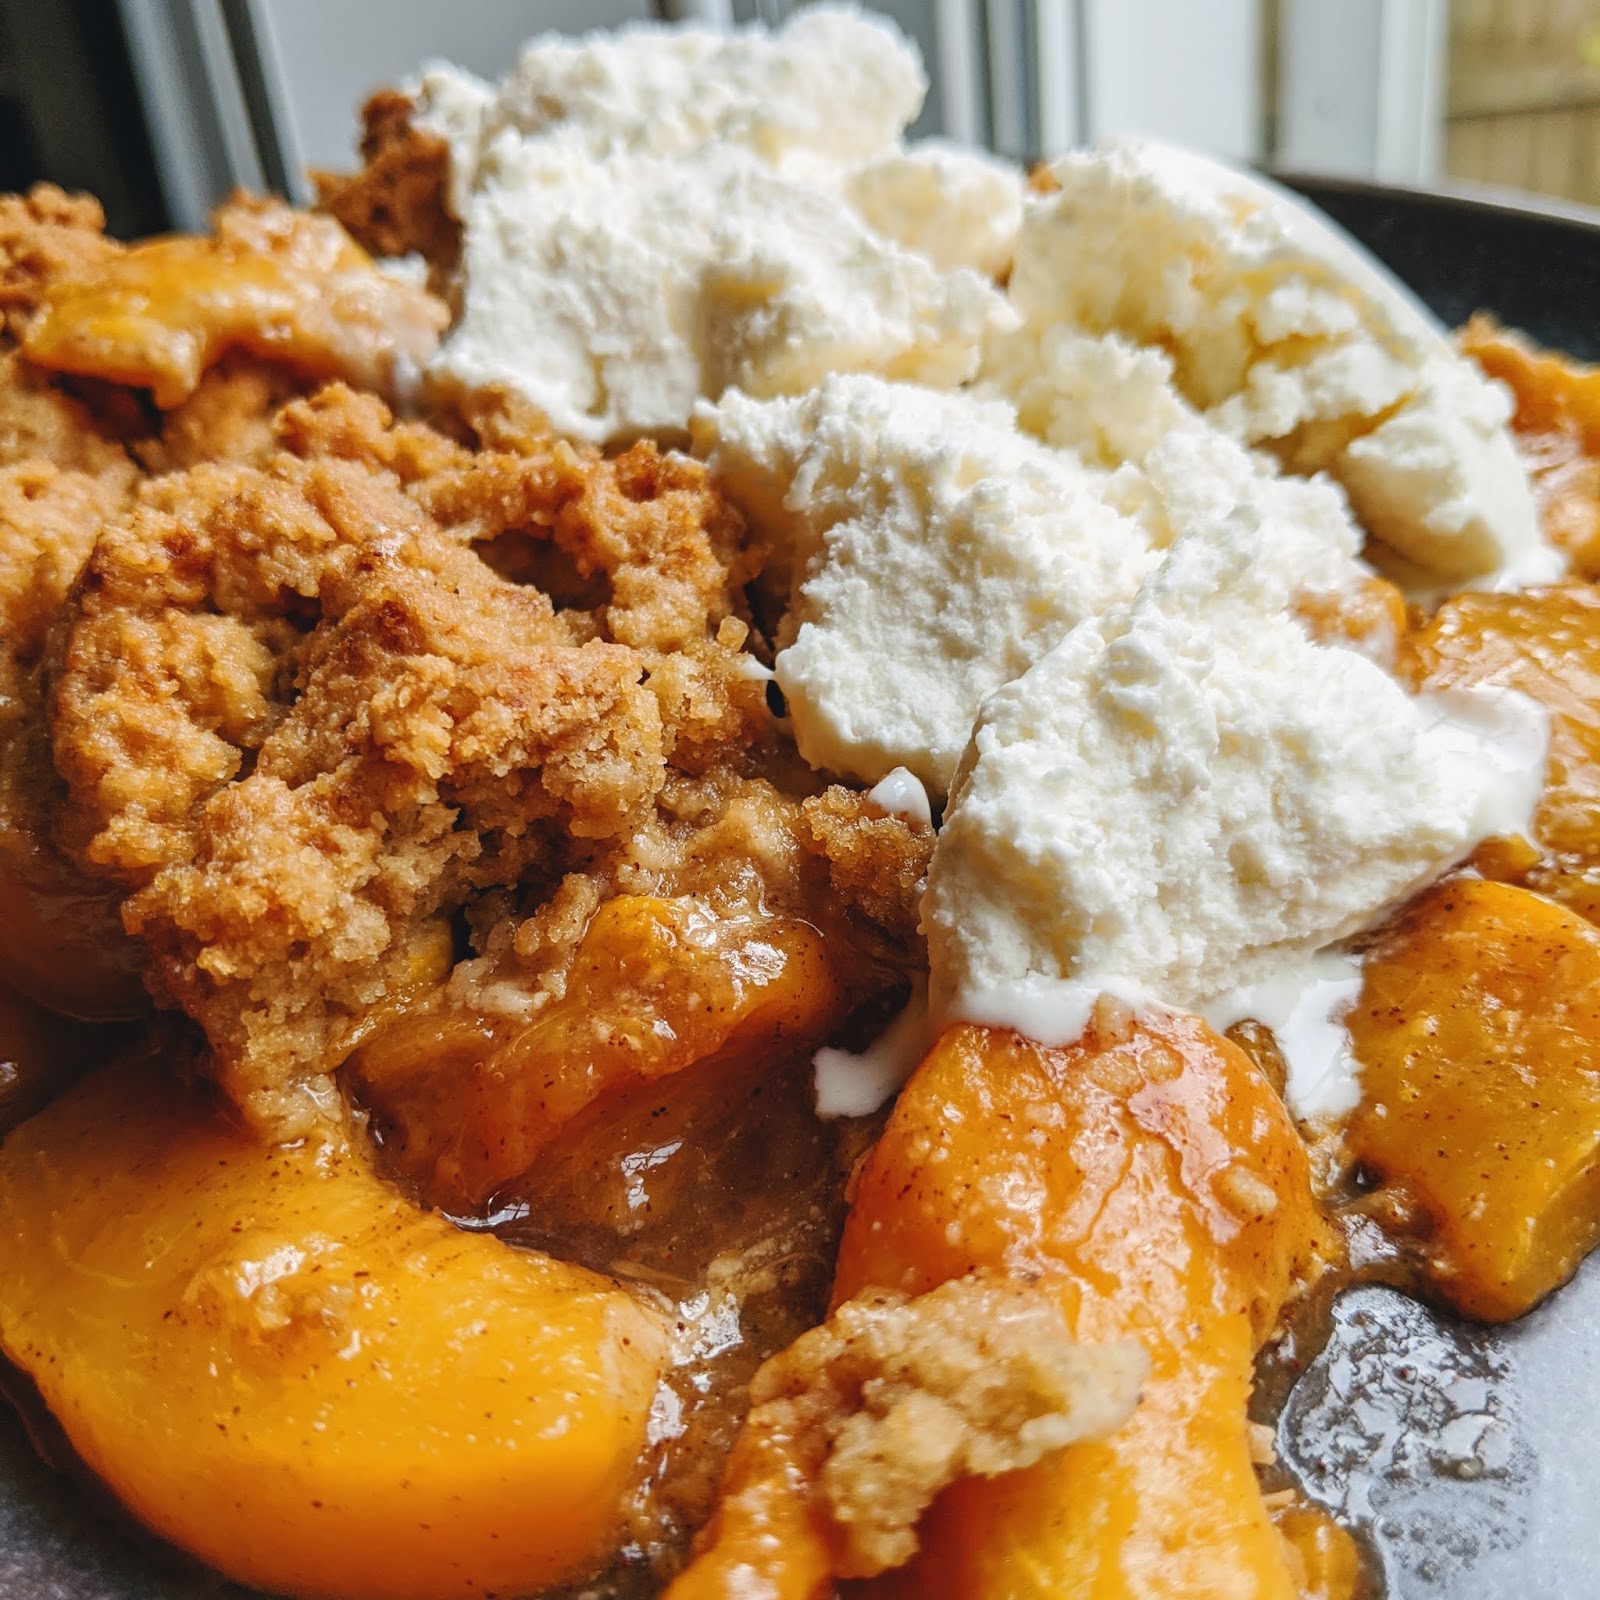
I had a bag of peaches going toward overripe that I needed to use stat! So I went looking for a paleo, lower sugar, some such variety of recipes. I came across this "Guilt Free Paleo Peach Cobbler" from Fearless Dining and adapted it only slightly for what I had on hand.


I suspect this is because of my own substitutions (coconut sugar for honey, tapioca flour for arrowroot powder) but the cobbler top was almost like bran muffins in texture and not necessarily in a bad way. We topped it with a keto vanilla "ice cream" that to me has the texture of cold compressed sand more than it tastes like ice cream. HA. The second time we ate some my husband asked for more cinnamon, so you can add more than what is in the recipe. I already had doubled the amount in the fruit.

Grain-Free Peach Cobbler
(adapted from Fearless Dining)

Ingredients

8 fresh peaches, sliced
1/2 cup coconut sugar
1/2 teaspoon cinnamon
1 tablespoon coconut oil, melted
1 tablespoon arrowroot starch

For the Crust:

2 1/2 cups almond flour
 3/4 cup arrowroot starch
1/4 cup cold butter or ghee
3 tablespoons honey
 2 large eggs
1/4 teaspoon salt
1/2 teaspoon baking soda

Instructions

Preheat the oven to 350F degrees.

Add the biscuit ingredients into a food processor and mix well until the dough forms.

Slice the peaches and add to a bowl. Add the coconut sugar, arrowroot, and coconut oil. Mix well.

Use a slotted spoon to move the peaches mixture (but not all of its moisture) into an 8x8 baking pan. Spread the biscuit mixture on top and bake for 30 minutes or until biscuit mixture seems cooked through. Serve hot or cold with ice cream or whipped cream.

Monday, June 15, 2020

Orange Poppyseed Yogurt Cake

Loaf cake is the cake of the pandemic. I know some of you out there are feeding your sourdough beasts but I found myself with more work to do, not less, and needed quick bakes. After having to make multiple tries for the lemon drizzle cake, I had read a lot of loaf cake recipes online. I was intrigued by the Grapefruit Greek Yogurt Cake recipe from Sally's Baking Addiction, but my order for grapefruits was thwarted and showed up as oranges instead. I had seen so many lemon poppyseed cakes that I had them in my head as well, and a bunch of Icelandic yogurt in the fridge, so I adapted Sally's recipe to make an orange poppyseed yogurt cake. And it was good. Scroll to the bottom for a bonus dog creeper picture.


Orange Poppyseed Yogurt Cake

1 1/2 cups all-purpose flour
1 tbsp poppy seeds 
1 1/2 tsp baking powder
1/2 tsp salt
3 large eggs
3/4 cup Greek yogurt
1 cup packed light brown sugar
1/2 cup vegetable or canola oil
1/4 cup freshly squeezed orange juice
1 1/2 tbsp orange zest
1 tsp vanilla extract

Orange glaze

1 cup confectioners' sugar
2 tbsp orange juice
1/4 tsp vanilla extract

  1. Preheat the oven to 350 and grease a 9x5 inch loaf pan.
  2. Whisk the flour, poppy seeds, baking powder, and salt together in a large bowl. In a medium bowl, whisk the eggs. Once combined, whisk in the yogurt, brown sugar, oil, orange juice, zest, and vanilla. Pour the wet ingredients into the dry ingredients and mix with a large wooden spoon or rubber spatula until combined. Avoid overmixing.
  3. Spread batter into the prepared loaf pan. Bake for 45-50 minutes. The cake is done when a toothpick inserted into the center comes out clean.
  4. Remove the cake from the oven and set on a wire rack. Allow to cool before drizzling with glaze.
  5. For the glaze, simply whisk the ingredients together and drizzle over cake. Slice and serve. Cover and store leftover cake at room temperature for up to 5 days.
Do you see Doyle?


Monday, June 08, 2020

Arabian Pancakes or Khobz Al-Jbab

My reading focus is on the Middle East this year so when I read Temporary People*, set in the UAE, I went looking for a recipe from there. Feast: Food from the Islamic World has been very useful in placing regional dishes, but the Romanization she gives is never how I find it elsewhere online. I can find references to khobz that seems to be bread, in Morocco. Jiibab is a garment. Pancakes in UAE are often written as chibab or chebab or even chabab but of course I know this doesn't really matter because in UAE it would be in Arabic. They are basically just... pancakes, although there is a little yeast, a little saffron, and it does seem to be typical most of the time that they are served with date syrup. Sometimes they are tiny, sometimes they are the size of the plate, but they do all seem to have the saffron-yeast-date syrup ingredients in common. Quite often, the syrup is served on the side for dipping the pancake in, rather than drizzling or pouring it over as I have done. I've seen other videos around the same area where pancakes are spread with cheese and folded in half, or filled with a sweet nut mixture and deep fried, then topped with a sugar syrup, but that last iteration seems to be specific to holiday celebrations like Eid. This recipe is more of an everyday pancake.


Arabian Pancakes
(recipe from Feast)

1 2/3 cups (200 g) unbleached all-purpose flour
3/4 tbsp whole milk powder**
1/4 tsp instant (fast-acting) yeast
1/4 tsp baking powder
pinch of salt
1 egg
1/4 cup raw cane sugar
pinch of saffron threads
unsalted butter, melted, for the skillet
1/2 cup (65 g) sesame seeds
Date syrup for serving

  1. Mix the flour, milk powder, yeast, baking powder, and salt in a bowl and make a well in the center.
  2. Whisk together the egg, sugar, saffron, and 1 1/4 cups warm water (310 ml) in a bowl until the sugar is dissolved.
  3. Add the sweet egg mixture to the flour mixture and gradually whisk it in until you have a batter that is thicker than crepe batter but thinner than pancake batter. Cover with plastic wrap and let sit for about 45 minutes to let the batter ferment.
  4. Brush a large nonstick skillet with a little melted butter and place over medium heat. When the pan is hot, scoop out a ladleful of the batter and pour into the pan, tilting the pan to spread the batter evenly. Sprinkle with some sesame seeds and cook for 2 minutes, or until the bottom is golden. Flip the jbab and cook the other side for 2 minutes, or until it is the same color. You may want to slip a knob of butter underneath the jbab after you flip it. Sprinkle the top with some more sesame seeds.
  5. Cook the remaining jbab the same way, and serve hot or warm drizzled with date or maple syrup.   
* You may read my review of this book in Goodreads.
** In the United States, if you want milk powder you have to buy a big bulky box of it, and I always only need a few spoonfuls. Most of what I read online said you can just use the same amount of milk and add it with the liquid, so I did.

Speaking of pancakes...

Like pancakes? I seem to make them from around the world! Check out the Finnish pannukakku, Icelandic pönnukökur, Papua New Guinean banana pancakes, the Danish ebleskiver, the Hungarian palacsintas, the Kaiserschmarrn or "Emperor's Mess" from Austria, the Swedish pancakes from Alaska, and what we call the German oven apple pancake. I also made ratio pancakes from Michael Ruhlman's book, which we can call American. I've made several more American pancakes, like the recipe from Rosa Parks held by the National Archives, another variation on lemon ricotta pancakes, and kauk moto from Myanmar. Pancakes can also be savory, like scallion pancakes from China (also called cong you bing.)

Monday, June 01, 2020

Uzbek Sambusa and My Cooking Class with the League of Kitchens

A few weeks ago, I got to participate in an online cooking class from League of Kitchens. LoK is an organization in New York that works with women from many different countries to teach how to cook their food. The class my husband bought for me was with Damira, from Uzbekistan. For a long time, these classes were taught in person, but our current situation forced them to move the classes online, which also opened them up for a wider audience. Lucky for me, who lives far from New York. I had been following them in Instagram already, just because I was hoping they would come out with a cookbook, since many of the women are from places I have been reading about and trying to learn how to cook from.


Last year, I read a novel from Uzbekistan in my year of the Stans (The Devil's Dance by Hamid Ismailov), and at Thanksgiving I tried to make a dumpling that was similar to the ingredients of the recipe we made together in this class, but not the final result.

For courtesy sake, I will not be posting the recipe here, but I encourage you to check out their website (not a paid advertisement) and take a class yourself. They are super organized - they sent the recipe, background information, and an ingredient list ahead of time, telling you what to prep and what to leave alone. There is a person who isn't the teacher running all the technology so the cook can focus on those instructions. She checked in with us and continually made sure we were ready to move on to the next phase, and weighed in on whether or not our sambusas were cooked enough. The class was long enough for us to prep and cook the meal, and there is even time at the end to eat together. In the class I took, some family members were sharing the experience from different states.


Uzbekistan was part of the very well known silk road, an important avenue for travel and trade. It should not be too surprising that the sambusa is related to the samosa and many other dishes of similar names.

The dough was interesting because it was possibly more similar to cong you bing, the Chinese scallion pancake I had previously attempted. It is made in a way that makes a quick lamination which results in flaky, crispy dough in under an hour. I was impressed with myself! The filling was butternut squash, onion, and cumin seed. I did not know if it would cook but it was perfect, not crunchy at all (again, unlike my Thanksgiving dumplings from Turkmenistan that failed.)


We made a radish and yogurt salad with a lot of herbs in it to go on the side. I ended up scooping some up on my sambusas because they went well together. I think the filling options are endless for these, and I hope to make them again soon.

Monday, May 25, 2020

Classic Apple Tarte Tatin - now with more nemesis

This post is really long, but it's all in service to this recipe, and isn't just a random story about what I watched on tv or anything like that. 

Caramel has long been a problem in the JennyBakes kitchen, from failed cakes to frustrating tarts. But caramel is a key element in a tarte tatin, and I couldn't read Ducks, Newburyport, whose narrator thinks frequently about tartes tatin, without making the attempt. Not to mention that she specifically uses Pink Lady apples and the Instacart person picking my apples for me had ended up bringing me a 3-lb bag of the same kind of apple!


The other appeal to the recipe I decided to use as my basis was that it made use of a "rough puff" for the puff pastry. Anyone who has sat through a season of the Great British Bakeoff (aka Great British Baking Show in the states) knows about a rough puff. But yet I had never had the opportunity to make one. I'll be honest that I was most excited about that!


I will share what I am certain is a lovely recipe outside of user error, and then discuss my thoughts on the recipe.

Tarte Tatin with Homemade Rough Puff Pastry Dough
(recipe from Brooklyn Supper, with great detail and lovely pictures, please refer to that site) 

Ingredients

Rough Puff Pastry
  • 1 1/4 cups all-purpose flour
  • 8 tablespoons (1 stick) unsalted butter, frozen
  • 1/4 teaspoon fine grain sea salt
  • 6 tablespoons ice water
Tarte Tatin
  • 6 medium apples, peeled and quartered with cores cut out (go with a crisp, flavorful variety like Jonagold or MacIntosh)
  • 1 1/4 cups white granulated sugar , divided
  • 1 tablespoon fresh squeezed lemon juice
  • 6 tablespoons unsalted butter
  • 1/4 teaspoon sea salt
  • 1 recipe puff pastry (above)
Instructions
  1. To make rough puff pastry dough, use a fork to blend flour and sea salt. Grate in frozen butter. Use fingertips to rub butter into flour, though not as thoroughly as you might for a traditional pie dough. Drizzle in half the ice water, turn dough until it’s absorbed. Add remaining water, turning dough once more. Gather dough into a loose mound; there will be a few dry bits, but that’s fine. Turn mound out onto a sheet of plastic, form a loose disc, and wrap tightly. Set in refrigerator and chill for 30 minutes.
  2. On a very lightly floured sheet of parchment, roll the disc out into an 8 x 15-inch rectangle. Dough will still be quite crumbly; just do your best. Fold sheet of dough into thirds, folding each third into the center, so you have something resembling an envelope (pictured above). Press an indentation into the upper corner of envelope with your fingertip, to indicate one turn. Wrap tightly with plastic and chill 30 - 45 minutes.
  3. Continue this process of rolling, folding into thirds, marking number of turns with a fingertip, wrapping, and chilling, for a total of 5 turns. As you can imagine, it’s best to give yourself a day when you can make this ahead. When you’ve completed the fifth turn, wrap dough and chill until needed for the tarte.
  4. Use a sharp knife to trim angled edges from the apple quarters, so they’ll sit flat, with the rounded side facing up. Toss prepared apples with lemon juice and 1/4 cup sugar, and set aside to co-mingle for 20 – 30 minutes.
  5. To make caramel, set a 9-inch, deep-sided heavy-bottomed skillet over medium heat. Add butter, and once melted, the remaining cup of sugar. Keep a close eye and stir constantly. First, things will hold together, then slowly, the mixture will darken and butter will begin to separate. Stay strong. Next, sugar mixture will bubble and spit a little. You may want to edge heat down slightly here, as you’re going for a light caramel color and things still have a ways to cook. Finally, caramel will come back together, smooth out, and cook quickly. As soon as you have an even, light caramel, remove pan from heat, about 10 - 15 minutes total.
  6. Preheat oven to 400 degrees F.
  7. Toss apples one more time, and then carefully spoon into hot caramel. Things are going to spit and bubble a little, so go slowly. If there’s a lot of excess juice (it varies according to the kinds of apples), leave it behind. Set caramel and apples back over medium, or slightly medium-low heat, and cook 15 minutes or so, stirring frequently to turn apples in the caramel mixture. Apples and caramel are ready when the apples have taken on color without being mushy and the caramel is a dark, golden brown.
  8. Arrange apples with rounded sides facing down in a nice circle, with several apples more in center.
  9. Roll the prepared puff pastry into a 10-inch circle, about 1/4-inch thick. Set on top of apples and tuck sides down into edges of the pan. Cut four 1-inch vents in center with a sharp knife.
  10. Set pan on a rimmed baking sheet and slide into oven.
  11. Cook tarte for about 25 minutes, or until the pastry has puffed up and is a nice golden brown.
  12. Set tarte aside to cool for a minute, then cover with a large plate, and use two potholders to flip. Slice and serve immediately.
     
Notes from JennyBakes:

Reader, there are so many places I made mistakes.

First, I decided to make a half recipe. I would be the only person in my house eating it and I figured I could just cut everything in half and use a smaller skillet.

The rough puff was going fine, and fit the skillet I had chosen, but...

The caramel followed the steps described in step 5, but by the time the mixture started to bubble and spit after separating, it was already a pretty dark reddish brown which quickly turned to BLACK BLACK BLACK hahahaha. I definitely over cooked it but to be fair, that was prior to even 10 minutes. Perhaps the lower amounts, perhaps using a nonstick pan, perhaps my infernal electric flattop stove.

So I pressed on. I did not cook the apples long, just arranged them and tried covering them with caramel at least partially (it had the texture of pulled sugar and I definitely knew it was already over but for SOME REASON I decided not to start over.

I had it all arranged in the 6-inch skillet and on a cookie sheet but I kept having this niggling thought in my head... nonstick skillet...plastic handle... IF I PUT THIS IN THE OVEN IT WILL MELT.

So I quickly and sloppily transferred the concoction to a lovely but oval-shaped ceramic baking pan. There were no longer exactly the right number of apples, and the puff pastry was no longer the right shape and covering everything. Yet I pressed on.

There was just no coming back for the caramel. And the lack of heat in the apples I didn't cook plus the late-in-the-game relocation of the puff pastry didn't do it in any favors and I didn't see the layering like I thought I should (in a few select pieces it was perfect and lovely but most of the time it was a lump of unscorched delight in a pool of burned and blackened apple-shaped corpses.

Will I try this recipe again? Oh probably not. I'm not sure it's worth the end result. I'd much rather have an apple pie or apple crisp, one of which is easier to make than a tarte tatin. I take some consolation in remembering Julia Child's episode of the French Chef where she turned her tarte tatin over and it fell apart and loosely spread beyond her serving platter. And she just tucked it all back in and declared it good enough. I suspect she had the opposite problem of me - not enough carmelization! Plus her apple choices seemed a bit willy-nilly and it's clear from the narrator in Ducks, Newburyport, who bakes for a living, that the apple matters. I enjoyed the Pink Lady apples in their slightly baked manner, once the charred caramel was cut off.

I might make the rough puff again, but of course anyone who bakes probably knows that once you see how much butter puff pastry has in it, you don't particularly want to eat it.