Saturday, February 28, 2009

Daring Bakers Challenge - Flourless Chocolate Cake with Deeply Chocolate Gelato

The February 2009 challenge is hosted by Wendy of WMPE's blog and Dharm of Dad ~ Baker & Chef. We have chosen a Chocolate Valentino cake by Chef Wan; a Vanilla Ice Cream recipe from Dharm and a Vanilla Ice Cream recipe from Wendy as the challenge.

I have made flourless chocolate cake before, and was excited that making ice cream would be part of this challenge. I am still not a master of ice cream. I don't know exactly what consistency I'm looking for when I transfer the mixture from the ice cream maker to the freezer for the solid-freeze. I feel like the mouth feel just isn't right. It almost ends up like a gummy texture, rather than smooth. I would welcome any pointers or reassurances!

Deeply Chocolate Gelato
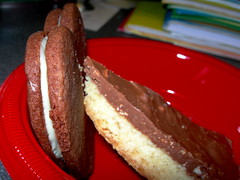
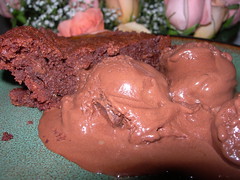
I decided to make this for Valentines Day, and I wanted to make a decadent ice cream. I had watched Ina Garten make this deeply chocolate gelato and knew I had to try it. And wow, this is the richest, darkest, chocolate ice cream or gelato that I have ever had. It made the flourless chocolate cake seem mild, and it was actually incredibly rich itself. Both my husband and I went through multiple glasses of milk just to eat one slice of cake with a scoop or two of ice cream.

Flourless Chocolate Cake, Chocolate Valentino
For the cake itself, the main part of the challenge, I used 4 oz of milk chocolate, 4 oz of bittersweet, and 8 oz of semisweet. It was still pretty dark. Since you don't add sugar to the recipe, the sweetness depends entirely on the taste of the chocolate. I think next time I would use half milk chocolate and half semisweet, perhaps.

Chocolate Valentino
Preparation Time: 20 minutes
16 ounces (1 pound) (454 grams) of semisweet chocolate, roughly chopped
½ cup (1 stick) plus 2 tablespoons (146 grams total) of unsalted butter
5 large eggs separated

1. Put chocolate and butter in a heatproof bowl and set over a pan of simmering water (the bottom of the bowl should not touch the water) and melt, stirring often.
2. While your chocolate butter mixture is cooling. Butter your pan and line with a parchment circle then butter the parchment.
3. Separate the egg yolks from the egg whites and put into two medium/large bowls.
4. Whip the egg whites in a medium/large grease free bowl until stiff peaks are formed (do not over-whip or the cake will be dry).
5. With the same beater beat the egg yolks together.
6. Add the egg yolks to the cooled chocolate.
7. Fold in 1/3 of the egg whites into the chocolate mixture and follow with remaining 2/3rds. Fold until no white remains without deflating the batter. {link of folding demonstration}
8. Pour batter into prepared pan, the batter should fill the pan 3/4 of the way full, and bake at 375F/190C
9. Bake for 25 minutes until an instant read thermometer reads 140F/60C.
Note – If you do not have an instant read thermometer, the top of the cake will look similar to a brownie and a cake tester will appear wet.
10. Cool cake on a rack for 10 minutes then unmold.

I was in a weird mood when I made this recipe, and decided to beat the egg whites by hand. Sometimes it is just fun to work hard for the end result.

On an unrelated note, is anyone on Twitter? I joined this week but am only using it as a place to stick random quotations from books I'm reading, or sometimes movies and songs. Still, if you ever wanted a trip inside the head behind jennybakes.com, there you go.

Categories: Cake, Chocolate, Daring Bakers, Gelato, Ice Cream

Friday, February 20, 2009

Happy Pączki Day!


Inside of a pączki
Originally uploaded by watchjennybake.
I just happened to be in Chicago the week before Lent, which to me meant that this year's culinary adventure during my conference had to be the pączki. There is actually a great Wikipedia entry on the pączki, including Chicago-specific information.

I am somewhat confused at when Pączki Day fell. Traditionally in Poland it is Fat Thursday, but since Americans have a lot of Fat Tuesday celebrations, in some cities here that becomes Pączki Day. It still seems like Chicago celebrated it yesterday, but Wikipedia does say that "Chicago celebrates both Fat Thursday and Fat Tuesday, due to its sizable Polish population." It made me laugh too. If you had pączki too often, sizable would definitely be the word.

Pączki
Yesterday morning I set off for my culinary adventure by getting directions from Google Maps, because they have a walking and public transit version. As a result I walked 12 blocks including over the river in 18 degree weather instead of just getting on the train and transferring which is what I did on the way back. Well, once I got unlost. I ended up going across the river to the west instead of the north, which probably only makes sense if you know Chicago and are as directionally challenged as me, but I found my way back to the conference (an hour later than I'd planned!).

Pasieka Bakery
There are many places in Chicago to have a pączki, but I wanted to go to the Polish neighborhood to get something authentic! I'd had a jelly doughnut grocery store version some years back in Indiana, and while that was good enough to make me crave them when I moved to the south, I wondered if I wasn't getting the full experience.

Inside the Pasieka Bakery, all the customers ahead of me spoke Polish. The women at the counter spoke Polish, and they asked me what I wanted in Polish. I think we can determine that is fairly authentic! They had a bunch of different kinds - rose, prune, blueberry, raspberry, custard, and apricot.

So what is the verdict? Are these "magical mystery doughnuts" worth a trek across town in the bleakest of winter? Of course for me, the adventure is sometimes the best part. But I would say they aren't just doughnuts. The bread is denser than usual doughnut fare, and the fillings are interesting. I was just happy to be back in the midwest when pączki were in season.

Categories: Bakery, Bread, Paczki

Sunday, February 15, 2009

Praline Banana Bread


Praline Banana Bread
Originally uploaded by watchjennybake.
This recipe comes from combining several, crazy thoughts in my head, and things I needed to use (bananas and homemade praline). The praline made the bread sweet and a little crunchy, with more depth of flavor than banana bread alone.

Praline Banana Bread
1/2 cup unsalted butter, softened
1 cup sugar
2 large eggs
1 cup mashed banana (roughly 3 ripe ones)
1/4 cup sour cream
1 tsp vanilla
1 3/4 cup all-purpose flour
1 tsp baking powder
1/2 tsp baking soda
1/4 tsp salt
1 cup homemade praline*

Preheat oven to 350. Prepare a loaf pan.

Cream butter and sugar until well blended. Add eggs, banana, sour cream, and vanilla. Mix in flour, baking powder, baking soda, and salt, on low speed. Mix in praline.

Scrape batter into pan. Bake until bread springs back, about 55 minutes. Cool in pan 20 minutes, then remove from pan.

*If you don't want to make praline, try substituting toffee chips. Or just use regular old nuts for regular old banana bread.

Categories: Bananas, Bread, Praline

Friday, February 13, 2009

Crunchy Cookies


Valentines Treats
Originally uploaded by watchjennybake.
I don't like crunchy cookies.

Both of the things I made for my student workers were crunchy. I thought maybe it was the recipe - too much flour? Or the weather - too dry? But I was told that some cookies are just crunchy.

Well, okay. But I don't have to like it.

These are both from A Passion for Baking by Marcy Goldman, a cookbook I find myself returning to again and again. The heart-shaped sandwich cookie is a Chocolate Ambivalence Cookie, meant to be sensitive to those who were more excited about Friday the 13th than Valentines Day. The other cookie is actually the recipe facing the first - Candy Bar Shortbread. Not too difficult, just make shortbread and sprinkle chopped up candy bars on top while it is still hot - I used Toblerone like suggested.

Categories: Chocolate, Cookies

Tuesday, February 03, 2009

Hazelnut Biscotti (Happy Birthday Mom!)


Hazelnut Biscotti
Originally uploaded by watchjennybake.
Today is my Mom's birthday. She lives far away from me, a forty-one hour drive to be exact, so I have to figure out ways to celebrate from afar. This year I sent her some coffee that is roasted locally that smelled exactly like an old favorite she used to drink, and decided I needed to bake something to send along with it.

Biscotti tend to be good travel cookies because they start out life crunchy, and will remain crunchy for a while. I still had hazelnuts left over from holiday baking, and came across the recipe for hazelnut biscotti in Baking with Julia, one of the cookbooks that gets the most use in my house. This is where the amazing hazelnut-skinning method that I mentioned in my last Yule Log post comes from.

It is more common for a mother to tell about the day of a child's birth, but the story of the day my Mom was born is a family legend, so I will retell it here. My Mom was born on a very cold day in February, and it was snowing. (She hates the snow). Her parents had just had the floors varnished, so her mother had to climb out the window to get to the hospital. I might have the details wrong, but it always makes me smile.

Hazelnut Biscotti
Makes about 4 dozen biscotti

2 cups water
3 tbsp baking soda
2/3 cup unblanched hazelnuts

1 2/3 cups all-purpose flour
1/2 tsp baking soda
1/4 tsp salt
2 large eggs
2 tsp hazelnut liqueur, such as Frangelico*
1 tsp pure vanilla extract
3/4 cup sugar

Center a rack in the oven and preheat the oven to 350 F.

To skin the hazelnuts, bring the water to a boil in a medium saucepan, add the baking soda and the nuts, and boil for 3-5 minutes, until the water turns black. To test if the skins have loosened sufficiently, drop a nut into a bowl of cold water and rub lightly against the skin - if the skin just slides off, the nuts are ready to go. Turn the nuts into a colander and run cold water over them. Slip off the skins, toss the nuts onto a towel, pat dry, and transfer to a jelly-roll pan.

Place the pan in the oven and toast the nuts, stirring occasionally, for about 15 minutes, or until evenly browned. The best way to test for total toastiness is to bite into a nut - it should be brown to the center. Remove the nuts from the oven and cool. Lower the oven temperature to 300 F.

When the nuts are cool enough to handle, coarsely chop them and set them aside.

Line a baking sheet with parchment paper and reserve until needed.

Put the flour, baking soda, and salt into a medium bowl and whisk just to blend.

In another bowl, whisk together the eggs, liqueur, vanilla, and sugar. Add the dry ingredients to the liquid and stir with a wooden spoon to mix. Add the nuts and continue to mix, just until well incorporated. (Since this dough is stiff, sticky, and hard to stir, you might find it easier just to reach in and mix it with your hands).

Flour your hands and lift half of the dough onto one side of the parchment-lined baking sheet. Pat and squeeze the dough into a chubby log 12-13 inches long. Don't worry about being neat or smoothing the dough - it will even out as much as it needs to in the oven. Repeat with the other half of the dough, leaving about 3 inches between the logs.

Bake the logs for exactly 35 minutes. Transfer the pan to a cooling rack and let cool for at least 10 minutes.

Using a serrated knife, cut the logs into 1/2-inch thick slices, cutting straight across or diagonally. (You can make the biscotti thinner or thicker, as you wish, and adjust the baking time accordingly.) Lay the biscotti on their sides on a cooling rack - you may need to use a second rack - then place the cooling rack in the 300 F oven, directly on an oven rack. (Baking the biscotti like this allows the oven's heat to circulate around the cookies, so there's no need to turn them over.)** The cookies may need to bake for as long as 15 minutes, but it's a good idea to start checking them after about 10 minutes. When the biscotti are golden brown, dry, and crisp, remove the cooling rack(s) from the oven. Let the cookies cool to room temperature before packing them for storage.

The cookies will keep in an airtight container for about a month.

*I just substituted with vanilla extract
**I baked them on a cookie sheet, and turned them over at 10 minutes.

Categories: Biscotti, Cookies, Hazelnuts