I just had friends here from Oregon, and wanted to cook a southern dessert. Red velvet cake seemed too heavy, and I got great suggestions like pecan pie and sweet potato pie, but then I started thinking about banana pudding. Banana pudding is the quintessential southern dessert, particularly when one is having collards, grits, and pork from Henry's Smokehouse like I was planning. But I couldn't just make banana pudding!
Luckily I recently checked out the Soby's New South Cuisine cookbook from the library and found this gem, the white chocolate banana cream pie. According to the book, it has been their top selling dessert since they opened in 1997. Soby's is one of our favorite restaurants in Greenville, in a beautiful building downtown. They always have good service and excellently prepared food, but it does tend to be busy (and louder). This dessert seemed like a classier take on banana pudding or banana cream pie (because actually this is a tart), so I decided to give it a shot.
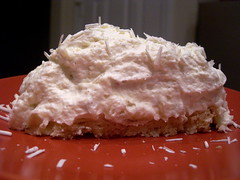
This is typical of restaurant recipes because so much of it can be made ahead of time. I made the crust and pastry cream two days in advance, so the night we ate, I only had to whip the cream, slice bananas, and mix a few things together. This was sweet, pillowy, and delicious. The banana flavor was prominent, and the vanilla flecks throughout were pretty.
Soby's White Chocolate Banana Cream Pie
(Serves 8-10)
Tart Shell:
1 3/4 cups flour
2/3 cup sugar
1/2 lb butter, cut into 1-inch pieces, chilled
1 egg
1 tsp vanilla extract
White chocolate pastry cream:
1 vanilla bean, whole
1 cup milk
1/4 cup white chocolate chips
3 Tbs cornstarch
1/4 cup sugar
1/4 tsp salt
2 eggs
Pie:
2 1/4 cups heavy cream
1/2 cup confectioner's sugar
1/4 cup Creme de Banana
1 cup white chocolate pastry cream, chilled
6 ripe bananas
1 11-inch tart shell, baked and cooled
White chocolate, thick piece, for garnish
Cocoa powder
For the tart shell: Place the flour and sugar in the bowl of an electric mixer fitted with the paddle attachment. On low speed, add half the cold butter and mix for 30 seconds, then add the remaining butter. Continue to mix until all the butter is cut into the flour and the mix resembles sand. Lightly beat together the egg and vanilla in a small bowl and add it to the flour and butter. Continue to mix until a dough ball is formed. If the dough does not form a ball after 1 minute, add a few drops of water. Remove the dough from the mixer. Wrap in plastic wrap and chill.
Preheat the oven to 350 F. Have ready an 11-inch removable-bottom tart mold. On a floured surface, roll out the dough into a 1/8-inch thick circle large enough to fit the mold. Press the dough into the tart mold. Refrigerate for 10 minutes. Bake the crust for 16-18 minutes or until it is golden brown and crisp.
For the pastry cream: Pour the milk into a heavy bottom 2-qt saucepan. Split the vanilla bean in half lengthwise and scrape out the seeds with the back of a small knife. Add the seeds and pod halves to the milk. Heat the milk until it is about to boil. While the milk is heating, whisk together the cornstarch, sugar, salt, and eggs until smooth. Tempter the egg mixture with one-quarter of the hot milk and then add it back to the pan. Whisk to combine. Continue to cook on medium heat stirring constantly. When the custard thickens, remove it from the heat and whisk in the white chocolate. Pour the pastry cream into a container and place a sheet of plastic wrap directly on top of the cream so no skin forms. Refrigerate until completely cool.
For the pie: Whip the heavy cream until soft peaks form. Add the sugar and creme de banana and whip to very stiff peaks. Place the cold pastry cream into another bowl and soften by mixing it with a rubber spatula. Slice the bananas into the pastry cream and stir to combine. Fold in the whipped cream. Mound the filling in the middle of the tart shell and smooth it down to the edge. Carefully cut the pie into 8 or 10 slices before garnishing. Using a vegetable peeler, shave enough white chocolate curls to cover the pastry cream. Dust the top with cocoa powder. Serve immediately or refrigerate.
Categories: Bananas, Cream, Pie, Tart, White Chocolate
Thursday, May 14, 2009


Tuesday, May 12, 2009
Iced Coffee Obsession
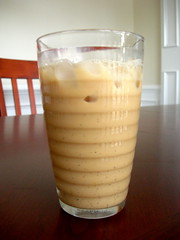
There is a little Vietnamese place that I love to go to in Greenville called Pho Noodleville. Granted, the service is always, always terrible. Not just bad - terrible. And the chairs are super uncomfortable. But there are rarely many people there (possibly a bad sign) and if you have a lot of time and patience, I think the food is worth it. It is sometimes hard to find good vegetarian food in the south, and they have enough options that I have not yet tried everything. My favorite are the tofu dishes which are well seasoned and filling, and are served with rice that I hope is intentionally greenish.
My actual secret, however, is that I really go there for the coffee. The most recent waiter we've had makes fun of me for ordering it because it isn't served with dinner in "his country" (aka Vietnam), and I often have to get it to go because it really does take that long to brew or he forgets until we are ready to pay. The jury is still out on that one. But I realized that they were simply using coffee from Cafe du Monde in New Orleans, which is technically coffee with chicory. They brew it in individual servings, into a cup that already has condensed milk in it. Once it is brewed and stirred together, it is served over ice. Words can't begin to explain how good it is.
This idea of iced coffee is not unique to the Vietnamese, of course. A trip to Saigon Market, also in Greenville, gave me an opportunity to buy a bottle of coffee concentrate from Cofe Thai, which is what they use at Thaicoon Ricefire and Sushi Bar, the Thai restaurant closest to the campus where I work.
When we were in Jamaica, we bought some of the famous Blue Mountain Coffee. The place where we bought it sold it black or with condensed milk (surprise surprise!). So even hot, this combination of coffee with condensed milk was nothing new.
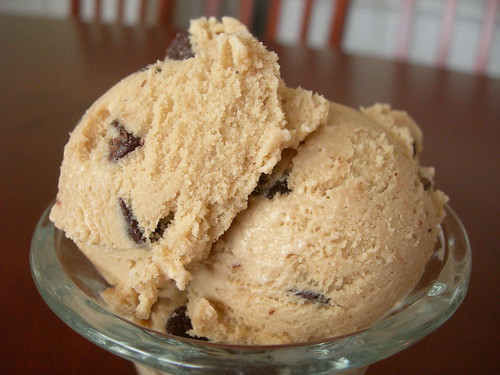
I have mentioned Perfect Scoop by David Lebovitz before, but when I saw his recipe for Vietnamese Iced Coffee Ice Cream, I felt like I had stumbled across a kindred spirit. I adapted the recipe to make Jamaican Blue Mountain Coffee instead, and added chocolate chips. It used a different technique, and much of the dairy in the recipe is actually condensed milk, true to the original.
In all of my iced coffee experiments, I came across the recipe for cold-brewed iced coffee, in the New York Times, blogged about and photographed beautifully by Smitten Kitchen. Since I had all these coffees floating around, of course I had to try it!
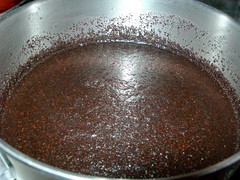
The mixture ahead of time does not look very encouraging. But you simply stir together ground coffee with water, let it sit on the counter covered for twelve hours (or more, as I discovered), and then strain it a few times. Voila - your own coffee concentrate. For true iced coffee, you would add ice and water to the cool concentrate, but I prefer to use milk, meaning soymilk, and 1-2 splenda packets. I feel like I have saved so much money that would normally go to Starbucks or local coffee shops by making my own iced coffee! I realize it isn't an iced latte, and this is not espresso, but if you have coffee that is high quality like the Jamaican Blue, or interesting enough in flavor like the coffee with chicory, you just can't go wrong.
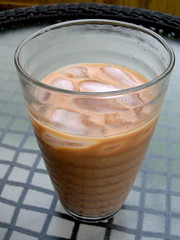
Now that we are headed into summer, if you give it a try, let me know what you think! Thanks to the NY Times and Smitten Kitchen for doing it first, and to David Lebovitz for his inspiring ice creams.
Categories: Coffee, Ice Cream
Monday, May 04, 2009
Roasted Strawberry Season
Strawberries are in season so much earlier in South Carolina than they were where I grew up in Oregon. I have actually missed it before, but not this year. This has been a great year for local berries, and I have been experimenting with new ideas and recipes.
Since I created a Twitter account just for baking, I have had a window into the daily lives of other bakers with Twitter accounts. When @glamah of Coco Cooks posted that she was roasting strawberries, I eagerly asked for the method, which she gracefully shared.
It is a simple method, but I just hadn't ever thought of roasting strawberries. She hulls them, sprinkles with sugar, drizzles with balsamic, tosses the berries and cooks until soft and carmelized. Balsamic and strawberries, if you haven't ever tried it, has this amazing result of not tasting vinegary but bringing out the flavor of the strawberry even more. Of the various toppings I'd prepared for crepes, this was by far the best.

I liked the flavor so much that when I made Nick Malgieri's Lemon Ginger Pound Cake (from The Modern Baker), I knew it deserved an awesome sauce. My youngest sister is always adding the word sauce at the end of various words, so as a tribute to her, the roasted strawberries mashed up became known as Awesomesauce. The cake by itself was flavorful, and the strawberry was a lovely pairing with the lemon and ginger. I brought it in for my student workers and anyone else passing through the music library, because it is finals week and sugar is essential.
Categories: Cake, Crepes, Ginger, Lemon, Strawberry
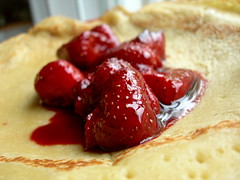
Since I created a Twitter account just for baking, I have had a window into the daily lives of other bakers with Twitter accounts. When @glamah of Coco Cooks posted that she was roasting strawberries, I eagerly asked for the method, which she gracefully shared.
It is a simple method, but I just hadn't ever thought of roasting strawberries. She hulls them, sprinkles with sugar, drizzles with balsamic, tosses the berries and cooks until soft and carmelized. Balsamic and strawberries, if you haven't ever tried it, has this amazing result of not tasting vinegary but bringing out the flavor of the strawberry even more. Of the various toppings I'd prepared for crepes, this was by far the best.
I liked the flavor so much that when I made Nick Malgieri's Lemon Ginger Pound Cake (from The Modern Baker), I knew it deserved an awesome sauce. My youngest sister is always adding the word sauce at the end of various words, so as a tribute to her, the roasted strawberries mashed up became known as Awesomesauce. The cake by itself was flavorful, and the strawberry was a lovely pairing with the lemon and ginger. I brought it in for my student workers and anyone else passing through the music library, because it is finals week and sugar is essential.
Categories: Cake, Crepes, Ginger, Lemon, Strawberry
Monday, April 27, 2009
Daring Bakers Challenge April 2009 - Cheesecake Centerpiece
The April 2009 challenge is hosted by Jenny from Jenny Bakes. She has chosen Abbey's Infamous Cheesecake as the challenge.
Oh wait, that's me. That's right! For the past month, I have been willing hostess to the bunch of bakers known as The Daring Bakers, consisting of over 1,000 bakers all over the world who unite once a month to make the same recipe. I know we all made Cheesecake Pops last April, but I wanted to pick a recipe that people could take and really make their own, letting the creativity flow. And wow, have they ever. If you want to see for yourself, head over to The Daring Kitchen and click on the blog roll. I've seen everything from people making their own cream cheese to vegemite cheesecake. And what did the vegans do? You need to check it out.
The recipe I pick comes from my friend Abbey T. who loves to bake. I called it "Abbey's Infamous Cheesecake," and the grammar police think it should be "Abbey's Famous Cheesecake," or "Infamous Abbey's Cheesecake." Whatever you want to call it, the basic recipe alone is to die for - I have never had a creamier cheesecake! But the instructions to the group were to do whatever they wanted with it, as long as the basic recipe was followed. And if they felt secure in their cheesecake making, to focus on really making their dessert look beautiful, like a centerpiece.
Of course, by needing to taste the recipe ahead of time, I've been making cheesecake for two months. Some were more successful than others, and my co-workers don't seem sick of cheesecake yet, but I'm ready to move onto something else for a while. Ha!
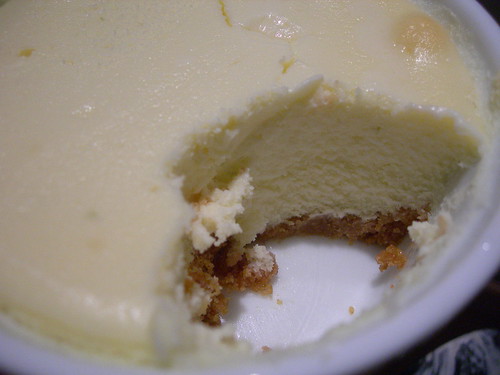
Here is the recipe. I would say that it can be made without a water bath, but if you take the trouble, it is even creamier, and completely worth the effort.
Abbey's Infamous Cheesecake:
crust:
2 cups / 180 g graham cracker crumbs
1 stick / 4 oz butter, melted
2 tbsp. / 24 g sugar
1 tsp. vanilla extract
cheesecake:
3 sticks of cream cheese, 8 oz each (total of 24 oz) room temperature
1 cup / 210 g sugar
3 large eggs
1 cup / 8 oz heavy cream
1 tbsp. lemon juice
1 tbsp. vanilla extract (or the innards of a vanilla bean)
1 tbsp liqueur, optional, but choose what will work well with your cheesecake
DIRECTIONS:
1. Preheat oven to 350 degrees F (Gas Mark 4 = 180C = Moderate heat). Begin to boil a large pot of water for the water bath.
2. Mix together the crust ingredients and press into your preferred pan. You can press the crust just into the bottom, or up the sides of the pan too - baker's choice. Set crust aside.
3. Combine cream cheese and sugar in the bowl of a stand-mixer (or in a large bowl if using a hand-mixer) and cream together until smooth. Add eggs, one at a time, fully incorporating each before adding the next. Make sure to scrape down the bowl in between each egg. Add heavy cream, vanilla, lemon juice, and alcohol and blend until smooth and creamy.
4. Pour batter into prepared crust and tap the pan on the counter a few times to bring all air bubbles to the surface. Place pan into a larger pan and pour boiling water into the larger pan until halfway up the side of the cheesecake pan. If cheesecake pan is not airtight, cover bottom securely with foil before adding water.
5. Bake 45 to 55 minutes, until it is almost done - this can be hard to judge, but you're looking for the cake to hold together, but still have a lot of jiggle to it in the center. You don't want it to be completely firm at this stage. Close the oven door, turn the heat off, and let rest in the cooling oven for one hour. This lets the cake finish cooking and cool down gently enough so that it won't crack on the top. After one hour, remove cheesecake from oven and lift carefully out of water bath. Let it finish cooling on the counter, and then cover and put in the fridge to chill. Once fully chilled, it is ready to serve.
Pan note: The creator of this recipe used to use a springform pan, but no matter how well she wrapped the thing in tin foil, water would always seep in and make the crust soggy. Now she uses one of those 1-use foil "casserole" shaped pans from the grocery store. They're 8 or 9 inches wide and really deep, and best of all, water-tight. When it comes time to serve, just cut the foil away.
Prep notes: While the actual making of this cheesecake is a minimal time commitment, it does need to bake for almost an hour, cool in the oven for an hour, and chill overnight before it is served. Please plan accordingly!
Some variations from the recipe creator ("Infamous" Abbey):
** Lavender-scented cheesecake w/ blueberries - heat the cup of heavy cream in the microwave or a saucepan until hot but not boiling. Add 2 tbsp of lavender flowers and stir. Let lavender steep in the cream for about 10-15 minutes, then strain the flowers out. Add strained cream to cheesecake batter as normal. Top with fresh blueberries, or make a quick stovetop blueberry sauce (splash of orange juice, blueberries, a little bit of sugar, and a dash of cinnamon - cook until berries burst, then cool)
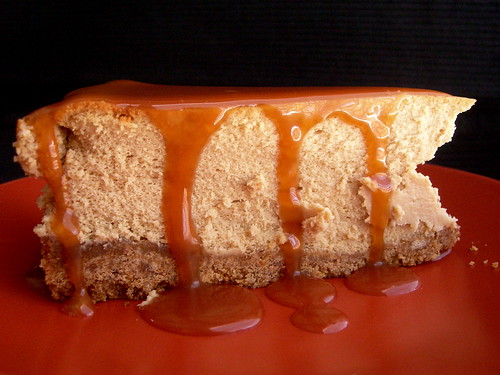
** Cafe au lait cheesecake with caramel - take 1/4 cup of the heavy cream and heat it in the microwave for a short amount of time until very hot. Add 1-2 tbsp. instant espresso or instant coffee; stir to dissolve. Add this to the remainder of cream and use as normal. Top cheesecake with homemade caramel sauce (I usually find one on the food network website - just make sure it has heavy cream in it. You can use store-bought in a pinch, but the flavor is just not the same since its usually just sugar and corn syrup with no dairy).
** Tropical – add about a half cup of chopped macadamias to the crust, then top the cake with a mango-raspberry-mandarin orange puree.
** Mexican Turtle - add a bar of melted dark chocolate (between 3 and 5 oz., to taste) to the batter, along with a teaspoon of cinnamon and a dash of cayenne pepper (about 1/8 tsp.). Top it with pecan halves and a homemade caramel sauce.
** Honey-cinnamon with port-pomegranate poached pears – replace 1/2 cup of the sugar with 1/2 cup of honey, add about a teaspoon or more (to taste) of cinnamon. Take 2 pears (any variety you like or whatever is in season), peeled and cored, and poach them in a boiling poaching liquid of port wine, pomegranate juice/seeds, a couple of "coins" of fresh ginger, a cinnamon stick, and about a 1/4 cup of sugar. Poach them until tender, then let cool. Strain the poaching liquid and simmer until reduced to a syrupy-glaze consistency, then cool. Thinly slice the cooled pears and fan them out atop the cooled cheesecake. Pour the cooled poaching syrup over the pears, then sprinkle the top with chopped walnuts and fresh pomegranate seeds.
Some variations from Jenny (from JennyBakes):
**Key lime - add zest from one lime to sugar before mixing with cream cheese. Substitute lemon juice, alcohol, and vanilla with key lime juice.
**Cheesecakelets - put in muffin tins, ramekins, or custard cups. Try baking 20-35 minutes, or until still a little jiggly, and cool as before.
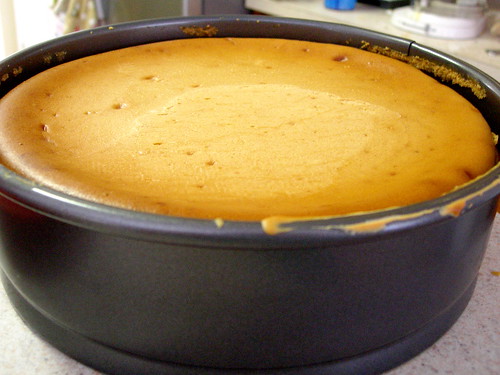
During my two months of cheesecake baking, my favorite version was the coffee cheesecake with caramel sauce (the first one in this post). A close second were the key lime cheesecakelets baked in ramekins (so creamy!). The Mexican chocolate cheesecake that I made just wasn't chocolatey enough for me, and then I had two moments of cheesecake fail. The first happened when I replaced the graham cracker crumbs with Oreos (which have a lot more fat in them) and it spewed all over the bottom of my oven and smoked up my house. The second was this idea that was brilliant in conception but not so great in practice - the Smores Spectacular Cheesecake. I actually ended up throwing it away. But I'm definitely going to file away what worked well for everyone else and pull this recipe out the next time I need something to bring to a party!
A huge thanks to Abbey T., and a heartfelt applause to the many Daring Bakers out there, whether this was your first cheesecake or one thousandth. You all made hosting this challenge a blast!
ETA: P.S. For those of you who tweet, I added a second Twitter account just for my baking. Now I can tweet about my thoughts on recipes or ideas, and not just blog once a week!
Categories: Caramel, Cheesecake, Chocolate, Coffee, Daring Bakers, Lime, Raspberry
Oh wait, that's me. That's right! For the past month, I have been willing hostess to the bunch of bakers known as The Daring Bakers, consisting of over 1,000 bakers all over the world who unite once a month to make the same recipe. I know we all made Cheesecake Pops last April, but I wanted to pick a recipe that people could take and really make their own, letting the creativity flow. And wow, have they ever. If you want to see for yourself, head over to The Daring Kitchen and click on the blog roll. I've seen everything from people making their own cream cheese to vegemite cheesecake. And what did the vegans do? You need to check it out.
The recipe I pick comes from my friend Abbey T. who loves to bake. I called it "Abbey's Infamous Cheesecake," and the grammar police think it should be "Abbey's Famous Cheesecake," or "Infamous Abbey's Cheesecake." Whatever you want to call it, the basic recipe alone is to die for - I have never had a creamier cheesecake! But the instructions to the group were to do whatever they wanted with it, as long as the basic recipe was followed. And if they felt secure in their cheesecake making, to focus on really making their dessert look beautiful, like a centerpiece.
Of course, by needing to taste the recipe ahead of time, I've been making cheesecake for two months. Some were more successful than others, and my co-workers don't seem sick of cheesecake yet, but I'm ready to move onto something else for a while. Ha!
Here is the recipe. I would say that it can be made without a water bath, but if you take the trouble, it is even creamier, and completely worth the effort.
Abbey's Infamous Cheesecake:
crust:
2 cups / 180 g graham cracker crumbs
1 stick / 4 oz butter, melted
2 tbsp. / 24 g sugar
1 tsp. vanilla extract
cheesecake:
3 sticks of cream cheese, 8 oz each (total of 24 oz) room temperature
1 cup / 210 g sugar
3 large eggs
1 cup / 8 oz heavy cream
1 tbsp. lemon juice
1 tbsp. vanilla extract (or the innards of a vanilla bean)
1 tbsp liqueur, optional, but choose what will work well with your cheesecake
DIRECTIONS:
1. Preheat oven to 350 degrees F (Gas Mark 4 = 180C = Moderate heat). Begin to boil a large pot of water for the water bath.
2. Mix together the crust ingredients and press into your preferred pan. You can press the crust just into the bottom, or up the sides of the pan too - baker's choice. Set crust aside.
3. Combine cream cheese and sugar in the bowl of a stand-mixer (or in a large bowl if using a hand-mixer) and cream together until smooth. Add eggs, one at a time, fully incorporating each before adding the next. Make sure to scrape down the bowl in between each egg. Add heavy cream, vanilla, lemon juice, and alcohol and blend until smooth and creamy.
4. Pour batter into prepared crust and tap the pan on the counter a few times to bring all air bubbles to the surface. Place pan into a larger pan and pour boiling water into the larger pan until halfway up the side of the cheesecake pan. If cheesecake pan is not airtight, cover bottom securely with foil before adding water.
5. Bake 45 to 55 minutes, until it is almost done - this can be hard to judge, but you're looking for the cake to hold together, but still have a lot of jiggle to it in the center. You don't want it to be completely firm at this stage. Close the oven door, turn the heat off, and let rest in the cooling oven for one hour. This lets the cake finish cooking and cool down gently enough so that it won't crack on the top. After one hour, remove cheesecake from oven and lift carefully out of water bath. Let it finish cooling on the counter, and then cover and put in the fridge to chill. Once fully chilled, it is ready to serve.
Pan note: The creator of this recipe used to use a springform pan, but no matter how well she wrapped the thing in tin foil, water would always seep in and make the crust soggy. Now she uses one of those 1-use foil "casserole" shaped pans from the grocery store. They're 8 or 9 inches wide and really deep, and best of all, water-tight. When it comes time to serve, just cut the foil away.
Prep notes: While the actual making of this cheesecake is a minimal time commitment, it does need to bake for almost an hour, cool in the oven for an hour, and chill overnight before it is served. Please plan accordingly!
Some variations from the recipe creator ("Infamous" Abbey):
** Lavender-scented cheesecake w/ blueberries - heat the cup of heavy cream in the microwave or a saucepan until hot but not boiling. Add 2 tbsp of lavender flowers and stir. Let lavender steep in the cream for about 10-15 minutes, then strain the flowers out. Add strained cream to cheesecake batter as normal. Top with fresh blueberries, or make a quick stovetop blueberry sauce (splash of orange juice, blueberries, a little bit of sugar, and a dash of cinnamon - cook until berries burst, then cool)
** Cafe au lait cheesecake with caramel - take 1/4 cup of the heavy cream and heat it in the microwave for a short amount of time until very hot. Add 1-2 tbsp. instant espresso or instant coffee; stir to dissolve. Add this to the remainder of cream and use as normal. Top cheesecake with homemade caramel sauce (I usually find one on the food network website - just make sure it has heavy cream in it. You can use store-bought in a pinch, but the flavor is just not the same since its usually just sugar and corn syrup with no dairy).
** Tropical – add about a half cup of chopped macadamias to the crust, then top the cake with a mango-raspberry-mandarin orange puree.
** Mexican Turtle - add a bar of melted dark chocolate (between 3 and 5 oz., to taste) to the batter, along with a teaspoon of cinnamon and a dash of cayenne pepper (about 1/8 tsp.). Top it with pecan halves and a homemade caramel sauce.
** Honey-cinnamon with port-pomegranate poached pears – replace 1/2 cup of the sugar with 1/2 cup of honey, add about a teaspoon or more (to taste) of cinnamon. Take 2 pears (any variety you like or whatever is in season), peeled and cored, and poach them in a boiling poaching liquid of port wine, pomegranate juice/seeds, a couple of "coins" of fresh ginger, a cinnamon stick, and about a 1/4 cup of sugar. Poach them until tender, then let cool. Strain the poaching liquid and simmer until reduced to a syrupy-glaze consistency, then cool. Thinly slice the cooled pears and fan them out atop the cooled cheesecake. Pour the cooled poaching syrup over the pears, then sprinkle the top with chopped walnuts and fresh pomegranate seeds.
Some variations from Jenny (from JennyBakes):
**Key lime - add zest from one lime to sugar before mixing with cream cheese. Substitute lemon juice, alcohol, and vanilla with key lime juice.
**Cheesecakelets - put in muffin tins, ramekins, or custard cups. Try baking 20-35 minutes, or until still a little jiggly, and cool as before.
During my two months of cheesecake baking, my favorite version was the coffee cheesecake with caramel sauce (the first one in this post). A close second were the key lime cheesecakelets baked in ramekins (so creamy!). The Mexican chocolate cheesecake that I made just wasn't chocolatey enough for me, and then I had two moments of cheesecake fail. The first happened when I replaced the graham cracker crumbs with Oreos (which have a lot more fat in them) and it spewed all over the bottom of my oven and smoked up my house. The second was this idea that was brilliant in conception but not so great in practice - the Smores Spectacular Cheesecake. I actually ended up throwing it away. But I'm definitely going to file away what worked well for everyone else and pull this recipe out the next time I need something to bring to a party!
A huge thanks to Abbey T., and a heartfelt applause to the many Daring Bakers out there, whether this was your first cheesecake or one thousandth. You all made hosting this challenge a blast!
ETA: P.S. For those of you who tweet, I added a second Twitter account just for my baking. Now I can tweet about my thoughts on recipes or ideas, and not just blog once a week!
Categories: Caramel, Cheesecake, Chocolate, Coffee, Daring Bakers, Lime, Raspberry
Sunday, April 19, 2009
Strawberry Rhubarb Crisp
On our way back from Asheville yesterday, I was shocked to see local strawberries already for sale. Where I grew up, strawberry season was early to mid June, and the long growing season here in South Carolina leaves a smile on my face. (Can you see it? I'm still grinning).
These particular strawberries didn't travel as far as the ones I buy in the grocery store - they were from Strawberry Hill U.S.A., where I've been just to buy strawberries in the past. We buy a lot of local produce from a place north of Travelers Rest called the Cider House. It is open year round, seven days a week, offering local produce, other food (canned goods and cider line the walls, and the fridge is full of Happy Cow products!), and boiled peanuts. It is easy to buy local when you have such great options! These are the "Sweet Charlie" variety.
I was going to make a strawberry rhubarb pie. Boring, perhaps, or at least typical, but I've never made that particular type. But I was looking for something where we could enjoy the deliciousness at breakfast instead. A fruit crisp has breakfast-like elements to it - fresh fruit, oats, nuts, even orange juice! So I was happily able to justify serving it for the first meal of our day.
The recipe comes from the March 2005 issue of Bon Appetit Magazine, and can be accessed on Epicurious.com. It is nicely accented with spices - cardamom and nutmeg - making it atypical and delicious.
My ramekins appear a little shrunken, but I didn't want them boiling over, and they were pretty full when they went into the oven. It seems like you could easily vary the ratio of rhubarb to strawberry, but I liked the way the recipe had it.
Categories: Crisp, Rhubarb, Strawberry
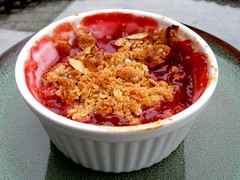
These particular strawberries didn't travel as far as the ones I buy in the grocery store - they were from Strawberry Hill U.S.A., where I've been just to buy strawberries in the past. We buy a lot of local produce from a place north of Travelers Rest called the Cider House. It is open year round, seven days a week, offering local produce, other food (canned goods and cider line the walls, and the fridge is full of Happy Cow products!), and boiled peanuts. It is easy to buy local when you have such great options! These are the "Sweet Charlie" variety.
I was going to make a strawberry rhubarb pie. Boring, perhaps, or at least typical, but I've never made that particular type. But I was looking for something where we could enjoy the deliciousness at breakfast instead. A fruit crisp has breakfast-like elements to it - fresh fruit, oats, nuts, even orange juice! So I was happily able to justify serving it for the first meal of our day.
The recipe comes from the March 2005 issue of Bon Appetit Magazine, and can be accessed on Epicurious.com. It is nicely accented with spices - cardamom and nutmeg - making it atypical and delicious.
My ramekins appear a little shrunken, but I didn't want them boiling over, and they were pretty full when they went into the oven. It seems like you could easily vary the ratio of rhubarb to strawberry, but I liked the way the recipe had it.
Categories: Crisp, Rhubarb, Strawberry
Sunday, April 12, 2009
Signs of Spring - Rhubarb Pecan Muffins
Seeing the first rhubarb of the season always makes me a bit giddy - spring! It is here! Soon to follow are the strawberries and peaches and apples, oh my.
The question always is, what can I do with rhubarb that I haven't already done? I was scouring through my tourist cookbook collection the other day (some people buy magnets, some buy shot glasses, I buy cookbooks!) for an oven-baked french toast recipe, and found that all the cookbooks from Black Hills, South Dakota, had multiple recipes for rhubarb muffins. I picked this one because it didn't have buttermilk like all the rest.
Rhubarb Pecan Muffins
from Black Hills Rosemalers Recipes, recipe credited to Jo Hoar and Engie Overweg
2 cups all purpose flour
3/4 cup sugar
1 1/2 tsp baking powder
1/2 tsp baking soda
1 tsp salt
3/4 cup chopped pecans
1 egg
1/4 cup vegetable oil
2 tsp grated orange peel
1 1/4 cups finely chopped rhubarb
3/4 cup orange juice
In a large mixing bowl, combine flour, sugar, baking powder, baking soda, salt, and nuts. In another bowl, combine egg, oil, orange peel, and orange juice. Add to dry ingredients all at once and stir just until moistened. Stir in rhubarb. Fill 12 lightly greased muffin cups almost to the top. Bake at 375 F. for 25-30 minutes.
The only change I made was to substitute brown sugar for the white, since I was out. They were delicious!
Welcome spring!
Categories: Muffins, Pecans, Rhubarb
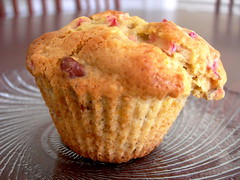
The question always is, what can I do with rhubarb that I haven't already done? I was scouring through my tourist cookbook collection the other day (some people buy magnets, some buy shot glasses, I buy cookbooks!) for an oven-baked french toast recipe, and found that all the cookbooks from Black Hills, South Dakota, had multiple recipes for rhubarb muffins. I picked this one because it didn't have buttermilk like all the rest.
Rhubarb Pecan Muffins
from Black Hills Rosemalers Recipes, recipe credited to Jo Hoar and Engie Overweg
2 cups all purpose flour
3/4 cup sugar
1 1/2 tsp baking powder
1/2 tsp baking soda
1 tsp salt
3/4 cup chopped pecans
1 egg
1/4 cup vegetable oil
2 tsp grated orange peel
1 1/4 cups finely chopped rhubarb
3/4 cup orange juice
In a large mixing bowl, combine flour, sugar, baking powder, baking soda, salt, and nuts. In another bowl, combine egg, oil, orange peel, and orange juice. Add to dry ingredients all at once and stir just until moistened. Stir in rhubarb. Fill 12 lightly greased muffin cups almost to the top. Bake at 375 F. for 25-30 minutes.
The only change I made was to substitute brown sugar for the white, since I was out. They were delicious!
Welcome spring!
Categories: Muffins, Pecans, Rhubarb
Tuesday, April 07, 2009
Cranky Cake
Sometimes, you just have to bake, to get it all out. I know I'm not the only one! I was having a bad morning, so I spent my lunch hour making this cake - the Orange-Glazed Almond Cake from the July 2006 issue of Vegetarian Times. I've had it sitting around begging to be made for almost two weeks now.
It is amazing what baking can do for your spirits, not even eating anything, just being able to pour energy into creation of something... anything. I used to deal with stress by playing the piano but until I get one of my own, baking is a great alternative.
I have come across several recipes lately depending on ground almonds, orange, and olive oil instead of butter. I want to make several different recipes to find which one I like best. This is a nice cake to have at the end of a heavier meal - it is light but full of flavor. The crunch of the ground almonds is throughout the cake, and the light spice of cinnamon blends nicely with the orange scent of the zest and orange syrup that gets poured over the cake after baking. It called for yogurt, so this time I used a Greek yogurt.
The recipe can be found here. It uses a lot of bowls and appliances, but is still really quick to make. This seems like a perfect summery cake, simple and flavorful.
Categories: Almond, Cake, Orange
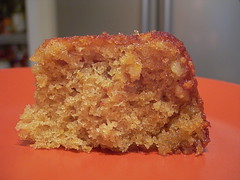
It is amazing what baking can do for your spirits, not even eating anything, just being able to pour energy into creation of something... anything. I used to deal with stress by playing the piano but until I get one of my own, baking is a great alternative.
I have come across several recipes lately depending on ground almonds, orange, and olive oil instead of butter. I want to make several different recipes to find which one I like best. This is a nice cake to have at the end of a heavier meal - it is light but full of flavor. The crunch of the ground almonds is throughout the cake, and the light spice of cinnamon blends nicely with the orange scent of the zest and orange syrup that gets poured over the cake after baking. It called for yogurt, so this time I used a Greek yogurt.
The recipe can be found here. It uses a lot of bowls and appliances, but is still really quick to make. This seems like a perfect summery cake, simple and flavorful.
Categories: Almond, Cake, Orange
Saturday, March 28, 2009
Twitter Brownies
I get recipes from all sorts of places. I recently signed up for Twitter, and one of the people I follow posted, "...Need stuff for dark choc cherry brownies and chocolate sauce. Wonder when liquor store opens-need kirsch." I had kirsch in my pantry, and was intrigued so I contacted her for the recipe.
It comes from Cooking Light, and there wasn't any kirsch in it, and while I think I have figured out that she put it in her chocolate sauce and possibly not her brownies, I decided to substitute the water for kirsch in this recipe. And whew, it was strong, but between the jam and alcohol you end up with a nice fruity flavor. But the texture and flavor of these, for a light brownie, definitely delicious.
The recipe can be found here, but I'll included it in the blog since I altered it a bit.
Twitter Brownies
* 3.4 ounces all-purpose flour (about 3/4 cup)
* 1 cup sugar
* 3/4 cup unsweetened cocoa
* 1 teaspoon baking powder
* 3/4 teaspoon salt
* 1/3 cup cherry preserves
* 1/3 cup kirsch, or water
* 5 tablespoons butter
* 1 large egg, lightly beaten
* 1 large egg white
* 1/3 cup semisweet chocolate chips
* Powdered sugar (optional)
Preparation
1. Preheat oven to 350°.
2. Line a 9-inch square baking pan with parchment paper; coat with cooking spray.
3. Weigh or lightly spoon flour into dry measuring cups; level with a knife. Combine flour, 1 cup sugar, unsweetened cocoa, baking powder, and salt in a large bowl; stir with a whisk. Combine cherry preserves, 1/3 cup water, and butter in a small saucepan; bring to a boil. Add preserves mixture to flour mixture; stir well. Add egg and egg white; stir until smooth. Stir in semisweet chocolate chips. Scrape batter into prepared pan. Bake at 350° for 25 minutes or until a wooden pick inserted in center comes out with a few moist crumbs. Cool in pan on wire rack. Garnish with powdered sugar, if desired.
I'm interested in following you if you are in Twitter. I have found a few bakers so far - CakeSpy, Baking Soda, and Ice Cream Guru David Lebovitz. For those of you who don't know, Twitter is one more social networking site where users update their status in 140 characters or less. Some of it can be pretty mundane, but others use it creatively. It is a fun way to follow famous people or friends in their daily lives. My account is the place I stick all the quotations I come across in books or music.
Categories: Baking light, Brownies, Chocolate, Cherry

It comes from Cooking Light, and there wasn't any kirsch in it, and while I think I have figured out that she put it in her chocolate sauce and possibly not her brownies, I decided to substitute the water for kirsch in this recipe. And whew, it was strong, but between the jam and alcohol you end up with a nice fruity flavor. But the texture and flavor of these, for a light brownie, definitely delicious.
The recipe can be found here, but I'll included it in the blog since I altered it a bit.
Twitter Brownies
* 3.4 ounces all-purpose flour (about 3/4 cup)
* 1 cup sugar
* 3/4 cup unsweetened cocoa
* 1 teaspoon baking powder
* 3/4 teaspoon salt
* 1/3 cup cherry preserves
* 1/3 cup kirsch, or water
* 5 tablespoons butter
* 1 large egg, lightly beaten
* 1 large egg white
* 1/3 cup semisweet chocolate chips
* Powdered sugar (optional)
Preparation
1. Preheat oven to 350°.
2. Line a 9-inch square baking pan with parchment paper; coat with cooking spray.
3. Weigh or lightly spoon flour into dry measuring cups; level with a knife. Combine flour, 1 cup sugar, unsweetened cocoa, baking powder, and salt in a large bowl; stir with a whisk. Combine cherry preserves, 1/3 cup water, and butter in a small saucepan; bring to a boil. Add preserves mixture to flour mixture; stir well. Add egg and egg white; stir until smooth. Stir in semisweet chocolate chips. Scrape batter into prepared pan. Bake at 350° for 25 minutes or until a wooden pick inserted in center comes out with a few moist crumbs. Cool in pan on wire rack. Garnish with powdered sugar, if desired.
I'm interested in following you if you are in Twitter. I have found a few bakers so far - CakeSpy, Baking Soda, and Ice Cream Guru David Lebovitz. For those of you who don't know, Twitter is one more social networking site where users update their status in 140 characters or less. Some of it can be pretty mundane, but others use it creatively. It is a fun way to follow famous people or friends in their daily lives. My account is the place I stick all the quotations I come across in books or music.
Categories: Baking light, Brownies, Chocolate, Cherry
Monday, March 16, 2009
Bakery Review - The Sisters McMullen Cupcake Corner
Most of the time when I pass by The Sisters McMullen in Asheville, NC, I manage to be around when it is closed. This past Friday I had the day off and as we wandered up the street from the Black Mountain College and Arts Center, I saw that it was open. The Sisters McMullen Cupcake Corner is a tiny spot, with just a few tables, but there are many baked treats, often including vegan options. It looks like there is a companion cupcake corner in Mars Hill, NC, but I have not personally experienced that shop.
Cupcakes are their specialty, but they had pastries, muffins, cookies, sandwiches, and hot drinks as well. I picked a vanilla latte cupcake. The cupcake itself was moist and slightly chewy on top (in a good way), and the buttercream tasted like the Italian kind - light, airy, and delicately sweet, not the powdered sugar or food coloring bonanza goo you often find. The guy behind the counter said that the bakers have creative freedom and are always coming up with new flavor combos for the cupcakes. That is what I love to hear, and I hope I manage to be back when they're open.
My suggestion - grab a cupcake to go, and walk down the street to the Double Decker Coffee Company for a Mayan hot chocolate and a great people watching spot from the upper level.
Categories: Bakery, Cupcake, Vegan
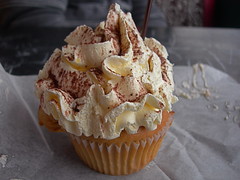
Cupcakes are their specialty, but they had pastries, muffins, cookies, sandwiches, and hot drinks as well. I picked a vanilla latte cupcake. The cupcake itself was moist and slightly chewy on top (in a good way), and the buttercream tasted like the Italian kind - light, airy, and delicately sweet, not the powdered sugar or food coloring bonanza goo you often find. The guy behind the counter said that the bakers have creative freedom and are always coming up with new flavor combos for the cupcakes. That is what I love to hear, and I hope I manage to be back when they're open.
My suggestion - grab a cupcake to go, and walk down the street to the Double Decker Coffee Company for a Mayan hot chocolate and a great people watching spot from the upper level.
Categories: Bakery, Cupcake, Vegan
Monday, March 09, 2009
Coffee Caramel Cheesecake
I have been experimenting with a cheesecake recipe from my friend Abbey. The possibilities are endless! The first one I tried was a coffee cheesecake with homemade caramel sauce. For the caramel sauce, I used a pretty simple one by Ina Garten, and it may be the first time in my life where a caramel recipe didn't completely destruct on me.
I'm not going to post the recipe for this cheesecake.... yet. Stay tuned. I may have another variation in the oven as we speak.
Categories: Caramel, Cheesecake, Coffee
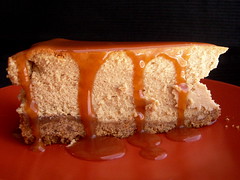
I'm not going to post the recipe for this cheesecake.... yet. Stay tuned. I may have another variation in the oven as we speak.
Categories: Caramel, Cheesecake, Coffee
Monday, March 02, 2009
Key Lime Yogurt Cake with Raspberry Coulis Ribbon
The danger in reading other blogs is constantly finding recipes that you want to try. When I saw this cake over at Culinary Concoctions by Peabody, I knew she had ensnared me once again into trying her recipe. This is an adaptation of an Ina Garten recipe, and I think it is probably the lemon one I've seen a million times. I wanted to try this so much I went out of my way to buy key lime juice, and raspberries in winter.
I consider myself an okay baker, but for some reason, quick breads evade me. I feel like they are always too dry, or get burned on the edges by the time the middle cooks. And while she is calling this a cake, I have deemed it a quick bread, because we ate it for breakfast in my house. This recipe is the farthest from dry that you can get. The batter starts out with yogurt and mascarpone cheese, and after it is baked you douse it with a syrup.
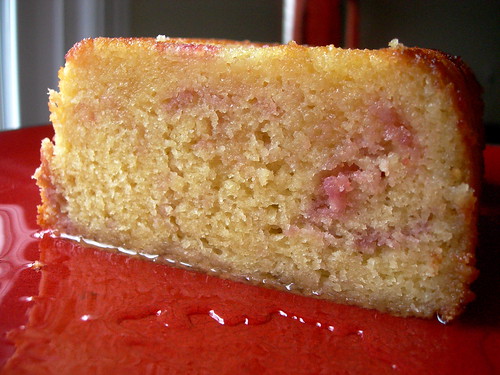
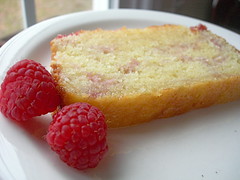
This results in a decadent, flavorful, moist breakfasty cake. The possibilities are wide open - I'm dying to try it with blood orange juice, or maybe meyer lemons. You can also see that my raspberry coulis made more of a patchwork pink pattern than a ribbon like hers, but it still tasted good. I also had neglected to buy limes at the store (although I remember looking at them and trying to remember why I needed them), so I added a bit of key lime juice to the batter as well. There was no shortage of lime here!
Please visit her blog for the recipe. You will NOT be disappointed.
Categories: Bread, Breakfast, Lime, Raspberry
I consider myself an okay baker, but for some reason, quick breads evade me. I feel like they are always too dry, or get burned on the edges by the time the middle cooks. And while she is calling this a cake, I have deemed it a quick bread, because we ate it for breakfast in my house. This recipe is the farthest from dry that you can get. The batter starts out with yogurt and mascarpone cheese, and after it is baked you douse it with a syrup.
This results in a decadent, flavorful, moist breakfasty cake. The possibilities are wide open - I'm dying to try it with blood orange juice, or maybe meyer lemons. You can also see that my raspberry coulis made more of a patchwork pink pattern than a ribbon like hers, but it still tasted good. I also had neglected to buy limes at the store (although I remember looking at them and trying to remember why I needed them), so I added a bit of key lime juice to the batter as well. There was no shortage of lime here!
Please visit her blog for the recipe. You will NOT be disappointed.
Categories: Bread, Breakfast, Lime, Raspberry
Saturday, February 28, 2009
Daring Bakers Challenge - Flourless Chocolate Cake with Deeply Chocolate Gelato
The February 2009 challenge is hosted by Wendy of WMPE's blog and Dharm of Dad ~ Baker & Chef. We have chosen a Chocolate Valentino cake by Chef Wan; a Vanilla Ice Cream recipe from Dharm and a Vanilla Ice Cream recipe from Wendy as the challenge.
I have made flourless chocolate cake before, and was excited that making ice cream would be part of this challenge. I am still not a master of ice cream. I don't know exactly what consistency I'm looking for when I transfer the mixture from the ice cream maker to the freezer for the solid-freeze. I feel like the mouth feel just isn't right. It almost ends up like a gummy texture, rather than smooth. I would welcome any pointers or reassurances!

I decided to make this for Valentines Day, and I wanted to make a decadent ice cream. I had watched Ina Garten make this deeply chocolate gelato and knew I had to try it. And wow, this is the richest, darkest, chocolate ice cream or gelato that I have ever had. It made the flourless chocolate cake seem mild, and it was actually incredibly rich itself. Both my husband and I went through multiple glasses of milk just to eat one slice of cake with a scoop or two of ice cream.

For the cake itself, the main part of the challenge, I used 4 oz of milk chocolate, 4 oz of bittersweet, and 8 oz of semisweet. It was still pretty dark. Since you don't add sugar to the recipe, the sweetness depends entirely on the taste of the chocolate. I think next time I would use half milk chocolate and half semisweet, perhaps.
Chocolate Valentino
Preparation Time: 20 minutes
16 ounces (1 pound) (454 grams) of semisweet chocolate, roughly chopped
½ cup (1 stick) plus 2 tablespoons (146 grams total) of unsalted butter
5 large eggs separated
1. Put chocolate and butter in a heatproof bowl and set over a pan of simmering water (the bottom of the bowl should not touch the water) and melt, stirring often.
2. While your chocolate butter mixture is cooling. Butter your pan and line with a parchment circle then butter the parchment.
3. Separate the egg yolks from the egg whites and put into two medium/large bowls.
4. Whip the egg whites in a medium/large grease free bowl until stiff peaks are formed (do not over-whip or the cake will be dry).
5. With the same beater beat the egg yolks together.
6. Add the egg yolks to the cooled chocolate.
7. Fold in 1/3 of the egg whites into the chocolate mixture and follow with remaining 2/3rds. Fold until no white remains without deflating the batter. {link of folding demonstration}
8. Pour batter into prepared pan, the batter should fill the pan 3/4 of the way full, and bake at 375F/190C
9. Bake for 25 minutes until an instant read thermometer reads 140F/60C.
Note – If you do not have an instant read thermometer, the top of the cake will look similar to a brownie and a cake tester will appear wet.
10. Cool cake on a rack for 10 minutes then unmold.
I was in a weird mood when I made this recipe, and decided to beat the egg whites by hand. Sometimes it is just fun to work hard for the end result.
On an unrelated note, is anyone on Twitter? I joined this week but am only using it as a place to stick random quotations from books I'm reading, or sometimes movies and songs. Still, if you ever wanted a trip inside the head behind jennybakes.com, there you go.
Categories: Cake, Chocolate, Daring Bakers, Gelato, Ice Cream
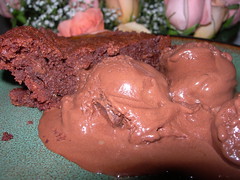
I have made flourless chocolate cake before, and was excited that making ice cream would be part of this challenge. I am still not a master of ice cream. I don't know exactly what consistency I'm looking for when I transfer the mixture from the ice cream maker to the freezer for the solid-freeze. I feel like the mouth feel just isn't right. It almost ends up like a gummy texture, rather than smooth. I would welcome any pointers or reassurances!
I decided to make this for Valentines Day, and I wanted to make a decadent ice cream. I had watched Ina Garten make this deeply chocolate gelato and knew I had to try it. And wow, this is the richest, darkest, chocolate ice cream or gelato that I have ever had. It made the flourless chocolate cake seem mild, and it was actually incredibly rich itself. Both my husband and I went through multiple glasses of milk just to eat one slice of cake with a scoop or two of ice cream.
For the cake itself, the main part of the challenge, I used 4 oz of milk chocolate, 4 oz of bittersweet, and 8 oz of semisweet. It was still pretty dark. Since you don't add sugar to the recipe, the sweetness depends entirely on the taste of the chocolate. I think next time I would use half milk chocolate and half semisweet, perhaps.
Chocolate Valentino
Preparation Time: 20 minutes
16 ounces (1 pound) (454 grams) of semisweet chocolate, roughly chopped
½ cup (1 stick) plus 2 tablespoons (146 grams total) of unsalted butter
5 large eggs separated
1. Put chocolate and butter in a heatproof bowl and set over a pan of simmering water (the bottom of the bowl should not touch the water) and melt, stirring often.
2. While your chocolate butter mixture is cooling. Butter your pan and line with a parchment circle then butter the parchment.
3. Separate the egg yolks from the egg whites and put into two medium/large bowls.
4. Whip the egg whites in a medium/large grease free bowl until stiff peaks are formed (do not over-whip or the cake will be dry).
5. With the same beater beat the egg yolks together.
6. Add the egg yolks to the cooled chocolate.
7. Fold in 1/3 of the egg whites into the chocolate mixture and follow with remaining 2/3rds. Fold until no white remains without deflating the batter. {link of folding demonstration}
8. Pour batter into prepared pan, the batter should fill the pan 3/4 of the way full, and bake at 375F/190C
9. Bake for 25 minutes until an instant read thermometer reads 140F/60C.
Note – If you do not have an instant read thermometer, the top of the cake will look similar to a brownie and a cake tester will appear wet.
10. Cool cake on a rack for 10 minutes then unmold.
I was in a weird mood when I made this recipe, and decided to beat the egg whites by hand. Sometimes it is just fun to work hard for the end result.
On an unrelated note, is anyone on Twitter? I joined this week but am only using it as a place to stick random quotations from books I'm reading, or sometimes movies and songs. Still, if you ever wanted a trip inside the head behind jennybakes.com, there you go.
Categories: Cake, Chocolate, Daring Bakers, Gelato, Ice Cream
Friday, February 20, 2009
Happy Pączki Day!
I just happened to be in Chicago the week before Lent, which to me meant that this year's culinary adventure during my conference had to be the pączki. There is actually a great Wikipedia entry on the pączki, including Chicago-specific information.
I am somewhat confused at when Pączki Day fell. Traditionally in Poland it is Fat Thursday, but since Americans have a lot of Fat Tuesday celebrations, in some cities here that becomes Pączki Day. It still seems like Chicago celebrated it yesterday, but Wikipedia does say that "Chicago celebrates both Fat Thursday and Fat Tuesday, due to its sizable Polish population." It made me laugh too. If you had pączki too often, sizable would definitely be the word.

Yesterday morning I set off for my culinary adventure by getting directions from Google Maps, because they have a walking and public transit version. As a result I walked 12 blocks including over the river in 18 degree weather instead of just getting on the train and transferring which is what I did on the way back. Well, once I got unlost. I ended up going across the river to the west instead of the north, which probably only makes sense if you know Chicago and are as directionally challenged as me, but I found my way back to the conference (an hour later than I'd planned!).
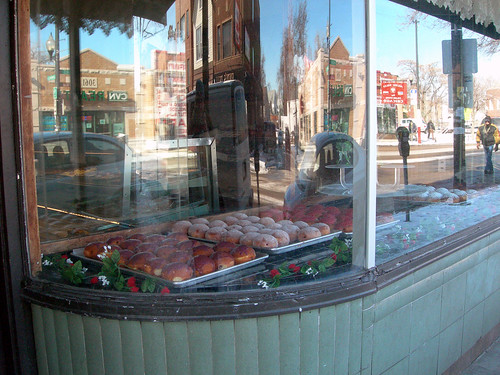
There are many places in Chicago to have a pączki, but I wanted to go to the Polish neighborhood to get something authentic! I'd had a jelly doughnut grocery store version some years back in Indiana, and while that was good enough to make me crave them when I moved to the south, I wondered if I wasn't getting the full experience.
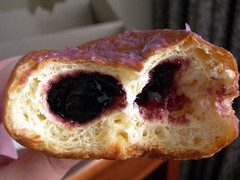
Inside the Pasieka Bakery, all the customers ahead of me spoke Polish. The women at the counter spoke Polish, and they asked me what I wanted in Polish. I think we can determine that is fairly authentic! They had a bunch of different kinds - rose, prune, blueberry, raspberry, custard, and apricot.
So what is the verdict? Are these "magical mystery doughnuts" worth a trek across town in the bleakest of winter? Of course for me, the adventure is sometimes the best part. But I would say they aren't just doughnuts. The bread is denser than usual doughnut fare, and the fillings are interesting. I was just happy to be back in the midwest when pączki were in season.
Categories: Bakery, Bread, Paczki
I am somewhat confused at when Pączki Day fell. Traditionally in Poland it is Fat Thursday, but since Americans have a lot of Fat Tuesday celebrations, in some cities here that becomes Pączki Day. It still seems like Chicago celebrated it yesterday, but Wikipedia does say that "Chicago celebrates both Fat Thursday and Fat Tuesday, due to its sizable Polish population." It made me laugh too. If you had pączki too often, sizable would definitely be the word.
Yesterday morning I set off for my culinary adventure by getting directions from Google Maps, because they have a walking and public transit version. As a result I walked 12 blocks including over the river in 18 degree weather instead of just getting on the train and transferring which is what I did on the way back. Well, once I got unlost. I ended up going across the river to the west instead of the north, which probably only makes sense if you know Chicago and are as directionally challenged as me, but I found my way back to the conference (an hour later than I'd planned!).
There are many places in Chicago to have a pączki, but I wanted to go to the Polish neighborhood to get something authentic! I'd had a jelly doughnut grocery store version some years back in Indiana, and while that was good enough to make me crave them when I moved to the south, I wondered if I wasn't getting the full experience.
Inside the Pasieka Bakery, all the customers ahead of me spoke Polish. The women at the counter spoke Polish, and they asked me what I wanted in Polish. I think we can determine that is fairly authentic! They had a bunch of different kinds - rose, prune, blueberry, raspberry, custard, and apricot.
So what is the verdict? Are these "magical mystery doughnuts" worth a trek across town in the bleakest of winter? Of course for me, the adventure is sometimes the best part. But I would say they aren't just doughnuts. The bread is denser than usual doughnut fare, and the fillings are interesting. I was just happy to be back in the midwest when pączki were in season.
Categories: Bakery, Bread, Paczki
Sunday, February 15, 2009
Praline Banana Bread
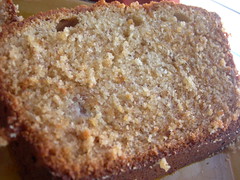
This recipe comes from combining several, crazy thoughts in my head, and things I needed to use (bananas and homemade praline). The praline made the bread sweet and a little crunchy, with more depth of flavor than banana bread alone.
Praline Banana Bread
1/2 cup unsalted butter, softened
1 cup sugar
2 large eggs
1 cup mashed banana (roughly 3 ripe ones)
1/4 cup sour cream
1 tsp vanilla
1 3/4 cup all-purpose flour
1 tsp baking powder
1/2 tsp baking soda
1/4 tsp salt
1 cup homemade praline*
Preheat oven to 350. Prepare a loaf pan.
Cream butter and sugar until well blended. Add eggs, banana, sour cream, and vanilla. Mix in flour, baking powder, baking soda, and salt, on low speed. Mix in praline.
Scrape batter into pan. Bake until bread springs back, about 55 minutes. Cool in pan 20 minutes, then remove from pan.
*If you don't want to make praline, try substituting toffee chips. Or just use regular old nuts for regular old banana bread.
Categories: Bananas, Bread, Praline
Praline Banana Bread
1/2 cup unsalted butter, softened
1 cup sugar
2 large eggs
1 cup mashed banana (roughly 3 ripe ones)
1/4 cup sour cream
1 tsp vanilla
1 3/4 cup all-purpose flour
1 tsp baking powder
1/2 tsp baking soda
1/4 tsp salt
1 cup homemade praline*
Preheat oven to 350. Prepare a loaf pan.
Cream butter and sugar until well blended. Add eggs, banana, sour cream, and vanilla. Mix in flour, baking powder, baking soda, and salt, on low speed. Mix in praline.
Scrape batter into pan. Bake until bread springs back, about 55 minutes. Cool in pan 20 minutes, then remove from pan.
*If you don't want to make praline, try substituting toffee chips. Or just use regular old nuts for regular old banana bread.
Categories: Bananas, Bread, Praline
Friday, February 13, 2009
Crunchy Cookies
I don't like crunchy cookies.
Both of the things I made for my student workers were crunchy. I thought maybe it was the recipe - too much flour? Or the weather - too dry? But I was told that some cookies are just crunchy.
Well, okay. But I don't have to like it.
These are both from A Passion for Baking by Marcy Goldman, a cookbook I find myself returning to again and again. The heart-shaped sandwich cookie is a Chocolate Ambivalence Cookie, meant to be sensitive to those who were more excited about Friday the 13th than Valentines Day. The other cookie is actually the recipe facing the first - Candy Bar Shortbread. Not too difficult, just make shortbread and sprinkle chopped up candy bars on top while it is still hot - I used Toblerone like suggested.
Categories: Chocolate, Cookies
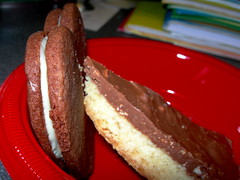
Both of the things I made for my student workers were crunchy. I thought maybe it was the recipe - too much flour? Or the weather - too dry? But I was told that some cookies are just crunchy.
Well, okay. But I don't have to like it.
These are both from A Passion for Baking by Marcy Goldman, a cookbook I find myself returning to again and again. The heart-shaped sandwich cookie is a Chocolate Ambivalence Cookie, meant to be sensitive to those who were more excited about Friday the 13th than Valentines Day. The other cookie is actually the recipe facing the first - Candy Bar Shortbread. Not too difficult, just make shortbread and sprinkle chopped up candy bars on top while it is still hot - I used Toblerone like suggested.
Categories: Chocolate, Cookies
Tuesday, February 03, 2009
Hazelnut Biscotti (Happy Birthday Mom!)
Today is my Mom's birthday. She lives far away from me, a forty-one hour drive to be exact, so I have to figure out ways to celebrate from afar. This year I sent her some coffee that is roasted locally that smelled exactly like an old favorite she used to drink, and decided I needed to bake something to send along with it.
Biscotti tend to be good travel cookies because they start out life crunchy, and will remain crunchy for a while. I still had hazelnuts left over from holiday baking, and came across the recipe for hazelnut biscotti in Baking with Julia, one of the cookbooks that gets the most use in my house. This is where the amazing hazelnut-skinning method that I mentioned in my last Yule Log post comes from.
It is more common for a mother to tell about the day of a child's birth, but the story of the day my Mom was born is a family legend, so I will retell it here. My Mom was born on a very cold day in February, and it was snowing. (She hates the snow). Her parents had just had the floors varnished, so her mother had to climb out the window to get to the hospital. I might have the details wrong, but it always makes me smile.
Hazelnut Biscotti
Makes about 4 dozen biscotti
2 cups water
3 tbsp baking soda
2/3 cup unblanched hazelnuts
1 2/3 cups all-purpose flour
1/2 tsp baking soda
1/4 tsp salt
2 large eggs
2 tsp hazelnut liqueur, such as Frangelico*
1 tsp pure vanilla extract
3/4 cup sugar
Center a rack in the oven and preheat the oven to 350 F.
To skin the hazelnuts, bring the water to a boil in a medium saucepan, add the baking soda and the nuts, and boil for 3-5 minutes, until the water turns black. To test if the skins have loosened sufficiently, drop a nut into a bowl of cold water and rub lightly against the skin - if the skin just slides off, the nuts are ready to go. Turn the nuts into a colander and run cold water over them. Slip off the skins, toss the nuts onto a towel, pat dry, and transfer to a jelly-roll pan.
Place the pan in the oven and toast the nuts, stirring occasionally, for about 15 minutes, or until evenly browned. The best way to test for total toastiness is to bite into a nut - it should be brown to the center. Remove the nuts from the oven and cool. Lower the oven temperature to 300 F.
When the nuts are cool enough to handle, coarsely chop them and set them aside.
Line a baking sheet with parchment paper and reserve until needed.
Put the flour, baking soda, and salt into a medium bowl and whisk just to blend.
In another bowl, whisk together the eggs, liqueur, vanilla, and sugar. Add the dry ingredients to the liquid and stir with a wooden spoon to mix. Add the nuts and continue to mix, just until well incorporated. (Since this dough is stiff, sticky, and hard to stir, you might find it easier just to reach in and mix it with your hands).
Flour your hands and lift half of the dough onto one side of the parchment-lined baking sheet. Pat and squeeze the dough into a chubby log 12-13 inches long. Don't worry about being neat or smoothing the dough - it will even out as much as it needs to in the oven. Repeat with the other half of the dough, leaving about 3 inches between the logs.
Bake the logs for exactly 35 minutes. Transfer the pan to a cooling rack and let cool for at least 10 minutes.
Using a serrated knife, cut the logs into 1/2-inch thick slices, cutting straight across or diagonally. (You can make the biscotti thinner or thicker, as you wish, and adjust the baking time accordingly.) Lay the biscotti on their sides on a cooling rack - you may need to use a second rack - then place the cooling rack in the 300 F oven, directly on an oven rack. (Baking the biscotti like this allows the oven's heat to circulate around the cookies, so there's no need to turn them over.)** The cookies may need to bake for as long as 15 minutes, but it's a good idea to start checking them after about 10 minutes. When the biscotti are golden brown, dry, and crisp, remove the cooling rack(s) from the oven. Let the cookies cool to room temperature before packing them for storage.
The cookies will keep in an airtight container for about a month.
*I just substituted with vanilla extract
**I baked them on a cookie sheet, and turned them over at 10 minutes.
Categories: Biscotti, Cookies, Hazelnuts
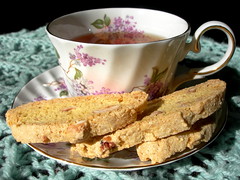
Biscotti tend to be good travel cookies because they start out life crunchy, and will remain crunchy for a while. I still had hazelnuts left over from holiday baking, and came across the recipe for hazelnut biscotti in Baking with Julia, one of the cookbooks that gets the most use in my house. This is where the amazing hazelnut-skinning method that I mentioned in my last Yule Log post comes from.
It is more common for a mother to tell about the day of a child's birth, but the story of the day my Mom was born is a family legend, so I will retell it here. My Mom was born on a very cold day in February, and it was snowing. (She hates the snow). Her parents had just had the floors varnished, so her mother had to climb out the window to get to the hospital. I might have the details wrong, but it always makes me smile.
Hazelnut Biscotti
Makes about 4 dozen biscotti
2 cups water
3 tbsp baking soda
2/3 cup unblanched hazelnuts
1 2/3 cups all-purpose flour
1/2 tsp baking soda
1/4 tsp salt
2 large eggs
2 tsp hazelnut liqueur, such as Frangelico*
1 tsp pure vanilla extract
3/4 cup sugar
Center a rack in the oven and preheat the oven to 350 F.
To skin the hazelnuts, bring the water to a boil in a medium saucepan, add the baking soda and the nuts, and boil for 3-5 minutes, until the water turns black. To test if the skins have loosened sufficiently, drop a nut into a bowl of cold water and rub lightly against the skin - if the skin just slides off, the nuts are ready to go. Turn the nuts into a colander and run cold water over them. Slip off the skins, toss the nuts onto a towel, pat dry, and transfer to a jelly-roll pan.
Place the pan in the oven and toast the nuts, stirring occasionally, for about 15 minutes, or until evenly browned. The best way to test for total toastiness is to bite into a nut - it should be brown to the center. Remove the nuts from the oven and cool. Lower the oven temperature to 300 F.
When the nuts are cool enough to handle, coarsely chop them and set them aside.
Line a baking sheet with parchment paper and reserve until needed.
Put the flour, baking soda, and salt into a medium bowl and whisk just to blend.
In another bowl, whisk together the eggs, liqueur, vanilla, and sugar. Add the dry ingredients to the liquid and stir with a wooden spoon to mix. Add the nuts and continue to mix, just until well incorporated. (Since this dough is stiff, sticky, and hard to stir, you might find it easier just to reach in and mix it with your hands).
Flour your hands and lift half of the dough onto one side of the parchment-lined baking sheet. Pat and squeeze the dough into a chubby log 12-13 inches long. Don't worry about being neat or smoothing the dough - it will even out as much as it needs to in the oven. Repeat with the other half of the dough, leaving about 3 inches between the logs.
Bake the logs for exactly 35 minutes. Transfer the pan to a cooling rack and let cool for at least 10 minutes.
Using a serrated knife, cut the logs into 1/2-inch thick slices, cutting straight across or diagonally. (You can make the biscotti thinner or thicker, as you wish, and adjust the baking time accordingly.) Lay the biscotti on their sides on a cooling rack - you may need to use a second rack - then place the cooling rack in the 300 F oven, directly on an oven rack. (Baking the biscotti like this allows the oven's heat to circulate around the cookies, so there's no need to turn them over.)** The cookies may need to bake for as long as 15 minutes, but it's a good idea to start checking them after about 10 minutes. When the biscotti are golden brown, dry, and crisp, remove the cooling rack(s) from the oven. Let the cookies cool to room temperature before packing them for storage.
The cookies will keep in an airtight container for about a month.
*I just substituted with vanilla extract
**I baked them on a cookie sheet, and turned them over at 10 minutes.
Categories: Biscotti, Cookies, Hazelnuts
Thursday, January 29, 2009
Daring Bakers January 2009 - Tuiles
This month's challenge is brought to us by Karen of Bake My Day and Zorra of 1x umruehren bitte aka Kochtopf. They have chosen Tuiles from The Chocolate Book by Angélique Schmeink and Nougatine and Chocolate Tuiles from Michel Roux. The savory option (tuiles/cornets) was from Thomas Keller's French Laundry Cookbook.
This was something I hadn't done before, and I have never had tuiles, just seen them in cookbooks. I decided to try two of the recipes and play around with shaping them.
If you want the recipes, please go to the blogs of the hostesses, listed above. Including them would make this entry far too long! There were two recipes I didn't try that I'm interested in doing in the future - nougatine and chocolate tuiles. I've seen some amazing versions of those already today!
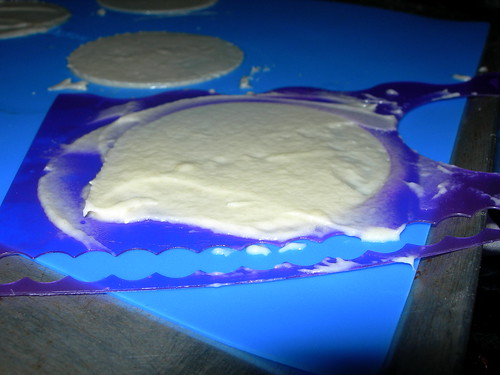
The first thing you have to figure out is the shape. I didn't want to make my own stencils, and found a huge pack of good ones in the scrapbooking section. I used a circle to make into cornets, and a palmetto for the sweet recipe.

I made the Thomas Keller recipe one night, and I was in a hurry because I wanted to bring them to book club. To speed things along, I softened the butter in the microwave and it went a little too far. As a result my cornets were never crunchy, just a little soft and greasy. Not what I would have hoped at all, but at the same time, I wasn't really sure what I was going for. They still look cute, and the mousse recipe was simple but tasty.

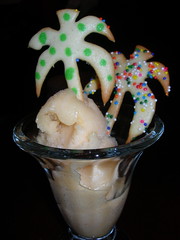
The sweet tuiles recipe from The Chocolate Book worked a lot better for two reasons - I let the butter soften on its own, and the step where I had to chill the dough for 30 minutes made for a much more even baking consistency. These were not greasy at all, but rather crisp and sweet. You can't really tell from the photos, but I did lay the palmettos over a rolling pin so they had some dimension to them. I served them with peach sorbet.
What do I think of tuiles, now that I've made two versions? I'd like to go back and make the savory version the right way. The recipe itself was simple but baking them takes a lot of time for the end result. I think I might make them again for a special occasion, because I like how you can make them into anything.
Categories: Cheese, Cookies, Daring Bakers
This was something I hadn't done before, and I have never had tuiles, just seen them in cookbooks. I decided to try two of the recipes and play around with shaping them.
If you want the recipes, please go to the blogs of the hostesses, listed above. Including them would make this entry far too long! There were two recipes I didn't try that I'm interested in doing in the future - nougatine and chocolate tuiles. I've seen some amazing versions of those already today!
The first thing you have to figure out is the shape. I didn't want to make my own stencils, and found a huge pack of good ones in the scrapbooking section. I used a circle to make into cornets, and a palmetto for the sweet recipe.
I made the Thomas Keller recipe one night, and I was in a hurry because I wanted to bring them to book club. To speed things along, I softened the butter in the microwave and it went a little too far. As a result my cornets were never crunchy, just a little soft and greasy. Not what I would have hoped at all, but at the same time, I wasn't really sure what I was going for. They still look cute, and the mousse recipe was simple but tasty.
The sweet tuiles recipe from The Chocolate Book worked a lot better for two reasons - I let the butter soften on its own, and the step where I had to chill the dough for 30 minutes made for a much more even baking consistency. These were not greasy at all, but rather crisp and sweet. You can't really tell from the photos, but I did lay the palmettos over a rolling pin so they had some dimension to them. I served them with peach sorbet.
What do I think of tuiles, now that I've made two versions? I'd like to go back and make the savory version the right way. The recipe itself was simple but baking them takes a lot of time for the end result. I think I might make them again for a special occasion, because I like how you can make them into anything.
Categories: Cheese, Cookies, Daring Bakers
Monday, January 19, 2009
Lemon Ricotta Pancakes
Sometimes I'll eat something at a restaurant and all I can think is "I could make it better." I know, I'm sure that makes me a joy to be around, but I try to keep it to myself.
We ordered lemon ricotta pancakes at the hotel we stayed at in Miami, much to the chagrin of the waiter who was trying everything in his power to get us to just order the breakfast buffet. He was rude, the pancakes took forever, and we had paid $16 for a big plate and three thin little wimpy pancakes with a tablespoonful of something vaguely fruity. We pushed the bad experience behind us, but I have had this nagging suspicion that they had just not done the concept of lemon ricotta pancakes justice!
I have had ricotta in my fridge for a few days, so this weekend I decided to make those pancakes that I knew could be better that what we had. I turned to one of my favorite food blogs, Smitten Kitchen, where she had made the same recipe that everyone across the internet seems to have made - the Lemon Ricotta Pancakes with Sauteed Apples from the September 1991 issue of Gourmet Magazine.
I didn't bother with the sauteed apples; we had leftover fruit syrup to use. These were light and fluffy and flavorful, no wimpy here. Not too sweet, but the lemon and ricotta allowed for a nice depth of flavor not found in pancakes-in-a-box.
Categories: Breakfast, Lemon, Pancakes, Ricotta
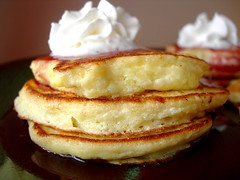
We ordered lemon ricotta pancakes at the hotel we stayed at in Miami, much to the chagrin of the waiter who was trying everything in his power to get us to just order the breakfast buffet. He was rude, the pancakes took forever, and we had paid $16 for a big plate and three thin little wimpy pancakes with a tablespoonful of something vaguely fruity. We pushed the bad experience behind us, but I have had this nagging suspicion that they had just not done the concept of lemon ricotta pancakes justice!
I have had ricotta in my fridge for a few days, so this weekend I decided to make those pancakes that I knew could be better that what we had. I turned to one of my favorite food blogs, Smitten Kitchen, where she had made the same recipe that everyone across the internet seems to have made - the Lemon Ricotta Pancakes with Sauteed Apples from the September 1991 issue of Gourmet Magazine.
I didn't bother with the sauteed apples; we had leftover fruit syrup to use. These were light and fluffy and flavorful, no wimpy here. Not too sweet, but the lemon and ricotta allowed for a nice depth of flavor not found in pancakes-in-a-box.
Categories: Breakfast, Lemon, Pancakes, Ricotta
Friday, January 16, 2009
Happy Birthday Elliott Carter
While I love to bake, in my day job I am a music librarian. I just put up a display featuring Elliott Carter, a composer who recently turned 100 years old and is still writing music! If you want to know more about him, there is a great summary of his life and work in the New York Times article about his birthday. I feel like his life is an example to all aspiring artists - although he mastered many things at a younger age, the first time he published an opera was at age 90!
At the music library, I decided that even without his presence, we could at least celebrate his birthday with cake. (Or I'd been wanting to try something from The Modern Baker, the newest cookbook by Nick Malgieri, one of my favorite bakers and baking teachers.)
I chose simple yellow cake layers. I paired them with a quick powdered sugar/butter/cocoa powder frosting, although Malgieri's Italian buttercream would have been much more decadent. The cake was lovely - dense, flavorful, and would have been lighter had I not overcooked it slightly. Guitar Hero and baking do not mix!
Making a cake from scratch is just about as simple as throwing the ingredients together necessary to use a mix, especially Malgieri's way. He experimented with separating the eggs and adding the whipped whites separately and found it made little difference, and adjusts the mixing time of other steps to aerate the dough. Any time a recipe makes something take one fewer bowl, I am not going to complain. You can tell it is not from a box the minute you slice into it and take a bite.
I'm going to put the recipe into this blog, but I think any of Malgieri's cookbooks are worth buying, so please do. They are always very well explained, and flawless. I have learned a lot over the years by watching him on Baking with Julia and Sara's Secrets.
Yellow Cake Layers
Makes two 9-inch (23-cm) round layers
1 3/4 cups all-purpose flour (spoon flour into a dry-measure cup and level off)
2 tsp baking powder
1/4 tsp salt
12 tablespoons (1 1/2 sticks) unsalted butter, softened
1 cup sugar
2 tsp vanilla extract
3 large eggs
1/3 cup milk or buttermilk*
1. Set a rack in the middle level of the oven and preheat to 350 F (180 C).
2. Combine the flour, baking powder, and salt. Stir well to mix.
3. Combine the butter, sugar, and vanilla in the bowl of an electric mixer. Beat with the paddle on medium speed until lightened in color and texture, 3-4 minutes.
4. Beat in the eggs, one at a time, mixing well after each addition.
5. Decrease the mixer speed to the lowest and add half of the flour mixture. Stop and scrape down the bowl and beater.
6. Beat in the milk and after it is absorbed, beat in the remaining flour mixture.
7. Stop and scrape the bowl and beater. Increase the speed to medium and beat the batter continuously for 3 minutes.
8. Divide the batter equally between the 2 prepared pans and smooth the tops. Bake the layers until they are well risen and deep golden, and feel firm when pressed in the center with a fingertip, 25-30 minutes.
9. Cool in the pans on racks for 5 minutes, then unmold, turn right side up again, and cool completely on racks.
Tips for serving and storing are in the cookbook. Buy it!
*I try to always use buttermilk when I can.
Categories: Cake, Chocolate
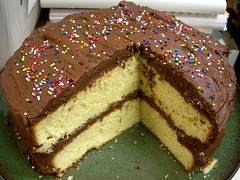
At the music library, I decided that even without his presence, we could at least celebrate his birthday with cake. (Or I'd been wanting to try something from The Modern Baker, the newest cookbook by Nick Malgieri, one of my favorite bakers and baking teachers.)
I chose simple yellow cake layers. I paired them with a quick powdered sugar/butter/cocoa powder frosting, although Malgieri's Italian buttercream would have been much more decadent. The cake was lovely - dense, flavorful, and would have been lighter had I not overcooked it slightly. Guitar Hero and baking do not mix!
Making a cake from scratch is just about as simple as throwing the ingredients together necessary to use a mix, especially Malgieri's way. He experimented with separating the eggs and adding the whipped whites separately and found it made little difference, and adjusts the mixing time of other steps to aerate the dough. Any time a recipe makes something take one fewer bowl, I am not going to complain. You can tell it is not from a box the minute you slice into it and take a bite.
I'm going to put the recipe into this blog, but I think any of Malgieri's cookbooks are worth buying, so please do. They are always very well explained, and flawless. I have learned a lot over the years by watching him on Baking with Julia and Sara's Secrets.
Yellow Cake Layers
Makes two 9-inch (23-cm) round layers
1 3/4 cups all-purpose flour (spoon flour into a dry-measure cup and level off)
2 tsp baking powder
1/4 tsp salt
12 tablespoons (1 1/2 sticks) unsalted butter, softened
1 cup sugar
2 tsp vanilla extract
3 large eggs
1/3 cup milk or buttermilk*
1. Set a rack in the middle level of the oven and preheat to 350 F (180 C).
2. Combine the flour, baking powder, and salt. Stir well to mix.
3. Combine the butter, sugar, and vanilla in the bowl of an electric mixer. Beat with the paddle on medium speed until lightened in color and texture, 3-4 minutes.
4. Beat in the eggs, one at a time, mixing well after each addition.
5. Decrease the mixer speed to the lowest and add half of the flour mixture. Stop and scrape down the bowl and beater.
6. Beat in the milk and after it is absorbed, beat in the remaining flour mixture.
7. Stop and scrape the bowl and beater. Increase the speed to medium and beat the batter continuously for 3 minutes.
8. Divide the batter equally between the 2 prepared pans and smooth the tops. Bake the layers until they are well risen and deep golden, and feel firm when pressed in the center with a fingertip, 25-30 minutes.
9. Cool in the pans on racks for 5 minutes, then unmold, turn right side up again, and cool completely on racks.
Tips for serving and storing are in the cookbook. Buy it!
*I try to always use buttermilk when I can.
Categories: Cake, Chocolate
Friday, January 09, 2009
Review - Tea at the Biltmore Inn
.jpg) Living an hour from Asheville means we live an hour from the Biltmore, "America's largest home!" My husband and I have been several times to see the house and grounds, and discovered that you can have afternoon tea at the inn. They serve you in the library, which overlooks the grounds, including a view of the Biltmore House. Our favorite time of year to go is autumn because the leaves are spectacular, but the holiday season is another great time to go. The tours of the house include live music, and the entire property is decorated for the holidays. The trees inside the house are all themed and memorable, although this year we didn't brave the crowds to see them.
Living an hour from Asheville means we live an hour from the Biltmore, "America's largest home!" My husband and I have been several times to see the house and grounds, and discovered that you can have afternoon tea at the inn. They serve you in the library, which overlooks the grounds, including a view of the Biltmore House. Our favorite time of year to go is autumn because the leaves are spectacular, but the holiday season is another great time to go. The tours of the house include live music, and the entire property is decorated for the holidays. The trees inside the house are all themed and memorable, although this year we didn't brave the crowds to see them. .jpg) |
| From December Holidays 2008 |
During the holidays, we had family here, and we all trekked up to the Biltmore Inn for tea. Something to know is that the best seats are given to couples, since the smallest tables are by the windows in the library, but larger groups will still have excellent service and a great atmosphere. Because of the holidays, there was a pianist entertaining us most of the time, which was nice.
 |
| From December Holidays 2008 |
Once you decide if you want tea with your tea, or if you want something a little stronger (there are options for Kir Royale or champagne), you can choose a tea from the box with little samples on each table. They offer teas from Mighty Leaf which is one of my favorite companies, and I tend to go with one of the more strongly flavored black teas, but they have a nice variety of herbal, black, and green. (That's my husband Nathaniel, pondering his tea selection. I'm sure he'll be thrilled I included that picture).
 |
| From December Holidays 2008 |
The afternoon tea comes with savory and sweet treats. Did I already recommend skipping both lunch and dinner the day you come for tea? It is a lot of food. The selections have been different every time I have gone, but this particular day the savory plate (vegetarian options only) included cucumber sandwich, butternut squash crostini, artichoke hummus, quince paste with brie, mushroom on baguette, and cranberry chutney. Everything was excellent and the flavors and textures were a nice contrast.
 |
| From December Holidays 2008 |
The sweet options included muffins, scones, chocolates, cookies, and mini tarts. Also on the table were clotted cream, strawberry jam, and lemon curd to spread on various things. This particular day the scones were raisin and the muffins were something like banana. The chocolates were delicious, but the tarts and cookies were somewhat mediocre.
One thing I want to make sure you understand - to get to tea at the Biltmore Inn, you need to either be staying as a guest at the inn or have a ticket to get in to see the house that day. I would recommend making plans for tea in the midst of spending the day there. We are season passholders this year, and hope to be able to get up there more often than we did before. If it seems too steep "just" for tea, Biltmore Village (a tiny town right outside the property) also has Chelsea's Tea Room which is excellent.
Subscribe to:
Posts (Atom)