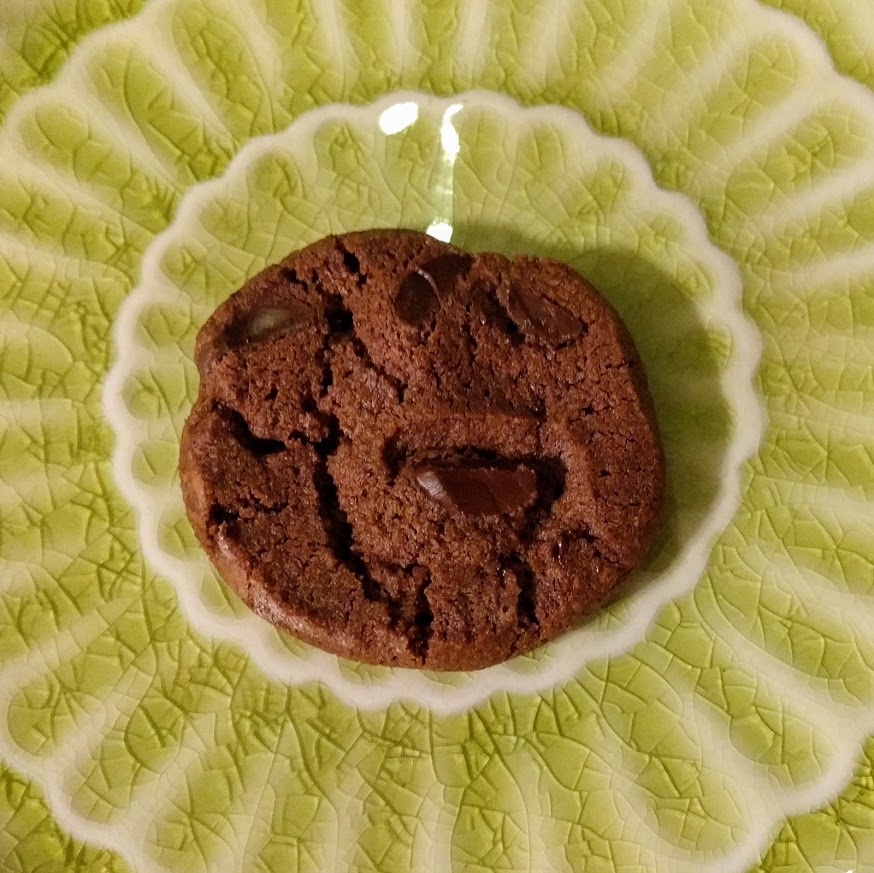
Monday, February 27, 2017

Version of Thin Mint Cookies (grain-free, low-carb)

It's Girl Scout Cookie time! This year the Girl Scouts are offering a gluten-free cookie for the first time, but at least my local scouts ran out of boxes. They still haven't really attempted a low-carb cookie, and might never. Never fear, there are recipes out there to try for people not consuming grain or sugar. I used a recipe from "All Day I Dream About Food" and adapted it slightly. You can see her original version here. My most significant change is not using a sugar substitute, but a lower-GI sugar. This is because of the tastes in my household!


Did I still buy a box of thin mints? Well yes. That is what you see on the left. My cookie is on the right. Pretty close! Without commercial chocolate drenching equipment it's not easy to get the glaze as thin as they get it, but who ever asked for less chocolate?

Here the two cookies are again, my version is on the bottom. You can see the almond flour makes a slightly larger grain, plus I did not bake these until crisp. There is less of a snap when you bite into it, but the chocolate still helps with that. Texture wise, I actually prefer my cookie!

When I made these I actually made a half batch, because this makes a lot! Especially when you consider that you are going to have to dip each one in chocolate, 40 is a lot of cookies. The full recipe is displayed below.

Thin Mint Cookies 
(adapted from All Day I Dream About Food) 

Ingredients
    Cookies:
  • 1 3/4 cups almond flour
  • 1/3 cup cocoa powder
  • 1/4 cup coconut sugar*
  • 1 tsp baking powder
  • 1/4 tsp salt
  • 1 large egg, slightly beaten
  • 2 tbsp butter, melted
  • 1/2 tsp vanilla extract 
  • 1/4 tsp peppermint extract**
  • Coating:
  • 1 tbsp coconut oil
  • 7 oz sugar-free chocolate chips such as Lily (Stevia-sweetened) OR 90% Lindt chocolate, chopped
  • 1/2 tsp peppermint extract
Instructions
    Cookies:
  1. Preheat the oven to 300F and line two baking sheets with parchment paper.
  2. In a large bowl, combine almond flour, cocoa powder, coconut sugar, baking powder and salt. Add in egg, butter, vanilla and peppermint extract and stir well until dough comes together.
  3. Roll out dough between two pieces of parchment paper to desired thickness (I rolled mine very thin, about 1/8 inch thick). Lift off top piece of parchment and set aside. Using a 2-inch diameter cookie cutter, cut out circles of dough and lift gently. Place cookies on prepared baking sheet. Gather up scraps of dough and reroll until too little is left to roll out.
  4. Bake cookies until desired texture. The original recipe says 30 minutes here but mine seemed done at 15, and I was afraid to burn them. Your mileage may vary but definitely check them at 15! Remove and let cool (they will continue to crisp up as they cool).
  5. Chocolate Coating:
  6. Place a metal bowl over a pot of gently simmering water, not allowing the bowl to touch the water. Melt coconut oil and chocolate together in the bowl, stirring until smooth. Remove from heat and stir in peppermint extract.
  7. Dip cookies into chocolate, using two forks to turn over and fully coat cookie. Gently pass chocolate-coated cookie back and forth between forks to remove excess chocolate, then place on waxed paper to cool and set. 
* As this recipe is, these are not at all a sweet cookie. I had missed that the original recipe had both powdered and liquid stevia. So there is room here for up to double this amount of coconut sugar.
** I know this does not seem like a lot but peppermint extract is very powerful in small doses and you do not want more than this. It will start to taste like medicine.

Monday, February 20, 2017

Raspberry Chocolate Chip Scones - two versions (regular and low-sugar, gluten-free)

Because I worked the Sunday shift last weekend, I stayed home on Tuesday, February 14, aka Valentines Day! I made myself a very Valentines-themed breakfast, one I wish I'd shared prior to the day since now it seems the wrong season. But I liked the (regular carby) scones so much that I made a low-sugar version this weekend. I thought I'd share both recipes.

The original breakfast, alongside Adagio's Ripe for Romance tea, which I actually bought last year (not a paid advertisement.)

I had leftover regular-sized semi-sweet chocolate chips so that's what I used in place of the chocolate from this original recipe. I also made a half-batch, which worked out pretty well although of course the moisture from the raspberries can be problematic. Perhaps make that amount a bit more scant, or use dried berries.


Raspberry Chocolate Tea Scones
(as seen on the Eggs on Sunday blog)


Ingredients
2 cups all-purpose flour
2 teaspoons baking powder
2 tablespoons sugar
4 tablespoons unsalted butter, chilled and chopped into small pieces
1 cup miniature chocolate chips or finely chopped chocolate
1 cup frozen raspberries, chopped (keep frozen until you’re ready to add them to the dough)
3/4 cup heavy cream
1 egg, separated
1 teaspoon vanilla extract

Directions
Preheat oven to 425 degrees and line a baking sheet with parchment or a silicone baking mat.
In a large bowl, whisk together the flour, baking powder, and sugar. Add the chopped cold butter and rub with your fingers into the flour until the bits of butter are roughly the size of peas. Stir in the chocolate chips/chunks.

Separate the egg; reserve the white for later use (you’ll use it to brush on the tops of the scones before baking.) In a separate bowl or liquid measuring cup, whisk together the cream, egg yolk, and vanilla extract.

Add the chopped frozen raspberries to the flour mixture. Pour in the cream, and using light, quick strokes, stir with a fork until just moistened (there may still be some flour on the bottom of the bowl.) Use your hands to gather the dough into a ball and knead it lightly a few times, just to gather it together. Don’t worry if there’s still a little flour remaining on the bottom of the bowl.

Turn the dough out onto a lightly floured work surface and divide into two balls. Gently flatten each ball into a 1-inch high disk, and cut each disk into 6 wedges (for 12 scones total.) Place on baking sheet and brush the tops with the reserved egg white; sprinkle with sugar.

Bake for about 12-15 minutes or until the tops are golden brown and scones are cooked through.


The lower-sugar gluten-free version is just a take one of my original low-sugar berry scone recipes from October 2015,  except I've started adding 1/2 cup tapioca flour (for a more tender texture). I used 1 cup frozen raspberries and added 1/2 cup mini stevia-sweetened chocolate chips. Those suckers are $8 a bag but if you only use 1/2 cup at most at a time, they can last a bit longer.

Monday, February 13, 2017

Government Cookies: Joe Froggers

A week ago, a co-worker emailed me with the subject line "government cookies." Apparently someone from GODORT went through and made a list of all the recipes they could find in the documents stored in the National Archives, and named their research guide, "Government Cookies." Many of them are historical, or serve a purpose like feeding 500 army men a peanut butter cookie for dessert. On the "molasses, honey, and other sweets" tab, I found the recipe for Joe Froggers, and I had all the ingredients. I didn't have plans for baked goods for Valentines Day, so the heart-shaped Joe Frogger was born!

The recipe links to the town of Marblehead, Massachusetts, which is the home of the Joe Frogger recipe. The Smithsonian dove deeper into the background of the cookie and posted it on their blog.

The rest of this information comes from the posted recipe, and I'm reposting it since most of the time USA government documents are considered in the public domain.

A Joe Frogger is a ginger cookie that dates back to Colonial times. Joe Froggers have been cherished by generations of residents of Marblehead, Massachusetts. The cookies were originally baked by a man known as Old Black Joe Brown and an Aunt Crese, who maintained a tavern on Gingerbread Hill. Because the cookies would keep for long periods of time, fishermen would take barrels of Joe Froggers along with them on their journeys.


Joe Frogger Cookies

3½ cups flour
1½ teaspoons salt
1½ teaspoons ground ginger
1 teaspoon baking soda
½ teaspoon ground cloves
½ teaspoon grated nutmeg
¼ teaspoon allspice
1 cup molasses
½ cup vegetable shortening
1 cup light brown sugar
2 tablespoons dark rum
1/3 cup hot water

Mix flour, salt, ginger, baking soda, cloves, nutmeg and allspice in a medium bowl. In a large bowl, beat together the molasses, shortening and brown sugar. Combine the hot water and rum.

Add the dry ingredients and the water/rum mixture alternately to the sugar/molasses mixture. (If the dough is dry, add a tablespoon or two of water.) Roll out the dough between two sheets of waxed paper until ¼ inch thick. Refrigerate at least two hours.

Preheat oven to 375 degrees F. Grease two baking sheets. Cut the dough into 3-inch cookies with a cookie cutter. (The original Joe Froggers were much larger. For the traditional size, use a coffee can.) Place on greased cookie sheets and bake for 10 – 12 minutes. (Longer for the traditional size.)

The cookies are baked when they are dark around the edges and firm in the centers. Set the cookie sheets on a rack to cool for five minutes. Remove to a rack to cool completely

Monday, February 06, 2017

Palestinian Warbat

A friend posted this recipe to Facebook the other day, with a sentiment along the lines of, "when times get hard, we need something sweet!" I have a few novels and memoirs by Palestinian writers that I'm planning to read soon, so the baked good fits in with my reading goals, just the way I like it!


I will link to the recipe I used, but you have to be a Facebook user to access it. Warbat is like a lot of Middle Eastern desserts, where every person making it seems to use a slightly different recipe and method. Some have a milk custard inside, some have pistachios and some don't, some fold the phyllo up like spanikopita (which would have helped keep the filling out), some (like me!) use orange blossom water instead of rose water, and so on. I watched quite a few videos on YouTube and it looks like most people making warbat are making four small triangles with the filling pointing into the center of a larger square; mine were quite large in comparison, a quarter of a phyllo sheet size.

Warbat also shares a very similar ingredient list to kunefe, a recipe which I've had associated with Turkish cooking lessons but never made any at home. Both recipes use an unsalted soft cheese. I was lucky to find the right kind at the Pita House in town, but you could substitute a unsalted white cheese from Mexico or Italy, or even try ricotta. I highly recommend the orange blossom over rose water, as far as my personal tastes go.

Warbat
(recipe transcribed from POP Palestine Cuisine in Facebook, with some alterations and additions)

Pre-made phyllo, thawed and kept under/inside damp towel.
Melted unsalted butter
300 mL water*
300 g sugar*
1/2 lemon
1 tsp orange blossom water
Soft white cheese, shredded or pulled apart
Additional granulated sugar to mix with the cheese

Over medium-high heat, stir together sugar and water. Heat until sugar dissolves and mixture is agitated or has started to boil. Add squeeze of lemon juice and orange blossom water, and allow to boil another 5 minutes, until mixture is clear and slightly thickened. Set aside to cool.

Preheat oven to 400 F. Line a pan with parchment paper, but use one with some type of edge in case the cheese squeezes out and the butter smokes on the bottom, which is what happened to me.

Lay one sheet of phyllo on a cutting board and brush with butter. Repeat with four more sheets. Cut into squares, depending on the size of the phyllo you will have 4 or 6. Sprinkle sugar over the cheese and mix. Mound cheese into the center of the square, and fold over, pressing the buttery parts together. Place on pan and brush with butter on the outside.

Bake 40 minutes or until browned. Pour or brush syrup over, and sprinkle with ground pistachios if desired.

Monday, January 30, 2017

Peanut Butter Banana Pupcakes (grain-free, cakes for dogs)

This weekend our boxer-shepherd mix, Doyle, turned 2. He has had some food sensitivities so I went looking for a recipe that would be easier, and landed on this one because it uses coconut flour. (I can't tell you how many times I saw a recipe that said "If your dog has a wheat allergy, use whole wheat!" Um NO that is still wheat!) Doyle and Winnie both liked these but I found it better if I broke them up into pieces before giving them to the dogs.


Peanut Butter Banana Pupcakes
(as seen on Mother Nature Network)


Yield: 12 cupcakes (Jenny's note: I made a half batch so ended up with 6)

Ingredients
For the cupcakes, followed by frosting ingredients that start with cream cheese
  • 1 cup unsalted, unsweetened peanut butter
  • 3 eggs
  • 2 bananas, mashed
  • 1/2 cup coconut flour
  • 1/4 cup cottage cheese
  • 3/4 tsp baking soda
  • 3/4 cup cream cheese
  • 1/2 cup unsalted, unsweetened peanut butter
  • 1 tbsp coconut oil
Cooking directions
  1. Preheat your oven to 350 degrees Fahrenheit.
  2. Grease a 12-cup muffin tin, or two 6-cup muffin tins, or line with paper muffin cups.
  3. In a large bowl, combine the peanut butter, eggs, bananas, and cottage cheese. Stir until well-combined. Add in the coconut flour and baking soda and stir until combined.
  4. Fill each muffin cup to about 3/4 full with the batter.
  5. Bake for 20-25 minutes, or until golden brown on top. While these are baking, begin making the frosting.
  6. In a small bowl combine the cream cheese, peanut butter and oil, and use a fork or a hand-mixer to cream together until smooth.
  7. Place in the fridge for 10 minutes to harden up again while the cupcakes finish baking.
  8. Remove the cupcakes from the oven and allow to cool on a wire rack.
  9. Ice the cooled cupcakes with the frosting mixture and serve!

Monday, January 23, 2017

Armenian Nazook

Back in 2012, when I was still baking along with the Daring Bakers challenges, I made an Armenian Nutmeg cake. The other option for that month was the nazook, an Armenian filled pastry. When my book club read Skylark Farm by Antonia Arslan, about the Armenian genocide, I intended to bake nazook for that gathering. But then I was somehow out of flour, and it snowed, and, yeah, that didn't happen.

But nazook remained in my head! And so eventually, I made it. The recipe comes from that month's host's aunt Aida, who you can see baking nazook on YouTube. I actually came across that recipe when searching for anything Armenian, before I made the connection back to the Daring Bakers original post!

I made the recipe as described, except I made a few filling variations. I used the butter-sugar-flour-vanilla filling in all of them, but 1/4 I made with that plus diced dried apricots, and half the dough I mixed finely chopped hazelnuts with the filling.

My dough was pretty dry... I think I should have followed my instincts and pulled it when it seemed to come together and not machine knead it the entire ten minutes. When will I learn? But these are still pretty decent despite an overworked dough, because the ratio of filling to dough is high. This is not a difficult recipe at all, and I can imagine many more filling variations!


Nazook

Yields 40 pieces
Video instructions by Jason's aunt Aida
Illustrated directions at the Daring Bakers website

Ingredients
Pastry dough
  • 3 cups (720 ml) (420 gm/15 oz) all-purpose (plain) flour, sifted
  • 2½ teaspoons (12½ ml) (7 gm) (¼ oz) (1 packet) active dry yeast
  • 1 cup (240 ml) (225 gm/8 oz) sour cream
  • 1 cup (2 sticks) (240 ml) (225 gm/8 oz) softened butter (room temperature)
Filling
  • 1 1/2 cups (360 ml) (210 gm) (7½ oz) all-purpose (plain) flour, sifted
  • 1 1/2 cups (360 ml) (340 gm/12 oz) sugar
  • 3/4 cup (1½ sticks) (180 ml) (170 gm/6 oz) softened butter (room temperature)
  • 2 teaspoons (10 ml) vanilla extract
Wash
  • 1-2 egg yolks (for the wash; alternatively, some yogurt, egg whites, or a whole egg)
Directions:
Make the Pastry Dough
1. Place the sifted flour into a large bowl.
2. Add the dry yeast, and mix it in.
3. Add the sour cream, and the softened butter.
4. Use your hands, or a standing mixer with a paddle attachment, to work it into a dough.
5. If using a standing mixer, switch to a dough hook. If making manually, continue to knead for about 10 minutes, or until the dough no longer sticks to the bowl or your hands. If it remains very sticky, add some flour, a little at a time.
6. Cover the dough and refrigerate for 3-5 hours, or overnight if you like.

Make the filling
7. Mix the flour, sugar, and the softened butter in a medium bowl.
8. Add the vanilla extract.
9. Mix the filling until it looks like clumpy, damp sand. It should not take long. Set aside.

Make the nazook
10. Preheat the oven to moderate 350°F/175°C/gas mark 4.
11. Cut the refrigerated dough into quarters.
12. Form one of the quarters into a ball. Dust your working surface with a little flour.
13. Roll out the dough into a large rectangle or oval. The dough should be thin, but not
transparent.
14. Spread 1/4 of the filling mixture across the rolled-out dough in an even layer. Try to spread the filling as close as possible to the edges on the short sides, but keep some of pastry dough uncovered (1 inch/2.5 cm) along the long edges.
15. From one of the long sides, start slowly rolling the dough across. Be careful to make sure the filling stays evenly distributed. Roll all the way across until you have a long, thin loaf.
16. Pat down the loaf with your palm and fingers so that it flattens out a bit (just a bit).
17. Apply your egg yolk wash with a pastry brush.
18. Use your crinkle cutter (or knife) to cut the loaf into 10 equally-sized pieces. Put onto an ungreased cookie sheet.
19. Place in a preheated moderate oven for about 30 minutes, until the tops are a rich, golden brown.
20. Allow to cool and enjoy!

Monday, January 16, 2017

Double Chocolate Almond Flour Brownies (gluten-free, grain-free)

This is a modified version of the recipe on the back of the gigantic bag of almond flour that I bought at Costco. It specifies 1/4 cup brown sugar and 1/4 cup granulated sugar, semisweet chocolate, and walnuts. I also used Stevia-sweetened chocolate chips. With a few more changes these could easily be made paleo-friendly as well, but we like our butter and chocolate chips.


Double Chocolate Almond Flour Brownies

4 oz bittersweet chocolate
1/2 cup (1 stick or 8 tbsp) butter, unsalted
1/2 cup coconut sugar
1 1/2 tsp vanilla extract
2 large eggs
1 1/2 cups almond flour
2/3 cup chocolate chips
1/2 cup chopped nuts (we used hazelnuts)

In a small saucepan over low heat, melt the chocolate and butter. Stir in sugar and vanilla and take off heat and cool (5-10 minutes is fine.) Beat in each egg, then stir in the almond flour, chocolate chips, and nuts. Spread into a parchment paper lined 8x8 pan. Bake at 350 for 30-35 minutes.


Monday, January 09, 2017

Hot Chocolate Marathon

I initially started out with the grand idea (not necessarily a new idea) to have 12 Days of Hot Chocolate in December. That turned out to be a crazy amount of sweetness so we went for every other day instead. Sometimes I post pictures to post with books I'm reading, so many of these are not solo hot chocolate pictures.

You can see the other recipes I was considering over on Pinterest, as well as some of the hot chocolate additions that are fun like Polar Bear marshmallows and frozen whipped cream shapes. One hot chocolate I really meant to make but never got around to is gingerbread hot chocolate, but once Christmas is over it just does not feel like gingerbread season anymore (says the baker who posted a gingerbread scone recipe in January.)

Icelandic Hot Chocolate

Considering my cold weather island obsession, it is not surprising that I would start with a self-declared recipe for Icelandic hot chocolate. The blogger had been to Iceland and discovered that they added a little bit of salt, and the recipe I'll link to is her interpretation of what she consumed gallons of while in that country. For our tastes, I added quite a bit more sugar and chocolate, so what is pictured (with chocolate sprinkles) is not exactly the recipe. It was our first night of hot chocolate, and we were hoping for richness.
Recipe: Icelandic Hot Chocolate


Orange Cardamom Hot Chocolate
This was hands-down our favorite hot chocolate. It was a surprising lead for multiple reasons - neither my husband nor I are big fans of white chocolate, and the green cardamom held potential to taste more like chai. Instead, this was sweet but not too sweet, fresh because of the orange, nuanced with the cardamom, and I ended up sad I only made a half batch, just enough to taste.

The recipe comes from a chart I randomly found in Pinterest that doesn't seem to link anywhere externally, although surely it originates from somewhere. I will copy the ingredients here so you can try it. Most of these hot chocolates, I just whisk together over medium-low heat until they are steamy but not boiling.

4 oz. white chocolate
2 cups milk
3-4 green cardamom pods, crushed
1 2-inch strip orange zest
1/2 tsp vanilla extract

The recipe actually instructs you to put the chocolate in a bowl, heat the other ingredients and strain into the hot chocolate, stirring until it is melted and smooth.


"Local" Hot Chocolate

Not so much a recipe as a bunch of local food producers' products - Happy Cow Creamery whole milk (delicious), Xocolatl Peppermint Drinking Chocolate, and Malvi Mallow Peppermint Marshmallow. Drink Local!


London Fog Hot Chocolate
 
I was reading a book set in London, and had been intrigued by this recipe, so I made this during one of the days I had off by myself. It seemed possibly too strange to be good, but I really liked it. If you don't know, a London Fog is an Earl Grey tea latte, often with vanilla flavoring too for some sweetness. I go through phases where I make tea lattes for myself, probably starting soon!  This was the richest of the recipes I made. First you steep earl grey in a mixture of milk and cream; I used my own Reading Envy tea blend because it has earl grey but also some black tea. Then you mix in some bittersweet chocolate. There is maple syrup in there too, although I didn't make the maple whipped cream that goes on top in the recipe. This is a great one for a blustery day or night and I will likely make it again.
Recipe: London Fog Hot Chocolate

Monday, January 02, 2017

Gingerbread Scones

We have a tradition in my household that we have "afternoon tea" as our primary meal on Christmas. It consists of any number of snacky type foods, sweets, savories, and usually a scone. This year I was looking at gingerbread scone recipes when my husband asked if we could have a gingerbread scone. Great minds! This was a good recipe, smelled delicious, just make sure not to overbake (I did a bit.)


Gingerbread Scones
(as seen on Serious Eats) 

Ingredients
For Scones:
  • 2 cups (10 ounces) all-purpose flour
  • 1/4 cup (1 3/4 ounces) plus 2 tablespoons packed light brown sugar
  • 2 teaspoons baking powder
  • 1 teaspoon ground ginger
  • 3/4 teaspoon ground cinnamon
  • 1/2 teaspoon salt
  • 1/4 teaspoon baking soda
  • 1/8 teaspoon ground cloves
  • 6 tablespoons (3 ounces) cold unsalted butter, cold
  • 1 large egg, separated, divided
  • 1/4 cup molasses
  • 5 tablespoons milk
  • 1 teaspoon granulated sugar (or sugar in the raw)
Optional Icing:
  • 1/2 cup (2 ounces) confectioners' sugar
  • 2 teaspoons milk
  1. Adjust oven rack to middle position and preheat to 375°F. Line baking sheet with parchment. Whisk flour, brown sugar, baking powder, ginger, cinnamon, salt, baking soda, and cloves in a large bowl to combine.
  2. Using pastry blender, cut in butter until mixture is fine and no pieces of butter remain. Add egg yolk, molasses, and milk to the bowl and then stir to form a thick dough (use hands if necessary to squeeze into a dough).
  3. Transfer dough to work surface and knead slightly to finish combining all of the ingredients. Roll into a 6-inch disc. Cut into 8 wedges and place on pan, spacing about 2 inches apart. Brush with egg white and sprinkle with granulated sugar.
  4. Bake until set, 17 to 19 minutes. Let cool on pan 5 minutes, then transfer to wire rack to cool completely before drizzling with icing.
  5. To make icing: Stir sugar with milk until smooth. If too runny to hold it's shape when drizzled, add a small amount of sugar to thicken. Using a pastry bag fitted with a small tip, or a spoon, drizzle icing over cooled scones. Let set in a cool dry space, about 30 minutes.

Monday, December 26, 2016

Fresh Pear Cake

When I was trying to decide what to make for my workplace's annual holiday luncheon, I had a hard time. I feel pressure to make a fantastic dessert and not to repeat myself, but I had already made Buche de Noel, stollen, gingerbread, Lemon Gingerbread Wonderland Cake, Cocoa Pomegranate Pavlova, and a striking Wintermint Cake.

I had pears in my head and that's the direction I pursued. I couldn't make a pear tart because my tart pan is missing its bottom, so I went looking for pear cakes. One recipe had a maple frosting; that sounded good. Another had a whipped brown sugar buttercream. I used that recipe but ran out of brown sugar before I got to the icing, and ended up making a cooked flour icing. I'm not sure what I think of that one so I'll just link to it (I've tasted good cooked flour icings so I'm guessing baker error!). If you want the brown sugar buttercream, please follow the link to the original pear cake recipe.


My co-workers seemed to enjoy this cake. I was worried it was too moist, because after making the pear puree I just dumped it all in rather than measuring. But the technique used with the pears makes the freshest pear flavor in the cake! I think I might like this better with a cream cheese icing, or that original maple idea, but the cake itself is worth trying for sure.

Fresh Pear Cake

6 ripe medium-sized pears (19 ounces, peeled and cored)*
3/4 cup brown sugar
3/4 cup granulated sugar
3 cups all-purpose flour
2 teaspoons baking soda
1 teaspoon cinnamon
1/2 teaspoon salt
1/4 teaspoon nutmeg
2 eggs
1/2 cup vegetable oil
1 teaspoon vanilla

  1. Peel and slice pears thin. Mix sliced pears with both sugars in a bowl. Let sit for one hour, then purée pear mixture in a food processor or blender.
  2. Preheat oven to 350F degrees. Line two 8-inch round cake pans with parchment paper, then grease with nonstick cooking spray.
  3. In a large mixing bowl, use a fork or whisk to stir flour, baking soda, cinnamon, salt and nutmeg together. Add pear purée, eggs, oil, and vanilla and stir just until combined.
  4. Pour batter into prepared pans and bake for 30-33 minutes or until a toothpick inserted in the center comes out with few crumbs attached. Cool in the pan for 10 minutes, then transfer cakes to a wire rack to cool completely.
Jenny's notes:
I used an immersion blender for the pear-sugar mixture.
I used 9-inch cake pans.
I wonder if pear nectar would have been a decent substitute for all the pear hassle, but can't recommend it yet!

Monday, December 19, 2016

Chocolate Tahini Cookies (gluten-free, paleo, grain-free)


Chocolate Tahini Cookies
(adapted from Salted Plains, which makes a vegan version)

Ingredients
  • 1 large egg
  • ½ cup tahini
  • ½ cup maple syrup
  • ¾ cup almond flour
  • ½ cup unsweetened cocoa powder
  • ¼ cup coconut sugar
  • ½ teaspoon baking powder
  • ½ teaspoon baking soda
  • ½ teaspoon salt
  • 1 teaspoon pure vanilla extract
  • ½ cup chocolate chips (I used Lily stevia-sweetened)
  • ¼-1/2 cup sesame seeds
Instructions
  1. Line a cookie sheet with parchment paper.
  2. In a large bowl, whisk tahini, maple syrup, vanilla extract, and egg together. Add almond flour, cocoa powder, coconut sugar, baking powder, baking soda, and salt. Stir until fully combined. Fold in chocolate chips. Cover bowl with plastic wrap and chill in refrigerator for at least 1 hour.
  3. Assembly: Preheat oven to 350 degrees Fahrenheit. Place the sesame seeds in a small bowl and sir to combine. Fill another small bowl with water. The cookie dough will be sticky, so spray your hands with cooking spray, then using a small spoon, scoop cookie dough and gently roll into a loose ball with your hands. Dip or roll each ball into sesame mixture and place on cookie sheet. Dip a fork into the water and press down slightly vertically and then horizontally on top of ball. Rewet your fork each time. This is not to get a tines marking on your cookies, rather, it is to ensure they spread into a more even circle during baking.
  4. Bake for 10 to 12 minutes. Remove from oven and wait a minute or two before transferring cookies to a wire rack.

Monday, December 12, 2016

Dorie Greenspan's World Peace Cookies

I've seen this recipe floating around and when it made the cover of Dorie's Cookies, I just had to try it. I decided these cookies would be perfect for holiday gifts to co-workers and friends, based on the year we have all had!


This recipe comes from Dorie Greenspan's website, and I'm only copying it here for your convenience (see her site for recipe tips.) Please buy one of her cookbooks! They are the staple of every baker's bookshelf.

World Peace Cookies

Makes about 36 cookies
1 1/4 cups (170 grams) all-purpose flour
1/3 cup (28 grams) unsweetened cocoa powder
1/2 teaspoon baking soda
1 stick plus 3 tablespoons (11 tablespoons; 5 1/2 ounces; 155 grams) unsalted butter, cut into chunks, at room temperature
2/3 cup (134 grams) packed light brown sugar
1/4 cup (50 grams) sugar
1/2 teaspoon fleur de sel or 1/4 teaspoon fine sea salt
1 teaspoon pure vanilla extract
5 ounces (142 grams) best-quality bittersweet chocolate, chopped into irregular sized bits

  1. Sift the flour, cocoa and baking soda together.
  2. Working with a stand mixer fitted with the paddle attachment, or in a large bowl with a hand mixer, beat the butter and both sugars together on medium speed until soft, creamy and homogenous, about 3 minutes. Beat in the salt and vanilla. Turn off the mixer, add all the dry ingredients and pulse a few times to start the blending. When the risk of flying flour has passed, turn the mixer to low and beat until the dough forms big, moist curds. Toss in the chocolate pieces and mix to incorporate. This is an unpredictable dough. Sometimes it’s crumbly and sometimes it comes together and cleans the sides of the bowl. Happily, no matter what, the cookies are always great.
  3. Turn the dough out onto a work surface and gather it together, kneading it if necessary to bring it together. Divide the dough in half. Shape the dough into logs that are 11/2 inches in diameter. Don’t worry about the length — get the diameter right, and the length will follow. (If you get a hollow in the logs, just start over.) Wrap the logs in plastic wrap and freeze them for at least 2 hours or refrigerate them for at least 3 hours.
  4. When you’re ready to bake: Center a rack in the oven and preheat it to 325 degrees F. Line two baking sheets with parchment paper or silicone baking mats.
  5. Working with one log at a time and using a long, sharp knife, slice the dough into 1/2-inch-thick rounds. (The rounds might crack as you’re cutting them — don’t be concerned, just squeeze the bits back onto each cookie.) Arrange the rounds on the baking sheets, leaving about 2 inches between them. (If you’ve cut both logs, keep one baking sheet in the fridge while you bake the other.)
  6. Bake the cookies for 12 minutes — don’t open the oven, just let them bake. When the timer rings, they won’t look done, nor will they be firm, and that’s just the way they should be. Transfer the baking sheet to a cooling rack and let the cookies rest until they are only just warm, at which point you can munch them, or let them reach room temperature (I think the texture’s more interesting at room temperature).
  7. Bake the remaining dough.


Monday, December 05, 2016

Pumpkin Tiramisu

Most years for Thanksgiving, we pick a theme. Since the meal is vegetarian, a theme can be more fun than having an obviously turkeyless spread. This year, Nathaniel requested Italian food. I had fun looking at traditional fall ingredients as used in Italian dishes. The final menu was pretty simple - Limoncello mixed drink, Tuscan-style roasted carrots, mushroom and radicchio lasagna, and pumpkin tiramisu for dessert.

There are several recipes floating around for pumpkin tiramisu. Some use gingersnaps. One used gelatin which is not typically in traditional tiramisu (and is not vegetarian!) I went with one that seemed like it just added pumpkin to the traditional mascarpone and used the Italian cookie amaretti as part of the crunchy parts. It comes from a company that makes ladyfingers, so I followed the recipe exactly.


Pumpkin Tiramisu
(from Delallo.com)

INGREDIENTS
  • 1 1/2 cups whipping cream
  • 1 1/2 cups sugar
  • 1 (8-ounce) container mascarpone cheese
  • 1 (15-ounce) can pure pumpkin
  • 1 teaspoon pumpkin pie spice
  • 1/4 cup amaretto
  • About 25 ladyfingers
  • 6 ounces amaretti cookies, crumbled
DIRECTIONS
  1. Beat cream and sugar until stiff peaks form. Combine with mascarpone, pumpkin and spices and beat until smooth.
  2. In a small, shallow dish, pour amaretto. Dip each ladyfinger before arranging along the bottom of a 13- by 9-inch baking dish, overlapping to fit. Spread one-third of filling atop ladyfingers, evenly sprinkle with one-third amaretti cookies and repeat for two more layers.
  3. Smooth top of dessert and wrap tightly in plastic and foil. Refrigerate. Best when chilled overnight.

Monday, November 28, 2016

Chocolate-Pumpkin Swirl Bread

I don't watch the Food Network or Cooking Channel much anymore; I pretty much stopped when they stopped putting chefs on and started filling it with reality tv and competitions. But every once in a while I'll watch shows like Brunch with Bobby, which is where I got this recipe. I made it to bring to work the few days we all had to work before Thanksgiving break. It was delicious! Bobby also makes a marmalade butter to go on this, but that didn't sound good to me. It was rich enough as is.


Chocolate-Pumpkin Swirl Bread
(Recipe from FoodNetwork.com) 

Butter or nonstick cooking spray, for the pan
1 3/4 cups all-purpose flour
1 teaspoon baking soda
1 teaspoon pumpkin pie spice
1/2 teaspoon baking powder
1/2 teaspoon fine salt
1 1/2 cups granulated sugar
1/2 cup vegetable oil
2 large eggs
1 cup canned pumpkin puree
1 teaspoon vanilla extract
3 ounces semisweet chocolate, melted and cooled

Preheat the oven to 350 degrees F. Brush a 9-by-5-inch loaf pan with butter, or spray with nonstick spray; set aside.

Combine the flour, baking soda, pumpkin pie spice, baking powder and fine salt in a medium bowl.

Place the sugar and oil in the bowl of a stand mixer fitted with the paddle attachment and beat on medium-high speed until well combined (it'll look like wet sand), about 1 minute.

Turn the mixer to medium speed and add the eggs, one at a time, beating well after each addition. Reduce the speed to low, add the pumpkin puree and vanilla extract, and mix until just combined, about 30 seconds. Stop the mixer and scrape down the sides of the bowl and the paddle. Add the flour mixture, and mix until just combined.

Remove the bowl from the mixer and drizzle the melted chocolate evenly over the batter.

Using a rubber spatula, fold the chocolate into the batter until it's just swirled in. (Be careful not to fully incorporate the chocolate into the batter--you want a marbled effect.)

Pour the batter into the prepared loaf pan and spread it into an even layer. Bake until the bread is browned on top and a toothpick inserted into the center comes out with a few moist crumbs attached, 50 to 60 minutes. Let cool in the pan on a wire rack for 10 minutes. Remove from pan and let cool another 10 minutes before slicing.
 

Monday, November 21, 2016

Nutmeg-Maple Cream Pie

I once made this for Thanksgiving but it never had its day in the sun. This pie deserves it! The ingredients are few and the steps are simple, so this is the pie for your best crust and quality maple syrup. Please do not substitute pancake syrup with imitation maple. It will not function in the right way.


Nutmeg-Maple Cream Pie
(recipe from the New York Times)

Ingredients:
  • ¾ cup maple syrup
  • 2 ¼ cups heavy cream
  • 4 egg yolks
  • 1 whole egg
  • ¼ teaspoon salt
  • 1 teaspoon freshly grated nutmeg
  • 1 teaspoon vanilla extract
  • 1 pre-baked 9-inch pie crust
  1. Preheat oven to 300 degrees. In a medium saucepan over medium-high heat, reduce maple syrup by a quarter, 5 to 7 minutes. Stir in cream and bring to a simmer. Remove from heat.
  2. In a medium bowl, whisk together egg yolks and egg. Whisking constantly, slowly add cream mixture to eggs. Strain mixture through a fine-mesh sieve into a cup or bowl with pouring spout. Stir in salt, nutmeg and vanilla.
  3. Pour filling into crust and transfer to a rimmed baking sheet. Bake until pie is firm to touch but jiggles slightly when moved, about 1 hour. Let cool to room temperature before serving.
 

Sunday, November 20, 2016

Thanksgiving Menu Planning

Are you still trying to decide what to make for Thanksgiving? I thought I'd suggest a few favorites from over ten years on JennyBakes! This is not all my fall recipes ever, but a few select recommended recipes. I've already baked off one loaf of the cranberry nut bread to bring to a family!


Sweet Breakfasts
Pumpkin Cinnamon Chip Scones with Browned Butter Vanilla Glaze
Pumpkin Cinnamon Roll Pancakes
Pumpkin Cream Cheese Muffins

Quick Breads (for breakfast or gifts for hosts)
Cranberry Nut Bread
Gluten-free Paleo Cranberry Nut Muffins
Gluten-free Pumpkin Chocolate Chip Bread 
Pumpkin Spice Bread with Maple Cheesecake Layer

Rolls
Pumpkin Dinner Rolls 
 
Pies (since you can't have Thanksgiving without pie!)
Apple Praline Pie
Streusel-topped Apple Custard Pie

Other Desserts
Apple Cider Cream Pie
Apple Cream Cheese Bundt Cake with Praline Glaze
Apple Slab Pie
Cranberry Snacking Cake
Custardy Apple Squares
(My) Grandma's Apple Cake
Pumpkin Cheesecake
Pumpkin Praline Cake
Pumpkin Spice Latte Cake 
Salted Caramel Apple Crumb Bars 

Monday, November 14, 2016

Pumpkin Spice Latte Cake

I got the concept for this recipe from the Hungry Rabbit blog, which has interesting flavors and beautiful photography. As I thought about Ken's recipe, I decided to go with tried and true recipes I trust, and make a few tweaks based on his recipe.  (For instance I wanted a cake more tender than what happens with me and butter cakes, and I wanted something more silky than a cold powdered-sugar-based buttercream.) The end result is DIVINE. Even if you don't care for pumpkin spice lattes, you may still like this cake. It is definitely one of my top recipes of the year.


Pumpkin Spice Latte Cake

The pumpkin cake is the pumpkin praline cake recipe (minus the praline elements) from the Almost Home Restaurant, a place I used to make desserts for a while when I lived in Indiana. I made a few tweaks to the recipe to help the cake tie better to the buttercream.

Combine:
2 cups flour
2 tsp baking powder
2 tsp cinnamon
1/2 tsp freshly ground or grated nutmeg
1/4 tsp ground cloves
1 tsp instant espresso
1 tsp baking soda
1 tsp salt

In a separate bowl, beat:
4 eggs
1 cup vegetable oil
1 2/3 cup granulated sugar
1 tsp vanilla

Add to egg mixture alternately with dry ingredients:
2 cups canned pumpkin (not pumpkin pie mix)

Spoon into 2 9" round pans, prepared. Bake at 350 F for 40 minutes or until done. Let cool 10 minutes, invert pans, and allow to cool completely.

The coffee buttercream is a silky delicious recipe originally from Nick Malgieri, the usual recipe I make for my buche de noel. 

Coffee Buttercream

4 large egg whites
1 cup sugar
24 tablespoons (3 sticks or 1-1/2 cups) unsalted butter, softened
2 tablespoons instant espresso powder
2 tablespoons rum or brandy

Whisk the egg whites and sugar together in the bowl of an electric mixer. Set the bowl over simmering water and whisk gently until the sugar is dissolved and the egg whites are hot.

Attach the bowl to the mixer and whip with the whisk on medium speed until cooled (10-15 minutes.) Switch to the paddle and beat in the softened butter and continue beating until the buttercream is smooth. Dissolve the instant coffee in the liquor and beat into the buttercream.

If at any point the mixture appears curdled, keep beating! It will all come back together and be shiny and smooth.

Monday, November 07, 2016

Make America Cake Again: Historical Election Cake

I have had election cake marked to try ever since I was doing research on baked goods associated with each state. But in this election year, it seemed like the appropriate time. I don't often mix baking with politics, except for that time I was trying to start a trend to Take Back the Tea Party.

When I started poking around the internet again, I saw a surge in recent news stories and blog posts about Election Cake. NPR interviewed the two bakers from the OWL Bakery in Asheville, NC, who are leading the charge. Asheville is only an hour north of me, so I felt a greater kinship with their project.

That also helped me pick a recipe, too. The OWL version incorporates local ingredients and natural leavening. I will post their version with my own modifications below.

I found others on Serious Eats and What's Cooking America, all versions of the often cited original recipe. one that came before women had the right to vote, before baking powder, and in an era when voting was a party. Women would bake cakes and bring booze to coax the rich white landowner voting types to cast their ballots. Voting was more of a party and less of a drag. We need to bring back this feeling to voting day, in my humble opinion. It always feels like you aren't even supposed to speak in a normal voice in the precinct.

These days, lady voters like myself can make an election cake AND stand in line to vote. While the precinct is unlikely to have any alcohol or baked goods, I can provide a cake with a little booze in it to reward coworkers who have voted. Most of the alcohol should burn off in the baking, I think? Ha. (The raisins soaked in brandy and apple flavored Jim Bean overnight.)


Election Cake

Day 1 (Prepare Preferment)
Using Sourdough Starter:

240 ml whole milk ~70º F (280 g)
¼ cup active starter — 100% hydrated (75 g)
           2 ¼ cups All Purpose or whole wheat pastry flour (280 g)
OR

Using Instant Yeast:

275 ml milk ~70º F (320 g)
           ¼ tsp instant yeast (1 g)
           2 ¼ cups plus 2 Tbsp All Purpose or whole wheat pastry flour (320 g)
          
Combine milk and sourdough starter or yeast and mix thoroughly until starter or yeast is well dispersed in the milk mixture. Add flour and mix vigorously until the starter is consistent and smooth. Scrape the sides of your bowl and cover with a damp towel or plastic wrap. Allow your starter to ferment for 8-12 hours at room temperature. When ready to use, your preferment will have bubbles covering the surface.

Soak Dried Fruits

If you plan to use dried fruits in your cake, we recommend soaking them overnight, or for several days beforehand. Measure out your dried fruit and cover with your liquor or liquid of choice (for non-alcoholic options, try apple cider/juice, other fruit juices, or steeped teas) in a small sauce pot. Warm over low heat for a few minutes, remove from the heat, and allow to soak, covered, overnight or for several hours.

Before incorporating into your cake, strain the liquid off of the fruit. Use this fruit flavored liquid as a cordial or to make a simple glaze after the cake is baked.


Day 2 (Prepare Final Dough, Proof, and Bake)
          
1 cup unsalted butter (226 g)
¾ cup unrefined sugar (155 g)

2 eggs (100 g)
1/3 cup whole-milk yogurt  (85 g)
¼ cup sorghum or honey (60 g)
Preferment (560 / 635 g)

2 ¼ cups All Purpose or whole wheat pastry flour* (280 g)
2 Tbsp spice blend**  (12 g)
¼ tsp ground coriander (1 g)
¼ tsp ground black pepper (1 g)
2 tsp salt (12 g)

2 Tbsp sherry or another  - optional (30 g)
2 cups rehydrated fruit (300 g)
With a paddle attachment in a stand mixer, cream the butter very well, then add sugar, mixing until very light and fluffy. Add the eggs one at a time on medium speed. Mix in the sorghum/honey and yogurt.
Exchange the paddle with a dough hook. Add the preferment (starter or sponge) and mix until just incorporated. Combine all of the dry ingredients before adding them to liquid ingredients and mix until just incorporated, being careful not to over-mix. Gently fold in the sherry (optional) and rehydrated fruit.
Divide evenly into a bundt pan or cake rounds that have been buttered and lightly floured. OWL Bakery uses mini bundt pans, which yields 8-10 cakes. Proof for 2-4 hours, until the cake has risen by about ⅓ of its volume.
Bake at 375° F (190° C) for 10 minutes. Reduce oven temperature to 350° F (177° C) and continue baking for about 25-30 minutes, until a tester comes out clean. Cool completely before cutting and eating. You may enjoy this cake plain or topped with a simple glaze.
Notes:

*Choose high extraction flour if possible
**Create a spice mixture with warm spices like ground cinnamon, allspice, nutmeg, clove, star anise, or mace.  OWL Bakery’s house spice blend is a combination of 8 spices. 

Notes from JennyBakes:

I used sour cream instead of yogurt, because that's what I had. I used half molasses/half honey in place of the sorghum. My spice blend was cinnamon, cloves, nutmeg, and allspice. I rehydrated my raisins in brandy and apple Jim Beam, and had meant to add some chopped apple to the batter but once I got to that stage completely forgot!

My cake was pretty dry, more like a bread. I suspect this is largely baker error, because this is my first naturally leavened cake. I covered it with a lemon-powdered sugar glaze and will let it sit a few days before bringing it to work on Election Day.