Monday, December 26, 2016

Fresh Pear Cake

When I was trying to decide what to make for my workplace's annual holiday luncheon, I had a hard time. I feel pressure to make a fantastic dessert and not to repeat myself, but I had already made Buche de Noel, stollen, gingerbread, Lemon Gingerbread Wonderland Cake, Cocoa Pomegranate Pavlova, and a striking Wintermint Cake.

I had pears in my head and that's the direction I pursued. I couldn't make a pear tart because my tart pan is missing its bottom, so I went looking for pear cakes. One recipe had a maple frosting; that sounded good. Another had a whipped brown sugar buttercream. I used that recipe but ran out of brown sugar before I got to the icing, and ended up making a cooked flour icing. I'm not sure what I think of that one so I'll just link to it (I've tasted good cooked flour icings so I'm guessing baker error!). If you want the brown sugar buttercream, please follow the link to the original pear cake recipe.


My co-workers seemed to enjoy this cake. I was worried it was too moist, because after making the pear puree I just dumped it all in rather than measuring. But the technique used with the pears makes the freshest pear flavor in the cake! I think I might like this better with a cream cheese icing, or that original maple idea, but the cake itself is worth trying for sure.

Fresh Pear Cake

6 ripe medium-sized pears (19 ounces, peeled and cored)*
3/4 cup brown sugar
3/4 cup granulated sugar
3 cups all-purpose flour
2 teaspoons baking soda
1 teaspoon cinnamon
1/2 teaspoon salt
1/4 teaspoon nutmeg
2 eggs
1/2 cup vegetable oil
1 teaspoon vanilla

  1. Peel and slice pears thin. Mix sliced pears with both sugars in a bowl. Let sit for one hour, then purée pear mixture in a food processor or blender.
  2. Preheat oven to 350F degrees. Line two 8-inch round cake pans with parchment paper, then grease with nonstick cooking spray.
  3. In a large mixing bowl, use a fork or whisk to stir flour, baking soda, cinnamon, salt and nutmeg together. Add pear purée, eggs, oil, and vanilla and stir just until combined.
  4. Pour batter into prepared pans and bake for 30-33 minutes or until a toothpick inserted in the center comes out with few crumbs attached. Cool in the pan for 10 minutes, then transfer cakes to a wire rack to cool completely.
Jenny's notes:
I used an immersion blender for the pear-sugar mixture.
I used 9-inch cake pans.
I wonder if pear nectar would have been a decent substitute for all the pear hassle, but can't recommend it yet!

Monday, December 19, 2016

Chocolate Tahini Cookies (gluten-free, paleo, grain-free)


Chocolate Tahini Cookies
(adapted from Salted Plains, which makes a vegan version)

Ingredients
  • 1 large egg
  • ½ cup tahini
  • ½ cup maple syrup
  • ¾ cup almond flour
  • ½ cup unsweetened cocoa powder
  • ¼ cup coconut sugar
  • ½ teaspoon baking powder
  • ½ teaspoon baking soda
  • ½ teaspoon salt
  • 1 teaspoon pure vanilla extract
  • ½ cup chocolate chips (I used Lily stevia-sweetened)
  • ¼-1/2 cup sesame seeds
Instructions
  1. Line a cookie sheet with parchment paper.
  2. In a large bowl, whisk tahini, maple syrup, vanilla extract, and egg together. Add almond flour, cocoa powder, coconut sugar, baking powder, baking soda, and salt. Stir until fully combined. Fold in chocolate chips. Cover bowl with plastic wrap and chill in refrigerator for at least 1 hour.
  3. Assembly: Preheat oven to 350 degrees Fahrenheit. Place the sesame seeds in a small bowl and sir to combine. Fill another small bowl with water. The cookie dough will be sticky, so spray your hands with cooking spray, then using a small spoon, scoop cookie dough and gently roll into a loose ball with your hands. Dip or roll each ball into sesame mixture and place on cookie sheet. Dip a fork into the water and press down slightly vertically and then horizontally on top of ball. Rewet your fork each time. This is not to get a tines marking on your cookies, rather, it is to ensure they spread into a more even circle during baking.
  4. Bake for 10 to 12 minutes. Remove from oven and wait a minute or two before transferring cookies to a wire rack.

Monday, December 12, 2016

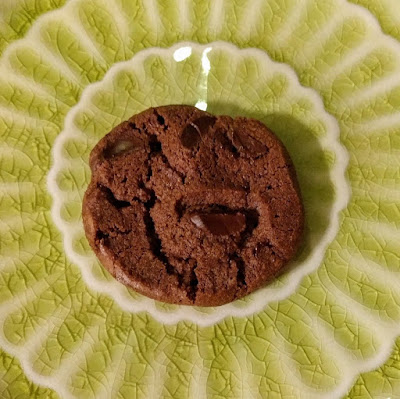
Dorie Greenspan's World Peace Cookies

I've seen this recipe floating around and when it made the cover of Dorie's Cookies, I just had to try it. I decided these cookies would be perfect for holiday gifts to co-workers and friends, based on the year we have all had!


This recipe comes from Dorie Greenspan's website, and I'm only copying it here for your convenience (see her site for recipe tips.) Please buy one of her cookbooks! They are the staple of every baker's bookshelf.

World Peace Cookies

Makes about 36 cookies
1 1/4 cups (170 grams) all-purpose flour
1/3 cup (28 grams) unsweetened cocoa powder
1/2 teaspoon baking soda
1 stick plus 3 tablespoons (11 tablespoons; 5 1/2 ounces; 155 grams) unsalted butter, cut into chunks, at room temperature
2/3 cup (134 grams) packed light brown sugar
1/4 cup (50 grams) sugar
1/2 teaspoon fleur de sel or 1/4 teaspoon fine sea salt
1 teaspoon pure vanilla extract
5 ounces (142 grams) best-quality bittersweet chocolate, chopped into irregular sized bits

  1. Sift the flour, cocoa and baking soda together.
  2. Working with a stand mixer fitted with the paddle attachment, or in a large bowl with a hand mixer, beat the butter and both sugars together on medium speed until soft, creamy and homogenous, about 3 minutes. Beat in the salt and vanilla. Turn off the mixer, add all the dry ingredients and pulse a few times to start the blending. When the risk of flying flour has passed, turn the mixer to low and beat until the dough forms big, moist curds. Toss in the chocolate pieces and mix to incorporate. This is an unpredictable dough. Sometimes it’s crumbly and sometimes it comes together and cleans the sides of the bowl. Happily, no matter what, the cookies are always great.
  3. Turn the dough out onto a work surface and gather it together, kneading it if necessary to bring it together. Divide the dough in half. Shape the dough into logs that are 11/2 inches in diameter. Don’t worry about the length — get the diameter right, and the length will follow. (If you get a hollow in the logs, just start over.) Wrap the logs in plastic wrap and freeze them for at least 2 hours or refrigerate them for at least 3 hours.
  4. When you’re ready to bake: Center a rack in the oven and preheat it to 325 degrees F. Line two baking sheets with parchment paper or silicone baking mats.
  5. Working with one log at a time and using a long, sharp knife, slice the dough into 1/2-inch-thick rounds. (The rounds might crack as you’re cutting them — don’t be concerned, just squeeze the bits back onto each cookie.) Arrange the rounds on the baking sheets, leaving about 2 inches between them. (If you’ve cut both logs, keep one baking sheet in the fridge while you bake the other.)
  6. Bake the cookies for 12 minutes — don’t open the oven, just let them bake. When the timer rings, they won’t look done, nor will they be firm, and that’s just the way they should be. Transfer the baking sheet to a cooling rack and let the cookies rest until they are only just warm, at which point you can munch them, or let them reach room temperature (I think the texture’s more interesting at room temperature).
  7. Bake the remaining dough.


Monday, December 05, 2016

Pumpkin Tiramisu

Most years for Thanksgiving, we pick a theme. Since the meal is vegetarian, a theme can be more fun than having an obviously turkeyless spread. This year, Nathaniel requested Italian food. I had fun looking at traditional fall ingredients as used in Italian dishes. The final menu was pretty simple - Limoncello mixed drink, Tuscan-style roasted carrots, mushroom and radicchio lasagna, and pumpkin tiramisu for dessert.

There are several recipes floating around for pumpkin tiramisu. Some use gingersnaps. One used gelatin which is not typically in traditional tiramisu (and is not vegetarian!) I went with one that seemed like it just added pumpkin to the traditional mascarpone and used the Italian cookie amaretti as part of the crunchy parts. It comes from a company that makes ladyfingers, so I followed the recipe exactly.


Pumpkin Tiramisu
(from Delallo.com)

INGREDIENTS
  • 1 1/2 cups whipping cream
  • 1 1/2 cups sugar
  • 1 (8-ounce) container mascarpone cheese
  • 1 (15-ounce) can pure pumpkin
  • 1 teaspoon pumpkin pie spice
  • 1/4 cup amaretto
  • About 25 ladyfingers
  • 6 ounces amaretti cookies, crumbled
DIRECTIONS
  1. Beat cream and sugar until stiff peaks form. Combine with mascarpone, pumpkin and spices and beat until smooth.
  2. In a small, shallow dish, pour amaretto. Dip each ladyfinger before arranging along the bottom of a 13- by 9-inch baking dish, overlapping to fit. Spread one-third of filling atop ladyfingers, evenly sprinkle with one-third amaretti cookies and repeat for two more layers.
  3. Smooth top of dessert and wrap tightly in plastic and foil. Refrigerate. Best when chilled overnight.

Monday, November 28, 2016

Chocolate-Pumpkin Swirl Bread

I don't watch the Food Network or Cooking Channel much anymore; I pretty much stopped when they stopped putting chefs on and started filling it with reality tv and competitions. But every once in a while I'll watch shows like Brunch with Bobby, which is where I got this recipe. I made it to bring to work the few days we all had to work before Thanksgiving break. It was delicious! Bobby also makes a marmalade butter to go on this, but that didn't sound good to me. It was rich enough as is.


Chocolate-Pumpkin Swirl Bread
(Recipe from FoodNetwork.com) 

Butter or nonstick cooking spray, for the pan
1 3/4 cups all-purpose flour
1 teaspoon baking soda
1 teaspoon pumpkin pie spice
1/2 teaspoon baking powder
1/2 teaspoon fine salt
1 1/2 cups granulated sugar
1/2 cup vegetable oil
2 large eggs
1 cup canned pumpkin puree
1 teaspoon vanilla extract
3 ounces semisweet chocolate, melted and cooled

Preheat the oven to 350 degrees F. Brush a 9-by-5-inch loaf pan with butter, or spray with nonstick spray; set aside.

Combine the flour, baking soda, pumpkin pie spice, baking powder and fine salt in a medium bowl.

Place the sugar and oil in the bowl of a stand mixer fitted with the paddle attachment and beat on medium-high speed until well combined (it'll look like wet sand), about 1 minute.

Turn the mixer to medium speed and add the eggs, one at a time, beating well after each addition. Reduce the speed to low, add the pumpkin puree and vanilla extract, and mix until just combined, about 30 seconds. Stop the mixer and scrape down the sides of the bowl and the paddle. Add the flour mixture, and mix until just combined.

Remove the bowl from the mixer and drizzle the melted chocolate evenly over the batter.

Using a rubber spatula, fold the chocolate into the batter until it's just swirled in. (Be careful not to fully incorporate the chocolate into the batter--you want a marbled effect.)

Pour the batter into the prepared loaf pan and spread it into an even layer. Bake until the bread is browned on top and a toothpick inserted into the center comes out with a few moist crumbs attached, 50 to 60 minutes. Let cool in the pan on a wire rack for 10 minutes. Remove from pan and let cool another 10 minutes before slicing.
 

Monday, November 21, 2016

Nutmeg-Maple Cream Pie

I once made this for Thanksgiving but it never had its day in the sun. This pie deserves it! The ingredients are few and the steps are simple, so this is the pie for your best crust and quality maple syrup. Please do not substitute pancake syrup with imitation maple. It will not function in the right way.


Nutmeg-Maple Cream Pie
(recipe from the New York Times)

Ingredients:
  • ¾ cup maple syrup
  • 2 ¼ cups heavy cream
  • 4 egg yolks
  • 1 whole egg
  • ¼ teaspoon salt
  • 1 teaspoon freshly grated nutmeg
  • 1 teaspoon vanilla extract
  • 1 pre-baked 9-inch pie crust
  1. Preheat oven to 300 degrees. In a medium saucepan over medium-high heat, reduce maple syrup by a quarter, 5 to 7 minutes. Stir in cream and bring to a simmer. Remove from heat.
  2. In a medium bowl, whisk together egg yolks and egg. Whisking constantly, slowly add cream mixture to eggs. Strain mixture through a fine-mesh sieve into a cup or bowl with pouring spout. Stir in salt, nutmeg and vanilla.
  3. Pour filling into crust and transfer to a rimmed baking sheet. Bake until pie is firm to touch but jiggles slightly when moved, about 1 hour. Let cool to room temperature before serving.
 

Sunday, November 20, 2016

Thanksgiving Menu Planning

Are you still trying to decide what to make for Thanksgiving? I thought I'd suggest a few favorites from over ten years on JennyBakes! This is not all my fall recipes ever, but a few select recommended recipes. I've already baked off one loaf of the cranberry nut bread to bring to a family!


Sweet Breakfasts
Pumpkin Cinnamon Chip Scones with Browned Butter Vanilla Glaze
Pumpkin Cinnamon Roll Pancakes
Pumpkin Cream Cheese Muffins

Quick Breads (for breakfast or gifts for hosts)
Cranberry Nut Bread
Gluten-free Paleo Cranberry Nut Muffins
Gluten-free Pumpkin Chocolate Chip Bread 
Pumpkin Spice Bread with Maple Cheesecake Layer

Rolls
Pumpkin Dinner Rolls 
 
Pies (since you can't have Thanksgiving without pie!)
Apple Praline Pie
Streusel-topped Apple Custard Pie

Other Desserts
Apple Cider Cream Pie
Apple Cream Cheese Bundt Cake with Praline Glaze
Apple Slab Pie
Cranberry Snacking Cake
Custardy Apple Squares
(My) Grandma's Apple Cake
Pumpkin Cheesecake
Pumpkin Praline Cake
Pumpkin Spice Latte Cake 
Salted Caramel Apple Crumb Bars 

Monday, November 14, 2016

Pumpkin Spice Latte Cake

I got the concept for this recipe from the Hungry Rabbit blog, which has interesting flavors and beautiful photography. As I thought about Ken's recipe, I decided to go with tried and true recipes I trust, and make a few tweaks based on his recipe.  (For instance I wanted a cake more tender than what happens with me and butter cakes, and I wanted something more silky than a cold powdered-sugar-based buttercream.) The end result is DIVINE. Even if you don't care for pumpkin spice lattes, you may still like this cake. It is definitely one of my top recipes of the year.


Pumpkin Spice Latte Cake

The pumpkin cake is the pumpkin praline cake recipe (minus the praline elements) from the Almost Home Restaurant, a place I used to make desserts for a while when I lived in Indiana. I made a few tweaks to the recipe to help the cake tie better to the buttercream.

Combine:
2 cups flour
2 tsp baking powder
2 tsp cinnamon
1/2 tsp freshly ground or grated nutmeg
1/4 tsp ground cloves
1 tsp instant espresso
1 tsp baking soda
1 tsp salt

In a separate bowl, beat:
4 eggs
1 cup vegetable oil
1 2/3 cup granulated sugar
1 tsp vanilla

Add to egg mixture alternately with dry ingredients:
2 cups canned pumpkin (not pumpkin pie mix)

Spoon into 2 9" round pans, prepared. Bake at 350 F for 40 minutes or until done. Let cool 10 minutes, invert pans, and allow to cool completely.

The coffee buttercream is a silky delicious recipe originally from Nick Malgieri, the usual recipe I make for my buche de noel

Coffee Buttercream

4 large egg whites
1 cup sugar
24 tablespoons (3 sticks or 1-1/2 cups) unsalted butter, softened
2 tablespoons instant espresso powder
2 tablespoons rum or brandy

Whisk the egg whites and sugar together in the bowl of an electric mixer. Set the bowl over simmering water and whisk gently until the sugar is dissolved and the egg whites are hot.

Attach the bowl to the mixer and whip with the whisk on medium speed until cooled (10-15 minutes.) Switch to the paddle and beat in the softened butter and continue beating until the buttercream is smooth. Dissolve the instant coffee in the liquor and beat into the buttercream.

If at any point the mixture appears curdled, keep beating! It will all come back together and be shiny and smooth.

Monday, November 07, 2016

Make America Cake Again: Historical Election Cake

I have had election cake marked to try ever since I was doing research on baked goods associated with each state. But in this election year, it seemed like the appropriate time. I don't often mix baking with politics, except for that time I was trying to start a trend to Take Back the Tea Party.

When I started poking around the internet again, I saw a surge in recent news stories and blog posts about Election Cake. NPR interviewed the two bakers from the OWL Bakery in Asheville, NC, who are leading the charge. Asheville is only an hour north of me, so I felt a greater kinship with their project.

That also helped me pick a recipe, too. The OWL version incorporates local ingredients and natural leavening. I will post their version with my own modifications below.

I found others on Serious Eats and What's Cooking America, all versions of the often cited original recipe. one that came before women had the right to vote, before baking powder, and in an era when voting was a party. Women would bake cakes and bring booze to coax the rich white landowner voting types to cast their ballots. Voting was more of a party and less of a drag. We need to bring back this feeling to voting day, in my humble opinion. It always feels like you aren't even supposed to speak in a normal voice in the precinct.

These days, lady voters like myself can make an election cake AND stand in line to vote. While the precinct is unlikely to have any alcohol or baked goods, I can provide a cake with a little booze in it to reward coworkers who have voted. Most of the alcohol should burn off in the baking, I think? Ha. (The raisins soaked in brandy and apple flavored Jim Bean overnight.)


Election Cake

Day 1 (Prepare Preferment)
Using Sourdough Starter:

240 ml whole milk ~70º F (280 g)
¼ cup active starter — 100% hydrated (75 g)
           2 ¼ cups All Purpose or whole wheat pastry flour (280 g)
OR

Using Instant Yeast:

275 ml milk ~70º F (320 g)
           ¼ tsp instant yeast (1 g)
           2 ¼ cups plus 2 Tbsp All Purpose or whole wheat pastry flour (320 g)
          
Combine milk and sourdough starter or yeast and mix thoroughly until starter or yeast is well dispersed in the milk mixture. Add flour and mix vigorously until the starter is consistent and smooth. Scrape the sides of your bowl and cover with a damp towel or plastic wrap. Allow your starter to ferment for 8-12 hours at room temperature. When ready to use, your preferment will have bubbles covering the surface.

Soak Dried Fruits

If you plan to use dried fruits in your cake, we recommend soaking them overnight, or for several days beforehand. Measure out your dried fruit and cover with your liquor or liquid of choice (for non-alcoholic options, try apple cider/juice, other fruit juices, or steeped teas) in a small sauce pot. Warm over low heat for a few minutes, remove from the heat, and allow to soak, covered, overnight or for several hours.

Before incorporating into your cake, strain the liquid off of the fruit. Use this fruit flavored liquid as a cordial or to make a simple glaze after the cake is baked.


Day 2 (Prepare Final Dough, Proof, and Bake)
          
1 cup unsalted butter (226 g)
¾ cup unrefined sugar (155 g)

2 eggs (100 g)
1/3 cup whole-milk yogurt  (85 g)
¼ cup sorghum or honey (60 g)
Preferment (560 / 635 g)

2 ¼ cups All Purpose or whole wheat pastry flour* (280 g)
2 Tbsp spice blend**  (12 g)
¼ tsp ground coriander (1 g)
¼ tsp ground black pepper (1 g)
2 tsp salt (12 g)

2 Tbsp sherry or another  - optional (30 g)
2 cups rehydrated fruit (300 g)
With a paddle attachment in a stand mixer, cream the butter very well, then add sugar, mixing until very light and fluffy. Add the eggs one at a time on medium speed. Mix in the sorghum/honey and yogurt.
Exchange the paddle with a dough hook. Add the preferment (starter or sponge) and mix until just incorporated. Combine all of the dry ingredients before adding them to liquid ingredients and mix until just incorporated, being careful not to over-mix. Gently fold in the sherry (optional) and rehydrated fruit.
Divide evenly into a bundt pan or cake rounds that have been buttered and lightly floured. OWL Bakery uses mini bundt pans, which yields 8-10 cakes. Proof for 2-4 hours, until the cake has risen by about ⅓ of its volume.
Bake at 375° F (190° C) for 10 minutes. Reduce oven temperature to 350° F (177° C) and continue baking for about 25-30 minutes, until a tester comes out clean. Cool completely before cutting and eating. You may enjoy this cake plain or topped with a simple glaze.
Notes:

*Choose high extraction flour if possible
**Create a spice mixture with warm spices like ground cinnamon, allspice, nutmeg, clove, star anise, or mace.  OWL Bakery’s house spice blend is a combination of 8 spices. 

Notes from JennyBakes:

I used sour cream instead of yogurt, because that's what I had. I used half molasses/half honey in place of the sorghum. My spice blend was cinnamon, cloves, nutmeg, and allspice. I rehydrated my raisins in brandy and apple Jim Beam, and had meant to add some chopped apple to the batter but once I got to that stage completely forgot!

My cake was pretty dry, more like a bread. I suspect this is largely baker error, because this is my first naturally leavened cake. I covered it with a lemon-powdered sugar glaze and will let it sit a few days before bringing it to work on Election Day.

Monday, October 31, 2016

Grain-Free, Gluten-Free Pumpkin Pancakes

I had opened a can of pumpkin Saturday, so Sunday morning I went looking for another breakfast pumpkin recipe. I made a version of the gluten-free pumpkin pancakes from the Against All Grain website. I didn't make her topping or use any bacon, and substituted a few ingredients, but I'll make note of those below. These are a good healthy version of a seasonal breakfast!


Grain-free, Gluten-free Pumpkin Pancakes

Ingredients:
  • 4 large eggs
  • ½ cup almond butter*
  • ½ cup pumpkin puree
  • ¼ cup honey*
  • ¼ cup almond milk or coconut milk*
  • 2 tablespoons melted coconut oil more for pan
  • ½ teaspoon vanilla extract
  • ¼ cup coconut flour
  • ¾ teaspoon baking soda
  • 1½ teaspoons cinnamon
  • ¾ teaspoons nutmeg
  • ¼ teaspoon ginger
  • ¼ teaspoon cardamom
  • ¼ teaspoon sea salt
Instructions:
  1. Preheat a griddle or shallow sauté pan to medium heat. Lightly brush with coconut oil.
  2. Place all of the wet ingredients in the bowl of a stand mixer. Beat on medium speed until combined.
  3. Add the remaining dry ingredients; beat until smooth and fully incorporated. Allow batter to sit for 5 minutes, then beat again for 30 seconds until thickened.*
  4. Pour ¼ cup of batter for each pancake onto the hot pan. Wait for the edges to start to lift, about 30 seconds, then gently flip the cake over. Continue cooking for 15-20 seconds, until cooked through and browned on both sides.
Jenny's notes:

I used peanut butter (it's what I had), coconut sugar in place of honey, and dairy milk (because it's what I had.) I also dumped everything in a canister and used my immersion blender, and it was fine.

Monday, October 24, 2016

Pumpkin Gingerdoodles

We always do a Halloween lunch party at work, and I feel this (nonexistent) pressure to bring something new every day. I've already done pumpkin cheesecake, candy corn cookies, pumpkin praline cake, apple cake, etc., etc. I found this recipe from the blog formerly known as "Culinary Concoctions by Peabody" and is now known as Sweet Recipeas. She pumpkinized and otherwise modified a recipe she got from Bakergirl, called Gingerdoodles or Snickersnaps.


I'm still reeling from realizing I had to make two different doughs, but whatever, I had let two sticks of butter come to room temperature and just made half batches of each dough. This was only a test anyway. And after my fingers were covered in soft sticky dough after the first tray (and after I dropped the back three into the bottom of the oven on their way into it, prompting a smoky oven fire, a new use of grill tongs, and managing a german shepherd mix who is terrified of kitchen fans), I decided that although neither recipe instructs you to, I would chill both doughs a few hours. It made a world of difference. I wouldn't attempt this recipe again without some chill time.  

I'm not tasting much in the pumpkin cookies. Perhaps they need more spices. I would bake the gingersnap dough on its own and be perfectly content. They are perfect. The pumpkin snickerdoodle needs work, perhaps it could be slightly less cakey and slightly more flavorful. Maybe some vanilla extract even. But this is a good start.

Pumpkin Gingerdoodles
(from Sweet Recipeas)

Dough 1:  Pumpkin Snickerdoodle Dough

1 1/2 cups granulated sugar
1 cup unsalted butter
2 eggs
¾ cup pumpkin puree
3 cups all-purpose flour
2 tsp. cream of tartar
1 tsp. baking soda
1/4 tsp. salt

Mix 1 1/2 cups sugar, the butter, pumpkin, and eggs in a stand mixer with paddle attachment.
Add in flour, cream of tartar, baking soda and salt and mix on low until fully combined. Set aside.*

Dough 2: Gingersnap Dough

3/4 cup butter
1 cup granulated sugar
1/4 cup molasses
1 egg
2 cups all-purpose flour
2 teaspoons baking soda
1/4 teaspoon salt
1 teaspoon cinnamon
1 teaspoon cloves
1 teaspoon ginger

Cream together butter and sugar. Add molasses and egg and continue beating. Add flour, baking soda, salt, cinnamon, cloves, and ginger and mix until combined, scraping down the sides of the bowl as needed.*

Mixture to roll cookies in:

1/4 cup granulated sugar
2 tsp. ground cinnamon

Combine cinnamon and sugar in a small bowl and set aside for rolling dough in.

Preheat oven to 350°F. Lightly grease baking sheets with no-stick cooking spray and set aside.

Roll a small amount of gingersnap dough into a ball and a small amount of snickerdoodle dough and place them together and gently roll or squeeze together.

Roll in cinnamon sugar.

Place on baking sheets and bake for 9-11 minutes. Remove from oven and allow to cool on baking sheets for 2 minutes before moving to cooling racks.

*JennyBakes says - make it easier on yourself and chill the mixed doughs for a few hours before trying to mash them together and bake them.

Monday, October 17, 2016

Custardy Apple Squares

This is a recipe I have been meaning to try. I needed something I could whip up quickly after a hectic week and knew that this was a recipe Dorie Greenspan keeps on hand for last-minute guests, somewhat of a pantry dish. (I think I see it most often posted on Dorie's own Instagram feed!)

The recipe can be found in Baking Chez Moi: Recipes from My Paris Home to Your Home Anywhere by Dorie Greenspan. I recommend all of her baking cookbooks; they are staples in my house. This one I snagged one day when it was a Kindle deal, and while I'm still not a huge fan of eCookbooks, this one seems to have a lot of good stuff to try.


The only change I made to the recipe was to bake it in a narrower dish than specified. She says 8" square pan, but only had a 9" square pan, and had read that it was "awfully shallow." I used a pan that is probably 8"x6" and still felt it was a bit shallow. But definitely tasty. The proportions are almost the same as an oven pancake, only with less milk and less butter. The apples, when sliced thinly, settle into lovely layers on their own. I baked mine for 40 of the recommended 40-50 minutes and it was browning around the edges. I'd like to try this again with some of her ideas - adding some kind of liqueur to the batter might be nice!

Custardy Apple Squares
(seriously, buy Dorie's books.... this recipe comes from her, although I've rewritten the instructions a bit)

3 medium juicy, sweet apples, such as Gala or Fuji, peeled
1/2 cup all purpose flour
1 tsp baking powder
2 large eggs
1/3 cup granulated sugar
pinch of fine sea salt
2 tsp vanilla extract
6 tbsp whole milk, room temperature
2 tbsp unsalted butter, melted and cooled

Center a rack in the oven and preheat the oven to 400 degrees F. Butter an 8-inch square baking pan and line the bottom with parchment paper.

Beat the eggs, sugar and salt together for about 2 minutes, until the sugar just about dissolves and the eggs are pale. Whisk in the vanilla, followed by the milk and melted butter. Add the flour and baking powder to the bowl and stir with the whisk until the batter is smooth.

Peel and slice the apples thinly (she recommends tools, I just used a knife!). Add the apples to the batter and fold gently, until every thin slice is coated. Scrape into the pan and smooth until reasonable.

Bake 40-50 minutes, or until golden brown, uniformly puffed - make sure the middle of the cake has risen - and a knife inserted into the center comes out clean. Transfer the pan to a cooling rack and allow to cool for at least 15 minutes.

Cut the cake into squares and dust with confectioners' sugar before serving, if desired.

Monday, October 10, 2016

Coffee Chocolate Chip No-Churn Ice Cream

I saw this idea of no-churn ice cream and had to try it. Will it be like no-knead bread, something I tried once and never did again?


Well, it's cold, and creamy. But the flavor isn't very intense, and it isn't as dense as the high-quality expensive ice cream we buy if we're going to bother. I'll probably still eat it. I can see many flavor combinations with this basic idea, though, and it is a heck of a lot easier than pulling out the ice cream maker (and planning ahead to freeze the bowl.)

Coffee Chocolate Chip No-Churn Ice Cream
(recipe from Baked by an Introvert)
  • 1/2 cup strong brewed coffee, cold*
  • 1 (14-ounce) can sweetened condensed milk
  • 2 cups heavy cream
  • 3/4 cup mini chocolate chips
Instructions
Combine the condensed milk and coffee in a small bowl. Whisk until smooth. Add the heavy cream to a large bowl. Using an electric mixer set to medium speed, beat until stiff peaks form. Turn the speed to low and slowly pour in the condensed milk and coffee mixture. Turn the speed back up to medium and beat until thickened. Using a silicone spatula, gently fold in the chocolate chips. Transfer to a freezer-safe container and freeze for at least 6 hours.

*I used cold brew because I tend to have it on hand!


Monday, October 03, 2016

Apple Cider Cream Pie

I've had this recipe marked to try for years now, and intentionally bought extra apple cider at the orchards in North Carolina. I wish I hadn't made so many mistakes... I decided to use my favorite all-butter crust and then in following the directions originally at Food & Wine resulted in overbaking it. I also don't have the fancy pie weights and crust covers so the foil came off and... yeah, the crust was just baked too much. The custard is interesting and not too sweet, but it takes some time to prepare since first you have to boil down cider and let that cool.

Summary: don't make the mistakes I did and you should have a great pie! I think this would be great for Halloween or Thanksgiving.


Apple Cider Cream Pie

(from Food & Wine November 2011)

Ingredients
crust
  • 1 cup all-purpose flour
  • 1 tablespoon cornstarch
  • 1 tablespoon sugar
  • 1 teaspoon kosher salt
  • 1 stick unsalted butter, cut into 1/2-inch dice and chilled
  • 3 tablespoons cold milk
  • 1 teaspoon apple cider vinegar
filling and topping
  • 2 cups apple cider
  • 1 cup sugar
  • 1/2 cup sour cream
  • 1/4 teaspoon salt
  • 4 large eggs
  • 1 cup heavy cream
  • 1/2 teaspoon cinnamon

How to make this recipe

  1. In a food processor, combine the flour, cornstarch, sugar and salt. Add the butter and pulse in 1-second bursts until the mixture resembles coarse meal. Combine the milk and vinegar and drizzle it on top. Pulse in 1-second bursts until the dough just comes together. Turn the dough out onto a work surface, gather up any crumbs and pat into a disk. Wrap in plastic and refrigerate until chilled, about 30 minutes.
  2. On a floured work surface, roll out the dough to an 11-inch round, a scant 1/4 inch thick; ease it into a 9-inch glass or ceramic pie plate. Trim the overhanging dough to 1 inch and fold it under itself. Crimp decoratively and chill the crust until firm, about 15 minutes.
  3. Preheat the oven to 425°. Line the crust with parchment paper and fill with pie weights or dried beans. Bake in the lower third of the oven for about 15 minutes, until the crust is barely set. Remove the parchment and pie weights. Cover the edge of the crust with strips of foil and bake for about 15 minutes longer, until the crust is just set but not browned. Press the bottom of the crust lightly to deflate it as it puffs; let cool. Lower the oven temperature to 350°.
  4. In a medium saucepan, boil the cider until it's reduced to 1/2 cup, about 10 minutes. Transfer to a bowl and let cool. Whisk in 3/4 cup of the sugar, the sour cream and salt, then whisk in the eggs.
  5. Pour the custard into the pie shell without removing the foil strips. Bake the pie in the lower third of the oven for 35 to 40 minutes, until the custard is set around the edge but the center is slightly jiggly. Let the pie cool completely.
  6. In a medium bowl, using an electric mixer, beat the heavy cream with the remaining 1/4 cup of sugar and the cinnamon until firmly whipped. Mound the cream on the pie, cut into wedges and serve.

Make Ahead

The recipe can be prepared through Step 5 and refrigerated for 2 days.

Serve With

Baked apple slices.
 

Monday, September 26, 2016

Cold Chocolate Snacking Cake

What is a "snacking cake," exactly? As far as I can figure it, it is a simple cake, one that can be frosted in the pan and served directly from it. No layers, no decorations, no fuss. This one has been on my to-make list for a while because of the cold factor, and when I desperately needed to make something to post to the blog in time, this was a great pick because everything is a pantry ingredient.


Cold Chocolate Snacking Cake
(recipe from The View from Great Island blog)

Ingredients
  • 3/4 cup unsweetened cocoa powder
  • 3/4 cup all-purpose flour
  • 1/2 teaspoon baking powder
  • 1/4 teaspoon salt
  • 3/4 cup (1 1/2 sticks) unsalted butter, room temperature
  • 1 cup sugar
  • 3 large eggs
  • 1 teaspoon vanilla extract
  • 1/2 cup sour cream
  • for the frosting
  • 1 cup heavy cream
  • 6 oz good semi sweet chocolate, chopped
  • 1/2 cup confectioner's sugar, sifted
  • 1/3 cup dark cocoa powder, sifted 
Instructions
  1. Set oven to 350F
  2. Spray an 7 1/2 x 11 1/2 brownie pan with cooking spray (you could substitute a 9x9 square pan, but the cooking time will be slightly longer and the cake will be taller)
  3. In a medium bowl, whisk the cocoa, flour, baking powder, and salt; set aside.
  4. In a mixing bowl, cream butter and sugar until light and fluffy. Beat in eggs, one at a time, then beat in vanilla. Reduce speed to low. Add flour mixture alternating with sour cream, starting and ending with the flour mixture.
  5. Spread batter into prepared pan. Tap pan firmly on counter top several times to force out large air bubbles. Bake until a toothpick inserted in center comes out clean, about 30 minutes. Don't over bake.
  6. To make the frosting: Heat the cream in a 2 cup glass measuring cup in the microwave until simmering. Add in the chocolate and let sit for 10 minutes, and then stir until smooth and glossy and the chocolate is all melted. If the chocolate isn't completely melted and smooth, zap it for another 15-30 seconds in the microwave.
  7. Add the sugar and cocoa powder and whisk until completely smooth. Pour over the cooled cake. Put the cake in the refrigerator to chill and set the frosting. I like to leave it there for a couple of hours. Serve cold, and store in the fridge. 
Notes from JennyBakes:
-I used a 9x9 square pyrex and ended up baking it for 40 minutes. It probably only really needed 35.

Monday, September 19, 2016

Nigella Lawson Flourless Chocolate Orange Cake

As mentioned in my previous blog post, my reading friend adapted this cake to a orange coconut cake, but once she'd mentioned it I couldn't get it out of my head I had to make the original. I used coconut sugar instead of regular to make it a bit lower on the glycemic index, but otherwise kept it the same.


This cake has one strange technique and a few strange ingredients - you must boil oranges a few hours (and then you use the entire thing, peel and all.) Since the "flour" is all almonds, you can see some nobbly bits. The end result is not overly chocolatey but reminded me more of a gingerbread in texture.


Flourless Chocolate Orange Cake
(recipe from Nigella Lawson as seen on Food.com)

2 small thin-skinned oranges, approx 375g total weight (or 1 large)*
6 eggs
1 tsp baking powder
1/2 tsp baking soda
200 g ground almonds**
250 g caster sugar***
50 g cocoa****
  1. Put the whole orange or oranges in a pan with some cold water, bring to the boil and cook for 2 hours or until soft.
  2. Drain, and when cool, cut the oranges in half and remove any big pips.
  3. Then pulp everything - pith, peel and all - in a food processor.
  4. Preheat the oven to gas mark 4/180°C (350F). Butter and line a 20cm springform tin.
  5. Add the eggs, baking powder, baking soda, almonds, sugar and cocoa to the orange in the food processor. Run the motor until you have a cohesive cake mixture, but slightly knobbly with the flecks of puréed orange.
  6. Pour and scrape into the cake tin and bake for an hour, by which time a cake tester should come out pretty well clean. Check after 45 minutes because you may have to cover with foil to prevent the cake burning before it is cooked through, or indeed it may need a little less than an hour; it all depends on your oven.
  7. Leave the cake to get cool in the tin, on a cooling rack. When the cake is cold you can take it out of the tin. Decorate with strips of orange peel or coarsely grated zest if you so wish, but it is darkly beautiful in its plain, unadorned state.
*I used two navel oranges
**I used 2 cups almond flour
***I used 3/4 cup coconut sugar and 1/2 cup granulated sugar
****1/2 cup

Monday, September 12, 2016

Did You Ever Have a Coconut Orange Cake?

I recently read Did You Ever Have a Family? by Bill Clegg, a novel that was longlisted for the Man Booker Prize and the National Book Award in 2015. The story revolves around a tragic event, a family dying the night before a wedding is to occur. But some of the characters, who narrate their own chapters, talk about the cake that was requested for the wedding. It seemed unusual, so of course I had to make it. Another reading friend was reading the book at the same time, and also tried a version which I hope to at least link to below.

"My mom made Lolly Reid's wedding cake. She got the recipe from a Brazilian restaurant in the city where she went one night after going in with her friends to see a show. It was a coconut cake made with fresh oranges. She prepared for days. It didn't have any pillars or platforms or fancy decorations; just a big sheet cake with a scattering of those tiny, silver edible balls...."
All I knew, since Clegg has not made the recipe he had in mind available anywhere, was that it had coconut and orange, should be a sheet (as opposed to a layer cake or bundt), and that I could add some of the tiny edible balls. I found two recipes I was considering. Both were in tube or bundt pans, but I knew that would roughly fill a 9x13 pan. One recipe that had the central ingredients and also identified as Brazilian was the Brazilian Flair Orange Cake with Coconut, but it seemed to be orange with coconut as a garnish, and I read the focus as being on coconut. I put that one aside for the Brazilian Cold Coconut Orange Cake, since it seemed to have the right flavor focus. It is assembled somewhat like a tres leche cake, where you pour a mixture of milks over the warm cake after poking holes in it. This is where the recipe went wrong for me, though, because it became too moist. I didn't end up taking it for coworkers to eat or anything! I suspect their "can" is a different size than my (14 oz) "can," but didn't think about it when mixing everything together. The cake as it was, with a simple glaze, would have been a delight. I also think the pictures accompanying that recipe don't look like they followed the end of the recipe, just made the cake part.


My reading friend Trudie liked the book less than I did but made a better cake. She started with Nigella Lawson's Flourless Chocolate Orange Cake, replacing the cocoa gram to gram with coconut. The color was so vivid, and the cake looked more like a cake and less like a pudding.  So beautiful, thanks Trudie!

More notes from Trudie:

1. Boiling up the oranges is critical as I have made this before and took a short cut with the boiling time and the oranges are too bitter, (however I have seen mention of microwaving them, to save time). The rest of the cake takes about 10mins to assemble - so it is just this stage needs planning.

2. Ground Almonds = Almond Meal, I am pretty sure you would have this, mine looks like this

3. For my coconut version of this cake I omitted the 50g of cocoa and put in 50g of shredded coconut instead

Monday, September 05, 2016

Clemson Blue Cheese Savories

It's Labor Day, and my husband has now been at his new job at Clemson University for a month! Clemson has been making blue cheese on campus since 1941. It even has its own website. N- brought home crumbles to try, and while we enjoy them in the various places we typically put blue cheese, I wanted to find a recipe that would better feature the cheese. These little round savory cracker-cookies topped with fig jam would be perfect on a cheese plate or at a tea - the perfect balance of savory and sweet. They come together quickly. I made a few changes in that I rolled the dough in plastic wrap and chilled it 15 minutes, then sliced and baked. I didn't get quite as many as 3 dozen, but thought that would be easier than rolling them out.


Blue Cheese and Fig Savories
(recipe from Food52)

Makes about 3 dozen
  • 1 cup all-purpose flour
  • 1/2 cup butter, room temperature
  • 4 ounces blue cheese, crumbled
  • Ground black pepper
  • Fig preserves, about 3 Tablespoons
  1. Preheat the oven to 350 degrees. Line a baking sheet with parchment paper.
  2. Place the flour, butter, blue cheese and a few grinds of black pepper in the bowl of a food processor. Process until the dough just comes together and starts to form a ball.
  3. Dump the dough onto a lightly floured surface and knead a few times to pull the dough together. Roll out to 1/8 inch thick with a floured rolling pin. Cut rounds out of the dough with a floured 1-inch cutter and transfer the rounds to the parchment-lined baking sheet.
  4. Using the back or a round half-teaspoon measure or your knuckle, make an indentation in the top of each dough round. Spoon about ¼ teaspoon of fig preserves into each indentation, using your finger to push the preserves as best as possible into the indentations.
  5. Bake the savories for 10 – 14 minutes, until the preserves are bubbling and the pastry is light golden on the bottom.
  6. Let cool on the baking sheet for at least 10 minutes, the remove to a wire rack to cool.
  7. You’ll find fig preserves at the grocery – it may be shelved with the “fancy” jams and jellies. You can make these a day ahead and keep them in two layers separated by waxed paper in an airtight container.
 

Sunday, August 28, 2016

Cinnamon Swirl Muffins (Grain-Free)

It isn't fall weather yet but I am so ready for the temperature to start dipping below 70 degrees Fahrenheit. It has been in the 90s here with rain threatening constantly, making everything a humid mess. Well, inside my house we keep it frigid so I was ready to go for something cinnamon.'

This is a recipe I adapted from a 1-minute coffee cake in a mug single serving recipe from Chocolate Covered Katie. It's adapted in a number of ways - I have made the recipe for more than one serving, I have used a different combination of flours, and I have used eggs and eliminated some of the other liquid ingredients to compensate. Still, I always want to give credit where credit is due. Check her out, she has great healthy recipes that taste good, with a lot of options for single-serving baking projects. These can be made as singles in the microwave but won't look quite as nice. Still tasty though.


Cinnamon Swirl Muffins (Grain-Free, Lower-Sugar)

1 cup plus 2 tbsp almond flour
1/2 cup tapioca flour
1 1/2 tsp baking powder
1/2 tsp salt
6 tbsp coconut sugar
2 eggs
1/4 cup vegetable oil

For the swirl:
1 tsp cinnamon
2 tbsp brown sugar Splenda
1 tbsp butter, melted/softened
Pinch of salt

Yield: 6 muffins

Instructions

Preheat oven to 350 F. Combine batter dry ingredients and mix well. Add wet and mix until just mixed. In a tiny bowl, combine all swirl ingredients. Fill six greased muffin cups 1/2 way with the batter.

Sprinkle on two-thirds of the swirl, then spoon the remaining batter on top. Finally, sprinkle on the rest of the swirl. Bake 12-13 minutes. If you aren't worried about sugar consumption, a powdered sugar glaze might be a nice addition!

Monday, August 22, 2016

Grain-Free Chocolate Waffles

I started making the recipe I posted in July for grain-free waffles this weekend, one which has quickly become a favorite in our almost weekly rotation. I knew we were eating them with strawberries, so at the last minute tried making a chocolate version. I took notes so I could share what I did!


Crispy Chocolate Grain-Free Waffles
(adapted from an adaptation on a  recipe on Simply Nourished Recipes)


Ingredients
  • 2 cups almond flour (or 1.5 cups almond flour and .5 cup tiger nut flour)*
  • 1/4 cup unsweetened cocoa powder
  • 1 cup tapioca starch/flour
  • 1 Tbsp. + 1 tsp. baking powder
  • 2 eggs
  • 1 cup almond milk
  • 1/2 cup coconut sugar
  • 1 tsp. vanilla
  • ½ cup coconut oil, melted
Instructions
  1. Preheat waffle iron according to manufacturer's directions.
  2. In a large bowl, combine almond flour, tiger nut flour, cocoa powder, tapioca starch, coconut sugar, and baking powder. Whisk or stir to combine well.
  3. Add wet ingredients to dry and stir until combined.
  4. Use 1/3 to 1/2 cup of batter at a time and use waffle maker as directed.
*On this particular day, I had no almond flour. Three bags of coconut flour, but no almond flour. So I went all tiger nut flour and it was fine!