Monday, May 03, 2021

Double Chocolate Loaf Cake with Chocolate Glaze

I've had this recipe on my to-make list forever. Follow the original at the Hungry Hutch for more specifics on methods and chocolates used! I just used a combination of what I had on hand and called it good! 

corner view of the glazed chocolate loaf, rich brown below and shiny on top

Double Chocolate Loaf Cake with Chocolate Glaze

Ingredients

Chocolate Loaf Cake

  • 1 cup whole milk
  • 6 tablespoons (3 ounces) unsalted butter, cut into pieces
  • 2 ounces dark chocolate (semisweet, bittersweet, some combo)
  • 3 large eggs
  • 1 cup sugar
  • 1 teaspoon vanilla extract
  • 1/4 teaspoon kosher salt
  • 1 cup all-purpose flour
  • 1/2 cup Dutch process cocoa powder
  • 2 teaspoons espresso instant coffee powder
  • 3/4 teaspoon baking soda

Chocolate Glaze

  • 4 ounces dark chocolate (semisweet, bittersweet, some combo)
  • 2 tablespoons (1 1/2 ounces) light corn syrup
  • 2 tablespoons (1 ounce) unsalted butter

two slices of loaf, dripping chocolate glaze on a pumpkin colored plate on a turquoise placemat

Instructions

  1. Make the Chocolate Loaf Cake: Bring the milk to a boil in a sauce pot. Pour the milk over the butter and chocolate and stir until melted. Let cool for at least 15 minutes. (This would be a good time to measure out the remaining ingredients.)
  2. Meanwhile, heat the oven to 350˚F. Line a 9-by-5-inch loaf pan with parchment paper; set aside.
  3. Whisk the eggs, sugar, vanilla, and salt into the slightly cooled chocolate mixture. Sift the flour, cocoa powder, coffee powder, and baking soda; add to the chocolate mixture and stir until thoroughly combined. (It will be a fairly loose batter.) Transfer to the prepared pan and bake until a cake tester or wooden skewer inserted into the middle of the cake comes out clean, about 45 minutes. Let cool for a while in the pan, before taking out to cool completely.
  4. Make the Chocolate Glaze: Put all of the ingredients in a microwave-safe bowl and microwave at half power for 30 second increments, stirring after each, until melted and smooth, about 1 minute total. Spread the glaze on top of the cake and then serve.0

Monday, April 26, 2021

Mine-All-Mine Sweet and Salty Chocolate Cookies from Nigella Lawson

I poked around Nigella Lawson's newest cookbook, Cook, Eat, Repeat: Ingredients, Recipes, and Stories and found the usual inviting tone I'm used to in her recipes and shows. She always makes a dish seem possible whether it's a recipe for two cookies (for one) or a more complex dinner. I love how this cookbook even has a rhubarb section, with a mix of specific recipes and also some written about in a narrative about rhubarb, from which a person could glean a recipe. (I've also discovered, between Nigella and Edd Kimber, that the British possible benefit from something called forced rhubarb which I'm not sure we even have in the United States.) I've marked other recipes to try but was of course going to go for these cookies first. I used Raaka maple dark chocolate discs instead of mini bittersweet chocolate chips, and added more than you would think should be reasonable, and was not sorry.

Two dark chocolate cookies together on a red plate.

Mine-All-Mine Sweet and Salty Chocolate Cookies

Ingredients

  • ⅓ cup all-purpose flour (regular or gluten-free)
  • 1½ Tbsp unsweetened cocoa powder
  • ⅛ tsp baking powder
  • ⅛ tsp baking soda
  • ⅛ tsp fine sea salt
  • 3 Tbsp unsalted butter, softened (vegan is fine)
  • 1½ Tbsp superfine sugar
  • 1 Tbsp dark brown sugar
  • ¼ tsp vanilla extract
  • 2 Tbsp mini bittersweet chocolate chips
  • ¼ tsp flaky sea salt

One cookie cut in half to show the melty center, with a backdrop of a back yard fence with lights illuminated along it.

Directions

  1. Preheat oven to 350°F. Line a light-colored baking sheet with parchment paper.

  2. In a small bowl, combine first 5 ingredients. In a slightly larger bowl, use a small wooden spoon to beat butter, sugars and vanilla until buff-colored and creamy. A generous spoonful at a time, gently beat in flour mixture. Once dry ingredients have been absorbed, beat vigorously until a sticky rich-brown dough forms. Stir in chocolate chips. Divide mixture into 2 portions, forming each into a 2½-inch patty. Place at least 4 inches apart on prepared baking sheet. Sprinkle evenly with flaky sea salt. Bake 12 minutes or until tops are riven with cracks (cookies will be soft). Let cool 5 minutes on baking sheet. Use a metal spatula to transfer cookies to a wire rack. Cool 10 minutes before eating (if you can).

Monday, April 19, 2021

Rhubarb and Berry Swamp Pie

In working through The Book on Pie by Erin Jeanne McDowell with the Rainy Day Bites Cookbook Challenge, I encountered a pie that I had never heard of - the swamp pie. McDowell learned of the swamp pie from a colleague at Food52 when she made a Raspberry Swamp Pie with two crusts, which was topped with custard mid-bake, and baked until set. McDowell took that idea, changed the berry, and tweaked it to have a streusel top instead. Her adaptation is the recipe in her cookbook and on Food52 (along with a very useful instructional video on this pie but also custard pies in general.) I have had rhubarb in the freezer begging to be used during the spring, so I decided to make a rhubarb adaptation. I decided 1.5 pounds of blueberries would be roughly 4 1/4-4 1/2 cups fruit, so I went with 3ish cups of rhubarb, 1ish cup of blueberries from last summer's garden, and the leftover raspberries from our Saturday breakfast (pancakes, always.)

Overhead shot of streusel topped pie with browned crust and peeks of tan custard, blue blueberries, and pink custard.


Blueberry (& Rhubarb!) Swamp Pie

Ingredients  
        Streusel Topping
  • 1/2 cup (40 grams) old-fashioned oats
  • 1/2 cup (60 grams) all-purpose flour
  • 2 tablespoons whole-wheat flour*
  • 1/2 cup (53 grams) light brown sugar
  • 1/4 teaspoon baking powder
  • 1/4 teaspoon fine sea salt
  • 1/4 teaspoon ground cinnamon
  • 4 tablespoons (57 grams) cold unsalted butter, cut into 1/2-inch cubes
        Blueberry Filling
  • 1 1/2 pounds (680 grams) fresh blueberries*
  • Zest and juice of 1 lemon
  • 1/2 cup (99 grams) granulated sugar
  • 1 vanilla bean, halved and scraped (or 2 teaspoons vanilla extract)
  • 3 tablespoons all-purpose flour
  • 1/2 teaspoon fine sea salt
  • 1 par-baked pie crust

    Custard Filling

  • 3/4 cup (171 grams) heavy cream
  • 2 tablespoons light brown sugar
  • 1 large egg (57 grams)
  • 1 teaspoon vanilla extract
 Directions
  1. Heat the oven to 375°F with a rack in the lower third of the oven (preferably with a baking steel or stone on it). Stir all the ingredients for the streusel together to combine, then add the butter and cut it into the mixture until it forms large clumps.
  2. In a medium bowl, toss the blueberries with the lemon zest and juice. (If using vanilla extract instead of vanilla bean, add here, too.)
  3. In a small bowl, mix the sugar and vanilla bean scrapings with your hands, rubbing the two together to disperse the seeds. Stir in the flour and salt, then sprinkle this mixture over the blueberries, stirring until well combined.
  4. Pour this mixture into the cooled par-baked pie crust and arrange in an even layer. Sprinkle the streusel evenly over the top of the pie.
  5. Transfer the pie to the oven (on top of the steel/stone, if using). Bake until the crust is deeply golden and the berries are juicy and bubbly, 35 to 40 minutes.
  6. Just before the pie reaches the 35 minute mark, make the custard filling. In a medium bowl, whisk the cream, brown sugar, egg, and vanilla to combine. When the pie reaches the doneness listed in step 4, pull out the oven rack and gently pour the cream mixture all over the surface of the bubbling pie. If the cream looks like it’s going to overflow over the edge of the crust, make a small hole with a paring knife to give you a spot to pour the custard, then slowly pour the custard into the well. Don’t go too fast, or it will overflow instead of sinking into the pie.
  7. Return the rack to the proper place and continue to bake until the custard is set around the edges but slightly jiggly in the center, 10 to 15 minutes more. Let cool completely before slicing and serving.


A slice of pie on a crystal plate, topped with vanilla icecream.

Notes from JennyBakes:

- I used a pate brisee crust in hopes it would par bake without shrinking (and I used dried beans as pie weights) - this worked! She recommends an all-butter crust but I was not feeling that confident.

- I don't really keep whole-wheat flour on hand, so I just used 2 more tbsp all-purpose flour. I could have used a nut flour instead and that would have added a bit more texture. No big deal.

- As described in my intro, I think you can use a scant 4.5 cups of almost any fruit you'd usually bake in a pie instead of the blueberries.

- Because I used frozen fruit, I had to bake this pie so much longer than the directions called for. Like 30 minutes longer. But it didn't burn, although I probably could have waited longer to add the custard. My fruit in the middle was not yet bubbling when I added it.

- If I made this combo again, and I would, because it was tasty, I might add a bit more sugar since rhubarb alone is not very sweet.

Monday, April 12, 2021

Fudge Brownies with Spicy Peanut Butter Swirl

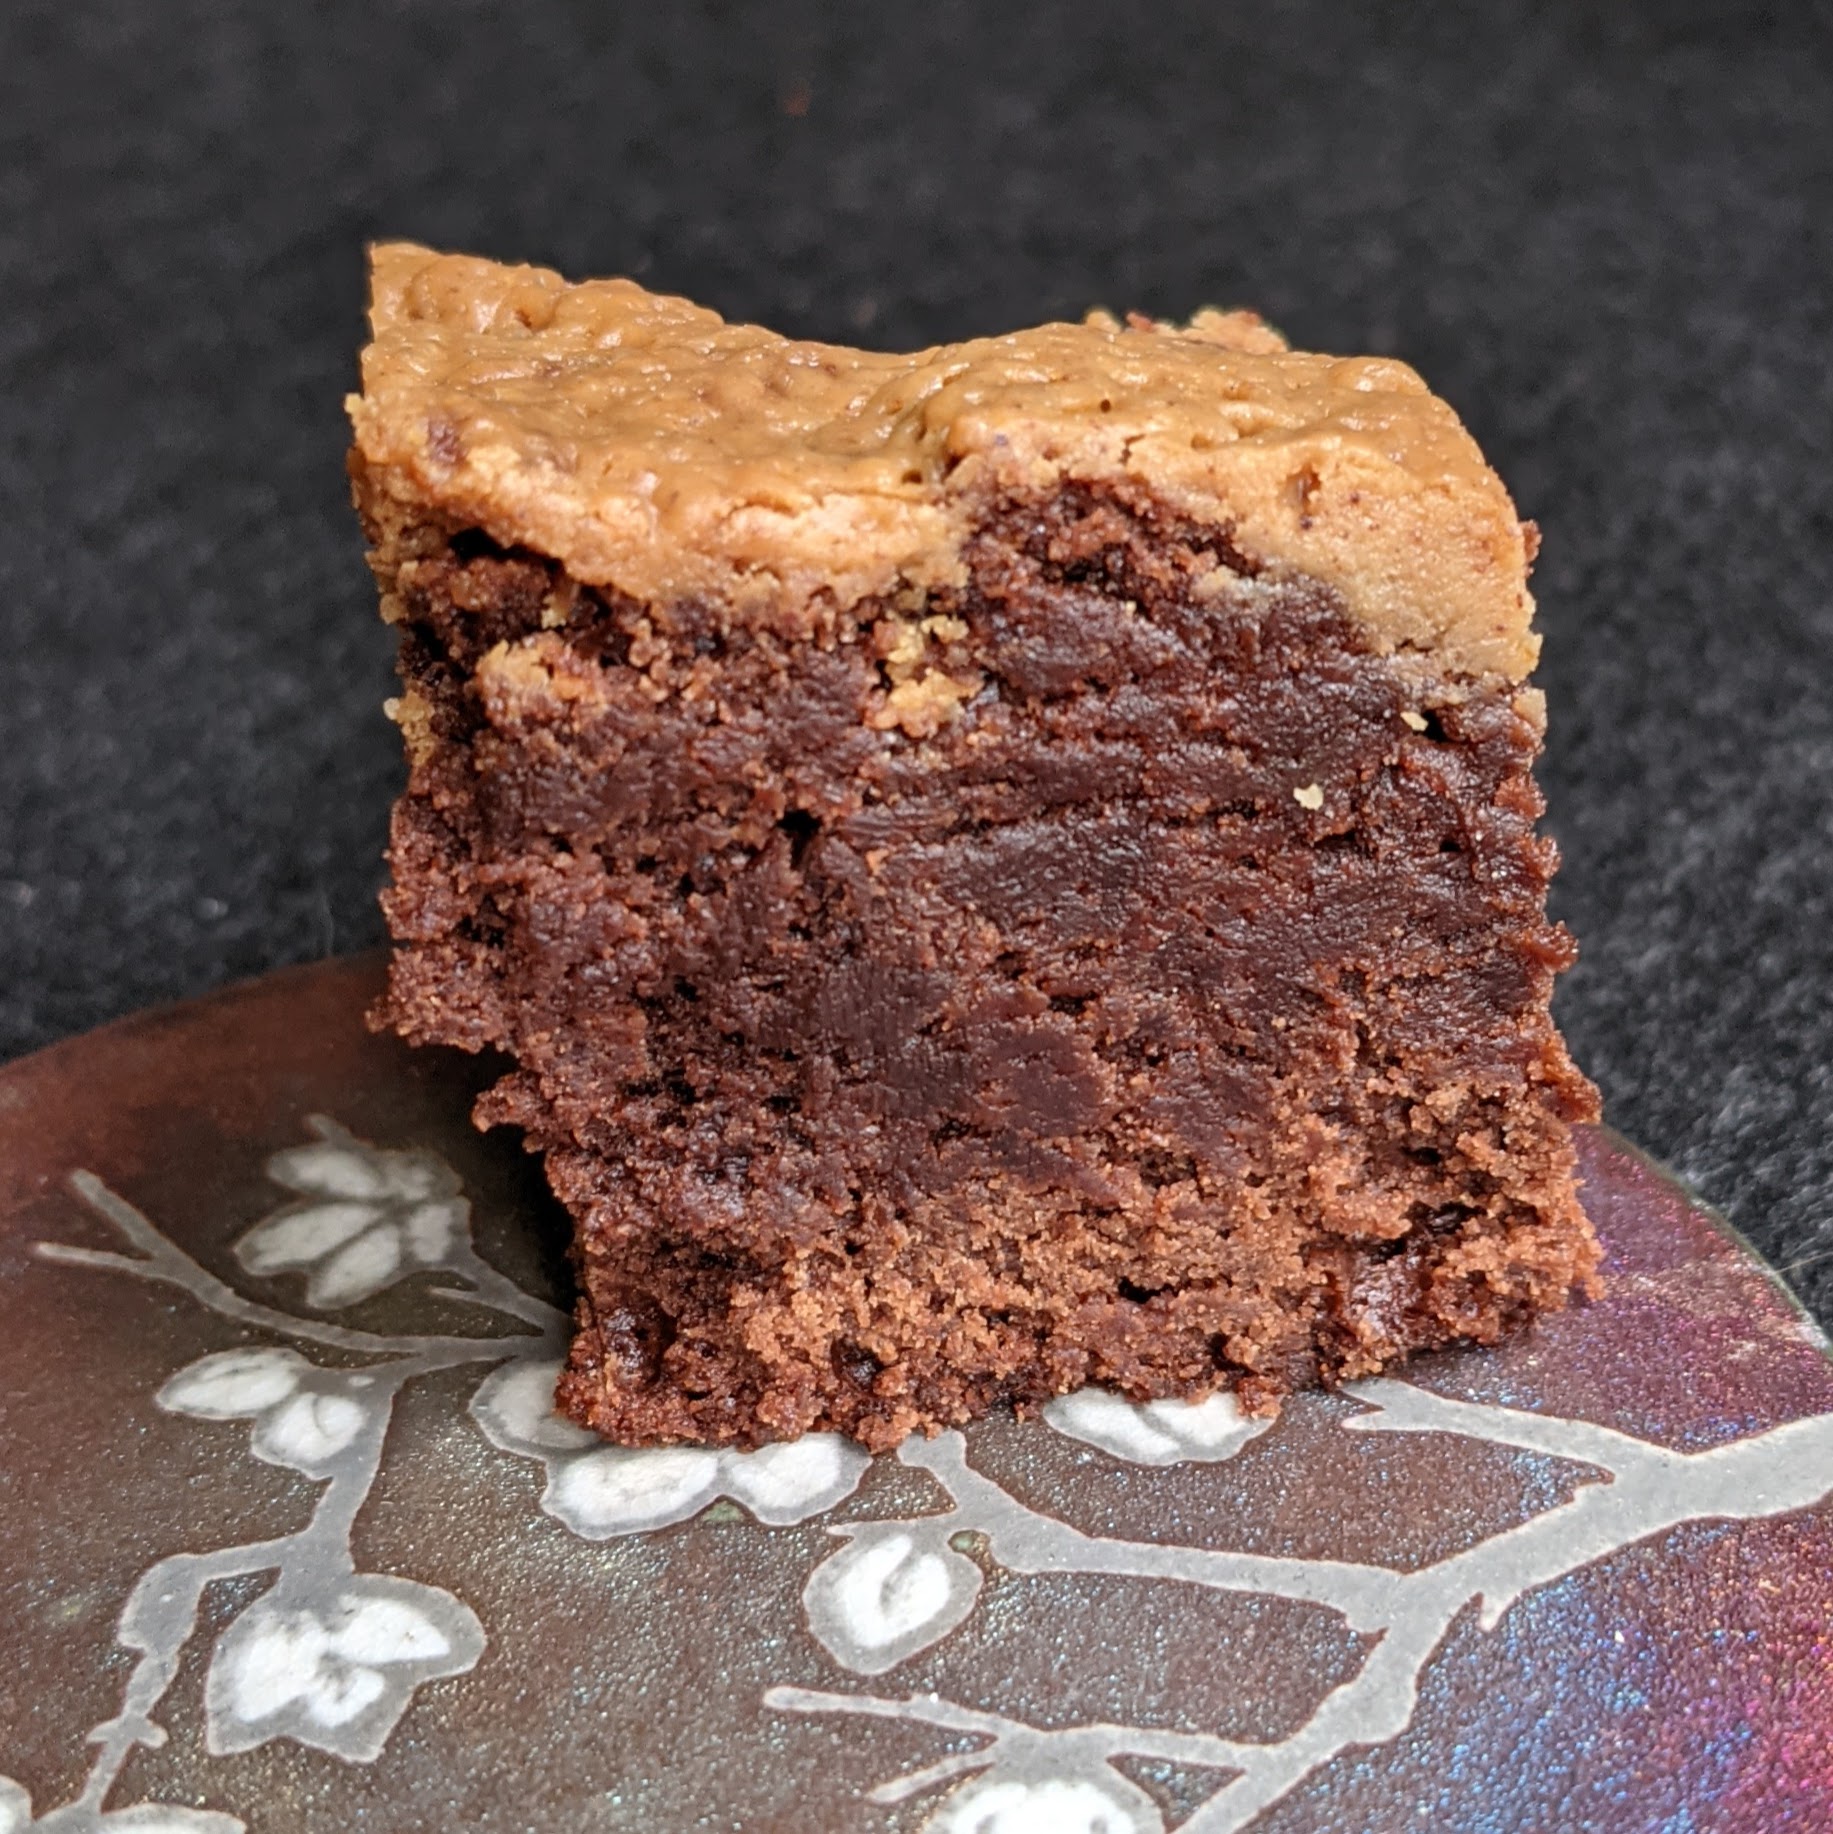
My picture of these brownies will be a bit misleading because I know I had some kind of user error, leading the swirl to be more of a full-on layer, not baking very quickly, possibly overbaking the rest, and so on. But I really like the concept, I thought they still tasted great in the end, so I will encourage you to check out the cookbook and the recipe and see if you can do better than me. (I'm pretty sure it was the peanut butter I used!) This comes from Food Between Friends by Jesse Taylor Ferguson and Julie Tanous.


Side view of fudgy brownie with lighter brown peanut butter layer on top

Fudge Brownies with Spicy Peanut Butter Swirl

Spicy Peanut Butter Swirl

3 tbsp unsalted butter, melted
1/2 cup crunchy peanut butter (regular old supermarket brands, not the natural stuff)
1/4 cup confectioners' sugar
1/2 tsp ground cinnamon
1/2 tsp cayenne pepper
1/4 tsp kosher salt

Brownies

Nonstick cooking spray
10 tbsp unsalted butter
5 oz 70-72% dark chocolate, finely chopped
1 1/4 cups granulated sugar
2 tbsp unsweetened cocoa powder
1/2 tsp kosher salt
1 tsp vanilla extract
3 large eggs, room temperature
1 cup all-purpose flour

  1. Make the peanut butter swirl: In a medium bowl, whisk together the melted butter, peanut butter, confectioners' sugar, cinnamon, cayenne, and salt until smooth. 
  2. Make the brownies: Preheat the oven to 350 F. Line a 9-inch square cake pan or baking dish with parchment paper, leaving a 1-inch overhang. Coat with nonstick cooking spray.
  3. Combine the butter and chocolate in a large, heatproof bowl. Melt in the microwave until smooth, stirring every 30 seconds, about 1 minute total. Add the sugar, cocoa powder, salt, and vanilla and whisk until smooth. Add the eggs, one at a time, whisking well after each addition. Use a rubber spatula to fold in the flour. Do not overmix.
  4. Transfer the batter to the baking dish. Dollop the peanut butter mixture on top of the brownie batter and use a butter knife to swirl it through. Bake until a toothpick inserted in the center comes out almost clean, but with a few moist crumbs attached, 25-30 minutes. Let cool completely in the pan before cutting into 16 brownies.


Monday, April 05, 2021

Rhubarb Bostock

As long-time readers of this blog know, sometimes I get a recipe in my head and can't let go of it until I try making it! And that's how it's been with rhubarb bostock. I saw it on the Instagram feed of Edd Kimber (aka @theboywhobakes) and once I started poking around, found a bunch of other bakers posting about it. It was like the baked good I'd never noticed!

And it is rather humble - it starts with stale brioche, adds some almond cream and fresh fruit, and gets baked in the oven with flaked almonds, and finally served with a little snow of powdered sugar. It's great to use up brioche (and thus was invented by bakeries) and also a great vehicle for seasonal fruit. I would probably just refer to it as... .FANCY TOAST.

One slice of rhubarb bostock


I had rhubarb in my freezer, so it's in celery slices instead of prettier stems (aka Edd Kimber's version.) I also think because mine was frozen, I had to bake an extra five minutes for mine to look browned and done in the middle. My husband thinks that once baked, it looks like hot dog pieces. But it doesn't taste like hot dogs, so there's that. And honestly brioche treated this way turns it into a handheld custard, and is very delicious. 

I used a different frangipane (almond cream) recipe - first I looked for one that could be made from almond paste since I had some, but I found an even simpler version with almond flour. Edd's starts with ground nuts and I wasn't sure how that compared to almond flour (I don't think it's that different.)

I can see a brunch scenario where you bake a pan of these without fruit and let people top them with jam or fruit to their tastes.


Rhubarb Bostock
Serves 8

Brioche
8 stale slices of brioche
50g caster sugar
1/2 tsp vanilla bean paste

Frangipane
125g unsalted butter
125g caster sugar
1 large egg
125g ground almonds
300g rhubarb
4 tbsp flaked almonds

For the sugar syrup add the sugar, vanilla bean paste and 50ml of water to a small saucepan and place over medium heat and cook until simmering and the sugar has dissolved. Remove from the heat and set aside. This can be made and refrigerated up to a week in advance. 

For the frangipane place the butter and sugar into a large bowl and beat with an electric mixer until light and fluffy, about 5 minutes. Add the egg and beat to combine then finish by mixing through the ground almonds to make a thick paste. Again this mixture can be made and then refrigerate in advance, it will keep for a couple days before it needs using but bear in mind as it chills it will become firmer so you’ll need to let it warm up a little before using. 

When ready to make preheat the oven to 180C (160C fan) and line a baking tray with parchment. Brush the slices of brioche with sugar syrup, making sure to use all of it. Spread the frangipane over the brioche (you can either do this with a spoon, or pipe it on with a piping bag). Cut the rhubarb into small batons that fit on the brioche and place on top of the frangipane. Finish with a sprinkling of flaked almonds.

Bake the bostocks for about 25-30 minutes or until the frangipane is golden. Remove from the oven and allow to cool slightly before serving, still a touch warm. 

The bostocks are best on the day made but can be served a day later if you have some left over. 

Monday, March 29, 2021

Caramel Chai Custard Pie

For March and April, the baking cookbook for the Rainy Day Bites Cookbook Club is The Book On Pie by Erin Jeanne McDowell. I skipped the first challenge, which was the Easy Fancy Apple Pie, although I did make the Breakfast Pie in an earlier post. The second challenge was the Earl Grey Custard Pie in Gingersnap Crust with Salted Caramel. Since my birthday cake made of Earl Grey was not to my tastes, I was not about to make another full dessert with it! The alternate version was this Chai Caramel Custard Pie, where you steep chai tea in milk and cream before making the custard. The options for the crust were many - I went with pecan sandies cookie crumb crust, because I thought it might be a little lighter (and less like fall) than the gingersnap crust. 

Overhead shot of a caramel custard pie, toppied with whipped cream and cookie crumbles

 
I'm not sure I cooked the caramel long enough, but since it was just for a sauce, I didn't worry too much about it. I didn't have light karo, just dark, so it was harder to see that caramel moment.

Side view of one slice of pie, oozing with caramel


I think this would be a great Thanksgiving pie alternative for people who don't eat pumpkin, but maybe it could be balanced with nuts or more salt in the caramel - it is sweet sweet sweet! Actually I saw some were just drizzling the caramel on the whipped cream instead of coating the custard in the pie; that would be another option.

Caramel-Earl Grey Custard Pie (chai version below)

Source: Epicurious (identical to recipe in cookbook, plus links below to caramel and crust)
 
Yield
one 9-inch / 23-cm pie

Ingredients

  • 226 g / 1 cup whole milk
  • 78 g / ⅓ cup heavy cream
  • 8 g / ¼ cup loose Earl Grey tea (or 5 Earl Grey tea bags)
  • 212 g / 1 cup packed dark brown sugar
  • 7 g / 1 tablespoon cornstarch
  • 170 g / 3 large eggs
  • 5 g / 1½ teaspoons vanilla extract
  • 2 g / ½ teaspoon fine sea salt
  • One 9-inch / 23-cm Basic Crumb Crust made with gingersnap crumbs, parbaked and cooled completely
  • 1 recipe Salted Caramel Sauce (optional), well chilled
  • Full Batch of Classic Whipped Cream (optional)

Preparation

  1. In medium saucepan, bring the milk and cream to a simmer over medium heat. Remove from the heat, add the tea, and cover the pan. Let steep for 15 to 20 minutes, then strain the liquid into a medium bowl (or just remove the tea bags, if using, and pour into the bowl).
  2. Preheat the oven to 350°F / 175°C with a rack in the center (preferably with a Baking Steel or stone on it).
  3. In a medium bowl, stir the brown sugar and cornstarch together well to combine. Add this mixture to the milk mixture, along with the eggs, and whisk well to combine. Add the vanilla and salt and whisk until well incorporated.
  4. Place the parbaked crust on a parchment-lined baking sheet and pour the custard into it. Transfer to the oven and bake until the crust is deeply golden brown and the custard is set around the outside but still slightly jiggly in the center, 45 to 50 minutes. Cool completely, then refrigerate for at least 2 hours (or up to 24 hours).
  5. Pour some or all of the caramel glaze over the top of the pie and spread into an even layer over the surface. A thin layer will set firmer and a thicker layer will be gooier—or you can drizzle it over slices when serving. Refrigerate the pie for at least 1 hour, or until ready to slice and serve.
  6. Do Ahead: The pie can be made up to 24 hours ahead and refrigerated until ready to serve. 
Variation
Caramel-Chai Custard Pie in Shortbread Crumb Crust:
Replace the Earl Grey tea with an equal amount of chai. Make the crumb crust with shortbread or vanilla cookie crumbs.


Monday, March 22, 2021

Ultra-Buttery Irish Scones

I was poking around for something Irishish to make on an early St. Patrick's Day morning but didn't have dried fruit and didn't have buttermilk or lemon juice (and didn't feel like soda bread anyway) when I encountered a few recipes for so-called "Irish" scones. I chose this one from Epicurious because it was highly rated, made a half recipe, substituted chocolate chips for currants, and forgot one of the folds in the directions, but they were tasty enough. I can't figure out if there isn't enough salt in the recipe or I forgot to add it. It was an early morning! I've made a lot of scones; it's nice to have one that's a little different.

Closeup of an Irish scone in cute folds and mini chocolate chips sticking out, held in front of my husband's plaid shirt.


Ultra-Buttery Irish Scones

Yield
8 scones
Active Time
20 minutes
Total Time
45 minutes

Ingredients

  • 1 cup cold whole milk
  • 1/4 cup granulated sugar
  • 1 teaspoon kosher salt
  • 3 cups all-purpose flour, plus more for dusting
  • 2 1/2 teaspoons baking powder
  • 1 cup (2 sticks) cold unsalted butter, divided
  • 1/2 cup dried currants
  • Demerara or turbinado sugar (for sprinkling)
  • Flaky sea salt (for sprinkling)

Preparation

  1. Preheat oven to 375°. Line a rimmed baking sheet with parchment paper.
  2. Whisk milk, granulated sugar, and kosher salt in a medium bowl until sugar and salt dissolve. Whisk flour and baking powder in a large bowl. Cut 10 Tbsp. butter into 1/2" cubes, add to flour mixture, and blend with a pastry cutter or your fingertips until pea-size pieces form with some larger chunks remaining. Add milk mixture and stir with a fork until large clumps form. Gently knead in the bowl until dough just comes together. Transfer to a lightly floured work surface.
  3. With a lightly floured rolling pin, roll out dough to a 14x8" rectangle, with long side facing you. Heat 2 Tbsp. butter in a small, microwave-proof bowl in the microwave until softened but not melted, about 20 seconds. Spread evenly over dough with fingertips, then sprinkle currants evenly on top and press to adhere. Fold up bottom third of dough over center, then fold down top third to meet bottom edge, as if folding a letter. Fold in half crosswise, then, using a rolling pin, gently flatten into an 8x4" rectangle.
  4. Cut dough in half lengthwise and in quarters crosswise to form 8 even squares. Transfer to prepared pan, spacing 2" apart. Sprinkle tops generously with demerara sugar and lightly with flaky sea salt.
  5. Bake until scones are golden brown, 25-30 minutes. Meanwhile, melt remaining 4 Tbsp. butter in a small saucepan over medium-low heat. When butter bubbles, remove from heat and skim off foam from surface. As soon as the scones come out of the oven, lightly brush tops with clarified butter, leaving behind white solids in bottom of saucepan. Cool scones on sheet on a wire rack and serve hot, warm, or room temperature.
Do Ahead
Rolled and cut scone dough can be frozen in an airtight container up to 2 days. Bake directly from the freezer, increasing baking time as needed. Scones can be made 6 hours ahead-let cool completely and store in an airtight container at room temperature.


Monday, March 15, 2021

Breakfast Pi(e)

I almost always miss Pi Day, which is so silly of me. This year I was not going to be thwarted! I was looking through The Book on Pie: Everything You Need to Know to Bake Perfect Pies by Erin Jeanne McDowell, and found a recipe for Breakfast Pie that wasn't savory, but seemed like it would be a mix between a no-bake cheesecake and a yogurt parfait. Sold! And that's what it turned out tasting like.

Overhead shot of Breakfast Pie, with the word Pi outlined in blueberries, a creamy white surface, and a border of blueberries and raspberries.

If I made this again, I'm not sure I'd make it in pie shape because mine at least didn't set up firmly. I did use organic whole milk yogurt that wasn't Greek yogurt, not sure if that matters. The recipe called specifically for Greek style, but I missed that detail. There were a few more crust suggestions to pair with the recipe that also sounded good, especially oatmeal cookie crust. The pie mixture itself is super tasty and would be good in a trifle or parfait. It reminds me of the Russian Cream we made for Mother's Day at the restaurant I worked at in 2001 - it's a different combo of dairy ingredients but has a similar texture and tang, and is served with fruit. If I made this again in pie form I might also swirl the jam through instead of putting it just on the bottom. It all ended up mixed together when I served it anyway!

Side view of pie with raspberry close-up and the word "Pi" out of focus in the background


Breakfast Pie

2/3 cup jam, marmalade, or preserves
1 9-inch crumb crust made with granola, or graham cracker crust
12 oz cream cheese, at room temperature
2 cups plain Greek yogurt
1 tbsp fresh lemon juice
1 tsp vanilla extract
1/2 tsp fine sea salt
2 cups berries or sliced fresh fruit of choice
Honey for drizzling

  1. Spoon the jam into the bottom of the cooled crust and spread into an even layer. Chill while you make the filling.
  2. In the bowl of a stand mixer fitted with the paddle attachment, cream the cream cheese and brown sugar until light and fluffy, 4-5 minutes. Add the yogurt, lemon juice, vanilla, and salt and mix well to combine.
  3. Pour the filling into the chilled pie crust and spread into an even layer. Refrigerate for at least 8 hours (or up to 24 hours).
  4. When ready to serve, arrange the fruit on top of the pie. If desired, drizzle honey over the fruit. Slice and serve.

Notes from JennyBakes:

-It's easy to make a few subs for lower-sugar items here, from making more of a nut or low-carb granola crust to using a no-sugar-added jam to using coconut sugar or brown sugar splenda instead of brown sugar. I used brown sugar Splenda and it was fine. I didn't think we needed honey at all.

-Deb from Rainy Day Bites and I talked about how cute this would be to make in individual sizes and let people add their own fruits. A great makeahead brunchy pie or tart!


Monday, March 08, 2021

Gibanica - (Serbian) Cheese Pie

In researching foods from Montenegro, Serbia, and this general area on the internet, I went down many rabbit holes. There are bunches of variations of this cheese pie that is basically phyllo or the slightly thicker yufka dough, layered or rolled or scrunched in a dish, with a thin mixture of dairy products, that bakes up into this beautiful creation that is halfway between macaroni and cheese and lasagna, kind of. It is the perfect thing to do with that extra roll of phyllo you end up with after a project, but if you do that, make HALF this recipe please. The recipe I followed most closely comes from the Where is My Spoon? blog, a woman living in Germany. I say most closely because there is a wide range out there and I substituted some ingredients, and only had half the phyllo, so I just made it work. I think I used ricotta instead of cottage cheese and maybe half yogurt, half sour cream. 

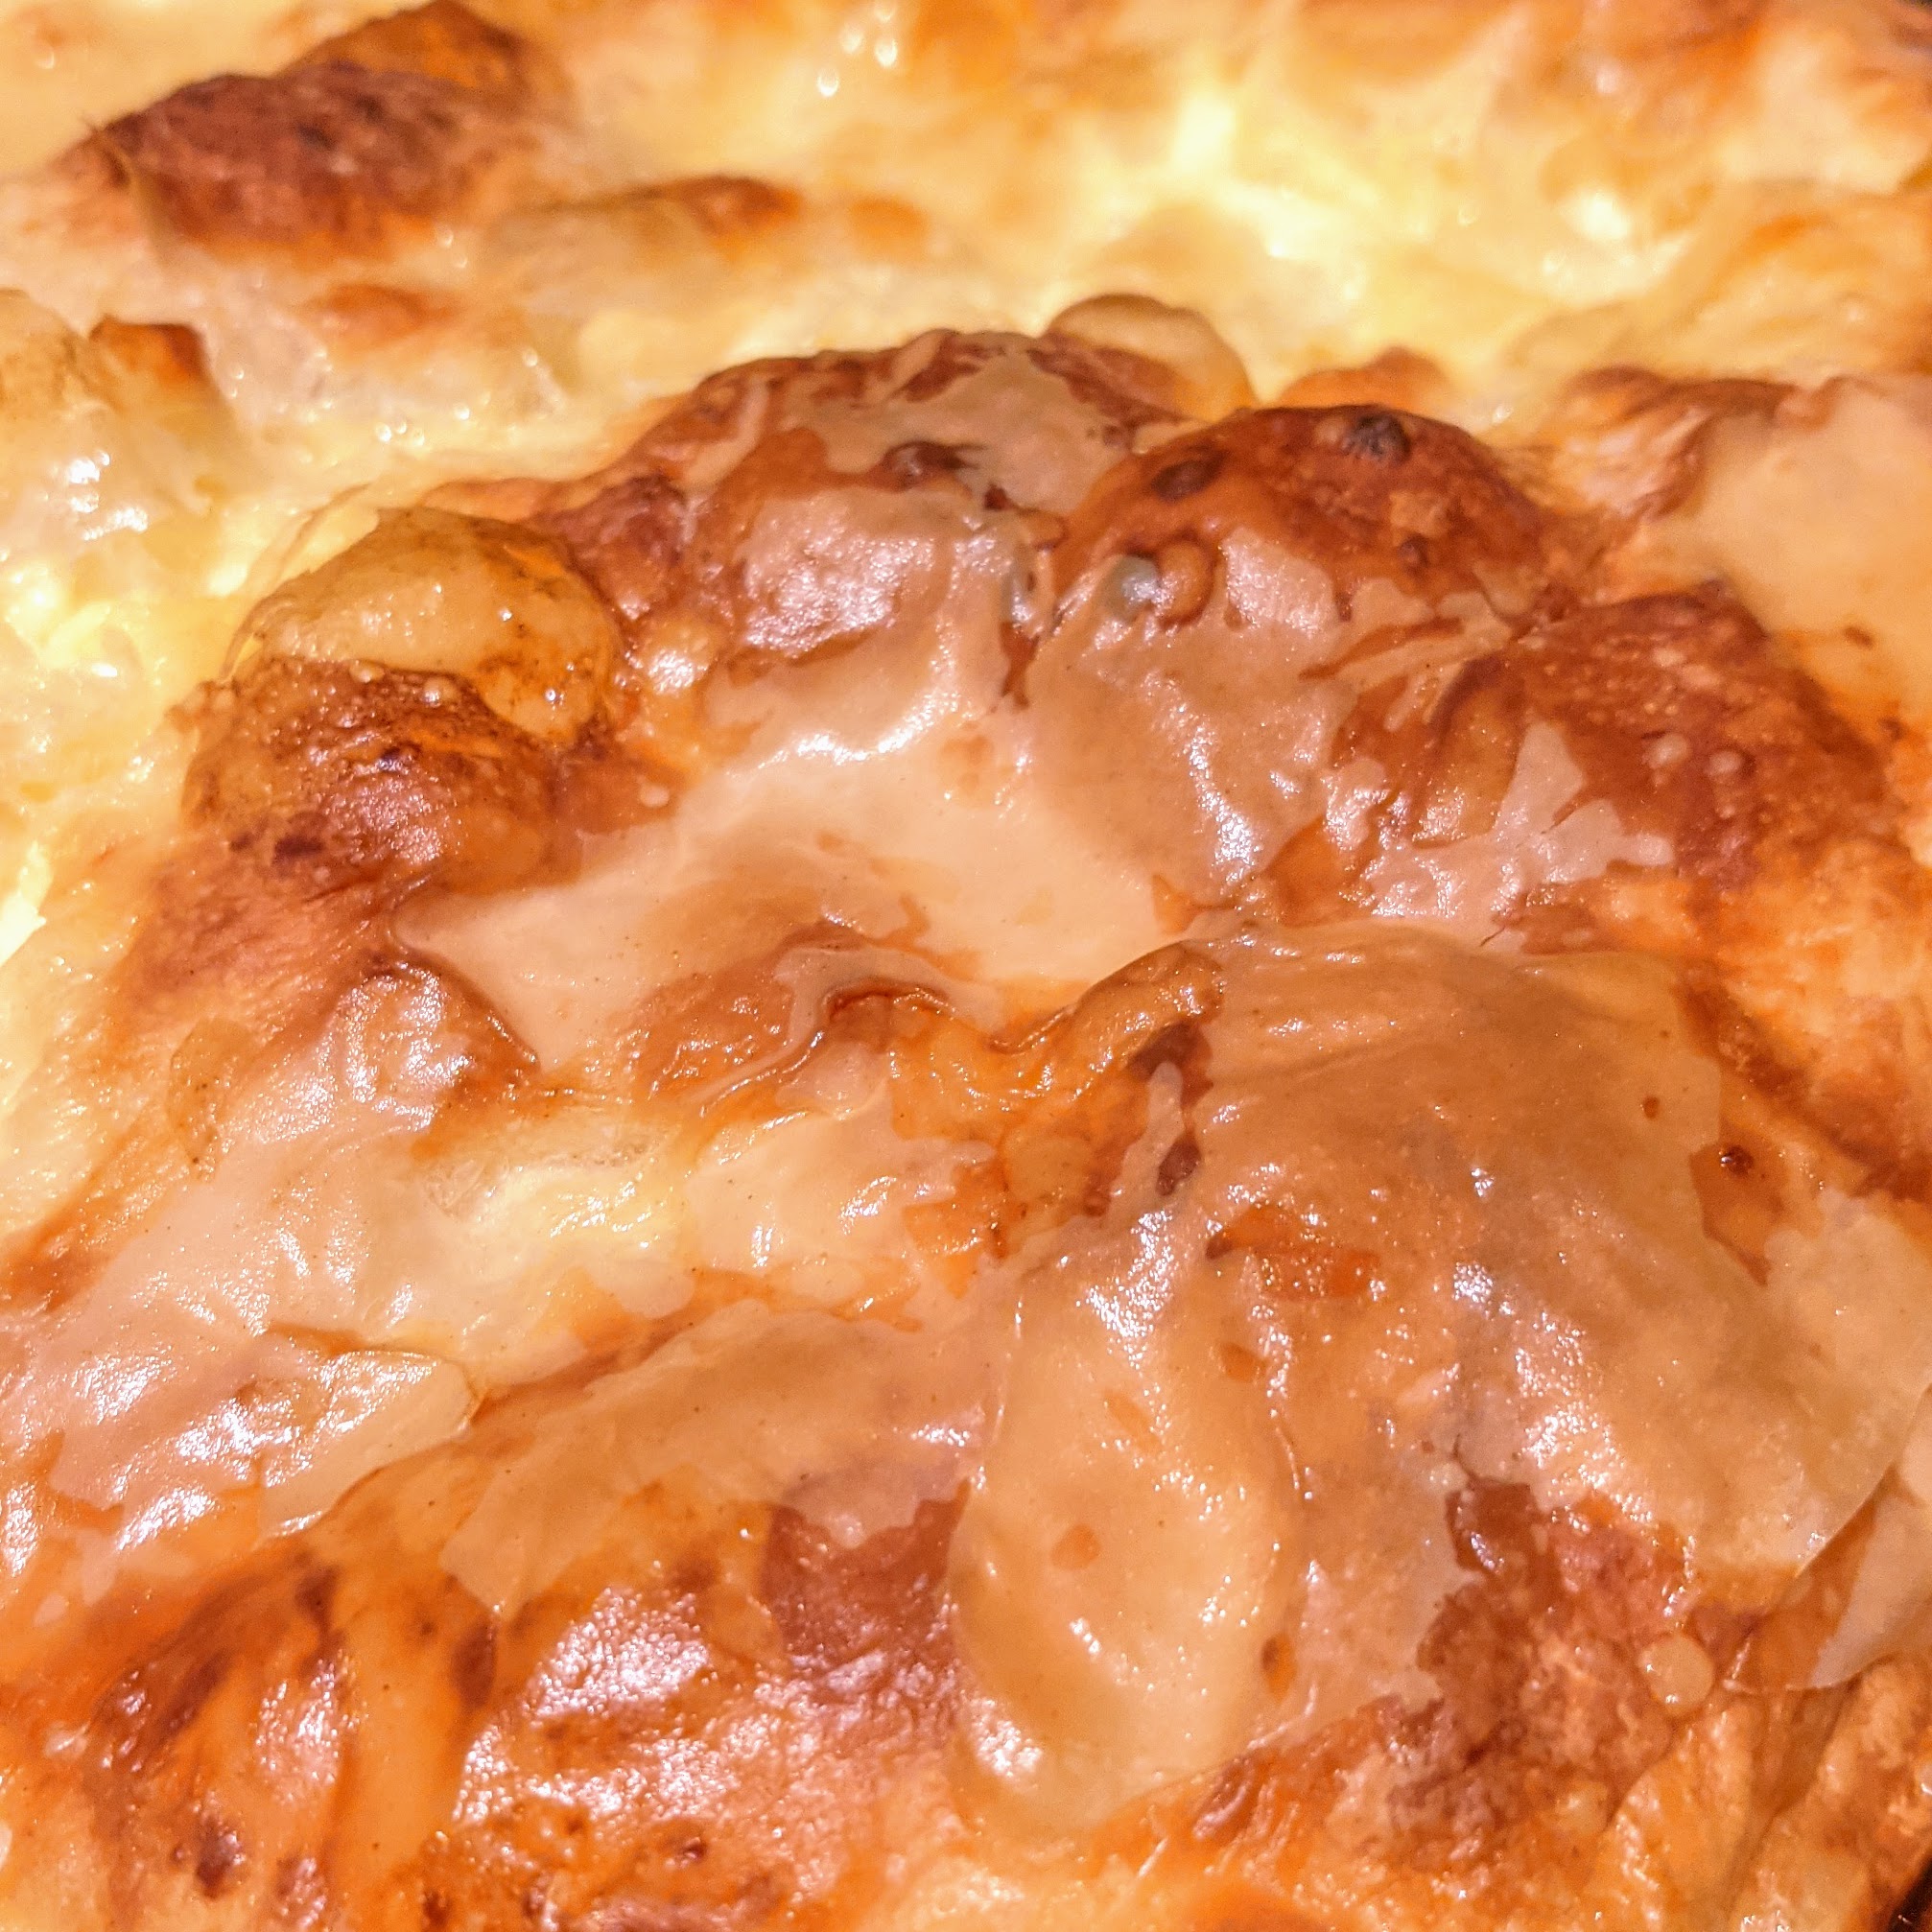
Gorgeous browning top of the gibanica

 
I should warn you that on every post about this dish, there are people from other countries in the region claiming it for their country. I don't know where it comes from or who first made it, but I do know it is tasty.

Gibanica

Ingredients

  • 750 g/ 1.6 lb phyllo or yufka dough
  • 350 g/ 12.3 oz cow milk feta
  • 200 g/ 7 oz/ about ¾ cup sour cream
  • 200 g/ 7 oz/ about ¾ cup cottage cheese
  • ½ liter/ 17 fl.oz/ 2 cups whole milk
  • 5 eggs
  • 3 tablespoons olive oil, divided
  • fine sea salt to taste 

Slice side view, not pretty, but delicious comfort food
 

Instructions

Filling:

  1. Roughly mash the feta cheese with a fork in a large bowl.
  2. Add the lightly beaten eggs, sour cream, cottage cheese, whole milk and add salt to taste. The amount of salt you need depends on how salty the feta cheese is, you should definitely try the mixture and add salt accordingly.

Assemble the gibanica:

  1. Grease the baking dish (approximately 30x22 cm/ 12x9 inches) with 1 tablespoon olive oil.
  2. Open the packet of dough, take out two sheets of dough, while keeping the rest covered at all times. Cover the dough you are not working with with a damp towel to prevent it from drying out. Work quickly.
  3. Place the first two dough sheets in the greased baking dish. The dough sheets should hang over the edges of the baking dish, when you are finished with filling the pie, you will seal it using these overlapping pieces of dough.
  4. Place the bowl with the cheese slurry next to the baking dish. Take one dough sheet out of the packet, crumple it a bit (it doesn't matter if it breaks a little) and dip and run it through the cheese mixture.
  5. Press it lightly into your hand to give it a rough round shape and place this crumpled dough into the baking dish.
  6. Make sure to keep two last sheets of dough to close the pie, but otherwise use as many pieces of dough as needed to fill the baking dish.
  7. Pour the remaining cheese mixture over the crumpled dough in the dish.
  8. Fold the overlapping sheets of dough over the pie.
  9. Take the last two sheets of dough and place them over the pie as well.
  10. Mix together the remaining olive oil and 2 tablespoons hot water. Brush the top of the pie with this mixture and leave it to soak on the counter while you preheat the oven, my convection oven needs about 10 minutes to get hot.
  11. Preheat the convection oven to 170 degrees Celsius/ 340 degrees Fahrenheit or a regular oven to 190 degrees Celsius/ 375 degrees Fahrenheit.
  12. Bake the gibanica for about 45 minutes or until golden brown and set.
  13. Serve hot or cold as suggested above.


Notes from JennyBakes:

You can interchange some of the dairy ingredients, but feta is a pretty important flavor. When you put it in the oven, it is fairly liquidy but if you scale up and down with the amount of phyllo/yufka, you should also scale up and down the other ingredients. That said if you've fit all you can fit and you just put in what looks right, it's hard to ruin this dish. The original recipe's pictures looks smoother than mine but I went a little rogue. 


Monday, March 01, 2021

Confetti/Funfetti Birthday Cake

One of the first visits at our house with the two boys we are adopting coincided with the birthday week of the older one. I got ingredients for three kid-friendly cakes and let him choose - Funfetti Layer Cake from Sally's Baking Addiction, and two options that looked great from Joy the Baker- Everybody's Birthday Cake, and a Southern-style strawberry cake. (When I don't know what to bake, it's so nice to have some favorite bakers I trust!) He went with funfetti! Who wouldn't? I was a bit nervous making a cake from scratch because sometimes a butter cake gets dry. I would recommend this recipe, and to link back to Sally's Baking Addiction for her tips, tricks, and beautiful photos.

A slice of sprinkle-speckled cake

Funfetti Layer Cake


Ingredients


Funfetti Cake

  • 3 and 3/4 cups (431g) sifted all-purpose flour
  • 1 teaspoon baking powder
  • 1 teaspoon baking soda
  • 1 teaspoon salt
  • 1 and 1/2 cups (3 sticks; 345g) unsalted butter, softened to room temperature
  • 1 and 3/4 cups (350g) granulated sugar
  • 4 large eggs, room temperature
  • 2 large egg whites, room temperature
  • 3 teaspoons (15ml) pure vanilla extract
  • 1 and 1/2 cups (360ml) buttermilk, room temperature
  • 3/4 cup (142g) rainbow sprinkles

Vanilla Frosting

  • 1 and 1/2 cups (3 sticks; 345g) unsalted butter, softened to room temperature
  • 6 cups (700g) sifted confectioners’ sugar
  • 1/3 cup (80ml) heavy cream
  • 3 teaspoons (15ml) pure vanilla extract (or use clear imitation vanilla extract for stark white frosting)
  • 1/8 teaspoon salt
  • optional: additional sprinkles for garnish

Directions

  1. Preheat oven to 350°F (177°C). Grease and lightly flour three 9-inch cake pans.
  2. Make the cake: Whisk the sifted flour, baking powder, baking soda, and salt together in a large bowl. Set aside. Using a handheld or stand mixer fitted with a paddle attachment, beat the butter on high speed until smooth and creamy – about 1 minute. Add the sugar and beat on high speed for 5 full minutes until creamed together fairly well. Scrape down the sides and up the bottom of the bowl with a rubber spatula as needed. On medium-high speed, add 1 whole egg at a time, beating well after each addition until all 4 whole eggs are mixed in. Set the 2 egg whites aside for now. Beat in the vanilla extract. Scrape down the sides and up the bottom of the bowl with a rubber spatula as needed.
  3. With the mixer on low speed, add the dry ingredients in three additions alternating with the buttermilk, beginning and ending with the dry ingredients, and mixing each addition just until incorporated. Do not overmix this batter. The batter will be smooth, velvety, and slightly thick. Vigorously whisk or beat the 2 additional egg whites until thick, foamy, and soft peaks form- about 3 minutes. Gently fold into the batter. Finally, fold the sprinkles into the batter. Spoon/pour batter evenly into each cake pan.
  4. Bake for around 25 minutes or until the cakes are baked through. To test for doneness, insert a toothpick into the center of the cake. If it comes out clean, it is done. Allow cakes to cool completely in the pans set on a wire rack. The cakes must be completely cool before frosting and assembling.
  5. Make the frosting: In a large bowl using a hand-held mixer or stand mixer fitted with a whisk or paddle attachment, beat the butter on medium speed until creamy – about 2 minutes. Add confectioners’ sugar, cream, vanilla extract, and salt with the mixer running on low. Increase to high speed and beat for 3 full minutes. Add more confectioners’ sugar if frosting is too thin, more cream if frosting is too thick, or a pinch more of salt if frosting is way too sweet.
  6. Assemble and frost: First, using a large serrated knife, slice a thin layer off the tops of the cakes to create a flat surface. Discard (or crumble over ice cream!). Place 1 cake layer on your cake stand or serving plate. Evenly cover the top with frosting. Top with 2nd layer and evenly cover the top with frosting. Finish with the third cake layer and spread the remaining frosting all over the top and sides. I tinted extra frosting both pink (1 drop pink food coloring) and blue (1 drop blue coloring) and used a Wilton 1M tip to pipe it around the top edges. Decorate top of cake with sprinkles, if desired.

Monday, February 22, 2021

Kid Food: Corn Dog Muffins

Not everyone knows that my husband and I are in the process of adopting two boys, which means I am in the process of learning how to cook for kids, which I haven't ever done! I had bought hot dogs when they were first supposed to start visits, but covid got in the way for a few weeks. So then I had these hot dogs I either had to eat or throw away. Luckily I had seen a recipe for corn muffins with hot dog pieces in them, kind of like a quick corn doggish thing. I still don't know if kids like them, but it was a good idea! I'd give credit for this recipe but it's a combo of a few.

A corn dog muffin split open in front of a whole one. Doggo in background.

Corn Dog Muffins*

1 cup flour
1 cup cornmeal
1 tsp baking powder
2 tbsp sugar
1 tsp salt
1 cup milk
6 tbsp sour cream
1 stick butter, melted
10ish hot dogs, uncooked, chopped into fourths or thirds.

  1. Preheat oven to 375 F.
  2. Stir dry ingredients together, mix in wet. 
  3. Spray muffin tin with non-stick cooking spray. 
  4. Add batter to cup until it just reaches the top.
  5. Poke hot dog pieces into muffins, evenly distributing.*
  6. Bake for 15 minutes or until top is not wet.
  7. Serve with mustard, honey mustard, and/or ketchup, whatever you'd eat with corn dogs.

Makes 14-18

*I made half this much and it made 8-9 muffins. I had a few with just 1/4 hot dog and liked those I'd put 2-3 pieces in best. 

Caution: Some consider hot dogs choking hazards for smaller children, so please proceed accordingly.


Monday, February 15, 2021

Napa Cabbage Okonomiyaki

I was first exposed to okonomiyaki through a Latin American restaurant in town, ASADA, which offers "Okonomiyaki À La Latin" on their Saturday brunch menu. In their treatment, this Japanese savory pancake was combined with avocado, chipotle, and meats prepared the Latin American way. It was delicious! When the Rainy Day Bites Cookbook Club had a pancake challenge from East: 120 Vegan and Vegetarian Recipes from Bangalore to Beijing by Meera Sodha, I was drawn in to the Napa Cabbage Okonomiyaki. I do not know how traditional this okonomiyaki is either, does it usually have this kind of cabbage? Is it usually vegetarian? But since I only had the fusion version to compare it to, I will just have to consider it delicious. This was a fast and easy lunch for two.

Overhead view of an okonomiyaki drizzled with brown and white sauces.

Napa Cabbage Okonomiyaki

Makes 2 pancakes (to serve 2)

For the okonomiyaki

1 1/4 cups all-purpose flour
1 1/4 tsp salt
4 large eggs
[2/3 cup water]
4 cups shredded Napa cabbage*
6 green onions, finely chopped, greens and whites separted
2 tbsp canola oil

For the okonomiyaki sauce

2 1/2 tbsp ketchup
2 1/2 tbsp A1 sauce
2 1/2 tbsp date syrup*

To serve

mayonnaise
crispy fried onions* (storebought, or as Deb suggested, some friend shallots would work)

Whisk the flour, salt, eggs, and 2/3 cup water together with a fork in a mixing bowl until there are no lumps and you have a smooth batter. Add the cabbage and the green onion whites, and mix well to coat all the vegetables. Now make the okonomiyaki sauce: put the ketchup, A1 sauce, and date syrup into a small bowl and mix well.

To cook the okonomiyaki, heat a tablespoon of oil in a small frying pan over a medium-high flame.* Add half the batter to the pan and flatten it with a spoon or spatula to help it into a circular pancake around 1-inch deep. Cook the first side for 3-4 minutes. You should see hte scraps of cabbage and batter at the edges of the pancake starting to brown and crisp. If it is browning too fast, turn down the heat a little. When it's ready, turn the okonomiyaki with a spatula for the other side for a further 3 minutes. Turn out onto a plate and repeat with the second half of the batter.

To serve, crisss-cross the surface of the okonomiyaki with the sauce and some mayonnaise, then liberally top with crispy onions and the reserved green onions.

Notes from JennyBakes:

-I added the water to the ingredient list because I'm bound to forget it if it isn't listed.
-4 cups shredded Napa cabbage is probably not even going to be half of one Napa cabbage. It would be a mistake to use more than what is called for because the batter will never cover it. I also ended up wishing I had sliced it a little thinner closer to the root.
-I had date syrup because of my year of Middle Eastern cooking and baking, but you might not. I think molasses or sorghum or honey or maple would all work but all taste a bit different.
-I thought I had crispy onions when I started making these but discovered I was wrong. I do believe this edition would have elevated mine okonomiyaki!
-I found medium-high to be too hot, but I have an electric stovetop.

More cookbook thoughts:


-This is going to go on my wishlist! I got it from the library.
-The only recipe I've tried so far is the Vietnamese Coffee Ice Cream, which was great sandwiched between crispy chocolate chip cookies.

Other dishes I want to try include:

 -Mushroom Bao
-Onigiri
-Rutabaga Laksa
-Peanut butter and broccolini pad thai
-Winter miso ramen
-Sri Lankan Beet Curry
-Beet & Yogurt Rice
-Winter Pilau
-Egg Tamago Rolls
-Bombay Rolls
-Black Dal
-Milli's Matcha Roll Cake


Speaking of pancakes (since crepes are part pancake) -

Like pancakes? I seem to make them from around the world! Check out the Khobz Al-jbab from the Arabian peninsula,  Finnish pannukakku, Icelandic pönnukökur, Papua New Guinean banana pancakeskauk moto from Myanmar, the Danish ebleskiver, the Hungarian palacsintas, the Kaiserschmarrn or "Emperor's Mess" from Austria, the Swedish pancakes from Alaska, and what we call the German oven apple pancake. Some pancakes seem like they might be from other places, like these Crepes with Roasted Bananas and Barbados Cream. I also made ratio pancakes from Michael Ruhlman's book, which we can call American. I've made several more American pancakes, like the recipe from Rosa Parks held by the National Archives, another variation on lemon ricotta pancakes. Pancakes can also be savory, like scallion pancakes from China (also called cong you bing) or the Onoyomiyaki from Japan.


Monday, February 08, 2021

Marionberry, hazelnut & coconut cake

This is a recipe that started with the Blueberry, pistachio & coconut cake in Simply by Sabrina Ghayour. (This was the January cookbook for the Rainy Day Bites Book Club, but this recipe was an additional one I made on my own.) Honestly, it feels like my recipe now. The USA version of the cookbook clearly made errors in the conversions (1 1/2 cups of butter instead of 1 1/2 sticks? It would be swimming!) and didn't include any salt... all baked goods without salted butter should have a little bit of salt. So this recipe is mine now! (I still wanted to give credit where it is due.)

Slice-cut view of cake with berries burst along bottom, buttery yellow color of the crumb

The cake would work with any berry except maybe strawberry, which has too much moisture. The dessicated coconut is not required and you could also substitute with shredded coconut, just know that will up the sweetness factor. You can't see the hazelnuts I threw in here but they did add some crunch. I bet pecans or walnuts would work even better and can imagine a blueberry-walnut or blackberry-pecan version of this cake. You may need to bake it just a little longer than the time given - you want the toothpick to come out clean from the middle.


Marionberry, hazelnut & coconut cake

3 eggs
3/4 cup granulated sugar
1 tsp vanilla extract
1/2 cup desiccated coconut
1 1/2 sticks unsalted butter, melted (6 oz)
1 1/2 cups all-purpose flour
1 tsp baking powder
1/2 tsp salt
1/4 cup milk
generous handful of hazelnuts
1 1/4 cups marionberries (I used frozen)

Preheat the oven to 350 F. Line a loaf pan with parchment paper.

Put the eggs, sugar, and vanilla into a large mixing bowl and beat together until well combined. Add the coconut and mix well, then stir in the melted butter until incorporated. Add the flour, baking powder, and milk and mix until smooth. Finally, stir in the hazelnuts and then gently fold in the marionberries.

Pour the batter into the prepared loaf pan and bake for about 1 hour, or until cooked through and a skewer or knife inserted into the center comes out clean. Remove from the oven. Use the parchment to lift cake from pan and let cool. Serve in slices.


Monday, February 01, 2021

Goat Cheese, Greens, and Za'atar Filo Tart

 The second challenge for January's Rainy Day Bites Cookbook Club was the Goat Cheese, Vegetable, and Za'atar Filo Tart from Simply: Easy Everyday Dishes by Sabrina Ghayour. It called for eggplant and red pepper, but that didn't sound good to me, so I took the general idea and ran with it. For her recipe you should check out her cookbook! I like the changes I made overall, but think I might try replacing the garlic granules with fresh garlic, and I think all of this would be nice sprinkled with aleppo pepper, since I have so much of that from previous recipes.

Close view of a filo crusted goat cheese tart with visible spinach and za'atar poking through

Goat Cheese, Greens, and Za'atar Filo Tart

Olive oil
1 zucchini, diced
1-2 handfuls baby spinach
2 green onions, sliced on the diagonal
3 1/2 tbsp butter, melted
6 sheets filo pastry (each about 19x10 inches)
7 eggs, 1 beaten for glaze
1 1/4 cups heavy cream
2 tbsp za'atar
1 tsp garlic granules
4 oz goat cheese (or an herbed goat cheese)
Salt and pepper

Preheat the oven to 400 F.

Line a plate with a double layer of paper towels. Place a large saucepan over high heat and pour in enough vegetable oil to coat the bottom of the pot. Add the diced zucchini and cook for 6-8 minutes, stirring occasionally. Remove the zucchini with a slotted spoon. Shake any excess oil off them, then transfer to the lined plate to drain and cool. 

Meanwhile select an ovenproof dish, about 13x9 inches. Brush melted butter over each pastry sheet and place 2 layers lengthwise in the dish with the ends overhanging the short edges of the dish. Take the remaining 4 sheets and set 2 layers side by side widthwise across the dish so that they meet in the center, with the excess overhanging the long edges of the dish. Crumple the overhanging pastry inside the edges of the dish to create a border for your pie, leaving room for the filling. Brush the crumpled pastry with the beaten egg.*

Sprinkle the filo base with the zucchini, green onion, and spinach. Beat the remaining 6 eggs and fold in the cream, za'atar, and garlic granules. Season with salt and pepper. Pour the mixture into the filo base, scatter with the goat cheese, and bake for 30 minutes until golden brown.

*It might work best to lightly scrunch the edge, put the rest of the pie together, and then brush the pastry with the egg. I also added scrunched pastry on top of the egg mixture to use up more of the roll of filo, and just dipped it in egg or butter. It's pretty forgiving as long as you work quickly. If you scrunch the sides down too soon the egg mixture might rise above the filo and leave a mess!

Monday, January 25, 2021

Salted Halva Blondies from Dessert Person

The January/February baking cookbook for the Rainy Day Bites Cookbook Club is Dessert Person by Claire Saffitz. I skipped the first challenge of the blood orange olive oil cake but it certainly looked delicious. The second challenge, which I posted to Instagram on Saturday the 23rd, are the Salted Halva Brownies. I'm copying the recipe from New York Seed + Mill since they had already posted it online.

A tan colored blondie with sesame seeds on top sits on a miniature turquoise cake platter.

I had baked with tahini before (tahini cookies, buckwheat tahini orange chocolate cookies, and tahini chocolate chip cookies) but had not used halva as an ingredient to add to things. I ordered a vanilla flavored halva and chopped it up. You can't see it in the picture but it adds a distinct flavor and chewy texture which made these very delicious.

Salted Halva Blondies

INGREDIENTS

1 ¼  c flour
1 tsp kosher salt 
½ tsp baking powder
6 oz (170g) white chocolate (chopped)
4 oz (1 stick) unsalted butter 
½ c light brown sugar 

1 large egg 
2 large egg yolks 
1 tbs vanilla extract
4 oz crumbled halva

2 tbs sesame seeds
Flaky sea salt (for sprinkling the top) 


STEPS
1. Preheat oven to 350F. Line an 8 x 8” pan with 2 sheets of foil, crossing one over the other. Butter the foil generously and set aside.  
2. Mix the dry ingredients in a medium bowl. Gently melt the white chocolate in a double boiler (i.e. in a bowl that is placed over a pot of simmering water). Add the butter and tahini to the white chocolate and stir gently to combine until smooth. Remove the mixture from the heat. 
3. Whisk the brown sugar into the white chocolate. It may start to look grainy and separate (which is normal). Add the egg and egg yolks and vanilla to the white chocolate mixture and whisk vigorously until smooth and glossy. 
4. Add the dry ingredients to the chocolate mix and use a flexible spatula to combine. Final step is to add the crumbled (or chunked halva) trying not to over mix at this point and break up the halva too much. 
5. Scrape batter into the buttered pan, sprinkle with sesame seeds, flaky sea salt and bake for 20-25 mins (or until blondies are golden brown on the top). Allow to cool in the pan, remove and slice into squares. They should be chewy on the inside and puffed on the top!

Makes 16 blondies. 
You can make these and freeze for up to 2 months.


Monday, January 18, 2021

Heljdopita - Buckwheat Crepe Cake

Every year I focus on a different region of the world for one of my reading goals, and find myself cooking and baking dishes from those countries as well. I recently read the first book for my Europe 2021 goal, a book from a little country called Montenegro. I did a bit of research on recipes from Montenegro, and found a few tourism/travel videos. Many of the dishes are also known in Serbia, of course, since they used to be the same country. It is only very recently that the language of Montenegrin has started to grow more distinct from Serbian as they start to declare their identity. One recipe that came up was what looked like a crepe cake, but the description of it was savory - heljdopita.

I consulted several cooks on the internet. One person made buckwheat crepes and stacked them in a pan to bake, another used a buckwheat type pastry (translated to "buckwheat bark"), and another made more of a dough than a batter, and rolled each piece out separately. I knew I didn't want to have to roll anything out "thin enough" because I never get there. The second person made a lasagna shaped buckwheat pie (referred to as "Perfect and Adorable Buckwheat Pie") but added spinach between the layers, which I liked. So I adapted the first person's recipe, brought in elements for the filling from other recipes, and added spinach between every other layer when I put it together. The recipe videos were all in Serbian and some ingredients are not quite the same, or maybe even measurements, so I did my best!

Heljdopita (aka Adorable Buckwheat Pie)

Ingredients for crepes:

150 g buckwheat flour (I used 1 cup + 2 tbsp)
250 g whole wheat flour (I used 1 3/4 cups all-purpose flour, but 1 1/2 may have been better)
3 eggs
One and a half deciliters of milk (I used 5 oz)
Three and a half deciliters of sparkling water (I used 11.75 oz, or 1 cup + scant 1/2 cup)

Filling:

200 g cheese (I used 8 oz feta, they use feta or another sharp crumbly cheese)
200 g cream cheese (I used sour cream since others did, I think the "cream cheese" references is really farmers' cheese, or some other mild soft cheese)
2 eggs
100 ml plain greek-style yogurt (1/3 cup)

Whisk eggs, stir in milk and water. Stir in buckwheat flour; stir in whole wheat flour half at a time. Make crepe like pancakes (medium heat, ladle in just enough to cover bottom, flip when edges start to curl, cook just a few seconds on the other side.)

Mash cheese, stir in sour cream (or cream cheese), eggs, and yogurt. Add salt and pepper to taste.

In a springform or dutch oven, layer a crepe with a spoon or so of filling, enough to spread around but does not need to fully cover. Add spinach if so desired, fresh baby leaves fine.

Bake at 400 F for 20-25 minutes.

Monday, January 04, 2021

Browned Butter Madeleines

I got a madeleine pan for Christmas and decided to just jump in and try making a batch in the lull between Christmas and New Year's Eve. I find videos helpful when I need to learn a new technique, so I went to YouTube first. If you're here just for the recipe, I used this one over here. But I have things to say about making madeleines!

Inga from BuzzFeed recorded a video of her with Dominique Ansel, both being charming with one another, making matcha madeleines to hand out to the customers who lined up before the bakery opens. I didn't want to make a specific flavor for my first time, plus he chills the batter 12-18 hours, a long overnight (he says this is for the baking powder's sake.) He uses honey as well. "Not bad." One idea this gave me was that you may be able to easily make flavored madeleines with various flavored powders. He also uses browned butter, and fills the pan with a piping bag.

Kim-Joy, famous from the British Baking Show, had a few hints to making perfect madeleines on her basics video, including using the freezer to speed up the chilling time. Whisking 7 minutes is very important, because madeleines are a sponge cake, and this is crucial to the structure. She does a good job showing the difference between the original beating and the gentle mixing at the end. In a separate video, she shows how to make "pandaleines" using her usual cutesy vibe. I wasn't going to go super decorative in my first attempt but she made me feel I could do this in a shorter period of time. (There are step by step directions in her cookbook, Baking with Kim-Joy.)

Then I watched John at Preppy Kitchen make madeleines with browned butter and lemon. Some of what he did reinforced what I'd seen earlier, and his recipe was more straightforward. I think what I ended up doing was his ingredients plus using the cooking spray on the pan recommended by one of the other websites I consulted. If you watch his video, I'm not sure he's correct about Proust inventing the madeleine but that's a topic for another day.

So now I have this pan. Do you have any favorite madeleine recipes? I'd like to do a glaze or a dip in the next version I try.


Madeleines
(recipe courtesy of John at Preppy Kitchen)

Ingredients

  • 7 tbsp unsalted butter (100g)
  • 2 large eggs at room temperature
  • 1/2 cup granulated sugar (100g)
  • 1 teaspoon lemon zest
  • 1 teaspoon pure vanilla extract
  • 3/4 cup all-purpose flour plus 1 tbsp (100g) sifted
  • 1/4 teaspoon baking powder
  • 1 pinch salt

Instructions

  • Melt the butter either in your microwave or in a small pot over medium heat. Browning the butter will add a lovely depth or flavor to the cakes but is of course optional. Once melted or browned pour the butter into a bowl and allow to cool.
  • Sift the flour, salt, and baking powder into a bowl then whisk together and set aside.
  • Add the eggs and sugar to the bowl or your stand mixer fitted with a whisk attachment or a large bowl if using an electric hand mixer. Beat on high until the mixture is a light yellow color with a thick silky texture, about 8-9 minutes. You'll see the beater leave trails when it's ready. Mix in the vanilla and lemon zest toward the end.
  • Fold the dry ingredients into the egg mixture and mix until just combined. You can sift the flour mixture into the eggs while you fold to avoid getting lumps or over-mixing the delicate batter.
  • Drizzle the butter into the batter and gently mix until just combined.
  • Cover and chill the batter as well as the buttered tins* for 1 hour then scoop one tablespoon of batter into each scallop-shaped well. Bake at 350F 8-10 minutes.
  • Serve with a light dusting of powdered sugar.

 Notes from JennyBakes:

I am noting that the butter, sugar, and flour all weigh the same in this recipe - I think that's what makes these sponge cakes. The additional ingredients help a bit with texture and flavor.

I did not chill or butter my tins, but they were brand new - I washed and sprayed with non stick spray based on the recommendation I found elsewhere. They were easy to remove!


Sunday, December 27, 2020

Gingerbread Cake with Date Syrup Sauce from The Flavor Equation

I'm back with another recipe from The Flavor Equation by Nik Sharma, and it was so perfect for the holidays. I just happened to have a giant jar of Iraqi date syrup in my pantry, so I was thrilled to have a use of it in this sauce. I didn't have bourbon so I left it out but will leave it in the directions below (which are from Nik Sharma's website as well as the book, which I recommend.) This was the end of the month challenge for the Rainy Day Bites Cookbook Challenge, an activity that has been such an excellent diversion for this year.

Slice of gingerbread cake with shiny date syrup sauce on top, in front of a lit christmas tree.

If I made this again I would have baked it 5 minutes less (I was worried about it being done enough and that left it just a little bit dry.) I still think the Smitten Kitchen take on Gramercy Tavern's gingerbread is my favorite, but it is legendarily difficult to get out of the pan - not a problem with this one. This also had some unique techniques involved, and I almost forgot to mix in the hot water at the end.

Gingerbread Cake with Date (Bourbon) Syrup Sauce
(recipe from Nik Sharma in The Flavor Equation)

SERVES 12 / MAKES ONE 9 IN [23 CM] SQUARE CAKE AND 2 CUPS [480 ML] SAUCE

For the cake:

¾ cup [165 g] unsalted butter, at room temperature, plus extra for greasing
1 Tbsp ground ginger
1 tsp ground black pepper
1 tsp ground green cardamom
1 tsp lime zest
2½ cups [350 g] all-purpose flour 
1½ tsp baking soda
½ tsp fine sea salt
2 oz [55 g] crystallized ginger, chopped 
¼ cup [50 g] sugar
¼ cup [85 g] honey
1 cup [320 g] unsulfured molasses or sorghum 
½ cup [120 g] crème fraîche 
2 large eggs, at room temperature
1 cup [240 ml] water warmed to 158°F [70°C] 

For the date syrup bourbon sauce:

2 Tbsp unsalted butter
1 cup [240 ml] date syrup
1 cup [240 ml] heavy cream
2 Tbsp honey bourbon or whiskey
¼ tsp fine sea salt 

For serving: 

Lightly sweetened crème fraîche 
Fresh lime zest


Grease a 9 in [23 cm] square baking pan with a little butter and line with parchment paper. Grease the parchment paper.

 Melt the butter in a small saucepan over medium heat. Remove from the heat and stir in the ginger, black pepper, cardamom, and lime zest. Let steep for 10 minutes.

 Sift the flour, baking soda, and salt through a fine-mesh sieve into a large bowl. Reserve 2 Tbsp of the flour mixture in a small bowl, add the crystallized ginger to it, and toss to coat well.

 Preheat the oven to 325°F [163°C]. Place the sugar, honey, and molasses in the bowl of a stand mixer. Scrape out the melted butter from the saucepan with a silicone spatula and add it to the mixer bowl. Using the paddle attachment, mix on medium speed until it turns a toffee-brown color, 4 to 5 minutes. Stop the mixer and scrape the sides of the bowl, add the crème fraîche, and mix on low speed until combined, 1 minute. Stop and scrape down the bowl. Mix in 1 egg at a time on medium speed until combined. Add the sifted dry ingredients and mix on low speed until combined, about 30 seconds. Stop and scrape down the sides of the bowl. On low speed, add the water and mix until combined. Remove the bowl from the mixer and scrape the sides. Fold in the crystallized ginger and transfer the cake batter to the prepared baking pan. Bake until the cake is golden brown on the surface and a skewer inserted in the center comes out clean, 50 to 60 minutes. Remove from the oven and let cool completely in the pan. Run a knife along the edges of the pan to release the cake and transfer to a serving plate.

 To prepare the date bourbon sauce, melt the butter in a small saucepan over medium-high heat. Swirl the butter in the saucepan until the milk solids start to turn red. Whisk in the date syrup and bring to a boil. Remove from the heat and whisk in the cream, followed by the bourbon and the salt. Transfer to an airtight jar and refrigerate until ready to use. You can make this sauce 2 days ahead of time.

 To serve, cut the cake into slices and serve with sweetened crème fraîche, a little lime zest, and a generous drizzle of the date bourbon sauce.


Notes from JennyBakes:

I used sour cream for the crème fraîche but would have used plain yogurt if I'd had it. I made a half recipe of the sauce, without the bourbon or any replacement for the alcohol, and that was enough for us! I also only had about 2/3 cup molasses so used date syrup for the rest of that as well.