There are a few baking blogs that I read with religious devotion, and Culinary Concoctions by Peabody happens to be one of them. She takes amazing pictures, develops creative recipes, and often tells funny stories. The entry that includes this recipe actually has a great story but I didn't notice it until I'd looked at it three times. All I had eyes for were these amazing layers of pumpkin spice bread and maple cheesecake, all in one delicious mini loaf.
When it came time to make the recipe, I didn't have loaf pans, so I pulled out my trusty bundt pan that I found for 50c at a garage sale in Broad Ripple, Indiana. It is an old fashioned metal one that you probably can't even buy anymore, but I adore it and make almost every breadlike or cakelike recipe in it. Someday I'll get out of my rut.
You can tell there is more pumpkin spice on the "top" of the cake, meaning the "bottom" ended up being more like a marbled bread-and-cheesecake mixture, but frankly, I didn't care because it just tasted SO good. I also left the nuts out, like usual.
The day the weather drops below 70 degrees or there is even a slight hint of a chill in the breeze, I have to start baking more. Autumn demands it! Just this weekend I made ginger cookies for a hiking trip, Souffled Pumpkin Oven Pancake for breakfast on Saturday, and this pumpkin spice bread. This one won the weekly blog post, hands down. You have to try it. Go to her blog today for the recipe and other great creations.
Categories: Bread, Cheesecake, Maple, Pumpkin
Monday, October 06, 2008


Thursday, October 02, 2008
Inside-Out Carrot Cake Cookies
I stumbled across this recipe one day while looking for something completely different, and had tucked it away in my brain. As temperatures dropped, my fall baking instincts kicked in, but didn't seem to be interested in apples or pumpkin. I remembered this recipe, and there you have it.
Inside-Out Carrot Cake Cookies
Gourmet Magazine - April 2004
Active time: 20 min Start to finish: 45 min
Makes about 13 cookies.
ingredients
1 1/8 cups all-purpose flour
1 teaspoon cinnamon
1/2 teaspoon baking soda
1/2 teaspoon salt
1 stick (1/2 cup) unsalted butter, softened
1/3 cup plus 2 tablespoons packed light brown sugar
1/3 cup plus 2 tablespoons granulated sugar
1 large egg
1/2 teaspoon vanilla
1 cup coarsely grated carrots (2 medium)
1 scant cup walnuts (3 oz), chopped
1/2 cup raisins (2 1/2 oz)
8 oz cream cheese
1/4 cup honey
Put oven racks in upper and lower thirds of oven and preheat oven to 375°F. Butter 2 baking sheets.
Whisk together flour, cinnamon, baking soda, and salt in a bowl.
Beat together butter, sugars, egg, and vanilla in a bowl with an electric mixer at medium speed until pale and fluffy, about 2 minutes. Mix in carrots, nuts, and raisins at low speed, then add flour mixture and beat until just combined.
Drop 1 1/2 tablespoons batter per cookie 2 inches apart on baking sheets and bake, switching position of sheets halfway through baking, until cookies are lightly browned and springy to the touch, 12 to 16 minutes total. Cool cookies on sheets on racks 1 minute, then transfer cookies to racks to cool completely.
While cookies are baking, blend cream cheese and honey in a food processor until smooth.
Jenny's Notes: There is a lot of sugar in these cookies, so they bake very flat. You can't see my nuts or raisins as well as in the Epicurious website recipe, because I used slivered almonds and golden raisins (that's what I had in the pantry!). I also added some cinnamon to the cream cheese to make it a little more flavorful.
My biggest complaint with this recipe is that once you make the sandwiches, you really only have a dozen cookies. I have 8 hungry student workers, and wish I had doubled the batch. Because of the cream cheese I stored them in the fridge, and they reminded me of whoopie pies because of the chill factor.
I'd definitely make these again. They were sweet, spicy, and chewy. I'd take these over carrot cake any day.
Categories: Almonds, Carrots, Cookies, Cream Cheese, Raisins

Inside-Out Carrot Cake Cookies
Gourmet Magazine - April 2004
Active time: 20 min Start to finish: 45 min
Makes about 13 cookies.
ingredients
1 1/8 cups all-purpose flour
1 teaspoon cinnamon
1/2 teaspoon baking soda
1/2 teaspoon salt
1 stick (1/2 cup) unsalted butter, softened
1/3 cup plus 2 tablespoons packed light brown sugar
1/3 cup plus 2 tablespoons granulated sugar
1 large egg
1/2 teaspoon vanilla
1 cup coarsely grated carrots (2 medium)
1 scant cup walnuts (3 oz), chopped
1/2 cup raisins (2 1/2 oz)
8 oz cream cheese
1/4 cup honey
Put oven racks in upper and lower thirds of oven and preheat oven to 375°F. Butter 2 baking sheets.
Whisk together flour, cinnamon, baking soda, and salt in a bowl.
Beat together butter, sugars, egg, and vanilla in a bowl with an electric mixer at medium speed until pale and fluffy, about 2 minutes. Mix in carrots, nuts, and raisins at low speed, then add flour mixture and beat until just combined.
Drop 1 1/2 tablespoons batter per cookie 2 inches apart on baking sheets and bake, switching position of sheets halfway through baking, until cookies are lightly browned and springy to the touch, 12 to 16 minutes total. Cool cookies on sheets on racks 1 minute, then transfer cookies to racks to cool completely.
While cookies are baking, blend cream cheese and honey in a food processor until smooth.
Jenny's Notes: There is a lot of sugar in these cookies, so they bake very flat. You can't see my nuts or raisins as well as in the Epicurious website recipe, because I used slivered almonds and golden raisins (that's what I had in the pantry!). I also added some cinnamon to the cream cheese to make it a little more flavorful.
My biggest complaint with this recipe is that once you make the sandwiches, you really only have a dozen cookies. I have 8 hungry student workers, and wish I had doubled the batch. Because of the cream cheese I stored them in the fridge, and they reminded me of whoopie pies because of the chill factor.
I'd definitely make these again. They were sweet, spicy, and chewy. I'd take these over carrot cake any day.
Categories: Almonds, Carrots, Cookies, Cream Cheese, Raisins
Saturday, September 27, 2008
Daring Bakers Challenge - Lavash Crackers
I was pleased when I saw that this month's Daring Bakers challenge was something savory, and even more pleased when it was vegan! The idea was to make the lavash cracker recipe from The Bread Baker's Apprentice and make any vegan and gluten free dip to go with it. It was optional to make the crackers themselves gluten free, but since I had bread flour in my freezer needing to be used, I went with regular for that. Thanks to Natalie of Gluten A Go Go and Shel of Musings From The Fishbowl for picking a great challenge. (You can view the recipe at Shel's blog, or pick up a copy of this cookbook for yourself. I know it is on my wishlist!

But back to the crackers. The posting date for this coincided with a international dinner night with friends, the theme of which was food from Saharan Africa. So I adapted the lavash and the dips that went with it to go along with this theme. I made the recipe for the first time last weekend, and didn't cut the crackers before baking. This meant breaking it into shards after it had cooled, and this worked okay, but I think they looked better the second time I made them, and precut them into squares or strips. The kneading also went better the second time, because I felt a specific moment when suddenly the dough felt like it was perfect, right around 8 minutes.

You can see poppy seeds, kosher salt, and a greenish spice on the crackers in various combinations. The green herb blend is za'atar, which is a mixture of thyme, sumac, sesame seeds, and salt. With its Arabic origins, I thought it was probably something that people in northern Africa would be familiar with, so it went along with my theme.

Ever since visiting my friend Abbey in Chapel Hill, NC, and seeing her amazing cupboards of gastronomic wonder, I have been wanting to try to make something with pomegranate molasses. Last weekend when I sat down and went through my stack of magazines, I found a recipe for muhammara in the July/August issue of Vegetarian Times. It called for pomegranate syrup, but I pretended it said molasses and substituted accordingly.
Muhammara is a dip made from roasted red peppers, olive oil, sauteed garlic, and toasted walnuts. It was tasty but I think next time I would use less of the pomegranate molasses and a little more garlic.

The other dip I made was Foul Mudammes, or Egyptian Fava Bean Dip. The hardest part about it, actually, was tracking down fava beans in town to make the second batch. I'm pretty sure Pita House is the only place selling them in a can, and I can always use an excuse to have to go there. From what I've read, fava beans and a bread similar to lavash is a traditional Egyptian breakfast. If this is true, I will be relocating to Egypt and continuing to blog from there. It was delicious and a perfect balance of spices and tomato and beans. I think it will become a staple in our house, pureed and lumpy.
This is the first time in a Daring Bakers challenge that I have felt that the recipe chosen would be something I would make repeatedly. I hope we see more savory challenges!!
Since I'm a music librarian in my day job, I thought I would say that today I listened to Cheb Mami - Meli Meli as I baked the crackers, and as I blogged them. Too bad I didn't have any Umm Kulthum!
Categories: Bread, Crackers, Daring Bakers, Vegan

But back to the crackers. The posting date for this coincided with a international dinner night with friends, the theme of which was food from Saharan Africa. So I adapted the lavash and the dips that went with it to go along with this theme. I made the recipe for the first time last weekend, and didn't cut the crackers before baking. This meant breaking it into shards after it had cooled, and this worked okay, but I think they looked better the second time I made them, and precut them into squares or strips. The kneading also went better the second time, because I felt a specific moment when suddenly the dough felt like it was perfect, right around 8 minutes.
You can see poppy seeds, kosher salt, and a greenish spice on the crackers in various combinations. The green herb blend is za'atar, which is a mixture of thyme, sumac, sesame seeds, and salt. With its Arabic origins, I thought it was probably something that people in northern Africa would be familiar with, so it went along with my theme.
Ever since visiting my friend Abbey in Chapel Hill, NC, and seeing her amazing cupboards of gastronomic wonder, I have been wanting to try to make something with pomegranate molasses. Last weekend when I sat down and went through my stack of magazines, I found a recipe for muhammara in the July/August issue of Vegetarian Times. It called for pomegranate syrup, but I pretended it said molasses and substituted accordingly.
Muhammara is a dip made from roasted red peppers, olive oil, sauteed garlic, and toasted walnuts. It was tasty but I think next time I would use less of the pomegranate molasses and a little more garlic.
The other dip I made was Foul Mudammes, or Egyptian Fava Bean Dip. The hardest part about it, actually, was tracking down fava beans in town to make the second batch. I'm pretty sure Pita House is the only place selling them in a can, and I can always use an excuse to have to go there. From what I've read, fava beans and a bread similar to lavash is a traditional Egyptian breakfast. If this is true, I will be relocating to Egypt and continuing to blog from there. It was delicious and a perfect balance of spices and tomato and beans. I think it will become a staple in our house, pureed and lumpy.
This is the first time in a Daring Bakers challenge that I have felt that the recipe chosen would be something I would make repeatedly. I hope we see more savory challenges!!
Since I'm a music librarian in my day job, I thought I would say that today I listened to Cheb Mami - Meli Meli as I baked the crackers, and as I blogged them. Too bad I didn't have any Umm Kulthum!
Categories: Bread, Crackers, Daring Bakers, Vegan
Sunday, September 21, 2008
Lingonberry Oatmeal Bars
I have wanted to have a home with a pantry in it for a long time, because I wanted to be like those tv cooks who walk the camera to their pantry and have all these magical ingredients inside from their travels and shopping trips. Since we bought our house, I have intentionally snagged uncommon food different places we go, and let it sit until I hit inspiration.
A weekend trip to IKEA in Atlanta a few weeks ago meant that I brought home a jar of lingonberry preserves. Yesterday morning I woke up feeling productive, and one of the things I did was to sit down and finally go through a stack of magazines that I never seem to have time for. The picnic section of July/August 2008 Vegetarian Times had this recipe for Raspberry Oatmeal Bars that included the instruction to "Feel free to try this recipe with different jams," and my brain started going through what was in my pantry. I knew I had English ginger preserves, but wasn't sure they would come through the heaviness of the bar cookie. I thought I still had something left over from one of the NC farms we visited over the summer, but then I remembered the lingonberry. Now, I had no idea what lingonberries actually tasted like, but I suspected they were slightly tart, and I love cranberries with oatmeal, and decided to give it a go.
It turns out that lingonberry preserves brought a lot of depth to this recipe. The slight tartness let the sweetness of the cookie have a flavor to play off of, and the way the berries still slightly explode in your mouth made for a fun eating experience.

In fact, worried that I was boring people with my pictures just of food, here I am taking a bite of one. They certainly didn't last long in my house.
Lingonberry Oatmeal Bars
adapted from Vegetarian Times, July/August 2008
Ingredients:
* 1 1/4 cups all-purpose flour
* 1 tsp. ground cinnamon
* 1/2 tsp. baking soda
* 1/4 tsp. salt
* 1 cup light brown sugar
* 1/2 cup (1 stick) unsalted butter, softened
* 1 large egg
* 1 tsp. vanilla extract
* 1/2 tsp. almond extract
* 2 cups old-fashioned rolled oats, divided
* 1 cup lingonberry preserves*
Directions:
1. Preheat oven to 350°F. Coat 9-inch-square baking dish with cooking spray.
2. Sift together flour, cinnamon, baking soda, and salt in large bowl.
3. Cream sugar and butter until light and fluffy. Beat in egg and vanilla and almond extracts until smooth. Add flour mixture to butter mixture; mix until combined. Stir in 13/4 cups oats. Spread 2/3 of batter on bottom of prepared baking dish. Spread raspberry jam over the batter with back of spoon.
4. Add remaining 1/4 cup oats to remaining batter. Crumble over top of raspberry jam. Bake 30 minutes, or until golden. Cool, then cut into bars.
*And of course, substitute any jam or preserves here! I used less than a cup.
Categories: Cookies, Lingonberries, Oats

A weekend trip to IKEA in Atlanta a few weeks ago meant that I brought home a jar of lingonberry preserves. Yesterday morning I woke up feeling productive, and one of the things I did was to sit down and finally go through a stack of magazines that I never seem to have time for. The picnic section of July/August 2008 Vegetarian Times had this recipe for Raspberry Oatmeal Bars that included the instruction to "Feel free to try this recipe with different jams," and my brain started going through what was in my pantry. I knew I had English ginger preserves, but wasn't sure they would come through the heaviness of the bar cookie. I thought I still had something left over from one of the NC farms we visited over the summer, but then I remembered the lingonberry. Now, I had no idea what lingonberries actually tasted like, but I suspected they were slightly tart, and I love cranberries with oatmeal, and decided to give it a go.
It turns out that lingonberry preserves brought a lot of depth to this recipe. The slight tartness let the sweetness of the cookie have a flavor to play off of, and the way the berries still slightly explode in your mouth made for a fun eating experience.
In fact, worried that I was boring people with my pictures just of food, here I am taking a bite of one. They certainly didn't last long in my house.
Lingonberry Oatmeal Bars
adapted from Vegetarian Times, July/August 2008
Ingredients:
* 1 1/4 cups all-purpose flour
* 1 tsp. ground cinnamon
* 1/2 tsp. baking soda
* 1/4 tsp. salt
* 1 cup light brown sugar
* 1/2 cup (1 stick) unsalted butter, softened
* 1 large egg
* 1 tsp. vanilla extract
* 1/2 tsp. almond extract
* 2 cups old-fashioned rolled oats, divided
* 1 cup lingonberry preserves*
Directions:
1. Preheat oven to 350°F. Coat 9-inch-square baking dish with cooking spray.
2. Sift together flour, cinnamon, baking soda, and salt in large bowl.
3. Cream sugar and butter until light and fluffy. Beat in egg and vanilla and almond extracts until smooth. Add flour mixture to butter mixture; mix until combined. Stir in 13/4 cups oats. Spread 2/3 of batter on bottom of prepared baking dish. Spread raspberry jam over the batter with back of spoon.
4. Add remaining 1/4 cup oats to remaining batter. Crumble over top of raspberry jam. Bake 30 minutes, or until golden. Cool, then cut into bars.
*And of course, substitute any jam or preserves here! I used less than a cup.
Categories: Cookies, Lingonberries, Oats
Sunday, September 14, 2008
Cookie Break
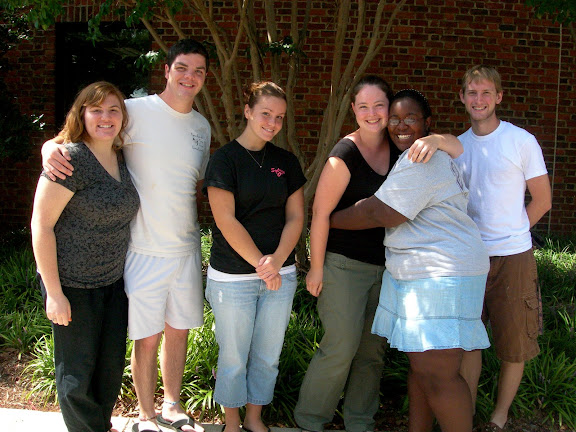
I will admit to plying my students with goodies, especially on days like today when I needed them to come in for a meeting on a weekend. I made two kinds of cookies for today - Fiesta del Sol Cookies and Kitchen Sink Cookies. Kitchen Sink Cookies are just what they sound like - today they had chocolate chips, butterscotch chips, oats, and coconut, but they could have had nuts, dried fruit, cereal, anything needing used up.
The second cookie is more of a unique flavor combination - cornmeal, lemon, and cinnamon - with the look and feel of a snickerdoodle. The cornmeal makes it a little crunchier. I love this cookie. I found it a few years back in the Enduring Harvests cookbook, which I highly recommend if you are looking for native americanish dishes or some new flavor combinations.
Fiesta del Sol Cookies
1 cup granulated sugar
1/2 cup butter at room temperature
1 egg
1 tsp vanilla
1 cup all purpose flour
1/2 cup fine cornmeal
1 tsp cinnamon
1 tsp baking powder
1 tsp lemon zest
1/4 tsp salt
Cinnamon-lemon sugar:
1/4 cup sugar
1 tsp lemon zest
1 tsp cinnamon
Cream together sugar and butter, then beat in the egg and vanilla. Mix in remaining ingredients. Blend together well. Cover and chill 2-3 hours or until firm.
Preheat oven to 350 F. Shape cookie dough into small balls, about 1/2" in diameter, and roll in the cinnamon-lemon sugar.
Set cookie balls 1" apart on lightly greased baking sheet. Bake 10 minutes or until just honey golden.
Jenny's notes: I might recommend doubling this recipe, but because each cookie is pretty small, it makes more than you might think. Any time a recipe includes zest of a citrus, I like to mix it with the sugar in the recipe before creaming it with the butter. I think it makes the cookie more fragrant.
Categories: Cookies
I have great student workers! Happy 2008!

The second cookie is more of a unique flavor combination - cornmeal, lemon, and cinnamon - with the look and feel of a snickerdoodle. The cornmeal makes it a little crunchier. I love this cookie. I found it a few years back in the Enduring Harvests cookbook, which I highly recommend if you are looking for native americanish dishes or some new flavor combinations.
Fiesta del Sol Cookies
1 cup granulated sugar
1/2 cup butter at room temperature
1 egg
1 tsp vanilla
1 cup all purpose flour
1/2 cup fine cornmeal
1 tsp cinnamon
1 tsp baking powder
1 tsp lemon zest
1/4 tsp salt
Cinnamon-lemon sugar:
1/4 cup sugar
1 tsp lemon zest
1 tsp cinnamon
Cream together sugar and butter, then beat in the egg and vanilla. Mix in remaining ingredients. Blend together well. Cover and chill 2-3 hours or until firm.
Preheat oven to 350 F. Shape cookie dough into small balls, about 1/2" in diameter, and roll in the cinnamon-lemon sugar.
Set cookie balls 1" apart on lightly greased baking sheet. Bake 10 minutes or until just honey golden.
Jenny's notes: I might recommend doubling this recipe, but because each cookie is pretty small, it makes more than you might think. Any time a recipe includes zest of a citrus, I like to mix it with the sugar in the recipe before creaming it with the butter. I think it makes the cookie more fragrant.
Categories: Cookies
I have great student workers! Happy 2008!
Sunday, August 31, 2008
Plum Cake and the Absence of Eclairs
If you are a Daring Baker, chances are you came by to check on my chocolate eclairs. As usual I procrastinated but then today ended up with bad baking mojo! I have learned from experience that when one recipe fails, I may as well hang up my apron for the day.
I may attempt the eclairs tomorrow if I end up with time on my hands. I do have the day off, and all the ingredients, so we'll see.
These plum cakes are a gem from the Baking with Julia tv series and accompanying cookbook. I have been recording all the old episodes on PBS to try to learn something, and this recipe seemed so simple and summery - finally, a fruit dessert that doesn't cover up the taste and freshness of the fruit!
I even bought ramekins for this dish, since I didn't have enough.
Well, I think I just tried taking too many shortcuts. I didn't have buttermilk, so I added vinegar to the milk, and probably didn't wait long enough. I mixed everything by hand so I'm not convinced the butter and sugars creamed enough. I divided the recipe by half.
It isn't ... bad, exactly. The batter just isn't holding the plum as much as it should. The creme chantilly that I made is good though. And you can definitely taste the plums, maybe too much.

I may attempt the eclairs tomorrow if I end up with time on my hands. I do have the day off, and all the ingredients, so we'll see.
These plum cakes are a gem from the Baking with Julia tv series and accompanying cookbook. I have been recording all the old episodes on PBS to try to learn something, and this recipe seemed so simple and summery - finally, a fruit dessert that doesn't cover up the taste and freshness of the fruit!
I even bought ramekins for this dish, since I didn't have enough.
Well, I think I just tried taking too many shortcuts. I didn't have buttermilk, so I added vinegar to the milk, and probably didn't wait long enough. I mixed everything by hand so I'm not convinced the butter and sugars creamed enough. I divided the recipe by half.
It isn't ... bad, exactly. The batter just isn't holding the plum as much as it should. The creme chantilly that I made is good though. And you can definitely taste the plums, maybe too much.
Wednesday, August 20, 2008
Summer Means Blackberry Pie
On the day of the great wine berry quest, all I came home with were blackberries. So I made a pie. And it was beautiful.
That's all you're getting out of me for tonight, I'm afraid.
What dessert means summer for you?

That's all you're getting out of me for tonight, I'm afraid.
What dessert means summer for you?
Tuesday, August 12, 2008
Just Baked Bakery Cafe in Topsail Island, NC
I spent last week at the beach in North Carolina. Bakeries in tourist towns have always interested me, because I have wonder if it is really possible to survive as a business with seasonal customers. Just Baked Bakery Cafe proves it is possible.
Two years ago, Just Baked was just a small little bakery, and it has now expanded into a larger space, also serving lunch and dinner. It is to my chagrin that I only decided to go here on my way out of town, since their lunch menu looked amazing and the smells that were coming from the kitchen would have brought me back daily.

Since I was there during breakfast, most of the offerings were pastries, muffins, and scones. They had already put out cookies, pies, and breads for the day, and I could see cupcakes and cakes cooling in the back.
You can look at the Just Baked Bakery Cafe website to see pictures of their cakes and other menu items. One night for dinner we had some bread that was like a cross between Italian and foccacia, and was delicious - nice air pockets, chewy, and flavorful.
Originally, I thought I'd just want to return to Topsail Island for the beauty of the ocean. Now I have two reasons to return!
Categories: Bakery, Blueberries, Pastry

Two years ago, Just Baked was just a small little bakery, and it has now expanded into a larger space, also serving lunch and dinner. It is to my chagrin that I only decided to go here on my way out of town, since their lunch menu looked amazing and the smells that were coming from the kitchen would have brought me back daily.
Since I was there during breakfast, most of the offerings were pastries, muffins, and scones. They had already put out cookies, pies, and breads for the day, and I could see cupcakes and cakes cooling in the back.
You can look at the Just Baked Bakery Cafe website to see pictures of their cakes and other menu items. One night for dinner we had some bread that was like a cross between Italian and foccacia, and was delicious - nice air pockets, chewy, and flavorful.
Originally, I thought I'd just want to return to Topsail Island for the beauty of the ocean. Now I have two reasons to return!
Categories: Bakery, Blueberries, Pastry
Thursday, July 31, 2008
Honey Peach Tart with Fresh Peach Ice Cream
To anyone looking here for the Daring Bakers challenge, I skipped this month! But I had a sack (known as bag in these parts) of fresh local peaches that I needed to do something with. I decided I had to make fresh peach ice cream, and made a lovely rustic honey peach tart to serve underneath.
Ha, I say that like the ice cream was the main attraction. Actually, the peaches are. It is always a challenge to find recipes that utilize fresh fruit without masking its freshness and flavor completely. The nice thing about the tart is that the crust is rolled thin and only is folded up around the edge, allowing the peaches to be the focus of the flavor. Since they are in one layer, they don't need to be mixed with much, and are in fact layered on top of a sprinkling of flour and sugar and drizzled with honey. The recipe is here but the baking time is 10 minutes too long, so really keep an eye on your crust.
The peach ice cream recipe comes again from The Perfect Scoop, and was interesting because it contained sour cream. The flavor was superb and a great show case for these South Carolina peaches.
For a closing word on South Carolina peaches, I turn to Stephen Colbert.
Categories: Ice Cream, Peaches, Tart

Ha, I say that like the ice cream was the main attraction. Actually, the peaches are. It is always a challenge to find recipes that utilize fresh fruit without masking its freshness and flavor completely. The nice thing about the tart is that the crust is rolled thin and only is folded up around the edge, allowing the peaches to be the focus of the flavor. Since they are in one layer, they don't need to be mixed with much, and are in fact layered on top of a sprinkling of flour and sugar and drizzled with honey. The recipe is here but the baking time is 10 minutes too long, so really keep an eye on your crust.
The peach ice cream recipe comes again from The Perfect Scoop, and was interesting because it contained sour cream. The flavor was superb and a great show case for these South Carolina peaches.
For a closing word on South Carolina peaches, I turn to Stephen Colbert.
Categories: Ice Cream, Peaches, Tart
Thursday, July 24, 2008
Chocolate Chip Cookie Olympics
Today is my 2nd blogiversary! To celebrate I originally intended to do something elaborate and involved, but then I came across Cream Puffs in Venice's entry on the chocolate chip cookie heard round the world, and hit inspiration.
You know, there are a lot of chocolate chip cookie recipes out there, since it is such a classic. A lot of them claim to be the best. So I figured, why not put them to the test!

Before we get to the challenge, please get to know our judges, some of the staff and faculty of the library at Furman University, where I am privileged to be the music librarian. I brought the three recipes of chocolate chip cookies to break today and encouraged feedback. I think most people had at least three cookies, so they were prepared to give a score!

Let's start with what I've named the Urban Legend Cookies. I'm sure you've heard the story, or something similar, where someone ate at the Neiman Marcus cafe, liked a cookie, asked for the recipe, and was charged $250 for it. To get back, they have made this recipe freely available to you, and please forward it to all of your friends. I first made this recipe years ago, back when I actually read forwards in my e-mail, and laughed when my Mom sent it to me the other day like it was something new.
You can check out Snopes.com if you want to know if the story has any truth, but true or not, this story at least has longevity. I included it merely for its story, knowing I didn't care much for the cookie itself. Ground up oats is a terrific idea, but there are simply too many dry ingredients in this cookie for my taste.
Neiman Marcus offers a recipe on their web site to counter the urban legend, but this is not the one I made (although it actually sounds pretty good). Instead I made the one that has been forwarded to me, and now you can too, if you want. My mixer wouldn't even hold the entire thing, and I would recommend halving it.

The second recipe vying for gold was the original Tollhouse Chocolate Chip Cookie recipe, what most people think of as chocolate chip cookies. That is the most frequent comment made from the "judges," that this recipe was what they remembered from childhood. The texture was also remarked on. I have to admit, I cheat on this recipe a bit - instead of using 1 cup butter, I used half butter and half margarine because they stay softer longer. Other than that, this is THE original recipe, and is what I would recommend if you just want something classic.

A few more than half of the judges picked the Jacques Torres chocolate chip cookie as being their favorite. This is the recipe Cream Puff posted about as well, and I don't understand the science any more than she did, but the strangest step is leaving the dough in the fridge for 24 hours. It did have much more depth of flavor than the other two, and seemed to hint or beg of orange, despite a lack of citrus. For some of the judges, it was far too salty, and did indeed have 3 times as much salt as the other two recipes.
For the cookie olympics of 2008, the Jacques Torres recipe gets the gold by a millisecond. The traditional Tollhouse recipe wins the silver, and the urban legend Neiman Marcus arrives at a distant third, but picks up the bronze medal.
For a funnier take on chocolate chip cookies, please visit my good friends at Cakespy. Okay, I've never met them, but they're the kind of people you want to claim to know.
Categories: Chocolate, Cookies

You know, there are a lot of chocolate chip cookie recipes out there, since it is such a classic. A lot of them claim to be the best. So I figured, why not put them to the test!
Before we get to the challenge, please get to know our judges, some of the staff and faculty of the library at Furman University, where I am privileged to be the music librarian. I brought the three recipes of chocolate chip cookies to break today and encouraged feedback. I think most people had at least three cookies, so they were prepared to give a score!
Let's start with what I've named the Urban Legend Cookies. I'm sure you've heard the story, or something similar, where someone ate at the Neiman Marcus cafe, liked a cookie, asked for the recipe, and was charged $250 for it. To get back, they have made this recipe freely available to you, and please forward it to all of your friends. I first made this recipe years ago, back when I actually read forwards in my e-mail, and laughed when my Mom sent it to me the other day like it was something new.
You can check out Snopes.com if you want to know if the story has any truth, but true or not, this story at least has longevity. I included it merely for its story, knowing I didn't care much for the cookie itself. Ground up oats is a terrific idea, but there are simply too many dry ingredients in this cookie for my taste.
Neiman Marcus offers a recipe on their web site to counter the urban legend, but this is not the one I made (although it actually sounds pretty good). Instead I made the one that has been forwarded to me, and now you can too, if you want. My mixer wouldn't even hold the entire thing, and I would recommend halving it.
The second recipe vying for gold was the original Tollhouse Chocolate Chip Cookie recipe, what most people think of as chocolate chip cookies. That is the most frequent comment made from the "judges," that this recipe was what they remembered from childhood. The texture was also remarked on. I have to admit, I cheat on this recipe a bit - instead of using 1 cup butter, I used half butter and half margarine because they stay softer longer. Other than that, this is THE original recipe, and is what I would recommend if you just want something classic.
A few more than half of the judges picked the Jacques Torres chocolate chip cookie as being their favorite. This is the recipe Cream Puff posted about as well, and I don't understand the science any more than she did, but the strangest step is leaving the dough in the fridge for 24 hours. It did have much more depth of flavor than the other two, and seemed to hint or beg of orange, despite a lack of citrus. For some of the judges, it was far too salty, and did indeed have 3 times as much salt as the other two recipes.
For the cookie olympics of 2008, the Jacques Torres recipe gets the gold by a millisecond. The traditional Tollhouse recipe wins the silver, and the urban legend Neiman Marcus arrives at a distant third, but picks up the bronze medal.
For a funnier take on chocolate chip cookies, please visit my good friends at Cakespy. Okay, I've never met them, but they're the kind of people you want to claim to know.
Categories: Chocolate, Cookies
Sunday, July 13, 2008
Ice Cream Intuition
I'm not sure if ice cream belongs in a baking blog, but since I got a beautiful ice cream maker for my birthday, I thought I would share about the experience.
With baking, I have made certain things long enough where I really have bake by "feel" in addition to following a recipe. I know the texture things should be before I move on to the next step. My goal by the end of the summer is to develop the same skill with ice cream. Believe me when I tell you it has not happened yet.
The first day that I made ice cream, I had selected pear-caramel ice cream from The Perfect Scoop. I had well-chilled the bowl, and had all the ingredients. Unfortunately, the pears had not ripened. I combed through the book, and didn't have everything for chocolate or coffee, but kept seeing this recipe for basil ice cream!
I happened to have a counter full of basil I had trimmed from my huge plant, needing a destination. Despite the fact that everyone at my house that day seemed to think basil ice cream was a strange idea, I plowed full speed ahead and made it anyway. My new fridge is a Samsung with a quick-chill drawer in it, so after cooling the mixture in an ice bath, I stuck it in that drawer to get chilly quickly. It seemed to work; by the time I poured the mixture into the frozen ice cream maker bin, the mixture had started to thicken.

The end result was a lovely, smooth ice cream the texture of soft-serve, although it melted very quickly. I could have put it in the freezer and waited to serve it until it had hardened, but the process is a long one, and we were all ready. Basil ice cream is incredibly summery - not too sweet, very fresh, and if you can manage not to think of pesto cream sauce while you are eating it, it is pretty incredible. I would not hesitate to make it again!
After one success, I thought it would be easy to make something else. When the pears finally ripened, i started off to make pear-caramel ice cream. I'm not sure why, if the recipe just didn't have the same binding agents (no egg yolks in that one) or if I was just simply impatient with the mixture, but after 30 minutes churning around in the machine it never set up at all. If I had been less frustrated, I could have dumped the mixture back into the fridge overnight, but it went down the garbage disposal.
Chocolate ice cream was to be my next feat. However I did not just want plain chocolate ice cream, and I knew I could supposedly add ingredients the last 5 minutes of churning. For some reason, making chocolate Hob Nobs ice cream entered my head and just would not leave. When I realized our friend Brian, who recently moved to London, had a birthday coming up, I decided to make Chocolate Hob Nobs ice cream in his honor.

Hob Nobs were one of the things I lived on when I was traveling in the UK, because they are these amazing oaty nobbly cookies with chocolate coating that come in a can, and are easy to stick in a backpack. I came across them at Whole Foods Market and snagged the last two cans!
The first time I tried it, the mixture smelled amazing but didn't set up. I knew I had merely been impatient, because the mixture was thick and coated the spoon just like it was supposed to. I re-chilled it and tried again, and this time it churned up beautifully. I added smashed up Hob Nobs to the churning mixture the last five minutes. We ate a bit of it right out of the ice cream maker, but froze the rest to give it more of a normal ice cream look, which is what you see here. (Happy birthday, Brian!)
Two successful tries down, many more to go. I am also desperate to find a frozen custard recipe, since we miss Ritter's in Indiana. What is your favorite type of ice cream?
ETA: If you are a LiveJournal user, you can now subscribe to this blog using their syndicated feed.
Categories: Basil, Chocolate, Ice Cream

With baking, I have made certain things long enough where I really have bake by "feel" in addition to following a recipe. I know the texture things should be before I move on to the next step. My goal by the end of the summer is to develop the same skill with ice cream. Believe me when I tell you it has not happened yet.
The first day that I made ice cream, I had selected pear-caramel ice cream from The Perfect Scoop. I had well-chilled the bowl, and had all the ingredients. Unfortunately, the pears had not ripened. I combed through the book, and didn't have everything for chocolate or coffee, but kept seeing this recipe for basil ice cream!
I happened to have a counter full of basil I had trimmed from my huge plant, needing a destination. Despite the fact that everyone at my house that day seemed to think basil ice cream was a strange idea, I plowed full speed ahead and made it anyway. My new fridge is a Samsung with a quick-chill drawer in it, so after cooling the mixture in an ice bath, I stuck it in that drawer to get chilly quickly. It seemed to work; by the time I poured the mixture into the frozen ice cream maker bin, the mixture had started to thicken.
The end result was a lovely, smooth ice cream the texture of soft-serve, although it melted very quickly. I could have put it in the freezer and waited to serve it until it had hardened, but the process is a long one, and we were all ready. Basil ice cream is incredibly summery - not too sweet, very fresh, and if you can manage not to think of pesto cream sauce while you are eating it, it is pretty incredible. I would not hesitate to make it again!
After one success, I thought it would be easy to make something else. When the pears finally ripened, i started off to make pear-caramel ice cream. I'm not sure why, if the recipe just didn't have the same binding agents (no egg yolks in that one) or if I was just simply impatient with the mixture, but after 30 minutes churning around in the machine it never set up at all. If I had been less frustrated, I could have dumped the mixture back into the fridge overnight, but it went down the garbage disposal.
Chocolate ice cream was to be my next feat. However I did not just want plain chocolate ice cream, and I knew I could supposedly add ingredients the last 5 minutes of churning. For some reason, making chocolate Hob Nobs ice cream entered my head and just would not leave. When I realized our friend Brian, who recently moved to London, had a birthday coming up, I decided to make Chocolate Hob Nobs ice cream in his honor.
Hob Nobs were one of the things I lived on when I was traveling in the UK, because they are these amazing oaty nobbly cookies with chocolate coating that come in a can, and are easy to stick in a backpack. I came across them at Whole Foods Market and snagged the last two cans!
The first time I tried it, the mixture smelled amazing but didn't set up. I knew I had merely been impatient, because the mixture was thick and coated the spoon just like it was supposed to. I re-chilled it and tried again, and this time it churned up beautifully. I added smashed up Hob Nobs to the churning mixture the last five minutes. We ate a bit of it right out of the ice cream maker, but froze the rest to give it more of a normal ice cream look, which is what you see here. (Happy birthday, Brian!)
Two successful tries down, many more to go. I am also desperate to find a frozen custard recipe, since we miss Ritter's in Indiana. What is your favorite type of ice cream?
ETA: If you are a LiveJournal user, you can now subscribe to this blog using their syndicated feed.
Categories: Basil, Chocolate, Ice Cream
Sunday, July 06, 2008
Blueberry and Blackberry Galette with Cornmeal Crust
After my recent blueberry picking ventures, I have been on the hunt for recipes that would allow me to use my berries without masking their flavor completely with sugar and pastry. Enter the blueberry and blackberry galette with cornmeal crust, in the most recent issue of Cooking Light! (Thanks Libby!)
I'm actually not sure there is anything light about this recipe. The crust has a stick and a half of butter, and the berries are mixed with regular sugar.... But who cares, really, it was incredibly tasty.
The cornmeal in the crust was a nice textural addition. I think if I made this again I might make individual tarts, since the large one almost didn't fit on a sheet pan and leaked all over my brand new oven.

Blueberry and Blackberry Galette with Cornmeal Crust
Recipe from Cooking Light
Ingredients
Pastry:
1 3/4 cups all-purpose flour (about 7 3/4 ounces)
1/3 cup granulated sugar
1/4 cup cornmeal
1/4 teaspoon salt
1/2 cup cold butter, cut into small pieces
1/3 cup fat-free buttermilk
Filling:
4 cups blueberries
2 cups blackberries
1/2 cup granulated sugar
3 tablespoons all-purpose flour
2 tablespoons lemon juice
2 tablespoons fat-free milk
1 large egg white
1 1/2 tablespoons turbinado sugar
Preparation
1. To prepare pastry, lightly spoon flour into dry measuring cups, and level with a knife. Combine flour and next 3 ingredients (through salt) in a food processor; pulse two times. Add butter to flour mixture; pulse 4 to 5 times or until mixture resembles coarse meal. With processor on, slowly add buttermilk through food chute; process just until dough forms a ball. Gently press dough into a 4-inch circle on plastic wrap; cover. Chill 30 minutes.
2. Preheat oven to 350°.
3. Unwrap and place dough on a sheet of parchment paper. Roll dough into a 15-inch circle. Place dough and parchment on a baking sheet.
4. To prepare filling, combine berries and next 3 ingredients (through juice) in a medium bowl; toss gently to coat. Arrange berry mixture in center of dough, leaving a 2-inch border. Fold edges of dough toward center, pressing gently to seal (dough will only partially cover berry mixture).
5. Combine fat-free milk and egg white in a small bowl, stirring well with a whisk. Brush dough with milk mixture; sprinkle turbinado sugar evenly over dough. Bake at 350° for 1 hour or until pastry is golden brown. Let stand 30 minutes; cut into wedges.
Yield
10 servings (serving size: 1 wedge)
Categories: Blackberries, Blueberries, Buttermilk, Pastry, Tart

I'm actually not sure there is anything light about this recipe. The crust has a stick and a half of butter, and the berries are mixed with regular sugar.... But who cares, really, it was incredibly tasty.
The cornmeal in the crust was a nice textural addition. I think if I made this again I might make individual tarts, since the large one almost didn't fit on a sheet pan and leaked all over my brand new oven.
Blueberry and Blackberry Galette with Cornmeal Crust
Recipe from Cooking Light
Ingredients
Pastry:
1 3/4 cups all-purpose flour (about 7 3/4 ounces)
1/3 cup granulated sugar
1/4 cup cornmeal
1/4 teaspoon salt
1/2 cup cold butter, cut into small pieces
1/3 cup fat-free buttermilk
Filling:
4 cups blueberries
2 cups blackberries
1/2 cup granulated sugar
3 tablespoons all-purpose flour
2 tablespoons lemon juice
2 tablespoons fat-free milk
1 large egg white
1 1/2 tablespoons turbinado sugar
Preparation
1. To prepare pastry, lightly spoon flour into dry measuring cups, and level with a knife. Combine flour and next 3 ingredients (through salt) in a food processor; pulse two times. Add butter to flour mixture; pulse 4 to 5 times or until mixture resembles coarse meal. With processor on, slowly add buttermilk through food chute; process just until dough forms a ball. Gently press dough into a 4-inch circle on plastic wrap; cover. Chill 30 minutes.
2. Preheat oven to 350°.
3. Unwrap and place dough on a sheet of parchment paper. Roll dough into a 15-inch circle. Place dough and parchment on a baking sheet.
4. To prepare filling, combine berries and next 3 ingredients (through juice) in a medium bowl; toss gently to coat. Arrange berry mixture in center of dough, leaving a 2-inch border. Fold edges of dough toward center, pressing gently to seal (dough will only partially cover berry mixture).
5. Combine fat-free milk and egg white in a small bowl, stirring well with a whisk. Brush dough with milk mixture; sprinkle turbinado sugar evenly over dough. Bake at 350° for 1 hour or until pastry is golden brown. Let stand 30 minutes; cut into wedges.
Yield
10 servings (serving size: 1 wedge)
Categories: Blackberries, Blueberries, Buttermilk, Pastry, Tart
Sunday, June 29, 2008
Daring Bakers - Danish Braid
I had made the Danish Braid from Baking with Julia last January, so when the June Daring Bakers Challenge was announced, I felt ready to meet this challenge head on. This time the recipe comes from The Secrets of Baking by Sherry Yard, and can be found at one of the two host(ess)'s sites for this challenge - Kelly from Sass & Veracity, or Ben from What's Cooking?.
I have a history of procrastination for challenges, but this time I had a really good excuse - we moved during the month of June! This is the first time I have owned a home, so it is all very exciting, and this was only my second baking project in my new kitchen. I am a little more hesitant to get this one dirty, but seeing how it has been cleaned successfully several times now, maybe I'll get over it.
 I did not start the dough until 10:30 last night or so, which was a MISTAKE. After the dough comes together, you have to roll it out, fold it up, and let it chill again 4-5 times. Thank goodness some friends were online to talk to me until 2:30 this morning, or I might have had an entirely different end result.
To me the main difference with this dough compared to Julia's recipe is that this has orange and cardamom in it, and I really noticed it this morning after the dough had chilled its minimum five hours and I was rolling it out to make it into the braid.
 Friday, I took the day off, and spent the morning picking blueberries at The Happy Berry in Six Mile, SC with some friends. I knew I wanted to use them somehow with this baking challenge, because seasonal local produce can't be beat! Down here in South Carolina we passed strawberries and rhubarb long ago, and are barreling down the path toward peaches at this point, but that means that blueberries are perfectly in season. I found a random blueberry filling recipe and cream cheese filling recipe online, but since that was after four and a half hours of sleep, I'm not sure I can find it again. Somewhere on the internet, but they proved sufficient. I deliberately undercooked the blueberry part, wanting to make sure we could still taste the freshness of the berry.

 The biggest misstep I made in this recipe was the beurrage, or butter block, stage. After seeing so many entries today, I see that it should have been more of a spreadable texture. But if you start with cold butter, and only have a Sunbeam mixer, nothing cohesive was going to happen. So I actually ended up grating the butter, mixing it with the flour, and sprinkling it on the dough during the first roll out. I feel like that worked pretty well, and it never got too warm to work with nor did it poke out of the sides, but I wonder how the end result would have been different if I had done that part more accurately.
Now to figure out what to do with the other half of the dough - I've seen some great examples of bear claws and chocolate croissants, I need to try one of those!
Categories: Blueberries, Breakfast, Cardamom, Danish, Daring Bakers, Pastry

I have a history of procrastination for challenges, but this time I had a really good excuse - we moved during the month of June! This is the first time I have owned a home, so it is all very exciting, and this was only my second baking project in my new kitchen. I am a little more hesitant to get this one dirty, but seeing how it has been cleaned successfully several times now, maybe I'll get over it.
To me the main difference with this dough compared to Julia's recipe is that this has orange and cardamom in it, and I really noticed it this morning after the dough had chilled its minimum five hours and I was rolling it out to make it into the braid.
Now to figure out what to do with the other half of the dough - I've seen some great examples of bear claws and chocolate croissants, I need to try one of those!
Categories: Blueberries, Breakfast, Cardamom, Danish, Daring Bakers, Pastry
Monday, June 23, 2008
Cookbook Review - Big Fat Cookies!
A co-worker lent me a few cookbooks and I have been eyeing this one throughout my move. The shiny pictures and easy to follow recipes lured me in, but the hardest part was picking which ones to try. I'm intrigued by the Pine Nut and Fig Round Ups as well as the Currant Cornmeal Crunch Cookies, but both of those were under the crunchy category.
And, well, I'm more of a soft cookie girl.
Growing up, my Mom often made morning glory muffins, full of carrots and coconut and nuts. The Morning Glory Breakfast Cookie is more like a muffin top, but in a handy cookie shape. My husband and I sometimes order Erin Baker's Breakfast Cookies online and love them, so I am always looking for a recipe that will come close. These aren't quite dense enough to be like those, but still delicious.
The other cookie I chose was the black and white cookie. These aren't typically the kind of cookie I would pick but I liked the idea of making them. The cookie dough is a lemon-scented buttermilk sugar cookie, and you use the bottoms to have a smooth surface to put the two glazes on. These were really fun to make, and have a lot more flavor than I expected.
So hooray! The first baking project in my new kitchen - two cookie recipes in two hours!
Categories: Apples, Breakfast, Buttermilk, Carrots, Chocolate, Coconut, Cookies, Lemon, Raisins

And, well, I'm more of a soft cookie girl.
Growing up, my Mom often made morning glory muffins, full of carrots and coconut and nuts. The Morning Glory Breakfast Cookie is more like a muffin top, but in a handy cookie shape. My husband and I sometimes order Erin Baker's Breakfast Cookies online and love them, so I am always looking for a recipe that will come close. These aren't quite dense enough to be like those, but still delicious.
The other cookie I chose was the black and white cookie. These aren't typically the kind of cookie I would pick but I liked the idea of making them. The cookie dough is a lemon-scented buttermilk sugar cookie, and you use the bottoms to have a smooth surface to put the two glazes on. These were really fun to make, and have a lot more flavor than I expected.
So hooray! The first baking project in my new kitchen - two cookie recipes in two hours!
Categories: Apples, Breakfast, Buttermilk, Carrots, Chocolate, Coconut, Cookies, Lemon, Raisins
Monday, June 16, 2008
Organized but not unpacked
This is my kitchen - spots are designated, but boxes still aren't unpacked, and half of it is still in the last place.
Coming soon - the first baking project in my new kitchen!
And yes, I totally did a sticky note organization method, because I couldn't decide where everything would go.

Coming soon - the first baking project in my new kitchen!
And yes, I totally did a sticky note organization method, because I couldn't decide where everything would go.
Sunday, June 08, 2008
Cookbook Tourism - Chocolate Zucchini Bread

Every time I travel, I try to buy a cookbook. As a result I have quite the regional cookbook collection! I often make piles of cookbooks to go through when I bring home an ingredient without a specific plan for it. This weekend, it was zucchini from the farmer's market in downtown Greenville. I was hoping for some kind of fruit, but we must have hit it post strawberry/rhubarb season but too early for blueberries.
It isn't like I've never made chocolate zucchini bread or cake before, but this recipe in particular comes from Clayton Farms B&B in Grinnell, IA. The recipe is from the Sampling Iowa Treasures Cookbook that I purchased from the only bed and breakfast in Prarie City, IA - Country Connection. Nathaniel and I stayed there as we moved across the country from Oregon to Indiana. It was a memorable day, because we managed to find enough time to go to the Iowa State Fair in the hottest weather we had ever experienced, managed to blow out the tires on the car we were carrying behind the moving truck (forgot to take off the emergency break), and the people running the B&B had an interesting conversation philosophy. I don't remember specifics, this was 2000, but I remember the breakfast conversation being very morbid.
Still, I may never visit Iowa again. But it can be nice to visit via my Iowa B&B Cookbook!
Chocolate Zucchini Bread
3 eggs
1 cup vegetable oil*
2 cups sugar
1 Tbsp vanilla
2 cups peeled, shredded zucchini
2 1/2 cups flour
1/2 cup cocoa powder
1 tsp salt
1 tsp baking soda
1 tsp cinnamon
1/4 tsp baking powder
Beat eggs, oil, sugar, and vanilla together. Stir in the zucchini. Mix together all the dry ingredients and add to previous mixture. Mix well and pour into two greased and floured 4x8x2 inch loaf pans. Bake at 350 for one hour or until it tests done.
* I was out of veg oil, so I used half butter and half olive oil. As moist as zucchini is, I was surprised to see such a high fat content in this recipe! I need to learn more about making recipes more healthful.
I also baked this in a bundt pan, because I hate my silicon loaf pan.
I have to admit that this recipe feels so boring to me, but only because I've had it a million times. It doesn't mean it is any less delicious. I'm in the middle of moving to the first home we've ever bought, so I had to grab something quick. Next week, depending on how together I am, you may see the first post from my new kitchen. In the meantime, please go to absolutely favorite baking blog, Cakespy, to see how they turned garden vegetables that aren't typically featured in baking into tasty treats. You won't regret it. (I'm still waiting for my brussel sprouts cupcake, personally).
ETA: This is my 100th post! Happy 100th post to me! I'll be celebrating my 2nd anniversary soon of blogging, so stay tuned!
Categories: Bread, Breakfast, Chocolate, Cinnamon, Zucchini
Monday, June 02, 2008
Blueberry-Blackberry Honey Butter-Glazed Scones
I was searching for a recipe to make to thank the people involved in a weeding project on the first day of summer in the library, and what is better than a scone that is stuffed with berries and glazed with honey? Yum.
This recipe comes from Passion for Baking, a cookbook I was given for the holidays but haven't made a lot from yet. The recipes are beautifully presented with good tips and nice photographs.
The main trick this recipe uses is to add a glaze to a scone, to extend its shelf life. It makes sense that my favorite scone recipe has a cinnamon-sugar glaze. Most of the time I tend to make scones that are more appropriate for jam and clotted cream, but these are more along the lines of coffee house scones.
Blueberry-Blackberry Honey Butter-Glazed Scones
1 tbsp fresh lemon juice
1 cup, approximately, whipping cream
3 1/2 cups all-purpose flour
1/2 cup sugar
1/2 tsp salt
4 tsp baking powder
1/2 tsp baking soda
3/4 cup unsalted butter, cut into chunks
1 large egg
2 tsp pure vanilla extract
1/2 - 3/4 cup frozen blueberries
1/2 - 3/4 cup frozen blackberries
Milk or melted butter for brushing*
1/3 cup honey
1/4 cup unsalted butter
Put lemon juice in a 1 cup measuring cup, pour in whipping cream to 1-cup mark, and let stand a few minutes to make soured cream.
Preheat oven to 425 F. Line baking sheet with parchment paper.
In a food processor, add flour, sugar, salt, baking powder, and baking soda and blend briefly. Add butter and pulse to make a coarse, grainy mixture.** Turn mixture into a large bowl and make a well in center. Add egg, vanilla, and enough soured cream to make a soft but firm dough. Gently fold in berries.***
Knead briefly on a lightly floured work surface, adding more flour, if required, to make a firm dough. Pat out to 1-inch thickness. Cut into wedges or rounds and place on prepared baking sheets. Brush each scone with milk or melted butter.
Bake until scones are nicely browned, about 16-19 minutes.
Meanwhile, for glaze, heat honey and butter in a liquid measuring cup in a microwave until mixture is just simmering, about 1 1/2 minutes on HIGH, stirring after 45 seconds.
Brush scones lightly with honey-butter glaze as they come out of the oven. Let stand on baking sheet. Repeat with more honey-butter glaze, more generously, about 15 minutes later.
Makes 8-12 scones****
* I somehow missed this step, but this would have added more browning.
** I definitely just went the old-fashioned biscuit method for this step, which is rubbing the butter into the dry ingredients until sandy.
*** I stirred the berries into the crumbly mixture before adding the soured cream.
**** Okay, if you made 8 as I did, they are crazy huge scones. Try 12 or 16 for sure.
Categories: Blackberries, Blueberries, Honey, Scones

This recipe comes from Passion for Baking, a cookbook I was given for the holidays but haven't made a lot from yet. The recipes are beautifully presented with good tips and nice photographs.
The main trick this recipe uses is to add a glaze to a scone, to extend its shelf life. It makes sense that my favorite scone recipe has a cinnamon-sugar glaze. Most of the time I tend to make scones that are more appropriate for jam and clotted cream, but these are more along the lines of coffee house scones.
Blueberry-Blackberry Honey Butter-Glazed Scones
1 tbsp fresh lemon juice
1 cup, approximately, whipping cream
3 1/2 cups all-purpose flour
1/2 cup sugar
1/2 tsp salt
4 tsp baking powder
1/2 tsp baking soda
3/4 cup unsalted butter, cut into chunks
1 large egg
2 tsp pure vanilla extract
1/2 - 3/4 cup frozen blueberries
1/2 - 3/4 cup frozen blackberries
Milk or melted butter for brushing*
1/3 cup honey
1/4 cup unsalted butter
Put lemon juice in a 1 cup measuring cup, pour in whipping cream to 1-cup mark, and let stand a few minutes to make soured cream.
Preheat oven to 425 F. Line baking sheet with parchment paper.
In a food processor, add flour, sugar, salt, baking powder, and baking soda and blend briefly. Add butter and pulse to make a coarse, grainy mixture.** Turn mixture into a large bowl and make a well in center. Add egg, vanilla, and enough soured cream to make a soft but firm dough. Gently fold in berries.***
Knead briefly on a lightly floured work surface, adding more flour, if required, to make a firm dough. Pat out to 1-inch thickness. Cut into wedges or rounds and place on prepared baking sheets. Brush each scone with milk or melted butter.
Bake until scones are nicely browned, about 16-19 minutes.
Meanwhile, for glaze, heat honey and butter in a liquid measuring cup in a microwave until mixture is just simmering, about 1 1/2 minutes on HIGH, stirring after 45 seconds.
Brush scones lightly with honey-butter glaze as they come out of the oven. Let stand on baking sheet. Repeat with more honey-butter glaze, more generously, about 15 minutes later.
Makes 8-12 scones****
* I somehow missed this step, but this would have added more browning.
** I definitely just went the old-fashioned biscuit method for this step, which is rubbing the butter into the dry ingredients until sandy.
*** I stirred the berries into the crumbly mixture before adding the soured cream.
**** Okay, if you made 8 as I did, they are crazy huge scones. Try 12 or 16 for sure.
Categories: Blackberries, Blueberries, Honey, Scones
Wednesday, May 28, 2008
Daring Bakers Challenge - Opera Cake!
I was so excited to hear that this month's challenge would be opera cake that I ran home and made it the day it was announced.
No, I'm not joking. For those of you who have read my stories of procrastination in the past, I am sure you are shocked. I had many reasons - I had made a strawberry mousse that was not great on its own and needed something to do with it, and the students in the music department were doing an oratorio the next day. I decided my first cake, rather than being an opera cake, would be an oratorio cake!
Before heading home I skimmed through the text of Dona Nobis Pacem by Ralph Vaughan Williams and wrote down some catchy phrases to potentially use in decorating. I went grocery shopping and then raided my cupboards to try to find an interesting flavor combination. I was originally going to do strawberry and cardamom, but then I spied the rosewater that I don't think I had used since making rice pudding almost two years ago. (The thought suddenly occurs to me that maybe it had expired, but I didn't kill anyone). I decided to use strawberry just in the mousse, and rose everywhere else - the cake, the syrup, and the buttercream.

I baked the Oratorio Cake in three rounds rather than using the jelly roll pan approach the first time, but even after an extended amount of time they still were not really done. I tried to flip one over too soon, but then saw how undone it was inside. This picture is the aftermath, after properly baking. Phew, disaster averted. I do like these cake layers with very little flour though. It got me thinking about creative things to do instead of almonds - surely other nuts. I wonder if things such as graham cracker crumbs would have worked. Can you substitute those for nuts or flour? I'll have to try sometime (mental note).

The buttercream wasn't quite as nice as Dorie's recipe but I still had no problems with it breaking or anything. The rose flavor was delicate but nice, and I colored the remainder to decorate the top of the cake. I still had enough left over to make what are now forever known as stress cupcakes.

I ended up being very happy that I had picked round cake pans for the Rose Strawberry Oratorio Cake, since the quotation I liked the most was about the moon. I brought it into the music library the next day. The student workers and a bunch of other students devoured it, in fact I had students coming back in unabashedly asking for seconds. For normal things like cookies or brownies, this doesn't surprise me, but I honestly was not convinced that the rose, almond, white chocolate, and strawberry combination would be pleasing to college student palates.
 Since I live in South Carolina, we get a lot of spring fruits coming in really early. This month was the month for strawberries AND rhubarb, and I had been wanting to try something else with rhubarb. When Tartlette made this rhubarb mousse, I e-mailed her to ask if I could borrow the recipe for my opera cake, not wanting to use it if she was planning to. Her recipes are always superb, but this mousse was light and foamy and delicious.
I didn't want to just make a rhubarb opera cake. I decided to incorporate ginger in some way, because it seemed that a lot of traditional rhubarb recipes added ginger. I was at Tea Junction in the local mall and they had premade simple syrups - I almost jumped ship and went with lavender instead of ginger, but ultimately decided the white ginger would be nice. This time I added it to the cake as well as the buttercream, and used it as a substitute for the syrup that is brushed onto the cake layers.

I went ahead and used the three square layers this time around, and was pleased with the result, even if I skipped the white chocolate layer and didn't really decorate. As you can see above I attempted to make a rose out of rolled out crystallized ginger, in a similar way I have seen flowers made out of gumdrops, but it was unwieldy. The toothpicks are an indication of how I prepared it for transportation since the square cake wouldn't fit in my round cake transporter!
I liked the spring flavors in this, but think I would like the chocolate version the most!
 This month was hosted by Ivonne from Cream Puffs in Venice, Lis from La Mia Cucina, Fran from Apples Peaches Pumpkin Pie, and Shea of Whiskful. The Daring Bakers have grown so huge, we are now hosting challenges with small armies, in order to involve our newer members before the next century. To view all the Daring Bakers posts for this challenge, please view the blogroll.
Categories: Almond, Buttercream, Cake, Daring Bakers, Ginger, Mousse, Rhubarb, Rose, Strawberry

No, I'm not joking. For those of you who have read my stories of procrastination in the past, I am sure you are shocked. I had many reasons - I had made a strawberry mousse that was not great on its own and needed something to do with it, and the students in the music department were doing an oratorio the next day. I decided my first cake, rather than being an opera cake, would be an oratorio cake!
Before heading home I skimmed through the text of Dona Nobis Pacem by Ralph Vaughan Williams and wrote down some catchy phrases to potentially use in decorating. I went grocery shopping and then raided my cupboards to try to find an interesting flavor combination. I was originally going to do strawberry and cardamom, but then I spied the rosewater that I don't think I had used since making rice pudding almost two years ago. (The thought suddenly occurs to me that maybe it had expired, but I didn't kill anyone). I decided to use strawberry just in the mousse, and rose everywhere else - the cake, the syrup, and the buttercream.
I baked the Oratorio Cake in three rounds rather than using the jelly roll pan approach the first time, but even after an extended amount of time they still were not really done. I tried to flip one over too soon, but then saw how undone it was inside. This picture is the aftermath, after properly baking. Phew, disaster averted. I do like these cake layers with very little flour though. It got me thinking about creative things to do instead of almonds - surely other nuts. I wonder if things such as graham cracker crumbs would have worked. Can you substitute those for nuts or flour? I'll have to try sometime (mental note).
The buttercream wasn't quite as nice as Dorie's recipe but I still had no problems with it breaking or anything. The rose flavor was delicate but nice, and I colored the remainder to decorate the top of the cake. I still had enough left over to make what are now forever known as stress cupcakes.
I ended up being very happy that I had picked round cake pans for the Rose Strawberry Oratorio Cake, since the quotation I liked the most was about the moon. I brought it into the music library the next day. The student workers and a bunch of other students devoured it, in fact I had students coming back in unabashedly asking for seconds. For normal things like cookies or brownies, this doesn't surprise me, but I honestly was not convinced that the rose, almond, white chocolate, and strawberry combination would be pleasing to college student palates.
I didn't want to just make a rhubarb opera cake. I decided to incorporate ginger in some way, because it seemed that a lot of traditional rhubarb recipes added ginger. I was at Tea Junction in the local mall and they had premade simple syrups - I almost jumped ship and went with lavender instead of ginger, but ultimately decided the white ginger would be nice. This time I added it to the cake as well as the buttercream, and used it as a substitute for the syrup that is brushed onto the cake layers.
I went ahead and used the three square layers this time around, and was pleased with the result, even if I skipped the white chocolate layer and didn't really decorate. As you can see above I attempted to make a rose out of rolled out crystallized ginger, in a similar way I have seen flowers made out of gumdrops, but it was unwieldy. The toothpicks are an indication of how I prepared it for transportation since the square cake wouldn't fit in my round cake transporter!
I liked the spring flavors in this, but think I would like the chocolate version the most!
Categories: Almond, Buttercream, Cake, Daring Bakers, Ginger, Mousse, Rhubarb, Rose, Strawberry
Tuesday, May 20, 2008
Fruity Mousse(s)
Mousse, which is French for "foam," is usually a light, airy dessert with whipped cream and/or egg whites, often using gelatin to stabilize (see various web definitions). This past month, both strawberries and rhubarb have been available in the sunny state of South Carolina. I was tired of desserts that masked the vivid brightness of these fresh fruits, and thought I would try making mousse to see if that would allow the flavor of the fruit to come through.
At the end of April we drove up to Strawberry Hill USA, a local farm growing strawberries and peaches. We bought a bucket of the largest, juiciest, sweetest strawberries I have ever had, and that is including the 20 years I lived right down the mountain from the Oregon strawberry fields that I would pick in for jam every summer with my Mom and sisters. I knew I didn't have long before they started to go bad, so I used the last half for the strawberry mousse.
Earlier in April I had gone through a bunch of recipes from The Enchanted Broccoli Forest and remembered a fresh strawberry mousse recipe that I had wanted to try. Since the cookbook is vegetarian, it relies on cornstarch as a thickener rather than gelatin. Unfortunately this does cause some issues with texture - instead of the light, foamy, airy feel I was hoping for, it is a bit cloying on the tongue. The heaviness also masks the freshness of the strawberries, and I think a bowl of strawberries may have been preferable to the mousse!
A few weeks later I ran into a recipe for rhubarb mousse on Tartlette's baking blog. She is one of my favorite bakers and I always marvel at how she brings elements together into one beautiful, perfect dessert. She used a rhubarb mousse in a lemon rhubarb marscapone mousse cake (follow the link for pictures and recipe), and my main goal was to use my second batch of rhubarb before it went bad waiting for me to get inspired. Rhubarb is tricky - a lot of people have not ever tried it, some claim to hate it, and I personally had not tasted it at all until last year. I didn't want it to be just rhubarb, and added some white ginger simple syrup that I found at a tea shop in the mall. I purposely allowed the rhubarb to stay a little chunky for some texture.
As opposed to the fresh strawberry mousse, this rhubarb ginger mousse was light, airy, foamy, and delicately flavored. The ginger added just a little punch to counteract the tartness of the rhubarb, which of course was also balanced by the light and sweet of the mousse. If I were to make strawberry mousse again, I would start with this basic mousse recipe.
Categories: Cream, Ginger, Mousse, Rhubarb, Strawberry

At the end of April we drove up to Strawberry Hill USA, a local farm growing strawberries and peaches. We bought a bucket of the largest, juiciest, sweetest strawberries I have ever had, and that is including the 20 years I lived right down the mountain from the Oregon strawberry fields that I would pick in for jam every summer with my Mom and sisters. I knew I didn't have long before they started to go bad, so I used the last half for the strawberry mousse.

Earlier in April I had gone through a bunch of recipes from The Enchanted Broccoli Forest and remembered a fresh strawberry mousse recipe that I had wanted to try. Since the cookbook is vegetarian, it relies on cornstarch as a thickener rather than gelatin. Unfortunately this does cause some issues with texture - instead of the light, foamy, airy feel I was hoping for, it is a bit cloying on the tongue. The heaviness also masks the freshness of the strawberries, and I think a bowl of strawberries may have been preferable to the mousse!
A few weeks later I ran into a recipe for rhubarb mousse on Tartlette's baking blog. She is one of my favorite bakers and I always marvel at how she brings elements together into one beautiful, perfect dessert. She used a rhubarb mousse in a lemon rhubarb marscapone mousse cake (follow the link for pictures and recipe), and my main goal was to use my second batch of rhubarb before it went bad waiting for me to get inspired. Rhubarb is tricky - a lot of people have not ever tried it, some claim to hate it, and I personally had not tasted it at all until last year. I didn't want it to be just rhubarb, and added some white ginger simple syrup that I found at a tea shop in the mall. I purposely allowed the rhubarb to stay a little chunky for some texture.

As opposed to the fresh strawberry mousse, this rhubarb ginger mousse was light, airy, foamy, and delicately flavored. The ginger added just a little punch to counteract the tartness of the rhubarb, which of course was also balanced by the light and sweet of the mousse. If I were to make strawberry mousse again, I would start with this basic mousse recipe.
Categories: Cream, Ginger, Mousse, Rhubarb, Strawberry
Monday, May 05, 2008
Stress Cupcakes
We have been house hunting all weekend and might be buying a home this year. I had some rose buttercream (color and flavor) left over and wanted to do something nice for our real estate agent, because she has spent many hours on us in the last week. What is better than making cupcakes?
Because of a baking project earlier in the week, I was out of eggs. Looking at homes for four hours is too exhausting, and I was adamant about not going to the store. I did a search for vegan cupcake recipes and adapted a chocolate vegan cupcake recipe into a vanilla one. I would have made almond to go with the rose, but was out of almond extract too.
Stress Cupcakes (AKA Rose Vanilla Vegan Cupcakes)
1 cup soy milk
1 tsp vinegar (I used white distilled)
3/4 cup granulated sugar
1/3 cup canola oil
1 tsp vanilla extract
1 tsp rosewater
1 1/3 cups all-purpose flour
3/4 tsp baking soda
1/2 tsp baking powder
1/4 tsp salt
1. Preheat oven to 350°F and line a muffin pan with paper or foil liners.
2. Whisk together the soy milk and vinegar in a large bowl, and set aside for a few minutes to curdle. Add the sugar, oil, vanilla extract, and rose water, to the soy milk mixture and beat until foamy. In a separate bowl, sift together the flour, baking soda, baking powder, and salt. Add in two batches to wet ingredients and beat until no large lumps remain (a few tiny lumps are OK).
3. Pour into liners, filling 3/4 of the way. Bake 18 to 20 minutes, until a toothpick inserted into the center comes out clean. Transfer to a cooling rack and let cool completely.
Frost as desired - I should point out that if you use a regular buttercream like I did, the cupcakes are no longer vegan! Simple pink sugar sprinkles make this cupcake look like a respite from mortgage rates and bidding wars and termite inspections. And to me, they tasted delicious - sweet and sugary and the little hint of rose adding a touch of sophistication.
Categories: Buttercream, Cupcake, Rose, Vanilla, Vegan

Because of a baking project earlier in the week, I was out of eggs. Looking at homes for four hours is too exhausting, and I was adamant about not going to the store. I did a search for vegan cupcake recipes and adapted a chocolate vegan cupcake recipe into a vanilla one. I would have made almond to go with the rose, but was out of almond extract too.
Stress Cupcakes (AKA Rose Vanilla Vegan Cupcakes)
1 cup soy milk
1 tsp vinegar (I used white distilled)
3/4 cup granulated sugar
1/3 cup canola oil
1 tsp vanilla extract
1 tsp rosewater
1 1/3 cups all-purpose flour
3/4 tsp baking soda
1/2 tsp baking powder
1/4 tsp salt
1. Preheat oven to 350°F and line a muffin pan with paper or foil liners.
2. Whisk together the soy milk and vinegar in a large bowl, and set aside for a few minutes to curdle. Add the sugar, oil, vanilla extract, and rose water, to the soy milk mixture and beat until foamy. In a separate bowl, sift together the flour, baking soda, baking powder, and salt. Add in two batches to wet ingredients and beat until no large lumps remain (a few tiny lumps are OK).
3. Pour into liners, filling 3/4 of the way. Bake 18 to 20 minutes, until a toothpick inserted into the center comes out clean. Transfer to a cooling rack and let cool completely.
Frost as desired - I should point out that if you use a regular buttercream like I did, the cupcakes are no longer vegan! Simple pink sugar sprinkles make this cupcake look like a respite from mortgage rates and bidding wars and termite inspections. And to me, they tasted delicious - sweet and sugary and the little hint of rose adding a touch of sophistication.
Categories: Buttercream, Cupcake, Rose, Vanilla, Vegan
Subscribe to:
Posts (Atom)