A few weeks ago, we were watching The Amazing Race when teams had a chance to make lavash the traditional way during a stop in Armenia. I couldn't get it out of my head but didn't have bread flour, so my baking project had to wait until I bought some. This is a simple recipe with endless variations, but I waited until I had an afternoon where I could have back to back 30 minute periods to rest the dough and bake the lavash in batches. I used poppy seeds, sesame seeds, and z'atar.
I poked around for traditional recipes and found a video made by an Armenian woman, translated into English. The comments are interesting because most of them are people from other countries, angry that she has "claimed" lavash for Armenia. Surely there are similar flatbreads in many cultures. And even I have made lavash, back in 2008 for a Daring Bakers challenge. I made more of a cracker version, slightly thicker than typical lavash. Of course I didn't have a traditional clay oven deep in the ground like the women in Armenia do, but I heated the pan in the oven at a very high heat.
Monday, April 25, 2016
Monday, April 18, 2016
Berry Coconut Muffins
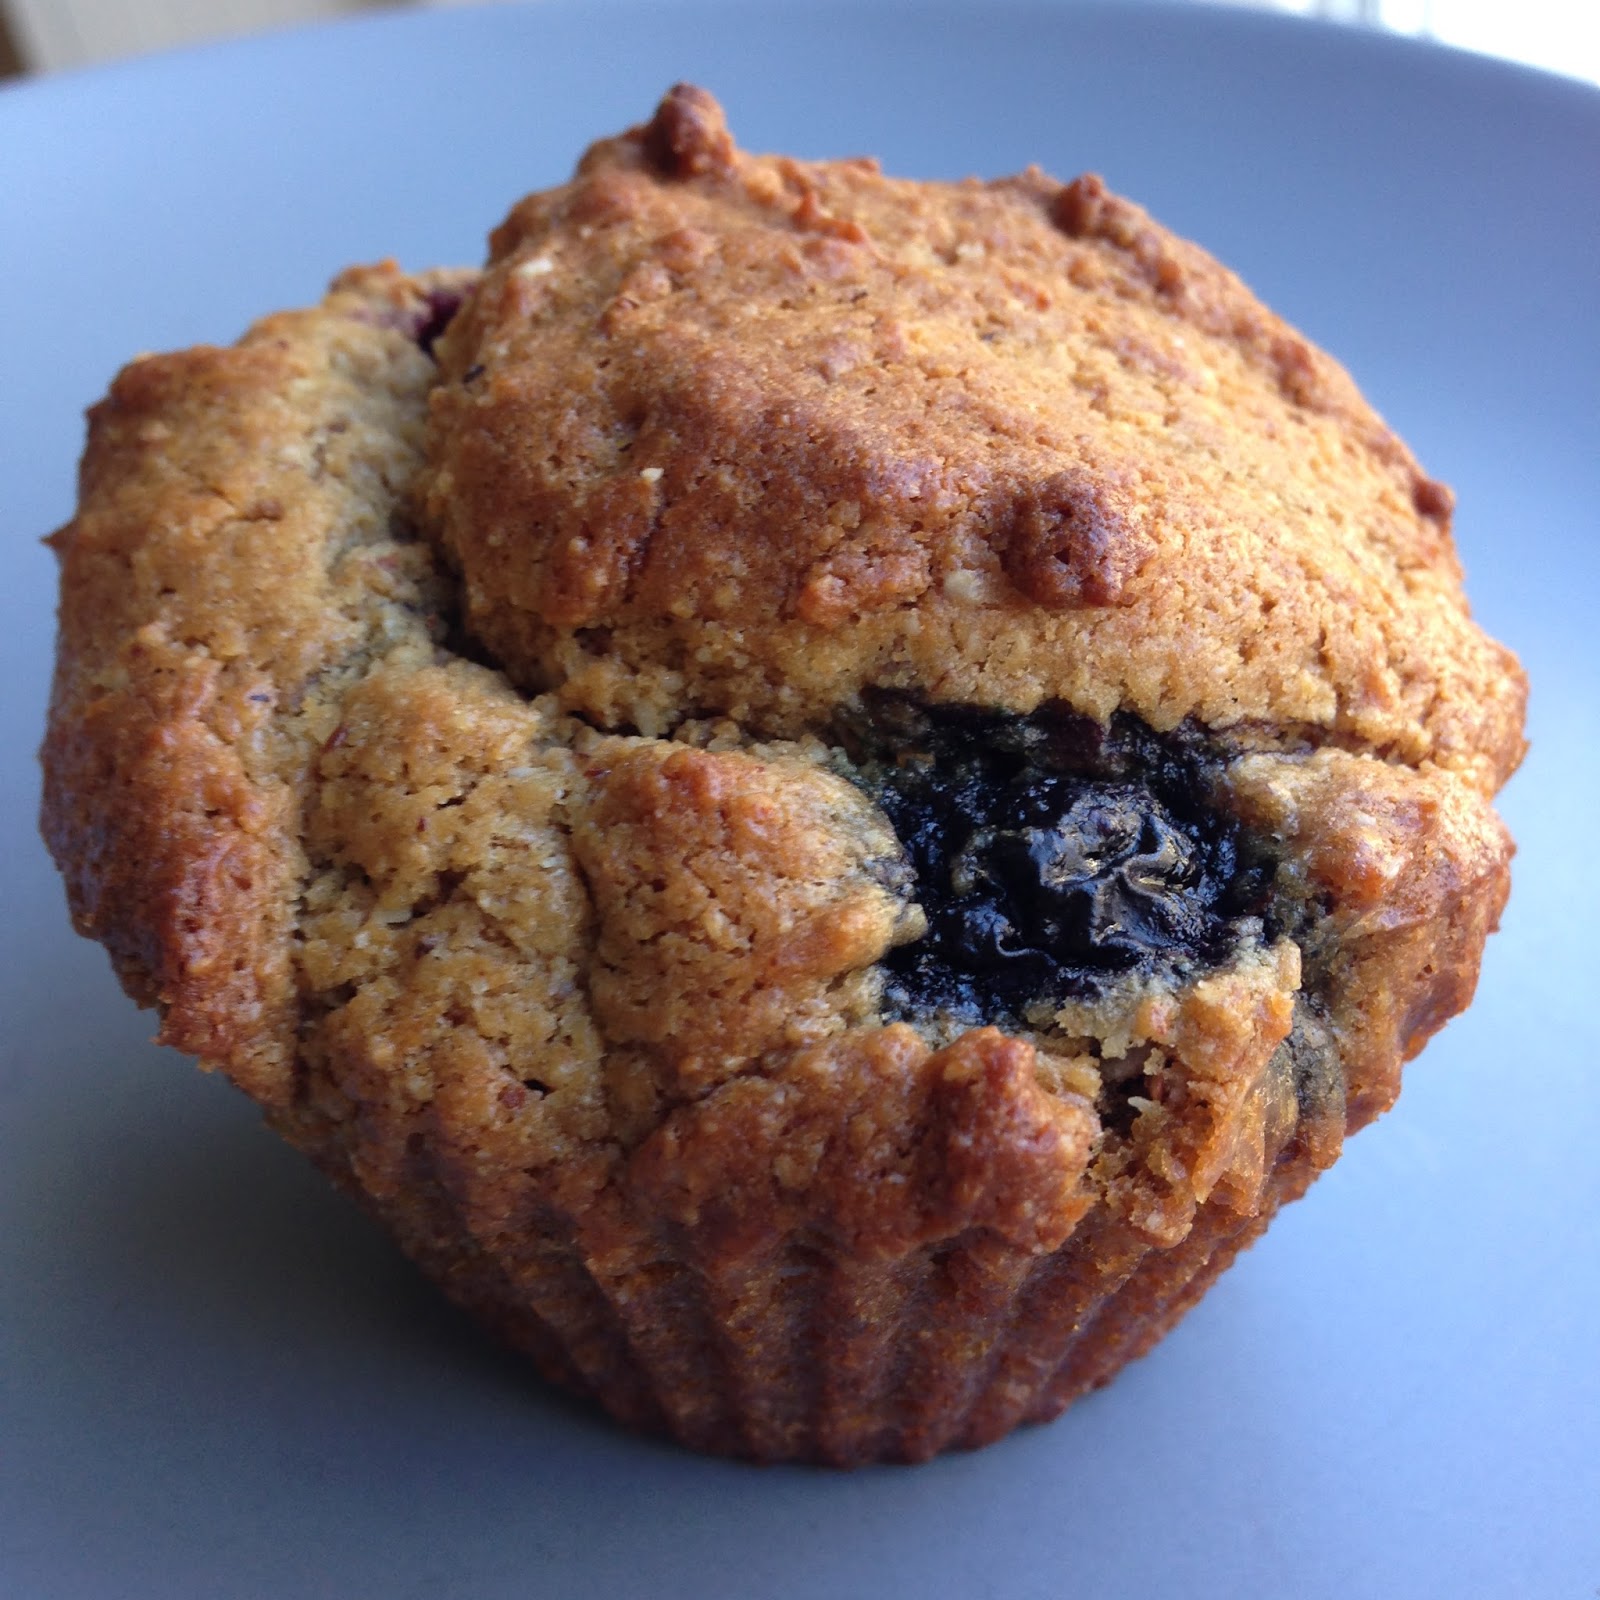
These are adapted from "Blueberries-and-Cream Mall Muffins" from A Passion for Baking by Marcy Goldman, one of my go-to cookbooks I keep on the shelf in my kitchen. I'm not sure what malls are like where Marcy grew up, but I don't actually know what a mall muffin is. I used marionberries and coconut flakes, but thinking back, if I had used coconut milk in place of buttermilk and coconut oil in place of butter, these would have tasted more strongly of coconut. As they are, they are tender and sweet. This recipe makes a lot; for us I think 1/4 recipe is best. The recipe times are also intended for the jumbo muffin size; if you make regular muffins they won't need to bake as long. I went with 10 minutes at 425 and the remainder at 350.
Berry Coconut Muffins
2 1/4 cups granulated sugar
1/2 cup vegetable oil
1/2 cup butter, melted
4 large eggs
1 tbsp pure vanilla extract
1/2 tsp each pure lemon and orange extract, optional
5 cups, approximately, all-purpose flour
1 tbsp baking powder
1/4 tsp baking soda
1/2 tsp salt
1 cup buttermilk
1/2 cup sour cream
2 cups semi-frozen berries
1/2 cup shredded sweetened coconut or unsweetened dried coconut flakes
Preheat oven to 425 F. Arrange oven rack to middle position.
Generously spray 12-cup large or standard muffin pan or a 24-cup small muffin pan with nonstick cooking spray and then line with paper muffin liners. Place pan on a parchment paper-lined baking sheet.
In a mixer bowl, blend sugar with oil and butter. Briskly add eggs, vanilla, and other extracts. Fold in 4 cups flour, baking powder, baking soda, and salt. Blend somewhat before next blending in buttermilk and sour cream. Batter should be quite thick; if not, add a touch more flour. Gently fold in berries with a spatula, trying not to break them apart.
Using a large ice-cream scoop, scoop a very large amount of batter into prepared muffin cups, loading them as full as you can. Dust tops of muffins with a little sugar.
Bake 15 minutes at 425 F; then reduce oven temperature to 350 F and bake until muffins are golden brown and spring back when gently pressed with fingertips, about 12-16 minutes. Let cool 5 minutes before removing from pan.
Berry Coconut Muffins
2 1/4 cups granulated sugar
1/2 cup vegetable oil
1/2 cup butter, melted
4 large eggs
1 tbsp pure vanilla extract
1/2 tsp each pure lemon and orange extract, optional
5 cups, approximately, all-purpose flour
1 tbsp baking powder
1/4 tsp baking soda
1/2 tsp salt
1 cup buttermilk
1/2 cup sour cream
2 cups semi-frozen berries
1/2 cup shredded sweetened coconut or unsweetened dried coconut flakes
Preheat oven to 425 F. Arrange oven rack to middle position.
Generously spray 12-cup large or standard muffin pan or a 24-cup small muffin pan with nonstick cooking spray and then line with paper muffin liners. Place pan on a parchment paper-lined baking sheet.
In a mixer bowl, blend sugar with oil and butter. Briskly add eggs, vanilla, and other extracts. Fold in 4 cups flour, baking powder, baking soda, and salt. Blend somewhat before next blending in buttermilk and sour cream. Batter should be quite thick; if not, add a touch more flour. Gently fold in berries with a spatula, trying not to break them apart.
Using a large ice-cream scoop, scoop a very large amount of batter into prepared muffin cups, loading them as full as you can. Dust tops of muffins with a little sugar.
Bake 15 minutes at 425 F; then reduce oven temperature to 350 F and bake until muffins are golden brown and spring back when gently pressed with fingertips, about 12-16 minutes. Let cool 5 minutes before removing from pan.
Monday, April 11, 2016
The Pancakes at the End of the Lane
I recently reread one of the shorter books by Neil Gaiman - The Ocean at the End of the Lane. The unnamed main character has returned to his childhood home after a death in the family (we are led to assume), and tells the story about the family living at the end of the lane. He ended up in their home several times during scary and confusing moments, and part of the "magic" of the three women included delicious, comforting food. I remember an apple custard type dessert being mentioned, and I remember these pancakes:
Pancakes at the End of the Lane
Ingredients
Put the flour and salt in a mixing bowl. Crack the eggs in and whisk/fork the egg into the flour.
Slowly add the milk/water mixture, stirring as you go, until there are no lumps and you have a liquid the consistency of a not too thick cream. (I'm guessing you add the butter to the batter and use additional butter to grease the pan but it doesn't include this step.)
Put the mixture in the fridge overnight.
Grease or butter or oil a non-stick frying pan. Heat it until it’s really hot. (I used medium temp on my stove.)
Stir the mixture you just took from the fridge thoroughly because the flour will all be at the bottom. Get an even consistency.
Ladle some mixture into the pan, thinly covering the whole of the base of the pan. When the base is golden, flip it (or, if you are brave, toss it). Cook another 30 seconds on the other side.
Squeeze lemon juice lightly over the surface, sprinkle with granulated sugar, and plop a blob of jam in there before rolling up like a cigar.
"Lettie cooked us pancakes on a big metal griddle, on the kitchen stove. They were paper-thin, and as each pancake was done Lettie would squeeze lemon onto it, and plop a blob of plum jam into the center, and roll it tightly, like a cigar."I had always listened to the audio previously, so this was the first time I had seen the ephemeral material at the end. A short Q&A between Joe Hill and the author asked a very important question - do the pancakes described exist and what is the recipe? They do exist, and Neil shared the recipe. So of course I had to make them! While a bit squidgier than crepes I've made previously, and although I had to use blueberry jam after not finding plum, these made a delicious and comforting breakfast.
Pancakes at the End of the Lane
Ingredients
- 1 cup of ordinary white flour
- 2 eggs
- A pinch of salt
- 2 1/2 cups of milk and water (a cup and a half of milk and a cup of water mixed)
- 1 tablespoon of either vegetable oil or melted butter
Put the flour and salt in a mixing bowl. Crack the eggs in and whisk/fork the egg into the flour.
Slowly add the milk/water mixture, stirring as you go, until there are no lumps and you have a liquid the consistency of a not too thick cream. (I'm guessing you add the butter to the batter and use additional butter to grease the pan but it doesn't include this step.)
Put the mixture in the fridge overnight.
Grease or butter or oil a non-stick frying pan. Heat it until it’s really hot. (I used medium temp on my stove.)
Stir the mixture you just took from the fridge thoroughly because the flour will all be at the bottom. Get an even consistency.
Ladle some mixture into the pan, thinly covering the whole of the base of the pan. When the base is golden, flip it (or, if you are brave, toss it). Cook another 30 seconds on the other side.
Squeeze lemon juice lightly over the surface, sprinkle with granulated sugar, and plop a blob of jam in there before rolling up like a cigar.
Monday, April 04, 2016
Carrot Cake Attempt #2 (low-sugar, gluten-free, grain-free)
A few years ago, I had just started learning how to bake in a lower-carb, lower-sugar fashion. I made a carrot cake from The Joy of Gluten-Free, Sugar-Free Baking that looked beautiful but neither of us could eat. The reason? There are copious amounts of artificial sweetener in both the cake and icing, and while these don't seem to bother most people, neither of us could force it down. I still have the book on my shelves and after a few years of experimenting with this kind of baking, I thought I could try it again, making a few substitutions, like using coconut sugar instead of Splenda, etc.
Verdict? Sigh, well, still not great. It LOOKS good. But the taste was still not there. I underutilized the coconut sugar so the cake part itself wasn't sweet enough, and I used brown sugar Splenda in the icing, something which works fine in our cinnamon toast but somehow was too obvious here.
I'm posting it anyway. I want people to know how bloggers do more work than you ever see because we make mistakes or ideas don't work the way we expect. This is one where I'm still not at the place I want to be with this one. I'll include the original recipe below from Peter Reinhardt and Denene Wallace, and mark the changes I made. The texture of the cake itself is fine, not too moist, not too dry, cakelike enough for those of us used to sugar-free baking. It's the taste that just isn't there. And it might be that carrots aren't a great idea for low-sugar baking to start with, as they are pretty high in sugar!
Carrot Cake with Cream Cheese Frosting
1 cup (4 oz) coconut flour
1 cup (4 oz) pecan flour*
1/4 cup unsweetened shredded dried coconut, lightly toasted**
2 cups Splenda or Stevia Extract in the Raw, or 1 cup New Roots Stevia Sugar***
2 tsp baking powder
1 1/4 tsp salt
1 1/2 tsp cinnamon
8 egg whites or 6 eggs
1 1/4 cup unsweetened soy milk or other milk
1/2 cup salted butter, melted
2 tsp vanilla extract
1/4 tsp liquid stevia****
2 1/2 cups packed finely shredded carrots
Cream cheese frosting
1 1/2 pounds cream cheese, at room temperature
1/2 cup salted butter, at room temperature
1 cup Splenda or Stevia Extract in the Raw, or 1/2 cup New Roots Stevia Sugar*****
1/2 tsp ground cinnamon
4 tsp vanilla extract
1 tbsp unsweetened soy milk or other milk
1/8 tsp liquid stevia****
Preheat the oven to 325 F. Line the bottom of two 8-inch round cake pans with parchment paper, then mist the inside walls of the pans along with the parchment with spray oil.
In a medium bowl, combine the coconut flour, pecan flour, shredded coconut, Splenda, baking powder, salt, and cinnamon and whisk until well mixed. In a large bowl, whisk the egg whites, milk, butter, vanilla, and liquid stevia together until thoroughly blended. Stir in the carrots. Add the flour mixture and stir with a large spoon for 1-2 minutes to make a thick, sticky batter. If the batter is too thick to pour, add a little more milk.
Pour the batter into the prepared pans. Use a spatula to evenly spread the batter, or jiggle the pan to evenly distribute the batter in the pan. Bake for 35 minutes, then switch racks and bake for about 30 more minutes, until the cakes are lightly golden and springy when pressed in the center and a toothpick inserted into the middle of each cake comes out clean. Let the cakes cool in the pans for at least 20 minutes.
Meanwhile, make the frosting. In a bowl of an electric mixture or a large bowl, combine all the frosting ingredients and mix with the paddle attachment on medium speed or stir vigorously with a large spoon until thoroughly blended. If using an electric mixer, switch to the whisk attachment and mix at medium-high speed for about 3 minutes, until the mixture is fluffy and very creamy; if mixing by hand switch to a sturdy whisk and beat vigorously.
As the cakes cool, they should shrink from the pan walls; if not, run an icing spatula or a thin knife around the edges. Invert the cakes onto two plates. They can be eaten as they are or be frosted, either singly or as a new two-layer cake. For a two-layer cake, spread some frosting over the top of the lower layer, spreading it to an even thickness of about 1/4 inch. Position the second layer on top and then spread the remaining frosting over the entire cake. Sprinkle the pecans, coconut, or both over the top and/or side of the cake if you like. Keep refrigerated.
*- I used almond flour because I had it on hand and pecans are expensive!
** - I left this out because I had the wrong coconut and was worried it might dry out the cake.
*** - I used a scant 1 cup of coconut sugar, which ended up not being quite sweet enough.
**** - Omitted from both cake and frosting.
***** - Used 1/3 cup of Brown sugar Splenda.
Verdict? Sigh, well, still not great. It LOOKS good. But the taste was still not there. I underutilized the coconut sugar so the cake part itself wasn't sweet enough, and I used brown sugar Splenda in the icing, something which works fine in our cinnamon toast but somehow was too obvious here.
I'm posting it anyway. I want people to know how bloggers do more work than you ever see because we make mistakes or ideas don't work the way we expect. This is one where I'm still not at the place I want to be with this one. I'll include the original recipe below from Peter Reinhardt and Denene Wallace, and mark the changes I made. The texture of the cake itself is fine, not too moist, not too dry, cakelike enough for those of us used to sugar-free baking. It's the taste that just isn't there. And it might be that carrots aren't a great idea for low-sugar baking to start with, as they are pretty high in sugar!
Carrot Cake with Cream Cheese Frosting
1 cup (4 oz) coconut flour
1 cup (4 oz) pecan flour*
1/4 cup unsweetened shredded dried coconut, lightly toasted**
2 cups Splenda or Stevia Extract in the Raw, or 1 cup New Roots Stevia Sugar***
2 tsp baking powder
1 1/4 tsp salt
1 1/2 tsp cinnamon
8 egg whites or 6 eggs
1 1/4 cup unsweetened soy milk or other milk
1/2 cup salted butter, melted
2 tsp vanilla extract
1/4 tsp liquid stevia****
2 1/2 cups packed finely shredded carrots
Cream cheese frosting
1 1/2 pounds cream cheese, at room temperature
1/2 cup salted butter, at room temperature
1 cup Splenda or Stevia Extract in the Raw, or 1/2 cup New Roots Stevia Sugar*****
1/2 tsp ground cinnamon
4 tsp vanilla extract
1 tbsp unsweetened soy milk or other milk
1/8 tsp liquid stevia****
Preheat the oven to 325 F. Line the bottom of two 8-inch round cake pans with parchment paper, then mist the inside walls of the pans along with the parchment with spray oil.
In a medium bowl, combine the coconut flour, pecan flour, shredded coconut, Splenda, baking powder, salt, and cinnamon and whisk until well mixed. In a large bowl, whisk the egg whites, milk, butter, vanilla, and liquid stevia together until thoroughly blended. Stir in the carrots. Add the flour mixture and stir with a large spoon for 1-2 minutes to make a thick, sticky batter. If the batter is too thick to pour, add a little more milk.
Pour the batter into the prepared pans. Use a spatula to evenly spread the batter, or jiggle the pan to evenly distribute the batter in the pan. Bake for 35 minutes, then switch racks and bake for about 30 more minutes, until the cakes are lightly golden and springy when pressed in the center and a toothpick inserted into the middle of each cake comes out clean. Let the cakes cool in the pans for at least 20 minutes.
Meanwhile, make the frosting. In a bowl of an electric mixture or a large bowl, combine all the frosting ingredients and mix with the paddle attachment on medium speed or stir vigorously with a large spoon until thoroughly blended. If using an electric mixer, switch to the whisk attachment and mix at medium-high speed for about 3 minutes, until the mixture is fluffy and very creamy; if mixing by hand switch to a sturdy whisk and beat vigorously.
As the cakes cool, they should shrink from the pan walls; if not, run an icing spatula or a thin knife around the edges. Invert the cakes onto two plates. They can be eaten as they are or be frosted, either singly or as a new two-layer cake. For a two-layer cake, spread some frosting over the top of the lower layer, spreading it to an even thickness of about 1/4 inch. Position the second layer on top and then spread the remaining frosting over the entire cake. Sprinkle the pecans, coconut, or both over the top and/or side of the cake if you like. Keep refrigerated.
*- I used almond flour because I had it on hand and pecans are expensive!
** - I left this out because I had the wrong coconut and was worried it might dry out the cake.
*** - I used a scant 1 cup of coconut sugar, which ended up not being quite sweet enough.
**** - Omitted from both cake and frosting.
***** - Used 1/3 cup of Brown sugar Splenda.
Monday, March 28, 2016
Coconut Flour Chocolate Chip Cookies (grain-free, gluten-free)
I found this recipe on Ambitious Kitchen, where she makes a paleo version with almond butter. I'm probably never really going to eat paleo entirely or spend money on almond butter, so I made the recipe with peanut butter. Otherwise it's the same. This is a great treat for those of us eating grain-free and lower-carb because the cookie actually feels and tastes like a cookie. Her original post has more ideas on substitutions, so check it out.
Coconut Flour Chocolate Chip Cookies
(as seen on Ambitious Kitchen)
Coconut Flour Chocolate Chip Cookies
(as seen on Ambitious Kitchen)
Ingredients
- 3/4 cup unsalted creamy almond butter
- 1/2 cup organic coconut sugar
- 2 tablespoons coconut oil, melted and cooled
- 2 eggs
- 1/4 cup coconut flour
- 1/2 teaspoon baking soda
- 1/4 teaspoon salt
- 1/3 cup dark chocolate chips (Jenny's note - I used Stevia-sweetened mini chips)
Instructions
- Preheat oven to 350 degrees F. Line a cookie sheet with parchment paper.
- In the bowl of a food processor, add in almond butter, coconut sugar and coconut oil; process until it comes together, about 1 minute. Add in eggs and process again. The dough will probably seize up at this point, but don't worry that's okay.
- Next, add in coconut flour, baking soda and salt; process again until a dough forms. Gently fold in chocolate chips.
- Use a cookie scoop to drop dough onto prepared cookie sheet. You can flatten dough with the palm of your hand if you'd like to have cookies like mine in the photo, or if you prefer, you can leave the dough as is and cookies will be a bit puffier.
- Bake for 8-10 minutes or until cookies turn slightly golden brown around the edges. Allow them to cool on cookie sheet for at least 5 minutes, then transfer to a wire rack to finish cooling. Repeat with remaining dough. Makes around 20 cookies (Jenny's note - I made 14 with my scoop.)
Monday, March 21, 2016
Review of Crepes et Croissants in Columbia, SC
While I do not necessarily think of Columbia, SC as a culinary destination, a growing number of restaurants have been impressing me on visits there for conferences, board meetings, and book festivals. One such place is Crêpes & Croissants, on Sumter Street, right around the corner from the Columbia Marriott and the Sheraton. I always end up at conferences at the Marriott and this is SO much better than pricey hotel breakfast. This would work for lunch too, as they are open until 2 most days.
I went with a librarian friend and we both had interesting coffee drinks, a crepe, and a pastry. I had a sweet lemon crepe (lemon curd and whipped cream), a chocolate croissant, and a cafe miel. Next time I'll try something more savory - their omelets and quiche sounded great too. This place is a bit hidden between chain restaurants but worth seeking out!
Monday, March 14, 2016
Pi Day 2016 - Sweet Potato Pie with Marshmallow Meringue in a Gingerbread Crust
This pie feels completely out of season, and it is, but it was an idea I couldn't get out of my head for Pi Day 2016. This would be the PERFECT pie for Thanksgiving, and I suppose for spring I should have been thinking lemon meringue or something with cream cheese.
It starts with Dominique Ansel's gingerbread crust, which I did not end up caring for much. It's rather more like a soft ginger cookie than a pie crust, making it increasingly difficult to work with, but it did have good flavor. I've had it on my mind ever since I first came across it. Overall it is more subtle than I expected, which makes it more versatile (but I still probably won't make it again, maybe just add ginger to a more tried and tested pie dough recipe.)
The pie itself is a version of a popular pie idea - taking what is normally a Thanksgiving side dish in the United States (sweet potatoes or yams with marshmallows on top) and making a pie version. I used the recipe from a cookbook I have at home, The Southern Pie Book, but it is basically the Southern Living recipe which I will post below. I had to bake the pie 15 minutes longer to get it to set in the middle. I thought it was okay but overall very sweet. And as Mr. JennyBakes pointed out, if you have this as a pie then you won't have it as a side dish, and having sweet potato casserole as a side dish is like a way to sneak dessert into dinner.
Dominique Ansel's Gingerbread Pie Crust
(as seen on Eater, where the pictured pie crust is quite darker than the one I made)
(Makes 2 pie crusts)
Ingredients:
½ cup plus 1 tbsp light brown sugar
2/3 stick unsalted butter, softened
3 tbsp lemon juice
1 tbsp milk
½ tsp vanilla extract
1¾ cups all purpose flour
1 tsp ground cinnamon
1 tsp ground ginger
Pinch nutmeg
2 tbsp fresh ginger, grated
2 tbsp cornstarch
Pinch Maldon sea salt
Method:
Sweet Potato Pie with Marshmallow Meringue
(recipe from The Southern Pie Book, originally from Southern Living)
FILLING:
It starts with Dominique Ansel's gingerbread crust, which I did not end up caring for much. It's rather more like a soft ginger cookie than a pie crust, making it increasingly difficult to work with, but it did have good flavor. I've had it on my mind ever since I first came across it. Overall it is more subtle than I expected, which makes it more versatile (but I still probably won't make it again, maybe just add ginger to a more tried and tested pie dough recipe.)
The pie itself is a version of a popular pie idea - taking what is normally a Thanksgiving side dish in the United States (sweet potatoes or yams with marshmallows on top) and making a pie version. I used the recipe from a cookbook I have at home, The Southern Pie Book, but it is basically the Southern Living recipe which I will post below. I had to bake the pie 15 minutes longer to get it to set in the middle. I thought it was okay but overall very sweet. And as Mr. JennyBakes pointed out, if you have this as a pie then you won't have it as a side dish, and having sweet potato casserole as a side dish is like a way to sneak dessert into dinner.
Dominique Ansel's Gingerbread Pie Crust
(as seen on Eater, where the pictured pie crust is quite darker than the one I made)
(Makes 2 pie crusts)
Ingredients:
½ cup plus 1 tbsp light brown sugar
2/3 stick unsalted butter, softened
3 tbsp lemon juice
1 tbsp milk
½ tsp vanilla extract
1¾ cups all purpose flour
1 tsp ground cinnamon
1 tsp ground ginger
Pinch nutmeg
2 tbsp fresh ginger, grated
2 tbsp cornstarch
Pinch Maldon sea salt
Method:
- In a stand mixer fitted with a paddle attachment, cream together butter and sugar on medium-low speed until light and fluffy, about 3 minutes. While continuing to mix, stream in lemon juice, followed by milk and vanilla, until evenly combined.
- In a bowl, whisk together the flour, cinnamon, ground ginger, nutmeg, grated ginger, cornstarch and salt until combined. With the mixer on medium-low speed, add in one-third of the dry ingredient mixture until evenly combined. Repeat with the next third of the dry ingredients, then the final third.
- Scrape down the sides of the bowl, and transfer the dough onto a sheet of plastic wrap. Form the dough into a rectangle no more than ½ inch thick, wrap in the plastic wrap and chill in the refrigerator for at least 1-2 hours.
- Remove the dough from the fridge. Divide the dough in half (this recipe yields two pie crusts, so you can keep one half wrapped in plastic wrap in the fridge). On a lightly floured surface, roll out the dough into a 14-inch round. Transfer to a pie tin, gently pressing down into the corners and up the sides. Trim away excess dough using a paring knife, leaving a 1-inch overhang around the edge. Fold the edges under, then form a fluted edge around the rim with your fingers. Lightly dock the bottom surface of the dough with a fork. Chill or freeze the pie shell in the pie pan until ready to bake.
- Preheat the oven to 350F.
- Line the pie shell with a coffee filter and fill with rice or dried beans to blind bake the crust. Bake in the oven for 14-16 minutes, until the bottom of the pie crust is just lightly baked.
- Remove from oven and discard the coffee filter and rice/beans. Return the crust to the oven and bake until golden brown, approximately 4 more minutes. Remove from oven and let cool.
Sweet Potato Pie with Marshmallow Meringue
(recipe from The Southern Pie Book, originally from Southern Living)
FILLING:
1/4 cup
butter, melted
1 cup
sugar
1/4 teaspoon
salt
3
large eggs
3 cups
lightly packed, cooked, mashed sweet potatoes (about 2 1/2 lb. sweet potatoes)
1 cup
half-and-half
1 tablespoon
lemon zest
3 tablespoons
lemon juice
1/4 teaspoon
ground nutmeg
MARSHMALLOW MERINGUE:
3
egg whites
1/2 teaspoon
vanilla extract
1/8 teaspoon
salt
1/4 cup
sugar
1
(7-oz.) jar marshmallow crème
Preparation
1.
Whisk
together egg yolk and cream; brush bottom and sides of crust with yolk
mixture. Bake 6 to 8 more minutes or until crust is golden. Transfer to a
wire rack, and cool. Reduce oven temperature to 350° F.
2. Prepare filling: Stir together melted butter, 1 cup sugar, and next 2 ingredients in a large bowl until mixture is well blended. Add sweet potatoes and next 4 ingredients; stir until mixture is well blended. Pour sweet potato mixture into prepared piecrust. (Pie will be very full.)
3. Bake at 350° for 50 to 55 minutes or until a knife inserted in center comes out clean, shielding with aluminum foil to prevent excessive browning. Preheat oven to 400° F.
4. Prepare meringue: Beat egg whites and next 2 ingredients at high speed with a heavy-duty electric stand mixer until foamy. Gradually add sugar, 1 Tbsp. at a time, beating until stiff peaks form.
5. Beat one-fourth of marshmallow crème into egg white mixture; repeat 3 times with remaining marshmallow crème, beating until smooth (about 1 minute). Spread over pie.
6. Bake at 400° for 6 to 7 minutes or until meringue is lightly browned.
2. Prepare filling: Stir together melted butter, 1 cup sugar, and next 2 ingredients in a large bowl until mixture is well blended. Add sweet potatoes and next 4 ingredients; stir until mixture is well blended. Pour sweet potato mixture into prepared piecrust. (Pie will be very full.)
3. Bake at 350° for 50 to 55 minutes or until a knife inserted in center comes out clean, shielding with aluminum foil to prevent excessive browning. Preheat oven to 400° F.
4. Prepare meringue: Beat egg whites and next 2 ingredients at high speed with a heavy-duty electric stand mixer until foamy. Gradually add sugar, 1 Tbsp. at a time, beating until stiff peaks form.
5. Beat one-fourth of marshmallow crème into egg white mixture; repeat 3 times with remaining marshmallow crème, beating until smooth (about 1 minute). Spread over pie.
6. Bake at 400° for 6 to 7 minutes or until meringue is lightly browned.
Monday, March 07, 2016
Chocolate Cinnamon Banana Bread
Somehow we are always faced with 3-4 overripe bananas at the end of the week. We always buy more than we can chew, I guess. Often these go into paleo muffins or 1-ingredient ice cream but this time I was craving something chocolatey. I also had some cinnamon chips in the cupboard which demanded inclusion. This was delicious!
Chocolate Cinnamon Banana Bread
Adapted from Smitten Kitchen
3 medium-to-large very ripe bananas
1/2 cup butter, melted
3/4 cup brown sugar
1 large egg*
1 teaspoon pure vanilla extract
1 teaspoon baking soda
1/4 teaspoon table salt
1 tsp ground cinnamon
1 cup all-purpose flour
1/2 cup cocoa powder (what you see pictured is Special Dark)
1 cup cinnamon chips
Heat your oven to 350°F.
Butter a 9×5-inch loaf pan, or spray it with a nonstick baking spray.
Mash bananas in the bottom of a large bowl. Whisk in melted butter, then brown sugar, egg, and vanilla. Place baking soda, salt, cinnamon, flour and cocoa powder in a sifter or fine-mesh strainer and sift over wet ingredients. Stir dry and wet ingredients with a spoon until just combined. Stir in cinnamon chips.
Pour into prepared pan and bake 55 to 65 minutes, until a tester or toothpick inserted into the center of the cake comes out batter-free. Cool in pan for 10 to 15 minutes, then run a knife around the edge and invert it out onto a cooling rack. Serve warm or at room temperature.
*One egg doesn't sound like enough but bananas do a lot of the work alongside the butter to bind this all together.
Chocolate Cinnamon Banana Bread
Adapted from Smitten Kitchen
3 medium-to-large very ripe bananas
1/2 cup butter, melted
3/4 cup brown sugar
1 large egg*
1 teaspoon pure vanilla extract
1 teaspoon baking soda
1/4 teaspoon table salt
1 tsp ground cinnamon
1 cup all-purpose flour
1/2 cup cocoa powder (what you see pictured is Special Dark)
1 cup cinnamon chips
Heat your oven to 350°F.
Butter a 9×5-inch loaf pan, or spray it with a nonstick baking spray.
Mash bananas in the bottom of a large bowl. Whisk in melted butter, then brown sugar, egg, and vanilla. Place baking soda, salt, cinnamon, flour and cocoa powder in a sifter or fine-mesh strainer and sift over wet ingredients. Stir dry and wet ingredients with a spoon until just combined. Stir in cinnamon chips.
Pour into prepared pan and bake 55 to 65 minutes, until a tester or toothpick inserted into the center of the cake comes out batter-free. Cool in pan for 10 to 15 minutes, then run a knife around the edge and invert it out onto a cooling rack. Serve warm or at room temperature.
*One egg doesn't sound like enough but bananas do a lot of the work alongside the butter to bind this all together.
Monday, February 29, 2016
Rwandan Honey Bread with Banana Jam
I have found many "honey bread" recipes throughout sources from East Africa - Kenya, Ethiopia, Rwanda. I chose it for Rwanda because of the story Jamie Oliver tells about the bakeries in Rwanda set up for widows to help them make a living. His recipe is identical to what I found in a much earlier cookbook, The African Kitchen by Josie Stow. That is the source for the banana jam recipe.
I like the idea of this bread with the honey and spices but I feel like mine ended up too floury and dense. It's a lack of practice on my part with kneading by hand. The banana jam smelled up the entire house!
Honey Bread from the Rwandan Women's Bakery (via Jamie Oliver)
Ingredients
Preparing the dough
Put the lukewarm water in a bowl and sprinkle the yeast packet on top. Leave for 2-3 minutes, then stir thoroughly. Leave the mixture to stand somewhere warm for around 5-10 minutes until you can see bubbles forming and the mixture looks like it’s expanding a little.
While you’re waiting, mix together the honey, egg and spices in a bowl until combined. Add the lukewarm milk, yeast mixture and two-thirds of the butter. Mix well then begin to add the flour, keeping your touch light.
Kneading the dough
Once the dough has come together, remove from the bowl and, on a well-floured surface, combine it with most of the flour – you’re looking for a light, soft dough that isn’t too wet, but you may not need all of your flour, so go slowly. If you get lots of dough on your hands, add a little flour to your palms and rub them together briskly until the dough falls off.
Knead the dough using floured hands (and once it needs no more flour, buttered hands) for around ten minutes, until it is springy and smooth – this stage is really important, because by doing this you’ll wake up the gluten strands, which is what will your bread an ace texture. You want to end up with one or more shiny, round, loaf shapes. I
Baking
What’s great about this bread is that it can be baked in lots of different types of tins. I (Jamie) used 3×5 inch round tins to get three fat little loaves. If you want one large loaf, go for an 8inch round tin, or a large loaf tin (Jenny did this). Alternatively, you can use a large round oven dish, such as a Le Creuset. Butter the tin / dish with the remaining butter and pop your dough inside – fill each one around half full.
Cover the tin with a clean tea towel and allow to rise in a nice warm place for at least an hour – you want the dough to have risen almost to the top of the tin. Don’t scrimp on this stage, as even rising is important!
Bake at 190°C/375°F/gas 5 for around 40 minutes – it should have a golden brown top with a crust. To test if it’s done, take a tea towel and place it on top, then turn it upside down so the tea towel catches it. Then tap it on the bottom – if it sounds hollow like a drum then it’s done!
Serve in torn-off chunks or thick slices with butter and a bit more honey, OR banana jam!
Banana Jam (via Josie Stow)
These directions are not the full recipe, as she included steps for canning at the end. I knew I wasn't going to can it, so I just transcribed a simplified version. I made a half recipe and it worked fine.
Peel and slice the bananas, add them to the lemon mixture and gently stir until they are well coated.
Cover the bowl with plastic wrap and leave to marinate 1 hour
Scrape into a pan and place over low heat. Bring mixture to a boil, stirring occasionally to prevent sticking.
Boil until thermometer reaches jam stage, 220 F, it will be a lovely rich amber color. (If you aren't canning it, you can probably get away with simply cooking it 30 minutes or so, until thickened.)
I like the idea of this bread with the honey and spices but I feel like mine ended up too floury and dense. It's a lack of practice on my part with kneading by hand. The banana jam smelled up the entire house!
Honey Bread from the Rwandan Women's Bakery (via Jamie Oliver)
Ingredients
- 1 packet of active dry yeast
- 1 egg
- 4-5 cups of all-purpose flour
- 3/4 cup lukewarm milk
- 1/2 cup honey
- 3/4 cup lukewarm water
- 6 tablespoons of melted butter
- 1 tablespoon ground coriander
- 1/2 tsp ground cinnamon
- 1/4 tsp ground cloves
Preparing the dough
Put the lukewarm water in a bowl and sprinkle the yeast packet on top. Leave for 2-3 minutes, then stir thoroughly. Leave the mixture to stand somewhere warm for around 5-10 minutes until you can see bubbles forming and the mixture looks like it’s expanding a little.
While you’re waiting, mix together the honey, egg and spices in a bowl until combined. Add the lukewarm milk, yeast mixture and two-thirds of the butter. Mix well then begin to add the flour, keeping your touch light.
Kneading the dough
Once the dough has come together, remove from the bowl and, on a well-floured surface, combine it with most of the flour – you’re looking for a light, soft dough that isn’t too wet, but you may not need all of your flour, so go slowly. If you get lots of dough on your hands, add a little flour to your palms and rub them together briskly until the dough falls off.
Knead the dough using floured hands (and once it needs no more flour, buttered hands) for around ten minutes, until it is springy and smooth – this stage is really important, because by doing this you’ll wake up the gluten strands, which is what will your bread an ace texture. You want to end up with one or more shiny, round, loaf shapes. I
Baking
What’s great about this bread is that it can be baked in lots of different types of tins. I (Jamie) used 3×5 inch round tins to get three fat little loaves. If you want one large loaf, go for an 8inch round tin, or a large loaf tin (Jenny did this). Alternatively, you can use a large round oven dish, such as a Le Creuset. Butter the tin / dish with the remaining butter and pop your dough inside – fill each one around half full.
Cover the tin with a clean tea towel and allow to rise in a nice warm place for at least an hour – you want the dough to have risen almost to the top of the tin. Don’t scrimp on this stage, as even rising is important!
Bake at 190°C/375°F/gas 5 for around 40 minutes – it should have a golden brown top with a crust. To test if it’s done, take a tea towel and place it on top, then turn it upside down so the tea towel catches it. Then tap it on the bottom – if it sounds hollow like a drum then it’s done!
Serve in torn-off chunks or thick slices with butter and a bit more honey, OR banana jam!
Banana Jam (via Josie Stow)
These directions are not the full recipe, as she included steps for canning at the end. I knew I wasn't going to can it, so I just transcribed a simplified version. I made a half recipe and it worked fine.
- 1 ¾ cups sugar
- ½ cup fresh lemon juice
- 1 tbsp lemon zest
- 6 ripe bananas
Peel and slice the bananas, add them to the lemon mixture and gently stir until they are well coated.
Cover the bowl with plastic wrap and leave to marinate 1 hour
Scrape into a pan and place over low heat. Bring mixture to a boil, stirring occasionally to prevent sticking.
Boil until thermometer reaches jam stage, 220 F, it will be a lovely rich amber color. (If you aren't canning it, you can probably get away with simply cooking it 30 minutes or so, until thickened.)
Monday, February 22, 2016
Mandazi - Rwandan Doughnuts
To continue my reading/baking Africa in 2016 project, I recently read Our Lady of the Nile by Scholastique Mukasonga, set in a Catholic girls school in the mountains of Rwanda right before the genocide. Doughnuts get mentioned frequently, the food the girls crave when they're away from home. The mothers send them food in suitcases, including:
“...For the city girls, doughnuts of every color under the sun - a secret Swahili recipe...."
I'm not sure if this recipe, found on the Compassion International website, is the doughnuts they mention, but this is simpler than most doughnuts - a quick batter, a short rest, a shallow fry.
Mandazi
Ingredients:
Mix together the egg, sugar, milk, butter and baking powder. Slowly mix in the flour, forming dough that’s soft but not sticky. Add more flour if needed.
With a rolling pin, roll the dough on a lightly floured surface until it’s about ¼-inch thick. Let it stand about 20 minutes, then cut it into 12-15 triangles.
Heat the oil in a skillet. Place the triangles in oil over medium heat and fry until both sides are golden brown. Remove to drain on paper towels. Sprinkle with powdered sugar.
“...For the city girls, doughnuts of every color under the sun - a secret Swahili recipe...."
I'm not sure if this recipe, found on the Compassion International website, is the doughnuts they mention, but this is simpler than most doughnuts - a quick batter, a short rest, a shallow fry.
Mandazi
Ingredients:
- 1 egg, beaten
- ½ c. sugar
- ½ c. milk
- 2 tbsp. butter, melted
- 2 tsp. baking powder
- 2 c. white flour
- ½ c. cooking oil, plus more as needed
- powdered sugar for sprinkling (optional)
Mix together the egg, sugar, milk, butter and baking powder. Slowly mix in the flour, forming dough that’s soft but not sticky. Add more flour if needed.
With a rolling pin, roll the dough on a lightly floured surface until it’s about ¼-inch thick. Let it stand about 20 minutes, then cut it into 12-15 triangles.
Heat the oil in a skillet. Place the triangles in oil over medium heat and fry until both sides are golden brown. Remove to drain on paper towels. Sprinkle with powdered sugar.
Monday, February 15, 2016
Pupcakes - Dog Friendly, gluten-free
Our shepherd-boxer mix, Doyle, turned a year old at the end of January, so I went looking for dog-friendly cake recipes. I found a bunch and picked one that I already had all ingredients for. This is the only food our dachshund mix, Winnie, has ever found motivation to come inside for, so I suppose you could say the dogs thought they were pretty tasty. Except for on his birthday, where Doyle got to eat one entire pupcake (about half as tall as a cupcake), I've been giving them much smaller pieces, sometimes with peanut butter on top and sometimes not.
Pupcakes
(Recipe from The Scrumptious Pumpkin blog)
Pupcakes
(Recipe from The Scrumptious Pumpkin blog)
Ingredients
- ½ cup brown rice flour
- 1 teaspoon baking powder
- ⅓ cup organic canola oil
- ⅓ cup organic applesauce
- 1 organic, pastured egg
- 2 tablespoons organic honey
- 3 tablespoons organic plain Greek yogurt
- 1½ tablespoons organic peanut butter
Instructions
- Preheat oven to 350 degrees F.
- In a mixing bowl, stir the flour, baking powder, canola oil, applesauce, egg, and honey until well combined.
- Insert cupcake liners into a muffin or cupcake pan. Spoon mixture into cupcake liners, filling each about halfway.
- Bake for about 10-12 minutes, or until a toothpick inserted in the center of a cupcake comes out clean.
- Allow cupcakes to cool to room temperature.
- Meanwhile, in a bowl, stir yogurt and peanut butter until mixture is smooth and creamy. Use a small spatula or butter knife to smooth a thin layer of the peanut butter frosting over each cupcake.
Storage:
cupcakes should hold up for 4-5 days if stored in an airtight container
in a cool, shaded, dry spot. Peanut butter frosting should be stored
separately, covered and refrigerated. Frost cupcakes immediately before
serving.
Monday, February 08, 2016
Sudanese Baseema
In looking for recipes from Sudan, I came across the website of Mark Tanner, a travel writer who documented quite a few recipes along the way. I found this recipe elsewhere on the internet, in sources that seem to predate him, so I'm not sure of its actual provenance.
As I mentioned in a previous post from two weeks ago, traditional Sudanese food seems split between two regions - Arabic influence and East African. This cake is very much more of the northern influence, with a cake similar to this (with slight alterations) made throughout much of the middle east. I myself have made Egyptian Basbousa, a cake that has many similarities although uses semolina (or farina) and honey instead of this recipe's regular flour and sugar syrup.
This is an easy cake and makes a lot - the yogurt makes it tender and the syrup poured on after it bakes makes it incredibly flavorful.
Ingredients:
5 eggs
1 cup icing sugar
3/4 cup butter / oil
500g yogurt
2 tsp baking powder
2 cups flour
1 tsp of vanilla extract
1 cup of coconut
1 1/2 cups of sugar
1 tbsp lemon juice
1 cup water
Beat eggs and sugar. Add oil and yogurt and mix.
In a separate bowl sift flour and add baking powder and coconut, then add to the mixture while stirring.
Spread mixture onto greased tray (9x13 pan was perfect.) Bake for 30 minutes 200° Celsius. (This is 400 F, which is hotter than most cakes but is correct for this one.)
In another saucepan, mix sugar and lemon with water, boil until syrup thickens.
When cake is baked, poke holes in it pour syrup over evenly so it soaks through (while still hot.)
As I mentioned in a previous post from two weeks ago, traditional Sudanese food seems split between two regions - Arabic influence and East African. This cake is very much more of the northern influence, with a cake similar to this (with slight alterations) made throughout much of the middle east. I myself have made Egyptian Basbousa, a cake that has many similarities although uses semolina (or farina) and honey instead of this recipe's regular flour and sugar syrup.
This is an easy cake and makes a lot - the yogurt makes it tender and the syrup poured on after it bakes makes it incredibly flavorful.
Ingredients:
5 eggs
1 cup icing sugar
3/4 cup butter / oil
500g yogurt
2 tsp baking powder
2 cups flour
1 tsp of vanilla extract
1 cup of coconut
1 1/2 cups of sugar
1 tbsp lemon juice
1 cup water
Beat eggs and sugar. Add oil and yogurt and mix.
In a separate bowl sift flour and add baking powder and coconut, then add to the mixture while stirring.
Spread mixture onto greased tray (9x13 pan was perfect.) Bake for 30 minutes 200° Celsius. (This is 400 F, which is hotter than most cakes but is correct for this one.)
In another saucepan, mix sugar and lemon with water, boil until syrup thickens.
When cake is baked, poke holes in it pour syrup over evenly so it soaks through (while still hot.)
Monday, February 01, 2016
Peanut Butter and Jelly Muffins (gluten-free)
This started as a paleo recipe which I have rendered not so paleo, so let's just call it gluten-free. These are delicious and could be easily adapted to have chocolate chips instead of berries. I made mine half with shredded coconut, and can recommend that ingredient too.
Peanut Butter and Jelly Muffins
Ingredients
- 1 cup peanut butter
- 1 cup almond meal/almond flour
- 3 eggs, whisked
- ½ cup coconut sugar
- ⅓ cup coconut oil, melted
- ½ teaspoon baking soda
- ½ teaspoon baking powder
- ¼ teaspoon sea salt
- pinch of cinnamon
- ½ cup frozen or fresh berries (I used blueberries, raspberries, and marionberries)
Instructions
- Preheat oven to 350 degrees F.
- Whisk eggs, then add sugar and peanut butter; blend until smooth. Stir in dry ingredients, and berries last. Frozen may remain frozen!
- Place ingredients into 8-10 silicone muffin cups in a muffin tin. Or you can use muffin tin paper liners.
- Bake for 15-20 minutes. (The bigger the berries the more time they may need, but look for browning on the top of the muffin.)
Monday, January 25, 2016
Sudanese Kisra - Sorghum Crepes
Last year I tried recipes from Oceania, and this year I'm going to be lingering in Africa. This coincides with my reading projects, since I'm trying to finish reading (at least) one book from every country in Africa in 2016. This month I have been in South Sudan and Uganda. Sudanese cuisine is interesting because it shifts when you move into South Sudan, from the Arabic influenced cuisine that is most similar to Egypt to more of an East African cuisine like in Ethiopia and other neighbors. Kisra seems to be most like injera (from Ethiopia) and can simultaneously be a utensil and a bread. It is not as pliable as injera, although I was not cooking it as thin or wide as is typically found in Sudan. You can read more about how it is traditionally prepared several places on the internet; I could only do what I could in my kitchen.
Luckily I had sorghum flour on hand from one of the gluten-free recipes I make frequently - pumpkin chocolate chip bread, which has a combination of three flours. These crepes (at least in the recipe I used) are not gluten-free, as the recipe maker thought using some all purpose flour helped them stick together better. Traditionally I believe they are made entirely of sorghum flour, but even with this adaptation, I had a hard time not having the crepes come out of the pan in pieces.
Plan ahead for this one - the batter must sit at room temperature at least 12 hours! I used the recipe from Global Table Adventure, and also made the stew she recommended alongside it, without the beef. I wish I had put another type of protein, maybe beans, because it was much thinner without the meat, and could only be eaten with a spoon.
Sudanese Kisra - Sorghum Crepes
(Recipe from Global Table Adventure, but go to that site for more information on traditional preparation; I'm distilling it to basic kitchen steps)
Makes at least 8 (depending how big you make them).
Ingredients:
2 cups sorghum flour
1 1/2 cups water, plus 1 cup, or as needed
1 cup all purpose flour
unroasted sesame see oil (I used vegetable because I could only find toasted sesame)
Luckily I had sorghum flour on hand from one of the gluten-free recipes I make frequently - pumpkin chocolate chip bread, which has a combination of three flours. These crepes (at least in the recipe I used) are not gluten-free, as the recipe maker thought using some all purpose flour helped them stick together better. Traditionally I believe they are made entirely of sorghum flour, but even with this adaptation, I had a hard time not having the crepes come out of the pan in pieces.
Plan ahead for this one - the batter must sit at room temperature at least 12 hours! I used the recipe from Global Table Adventure, and also made the stew she recommended alongside it, without the beef. I wish I had put another type of protein, maybe beans, because it was much thinner without the meat, and could only be eaten with a spoon.
Sudanese Kisra - Sorghum Crepes
(Recipe from Global Table Adventure, but go to that site for more information on traditional preparation; I'm distilling it to basic kitchen steps)
Makes at least 8 (depending how big you make them).
Ingredients:
2 cups sorghum flour
1 1/2 cups water, plus 1 cup, or as needed
1 cup all purpose flour
unroasted sesame see oil (I used vegetable because I could only find toasted sesame)
- Mix the sorghum flour with 1 1/2 cups water and let sit overnight (at least 12 hours).
- The next day stir in the all purpose flour and last cup of water, to form a thin batter.
- Ladle some kisra batter into a greased pan over medium heat. Immediately take a credit card or small scraper and, holding it at a 30 degree angle, spread the batter around smoothly. This can take some practice.
- When the edges begin to curl up like a smile, the kisra is done. This should only take a minute or so.
- Stack them on a plate and keep warm with a towel. After they cool, they’re quite a bit more sturdy… and are less likely to break or crack.
Monday, January 18, 2016
Banana Chocolate Chip Muffins (paleo, lower carb, gluten-free)
This is another recipe that is a slight adaptation of one I found at PaleOMG, a blog I recommend! Really this post should be a guest post because my husband made them both times we had them, because I had a knee injury that wouldn't let me stand very easily. And then this morning he made them again just because he's nice. Sorry the picture looks like a cookie but it is merely an aerial view. You can see what a great muffin texture this has despite being all the dietary restrictions that it is. This calls for chocolate chips but would also be great with berries, probably without the espresso powder.
Banana Chocolate Chip Muffins
Adapted from PaleOMG
*We have made this recipe with coconut/palm sugar as well as Truvia brown sugar substitute, and both worked great!
Banana Chocolate Chip Muffins
Adapted from PaleOMG
Serves: 12 muffins
Ingredients
- 3 brown bananas, mashed
- ⅓ cup sugar substitute*
- 1 teaspoon vanilla extract
- 3 eggs
- ½ cup peanut butter (almond if you're really paleo)
- ¼ cup coconut flour
- 1 teaspoon instant espresso powder (optional)
- ½ teaspoon baking soda
- ½ teaspoon baking powder
- 1 teaspoon cinnamon
- pinch of salt
- ½ cup mini chocolate chips
*We have made this recipe with coconut/palm sugar as well as Truvia brown sugar substitute, and both worked great!
Instructions
- Preheat oven to 350 degrees. Line a muffin pan (we use silicone muffin cups.)
- In a large bowl, mix together bananas, sugar substitute, vanilla extract, eggs, and peanut butter.
- Then add coconut flour, instant coffee, baking soda, baking powder, cinnamon and salt and mix well. Fold in chocolate chips.
- Pour mixture into 12 muffin cups and place in oven to bake for 25 minutes.
- Let cool before removing from muffin cups.
Monday, January 11, 2016
Cardamom Crescents
This is one of the recipes I had planned to make for the holidays but I ran out of time! Despite a knee injury I was in that mood where the only thing that will help is to MAKE something, so I sucked it up and made these cookies Wednesday night. I thought they were tasty! Next time around I am not sure I'd bother with the crescent shape, however on a cookie tray it would add some variety. This is a similar recipe to "Mexican Wedding Cookies" or "Russian Teacakes" that seem to show up at tea parties and the holidays, probably because of the final stages of rolling a baked cookie in powdered sugar, which looks like snow.
I made the recipe as I found it although originally I dumped 2 cups of confectioners' sugar in with the butter. I cleaned the recipe up to add clarity to that confusion. I also had vanilla powder on hand, a gift from a co-worker who recently traveled to India, so I added 1/2 tsp of that. It looked almost like finely ground vanilla beans, and was more the color of the spices.
Cardamom Crescents
from Sweet Paul Magazine
I made the recipe as I found it although originally I dumped 2 cups of confectioners' sugar in with the butter. I cleaned the recipe up to add clarity to that confusion. I also had vanilla powder on hand, a gift from a co-worker who recently traveled to India, so I added 1/2 tsp of that. It looked almost like finely ground vanilla beans, and was more the color of the spices.
Cardamom Crescents
from Sweet Paul Magazine
You will need:
2 1⁄2 cups all purpose flour
1 teaspoon salt
3⁄4 teaspoon cardamom, ground
3⁄4 teaspoon cinnamon, ground
1 teaspoon salt
3⁄4 teaspoon cardamom, ground
3⁄4 teaspoon cinnamon, ground
1/2 tsp vanilla powder (optional; I added this because I had it!)
2 sticks unsalted butter, at room temperature
1 cup confectioners’ sugar
1 teaspoon vanilla extract
2 cups walnuts, very finely chopped (in food processor)
2 sticks unsalted butter, at room temperature
1 cup confectioners’ sugar
1 teaspoon vanilla extract
2 cups walnuts, very finely chopped (in food processor)
For after baking:
2 cups confectioners’ sugar
- Preheat oven to 350F
- Whisk together the first 4 ingredients.
- Beat butter and 1 cup confectioners' sugar until light and fluffy.
- Add vanilla extract and stir to combine.
- Add the flour mixture and mix, just until combined.
- Add walnuts and stir until thoroughly incorporated.
- Using 1 tablespoon of dough per cookie, shape into crescents and place on baking sheets about 2” apart.
- Bake, in batches if needed, until lightly golden. This will take about 15 minutes.
- Let cool for 5–10 minutes.
- Place the remaining 2 cups confectioners’ sugar in a wide, shallow bowl.
- When the crescents are cool enough to handle but still warm, roll in confectioners’ sugar, then transfer to a wire rack to cool completely.
- Once cool, roll in confectioners’ sugar again.
Monday, January 04, 2016
Marionberry Pie
This is actually the pie I made for dessert on Thanksgiving, but in all my posting about Oceanic baking I somehow left it out. I have previously explained why I have marionberries in my freezer, but I was saving some for a real pie with a real crust for the holiday. I'm so glad I did!
This recipe comes from Sunset Magazine, a magazine I only recently discovered is about northwest living. I grew up with it so I just thought it was part of everybody's childhood. It was voted one of their favorite recipes of all time. I wouldn't change a thing!
Marionberry Pie
from Sunset Magazine, via Anjou Bakery
2. Preheat oven to 375° with rack on bottom rung. On a lightly floured board, roll larger disk into a 12-in. circle. Loosen with a long metal spatula, gently roll around a rolling pin, then unroll into a 9-in. pie pan (if dough cracks, press back together). Fold edge under, so it's flush with pan rim, then crimp. Chill 15 minutes.
3. Roll remaining dough into an 11-in. circle. With a cookie cutter, cut out as many shapes, such as squares, as needed to cover most of pie. Set cutouts on a baking sheet; chill 15 minutes.
4. Make filling: Stir together cornstarch and granulated sugar in a large bowl. Add berries with juices and toss to coat. Arrange evenly in pie shell. Lightly brush pastry cutouts with water and sprinkle with coarse sugar. Arrange cutouts over filling.
5. Bake pie until filling bubbles and pastry is golden in center, 55 to 60 minutes (up to 1 1/2 hours if berries were frozen); if edge starts to get dark, cover with foil, and if pie starts to bubble over, put a rimmed pan underneath it.
6. Let cool on a rack to room temperature, at least 3 hours.
This recipe comes from Sunset Magazine, a magazine I only recently discovered is about northwest living. I grew up with it so I just thought it was part of everybody's childhood. It was voted one of their favorite recipes of all time. I wouldn't change a thing!
Marionberry Pie
from Sunset Magazine, via Anjou Bakery
Ingredients
The crust
2 cups
flour
2 1/2 tablespoons
granulated sugar
1/4 teaspoon
salt
14 tablespoons
(1 3/4 sticks) cold unsalted butter, cut into 2-tbsp. chunks
The filling
1/4 cup
cornstarch
1 cup
granulated sugar
1 3/4 pounds
(6 1/2 cups) fresh or frozen marionberries or
other blackberries (for frozen, measure, thaw until somewhat softened,
and use all juices)
Coarse white sparkling sugar
Preparation
1. Make crust: Combine dry ingredients in a stand mixer. Add butter and beat with paddle attachment on low speed, scraping bowl as needed, until pieces are raisin-size. With mixer still on low speed, drizzle in 1 tbsp. ice water; beat until pastry comes together, 1 1/2 to 3 minutes. Form 1 1/4 cups into a disk and the rest into a smaller disk.2. Preheat oven to 375° with rack on bottom rung. On a lightly floured board, roll larger disk into a 12-in. circle. Loosen with a long metal spatula, gently roll around a rolling pin, then unroll into a 9-in. pie pan (if dough cracks, press back together). Fold edge under, so it's flush with pan rim, then crimp. Chill 15 minutes.
3. Roll remaining dough into an 11-in. circle. With a cookie cutter, cut out as many shapes, such as squares, as needed to cover most of pie. Set cutouts on a baking sheet; chill 15 minutes.
4. Make filling: Stir together cornstarch and granulated sugar in a large bowl. Add berries with juices and toss to coat. Arrange evenly in pie shell. Lightly brush pastry cutouts with water and sprinkle with coarse sugar. Arrange cutouts over filling.
5. Bake pie until filling bubbles and pastry is golden in center, 55 to 60 minutes (up to 1 1/2 hours if berries were frozen); if edge starts to get dark, cover with foil, and if pie starts to bubble over, put a rimmed pan underneath it.
6. Let cool on a rack to room temperature, at least 3 hours.
Wednesday, December 30, 2015
A Year of Baking in Oceania
What a year! I have had a great time trying out recipes from various countries and people groups in Oceania. This was all to accompany a year of reading books set in the same region, which you can read about over on Reading Envy (or listen to the podcast to accompany it!)
In case you missed them, here are the posts from this year of Oceania (plus a few bonus desserts from previous years.)
Anzac Biscuits (Australia and New Zealand)
Banana Fritters (The Marquesas)
Masi Popo - Coconut Shortbread (Samoa)
Pavlova (New Zealand)
Banana Pancakes (Papua New Guinea)
Rock Cakes (Australia and New Zealand)
Panipopo - Coconut Buns (Samoa)
Lamington (Australia and New Zealand)
Po'e - fruit pudding (Tahiti)
Cocoa Pavlova with Cardamom and Pomegranate Jelly (Americanized but New Zealand)
Mini cocoa pavlovas (New Zealand)
Sydney Special aka Doormat (Australia and New Zealand)
Pandan Chiffon Cake (Indonesia)
Spekkoek (Indonesia)
Maori Bread (New Zealand)
Of all of these recipes, my favorite was either the cocoa-pomegranate pavlova or the spekkoek. My co-workers gobbled up the lamingtons and anzac biscuits, while my husband liked the po'e best.
Not pictured: a complete disaster trying to use tapioca in place of sago in a recipe from Papua New Guinea.
In case you missed them, here are the posts from this year of Oceania (plus a few bonus desserts from previous years.)
Anzac Biscuits (Australia and New Zealand)
Banana Fritters (The Marquesas)
Masi Popo - Coconut Shortbread (Samoa)
Pavlova (New Zealand)
Banana Pancakes (Papua New Guinea)
Rock Cakes (Australia and New Zealand)
Panipopo - Coconut Buns (Samoa)
Lamington (Australia and New Zealand)
Po'e - fruit pudding (Tahiti)
Cocoa Pavlova with Cardamom and Pomegranate Jelly (Americanized but New Zealand)
Mini cocoa pavlovas (New Zealand)
Sydney Special aka Doormat (Australia and New Zealand)
Pandan Chiffon Cake (Indonesia)
Spekkoek (Indonesia)
Maori Bread (New Zealand)
Of all of these recipes, my favorite was either the cocoa-pomegranate pavlova or the spekkoek. My co-workers gobbled up the lamingtons and anzac biscuits, while my husband liked the po'e best.
Not pictured: a complete disaster trying to use tapioca in place of sago in a recipe from Papua New Guinea.
Monday, December 28, 2015
Fried Banana Cakes from The Marquesas
This recipe comes from Sam Choy's Polynesian Kitchen and is a use of bananas that seems prevalent throughout the South Pacific. This particular recipe comes from The Marquesas.
Fried Banana Cakes
4 very ripe bananas, peeled
1 tsp vanilla extract
1/2 to 2/3 cup flour (depending on the size and moistness of the bananas)
1/4 tsp baking powder
pinch of salt
1 tbsp sugar
1 tsp grated lime zest
oil for frying
Cinnamon sugar (1 tbsp sugar and a few pinches of cinnamon) for garnish
In a food processor (or you know, with a fork) pulverize the bananas with the vanilla extract. Sift together the flour, baking powder, salt, and sugar. Add the lime zest and dry ingredients to the food processor. Mix until dough is of a light texture. Rest for a few minutes, then form the dough into 15 patties. Fry cakes in 1/2-inch-deep-oil, turning to brown evenly on both sides. Drain on paper towels, sprinkle with cinnamon sugar, and serve hot.
Fried Banana Cakes
4 very ripe bananas, peeled
1 tsp vanilla extract
1/2 to 2/3 cup flour (depending on the size and moistness of the bananas)
1/4 tsp baking powder
pinch of salt
1 tbsp sugar
1 tsp grated lime zest
oil for frying
Cinnamon sugar (1 tbsp sugar and a few pinches of cinnamon) for garnish
In a food processor (or you know, with a fork) pulverize the bananas with the vanilla extract. Sift together the flour, baking powder, salt, and sugar. Add the lime zest and dry ingredients to the food processor. Mix until dough is of a light texture. Rest for a few minutes, then form the dough into 15 patties. Fry cakes in 1/2-inch-deep-oil, turning to brown evenly on both sides. Drain on paper towels, sprinkle with cinnamon sugar, and serve hot.
Saturday, December 26, 2015
Panipopo - Sweet Coconut Buns from Samoa
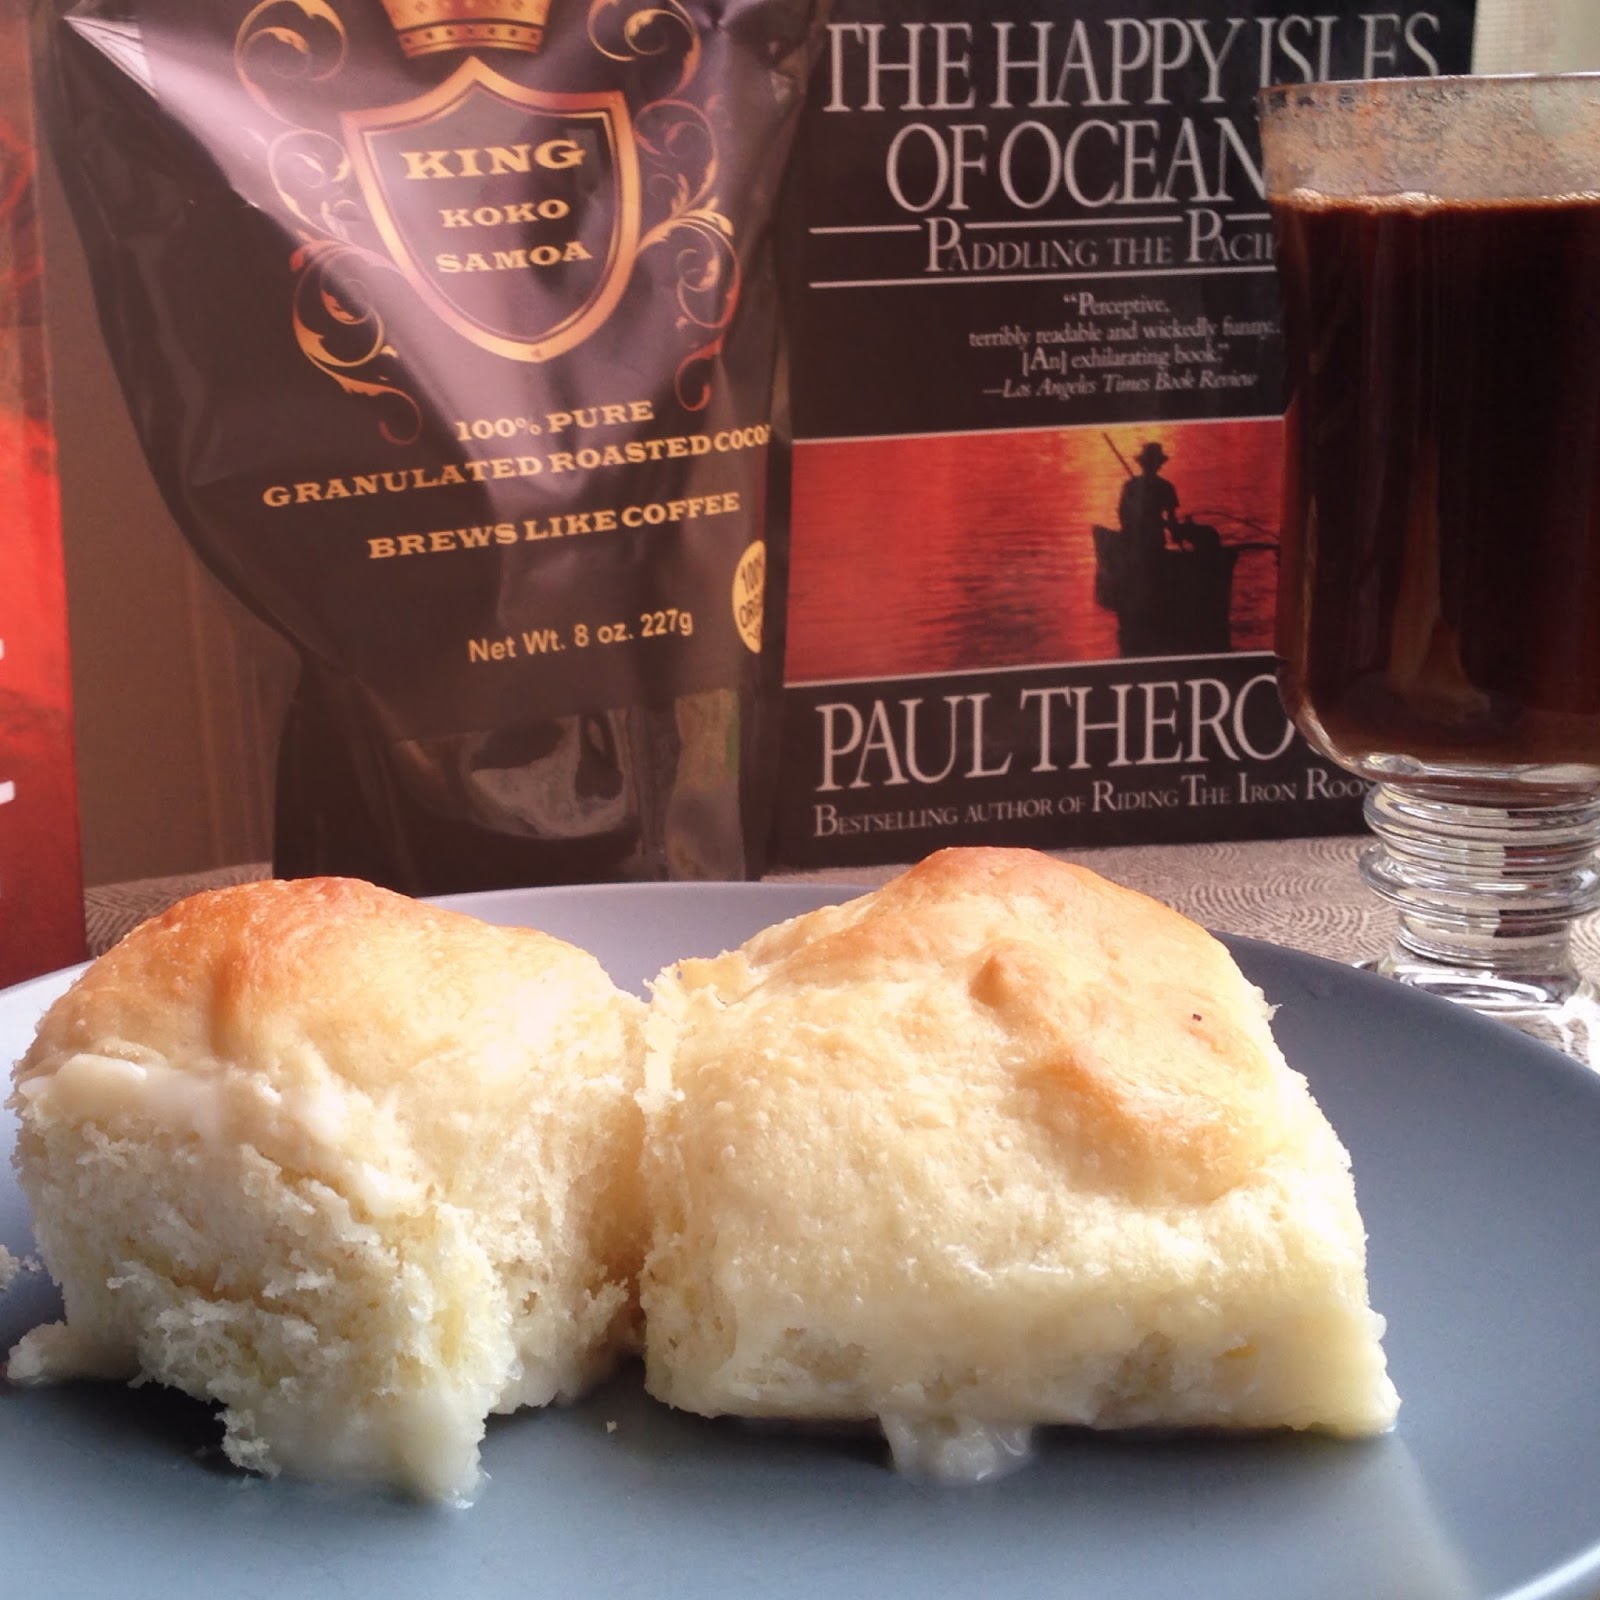
I previously posted about masi popo, coconut shortbread from Samoa. This recipe is the other one I've been planning to make all year! This is basically just a sweet yeast bun baked in a liquid of coconut milk, water, and sugar. Kind of like buns made into bread pudding. Traditionally it is served in the evening with kokosamoa (Samoan Cocoa) so I waited until I had some before making the panipopo!
Panipopo (Sweet Coconut Buns)
Recipe from SamoaFood.com
1 package (2 1/4 tsp) active dry yeast
1 cup warm water
1/4 cup sugar
1/2 tsp salt
1 egg, lightly beaten
2 tbsp vegetable oil
2 1/2 -3 cups all-purpose flour
Let yeast bloom in water for 10 minutes. Add remaining ingredients, adding the smaller amount of flour unless it needs more. Knead 10-20 minutes or until dough is smooth and elastic. Place the dough in a lightly greased bowl, cover, and leave to double in volume. (Optional: Punch down and leave to double in volume again.)
There are two ways to shape the buns.
Preheat oven to 375 F and make coconut sauce: Mix coconut sauce ingredients together.
Pour coconut sauce over buns and bake 25-30 minutes until golden brown. Allow to cool at least 30 minutes to ensure sauce is absorbed. Store leftovers in fridge.
Coconut Sauce
1/2 can coconut milk (full-fat)
1/2 can water
1/2 cup sugar
Panipopo (Sweet Coconut Buns)
Recipe from SamoaFood.com
1 package (2 1/4 tsp) active dry yeast
1 cup warm water
1/4 cup sugar
1/2 tsp salt
1 egg, lightly beaten
2 tbsp vegetable oil
2 1/2 -3 cups all-purpose flour
Let yeast bloom in water for 10 minutes. Add remaining ingredients, adding the smaller amount of flour unless it needs more. Knead 10-20 minutes or until dough is smooth and elastic. Place the dough in a lightly greased bowl, cover, and leave to double in volume. (Optional: Punch down and leave to double in volume again.)
There are two ways to shape the buns.
- Roll into a long rectangle, and then roll up like cinnamon rolls, then slice into 12 even sized rounds
- Pinch off balls of dough and roll into 12 balls.
Preheat oven to 375 F and make coconut sauce: Mix coconut sauce ingredients together.
Pour coconut sauce over buns and bake 25-30 minutes until golden brown. Allow to cool at least 30 minutes to ensure sauce is absorbed. Store leftovers in fridge.
Coconut Sauce
1/2 can coconut milk (full-fat)
1/2 can water
1/2 cup sugar
Thursday, December 24, 2015
Wintermint Cake
My friend Kasia makes some version of a Wintermint cake all through the holiday season so I went looking for a recipe. This one was created by the guys who opened Baked in Brooklyn, although please use my recipe below as the one on the Sweet Paul Magazine website has a major error in the buttercream ingredients. I decorated mine with peppermint bark instead of crushed peppermint candies.
Wintermint Cake from BAKED in Brooklyn
Recipe from Renato Polifiato & Matt Lewis of Brooklyn's BAKED Bakery
As posted on Sweet Paul Magazine with buttercream error
Serves 12
Classic Chocolate Cake:
3⁄4 cup dark cocoa powder
1 1⁄4 cups hot water
2⁄3 cup sour cream
2 2⁄3 cups flour, plus more for dusting
2 teaspoons baking powder
1 teaspoon baking soda
1⁄2 teaspoon salt
3⁄4 cup unsalted butter, softened
1⁄2 cup unflavored shortening
1 1⁄2 cups sugar
1 cup dark brown sugar, firmly packed
3 large eggs, at room temperature
1 tablespoon vanilla
Peppermint Buttercream:
1 1⁄2 cups sugar
1⁄3 cup all-purpose flour
1 1/2 cups whole milk
1⁄3 cup heavy cream
1 1⁄2 cups unsalted butter, soft but cool, cut into small pieces
1 teaspoon pure vanilla extract
1 teaspoon peppermint extract
Mint Chocolate Ganache:
6 oz dark chocolate (60–72%), chopped coarsely
1⁄2 cup heavy cream
1 tablespoon creme de menthe (optional)
1⁄2 teaspoon peppermint extract
- For the Classic Chocolate Cake, preheat oven to 325° degrees.
- Butter and flour 3 cake pans, line with parchment, and butter the parchment.
- Mix cocoa powder, hot water, and sour cream together and set aside to cool.
- Sift flour, baking soda, baking powder, and salt, and set aside.
- Beat butter and shortening together on medium speed until light and fluffy, about 5 minutes.
- Add sugars beat until light and fluffy, about 5 more minutes.
- Add the eggs, 1 at a time, and then vanilla, and beat until incorporated. Then, slowly add the dry mixture and cocoa mixture to the batter, alternating the 2 kinds and ending with dry.
- Divide batter between 3 pans and spread evenly. Bake for 35–40 minutes (rotate the pans halfway through) or until a toothpick comes out clean. Then cool for 20 minutes then invert onto a rack to cool completely.
- For the Peppermint Buttercream, In a medium heavy-bottomed saucepan, whisk sugar and flour together. Then add milk and cream and cook over medium heat, whisking occasionally, until mixture comes to a boil and has thickened. This will take about 10–15 minutes.
- Transfer mixture to bowl of an electric mixer fitted with the paddle attachment. Beat on high until cool, which will take about 7–9 minutes of mixing. Tip: Speed up the process by pressing bags of frozen berries or frozen corn against the sides and bottom of the mixing bowl.
- Reduce speed to low and add butter. Mix until incorporated.
- Increase to medium-high and beat until frosting is light and fluffy, about 1–2 minutes.
- Add vanilla and peppermint extract and continue mixing until combined. If frosting is too soft, put bowl in refrigerator to chill slightly, then beat again until it is proper consistency. If frosting is too firm, set bowl over a pot of simmering water and beat with a wooden spoon until it is the proper consistency.
- For the Mint Chocolate Ganache, place chocolate in a medium heatproof bowl and set aside.
- In a small saucepan over medium heat, bring cream just to a boil.
- Remove cream from heat and pour over bowl of chocolate.
- Let sit for 2 minutes, then slowly stir the chocolate and cream mixture until chocolate is completely melted and smooth. Then, let ganache come to room temperature.
- To assemble the Wintermint Cake, place 1 cake layer on a serving platter.
- Trim cake layer to create a flat surface and use offset spatula to spread about 1⁄4 cup of ganache on top only.
- Let set for 1 minute in refrigerator.
- Spread approximately 11⁄4 cups of buttercream on top of ganache.
- Repeat with following 2 layers.
- Crumb coat cake and refrigerate briefly, for around 15 minutes.
- Frost sides and top of cake with remaining buttercream.
- Garnish cake with optional 1⁄4 cup of crushed peppermint candies and refrigerate for about 15 minutes to firm up the entire cake.
Monday, December 21, 2015
Treats from Down Under: Lamington
When considering the final baked good from Australia and New Zealand that I planned to make in 2015 (unless I get my act together and make mud cake for New Years Eve), it had to be the lamington. I had made pavlova multiple times, tried a few childhood snacks like rock cakes and Sydney Special, but something that came up everywhere was the lamington. In my mind it sounds like lamb because it looks like lamb - cake dipped in chocolate and rolled in coconut.
The coconut and the cake vary - Cake Spy uses the more American sweetened shredded coconut, and Dan Lepard posted a delicious looking double chocolate version for The Guardian. I went with the recipe used by The Galley Gourmet, because it seemed rather traditional but was already using American measurements. Her recipes also always look so clean and straightforward, that they always have a lot of visual appeal for me.
People seemed to LOVE this lamington, but I have to tell you that they turned out huge. I cut the cake in the recommended 2 inch by 2 inch pieces, but by the time they were covered in the thick chocolate glaze and not-so-delicately rolled in coconut, they were giant individual sized cakes. One professor said one lamington provided a generous dessert split between she and her husband. Another thing I would say is that this has got to be the messiest dessert I have ever made, and I used to work up to my elbows in cake decorating supplies. Despite the glowing reviews and delicious end result, I'm not sure I would do it again!
Lamingtons
makes 24 two-inch squares
Recipe from The Galley Gourmet, who adapted it from Martha Stewart Living
For the Cake
8 ounces (1 cup) unsalted butter, at room temperature, plus more for pans
2 2/3 cups cake flour, plus more for pans
2 cups granulated sugar
2 teaspoons pure vanilla extract
4 extra large eggs
2 teaspoons baking powder
1/4 teaspoon kosher slat
1 cup milk (2% or whole), at room temperature
2/3 cup raspberry jam
For the Chocolate Icing
1 cup milk (2% or whole)
2 (14-ounce) packages shredded sweetened coconut, chopped
2 ounces (1/4 cup) unsalted butter
1 Tablespoon pure vanilla extract
1/2 teaspoon espresso powder
8 cups confectioners' sugar
1 cup unsweetened cocoa powder
For the Cake
Preheat the oven to 325° F. Butter two 9x13-inch baking pans; line the bottoms with parchment and butter. Dust the pans with flour, tapping out the excess; set aside.
In the bowl of an electric mixer fitted with the paddle attachment, cream the butter and sugar until light and fluffy, about 3 minutes. Scrape down the sides of the bowl and add the vanilla and eggs, one at a time; beating until incorporated.
Whisk together the flour, baking powder, and salt; add to the egg mixture in three additions, alternating with the milk and beginning and ending with the flour mixture.
Divide the batter between the prepared pans. Bake until a cake tester inserted in the center comes out clean, about 30 minutes. Cool slightly on wire racks. Remove the cake from the pans and set on wire racks to cool completely.
Spread one of the cooled cakes with the jam. Place the other cake on top. Lightly cover with plastic and freeze until firm. (Cakes can be made and filled a day in advance). Once frozen, use a sharp knife to cut the squares into 24 two-inch squares. Keep the cakes chilled until ready to ice.
For the Chocolate Icing
In a medium bowl, warm the milk and butter in the microwave until the butter has melted. Set the bowl over a pan of simmering water. Add the vanilla and espresso powder. Using a wire whisk, gradually whisk in the confectioners' sugar and cocoa powder; whisk until completely smooth.
Place the coconut in a shallow dish; set aside. Place a cake square on the tines of a large fork and dip the bottom of the cake into the chocolate icing. Using a large spoon or ladle, coat the the cake with the icing until all sides are covered. Allow the excess icing to drip off. Transfer the cake square to the coconut dish and sprinkle the top and sides of the cake with the coconut, gently pressing to adhere. Transfer the coated squares to a parchment lined baking sheet and allow to stand until the coating has set-- at least 20 minutes. Continue with the remaining squares. Cake can be kept in an airtight container for up to two days. Enjoy!
Source: Adapted from Martha Stewart Living, April 2002
The coconut and the cake vary - Cake Spy uses the more American sweetened shredded coconut, and Dan Lepard posted a delicious looking double chocolate version for The Guardian. I went with the recipe used by The Galley Gourmet, because it seemed rather traditional but was already using American measurements. Her recipes also always look so clean and straightforward, that they always have a lot of visual appeal for me.
People seemed to LOVE this lamington, but I have to tell you that they turned out huge. I cut the cake in the recommended 2 inch by 2 inch pieces, but by the time they were covered in the thick chocolate glaze and not-so-delicately rolled in coconut, they were giant individual sized cakes. One professor said one lamington provided a generous dessert split between she and her husband. Another thing I would say is that this has got to be the messiest dessert I have ever made, and I used to work up to my elbows in cake decorating supplies. Despite the glowing reviews and delicious end result, I'm not sure I would do it again!
Lamingtons
makes 24 two-inch squares
Recipe from The Galley Gourmet, who adapted it from Martha Stewart Living
For the Cake
8 ounces (1 cup) unsalted butter, at room temperature, plus more for pans
2 2/3 cups cake flour, plus more for pans
2 cups granulated sugar
2 teaspoons pure vanilla extract
4 extra large eggs
2 teaspoons baking powder
1/4 teaspoon kosher slat
1 cup milk (2% or whole), at room temperature
2/3 cup raspberry jam
For the Chocolate Icing
1 cup milk (2% or whole)
2 (14-ounce) packages shredded sweetened coconut, chopped
2 ounces (1/4 cup) unsalted butter
1 Tablespoon pure vanilla extract
1/2 teaspoon espresso powder
8 cups confectioners' sugar
1 cup unsweetened cocoa powder
For the Cake
Preheat the oven to 325° F. Butter two 9x13-inch baking pans; line the bottoms with parchment and butter. Dust the pans with flour, tapping out the excess; set aside.
In the bowl of an electric mixer fitted with the paddle attachment, cream the butter and sugar until light and fluffy, about 3 minutes. Scrape down the sides of the bowl and add the vanilla and eggs, one at a time; beating until incorporated.
Whisk together the flour, baking powder, and salt; add to the egg mixture in three additions, alternating with the milk and beginning and ending with the flour mixture.
Divide the batter between the prepared pans. Bake until a cake tester inserted in the center comes out clean, about 30 minutes. Cool slightly on wire racks. Remove the cake from the pans and set on wire racks to cool completely.
Spread one of the cooled cakes with the jam. Place the other cake on top. Lightly cover with plastic and freeze until firm. (Cakes can be made and filled a day in advance). Once frozen, use a sharp knife to cut the squares into 24 two-inch squares. Keep the cakes chilled until ready to ice.
For the Chocolate Icing
In a medium bowl, warm the milk and butter in the microwave until the butter has melted. Set the bowl over a pan of simmering water. Add the vanilla and espresso powder. Using a wire whisk, gradually whisk in the confectioners' sugar and cocoa powder; whisk until completely smooth.
Place the coconut in a shallow dish; set aside. Place a cake square on the tines of a large fork and dip the bottom of the cake into the chocolate icing. Using a large spoon or ladle, coat the the cake with the icing until all sides are covered. Allow the excess icing to drip off. Transfer the cake square to the coconut dish and sprinkle the top and sides of the cake with the coconut, gently pressing to adhere. Transfer the coated squares to a parchment lined baking sheet and allow to stand until the coating has set-- at least 20 minutes. Continue with the remaining squares. Cake can be kept in an airtight container for up to two days. Enjoy!
Source: Adapted from Martha Stewart Living, April 2002
Thursday, December 17, 2015
Elusive Yeti: Samoan Coconut Shortbread
When I started researching recipes from Samoa, I found recipe after recipe, savory and sweet, with coconut. Coconut milk, shredded coconut, coconut meat, etc., etc. It is no surprise that one of the recipes I came across on multiple blogs and recipe websites is this Samoan Coconut Shortbread. When you think Samoan, don't think of the Girl Scout Cookie, which is a shortbread (and coconut, no surprise) cookie that is dipped and drizzled in chocolate. They got the coconut part right but chocolate isn't as prominent. (However, you can buy King Koko Samoa, something I have yet to try, but it appears as if you brew roasted cocoa beans the way you drink coffee - ground and steeped in water. Can't wait to try it!)
I'm not a huge fan of shortbread. I'm still not convinced I do it right although people always assure me it is what they think of as shortbread. So I'm not sure I love this recipe. I do love that it's authentic and from Samoa ("Masi Popo") and I love the adorable cookie cutter my husband bought me of a sasquatch/yeti. That's what inspired me to finally make the recipe! I made a double batch of dough, which was a mistake since half of it is still in the fridge, but I made a bunch of yeti, glazed them, and sprinkled desiccated coconut on for a snowy look.
I like the double coconut, and you really taste it when you bite into the cookie.
While this recipe is photographed many places and mentioned others, very few sites had the actual recipe. Since recipes can't be covered by copyright, I went a little deeper to find it. The Internet Archive let me down but a fun blog called The International Dinner Project still had it in their post. Check out their site; they will continue to be a resource to me as I cook and bake around the world.
Masi Popo (Coconut Shortbread from Samoa)
Ingredients
120gm butter (4½ oz)
2/3 cup white sugar
2 eggs
200ml full coconut milk – not lite! (7 fl oz)
1 tsp vanilla essence or extract
4 cups flour
3 tsp baking powder
pinch of salt
Preparation
I'm not a huge fan of shortbread. I'm still not convinced I do it right although people always assure me it is what they think of as shortbread. So I'm not sure I love this recipe. I do love that it's authentic and from Samoa ("Masi Popo") and I love the adorable cookie cutter my husband bought me of a sasquatch/yeti. That's what inspired me to finally make the recipe! I made a double batch of dough, which was a mistake since half of it is still in the fridge, but I made a bunch of yeti, glazed them, and sprinkled desiccated coconut on for a snowy look.
I like the double coconut, and you really taste it when you bite into the cookie.
While this recipe is photographed many places and mentioned others, very few sites had the actual recipe. Since recipes can't be covered by copyright, I went a little deeper to find it. The Internet Archive let me down but a fun blog called The International Dinner Project still had it in their post. Check out their site; they will continue to be a resource to me as I cook and bake around the world.
Masi Popo (Coconut Shortbread from Samoa)
Ingredients
120gm butter (4½ oz)
2/3 cup white sugar
2 eggs
200ml full coconut milk – not lite! (7 fl oz)
1 tsp vanilla essence or extract
4 cups flour
3 tsp baking powder
pinch of salt
Preparation
- Heat the over up to about 180˚C (350˚F)
- Cream the butter and sugar together well.
- Add the eggs one at a time mixing well.
- Here comes the magic, add the coconut milk and vanilla, again mixing well.
- Now mix in the dry ingredients (flour and baking powder).
- The dough may still be a little sticky, so a little more flour may be needed.
- Cover your kneading surface with a generous amount of flour so the dough doesn’t stick to in and knead until it’s a nice and even consistency. (At this point I chilled the dough several hours so it would be easier to roll out.)
- I pinch of about a third of the dough and roll out onto lightly floured baking paper (so I don’t have to try to pick up each biscuit/cookie slice from the kneading surface individually)
- Roll out the dough until it’s about ¼” (6mm) thick, and cut into 3″ (75mm) squares. I find dipping the knife in flour every so often helps to keep it from sticking to the dough.
- Then just pick up your baking paper at the edges and place it onto your over tray and cook for about 25 minutes, or till just golden brown (a little browner than they appear in the photo above) The squares when cooled should be quite hard, not soft like biscuits, and have a nice “snap” when broken. (For what I used the cookies for, I baked them 10 minutes less, in order to have more of a soft cookie.)
Monday, December 14, 2015
Treats from Down Under: Sydney Special (aka Doormat)
I declared November to be New Zealand November. If you are interested in what I'm reading, you can check out my initial post as well as my first week update.
One of the first books I read was the first volume of an autobiography by Lauris Dorothy Edmond - Hot October. Edmond is a well-loved New Zealand poet. You can read more about her life in my book review, but the book was also useful as an insight into food of the 1930s and 1940s. I previously made and posted about rock cakes, but had a chance to make Sydney Special. The following passage comes from her childhood.
I looked at quite a few recipes before selecting the recipe I used. Some didn't include coconut, some didn't include oats, some didn't have cocoa powder in the lower mixture. It almost has the texture of a Rice Krispie Treat, which you then cover in chocolate. It all sounded so sweet that I elected to use dark instead of milk chocolate. This rendered everything not very sweet, but my tasters (work colleagues!) preferred it this way. I think if I made it for kids, milk chocolate would be the ticket. This recipe also has cornflakes in it, an ingredient I came across multiple times in New Zealand sweets. It must be of the same era where every housewife was discovering the usefulness of processed food!
Another reason this makes a great treat for kids is that it is easy to make, and I can see involving kids in crunching together the parts in the layer before baking, and sprinkling the chocolate chips on top, spreading them as they melt.
Sydney Special (aka "Doormat")
Recipe from Leeks and Limoni, where she also refers to it as "Chocolate Crunch Slices"
1 tablespoon cocoa
150g self raising flour (or AP flour + a few additions)
pinch salt
200g milk (or dark!) chocolate for the top
A baking tin, 17 x 26cm approx, greased and base lined with greaseproof paper (I used a 9x9 pan and parchment paper.)
Preheat oven to 160°C (I did 350 F.)
Melt the butter and sugar together over a low heat. Add the rest of the ingredients and mix well.
Pour and press evenly into the prepared tin (pan).
Bake for 20-25 mins. Remove from the oven and leave to cool in the tin (pan).
Melt the chocolate and pour over the top. (I let the heat of the baked part do this for me!)
When cold, cut into squares or rectangles as you prefer. (The chocolate, once firm, dictated how big the pieces would be, and I just let it break apart as it seemed to desire.)
One of the first books I read was the first volume of an autobiography by Lauris Dorothy Edmond - Hot October. Edmond is a well-loved New Zealand poet. You can read more about her life in my book review, but the book was also useful as an insight into food of the 1930s and 1940s. I previously made and posted about rock cakes, but had a chance to make Sydney Special. The following passage comes from her childhood.
"Greenmeadows was a village, and we took part in local activities and performances without question. Our mother was a faithful member of the Women's Institute, intermittently secretary or president of the Gardening Circle and always president of the Drama Circle. They wrote away to Samuel French and Co for hired sets of plays, English drawing-room comedies mostly, and either rehearsed or performed them in the Taradale Town Hall or did readings in one another's sitting rooms. When it was our turn there was much preparation, the making of peanut brownies, rock cakes, Sydney Special (a concoction of rolled oats, coconut, sugar, butter, also known as Doormat) and orange cake."
I looked at quite a few recipes before selecting the recipe I used. Some didn't include coconut, some didn't include oats, some didn't have cocoa powder in the lower mixture. It almost has the texture of a Rice Krispie Treat, which you then cover in chocolate. It all sounded so sweet that I elected to use dark instead of milk chocolate. This rendered everything not very sweet, but my tasters (work colleagues!) preferred it this way. I think if I made it for kids, milk chocolate would be the ticket. This recipe also has cornflakes in it, an ingredient I came across multiple times in New Zealand sweets. It must be of the same era where every housewife was discovering the usefulness of processed food!
Another reason this makes a great treat for kids is that it is easy to make, and I can see involving kids in crunching together the parts in the layer before baking, and sprinkling the chocolate chips on top, spreading them as they melt.
Sydney Special (aka "Doormat")
Recipe from Leeks and Limoni, where she also refers to it as "Chocolate Crunch Slices"
(I found equivalencies for these but didn't keep track of them. Sorry! A simple Google search can convert ingredients to American measurements. Or you may use a scale.)
175g butter
110g soft brown sugar
25g cornflakes
50g dessicated coconut1 tablespoon cocoa
150g self raising flour (or AP flour + a few additions)
pinch salt
200g milk (or dark!) chocolate for the top
A baking tin, 17 x 26cm approx, greased and base lined with greaseproof paper (I used a 9x9 pan and parchment paper.)
Preheat oven to 160°C (I did 350 F.)
Melt the butter and sugar together over a low heat. Add the rest of the ingredients and mix well.
Pour and press evenly into the prepared tin (pan).
Bake for 20-25 mins. Remove from the oven and leave to cool in the tin (pan).
Melt the chocolate and pour over the top. (I let the heat of the baked part do this for me!)
When cold, cut into squares or rectangles as you prefer. (The chocolate, once firm, dictated how big the pieces would be, and I just let it break apart as it seemed to desire.)
Monday, December 07, 2015
Fluffy Paleo Pancakes (gluten-free, low-carb)
I'm back again, happily posting about another adaptation of an outstanding recipe from PaleOMG. Her original recipe includes a lemon raspberry sauce, so please visit her blog to try it out. I just wanted to try the pancakes, so made a half recipe mid-week (with 2 eggs instead of attempting 1.5), and repeated the full recipe for the two of us today. I actually liked the first attempt better texture-wise, so I have added an egg here. I ended up thinning out the second half of the batter with a little more almond milk. (Also: 1/2 cup + 3 tbsp is just about the same as 2/3 cup, so I've altered that in the recipe I've posted as well.)
The texture for these is really great, the batter has no problem sticking together (see: almond flour pancakes!) and actually bubbles the way normal pancakes do. I will absolutely make these again.
Fluffy Paleo Pancakes
The texture for these is really great, the batter has no problem sticking together (see: almond flour pancakes!) and actually bubbles the way normal pancakes do. I will absolutely make these again.
Fluffy Paleo Pancakes
Ingredients
- 4 eggs, whisked
- 2/3 cup almond milk
- 1 tablespoon honey or sugar substitute
- 1 teaspoon vanilla extract
- ½ cup coconut flour
- ½ cup tapioca flour
- ½ teaspoon baking powder
- ½ teaspoon baking soda
- pinch of salt
Instructions
- Whisk together pancake ingredients: eggs, almond milk, honey and vanilla extract in a large bowl.
- Then, while continuously whisking, add coconut flour, tapioca flour, baking powder and baking soda and a pinch of salt to the large bowl. Whisk until batter is well combined.
- Grease a large pan and place over medium heat. Once pan is hot, use a large ladle to pour a pancakes size pancake on the pan.
- Once pancake has cooked and bubbles begin to surface on the top of the pancake, flip it. The pancake should need to cook for 2-3 minutes each side.
- Repeat with the rest of the pancake mixture.
Notes
Yields 4-5 four inch pancakes (I got 6 3.5-4 inch pancakes, just perfect for two people)
Subscribe to:
Posts (Atom)