Monday, July 20, 2015

Happy Blogiversary to JennyBakes with Blueberry Cornmeal Butter Cake

On the 24th of July, 2006, I started JennyBakes. I had recently moved to a new state and a new job, one that was a full-time faculty librarian position. No more long commutes, no more juggling multiple jobs... all of the sudden I had time on my hands. With a few years of library school between my culinary jobs and the present (of 2006) I decided it could be time to bake for fun again.

The blog has shifted a bit over time, from building a community with other bloggers to taking on Daring Bakers challenges to experimenting with alternative baking. I have learned a lot, failed from time to time, and made some great discoveries! Thanks to those of you still checking in.

This time of year blueberries are at their peak, so although I had plans to make a fancy apricot mousse cake for my blogiversary, I was faced with three pints of blueberries in my fridge that had to be used! I poured through my cookbooks and stumbled across this recipe, and decided to knock it out. I'll bring it to work on the day this post goes live.

This comes from the marvelous Smitten Kitchen cookbook, a combination of blueberry crumb cake with cornbread. And it really works. I had to bake it longer than suggested but my blueberries were very plump and juicy. Not surprising. This is a marvelous little snacking cake!


Blueberry Cornmeal Butter Cake

(recipe from The Smitten Kitchen Cookbook, and while recipes are not protected by copyright, I highly recommend having this one on your shelf)
(yields one 8x8" pan - about 16 squares)

Ingredients


Cake Batter:
1 c. all-purpose flour
1/2 c. cornmeal
2 tsp. baking powder
1/2 tsp. salt
1 stick (8 tbsp.) unsalted butter, room temperature
1 c. sugar
2 eggs
1/4 tsp. vanilla extract
1/4 tsp. lemon zest
1/3 c. sour cream or plain Greek yogurt
2 c. blueberries, rinsed and patted dry

Streusel Topping:
1/2 c. sugar
6 tbsp. flour
2 tbsp. cornmeal
1/4 tsp. ground cinnamon
pinch of salt
3 tbsp. unsalted butter, COLD and cut into small pieces

Instructions

Preheat oven to 350*.

Line the bottom of an 8x8" square pan with parchment paper, and then coat the parchment paper and sides with nonstick cooking spray. Wipe the cooking spray to evenly spread and to ensure it gets in all of the corners, thoroughly coating the bottom and sides.

CAKE BATTER:
Whisk the flour, cornmeal, baking powder, and salt in a medium bowl. In a large bowl, use an electric mixer to beat the butter and sugar together until pale and fluffy, for at least 2 minutes. Beat in the eggs one at a time, scraping down the bowl after each addition, then add the vanilla and zest.
Then add a third of the flour mixture, all of the sour cream/yogurt, and another third of the flour mixture - beating until just blended after each addition.
Scrape down the sides of the bowl. Mix the remaining third of flour mixture with the blueberries. Gently fold the blueberry-flour mixture into the cake batter.
Spread the cake batter into the prepared pan.

STREUSEL TOPPING:
For the streusel topping, combine the dry ingredients in a small bowl. Mash in the cold butter pieces with a fork, your fingertips, or pastry blender. Scatter the topping evenly over the batter.
Bake the cake 35 minutes until the top is golden brown and center comes out clean, about 35 minutes. Cool the cake in the pan on a wire rack for 5 minutes. Run a knife or spatula around the edges of the pan to loosen the cake, then gently lift out the cake to cool completely. Cut into 16 squares.

Wednesday, July 15, 2015

The Sweeter Side of Beaufort, SC

At the end of June, my husband Nathaniel and I spent a week in Beaufort, SC to celebrate our 15th wedding anniversary.  We had the chance to try several sweet spots, and I'll highlight my favorites below.

Best afternoon tea: Southern Graces Bistro (inside the Beaufort Inn)

We stayed several nights at a cottage that makes up part of the Beaufort Inn, so we had the chance to have several meals at Southern Graces Bistro. My favorite was afternoon tea, which we did for our anniversary. You have to make a reservation. The picture on top is how our table looked when we sat down - an entire plate of fresh fruit and sliced cheese, a plate of sandwiches (they accommodated our vegetarian needs nicely), and a cake tier of sweet things (muffins, cakes, scones.)  I'm not sure if you can have afternoon tea anywhere else in Beaufort, but we would recommend this one.

Best candy: The Chocolate Tree

This store is filled wall to wall with homemade chocolates. They have milk and white chocolate too, we just love dark. They have a large sugar free collection, jelly beans of all kinds, pre-made gift baskets, and a back wall of candy making supplies. They do everything in-house and it was just as busy in the heat of summer as it was the week before Christmas. My favorite thing might have been the raspberry jelly covered in chocolate, but that may be a nostalgia chocolate for me. I'm always surprised by how inexpensive it is!

Best espresso: Common Ground Coffeehouse

I don't have a picture representation but we went here almost every day. They are in the perfect location, midway down Bay Street, accessible from the waterfront walk too. They have a variety of savory food, pastries, and gelato, but I really liked their coffee drinks.

Best drink to beat the heat: Scout Southern Market


There is a wine bar in town, but in 99 degree weather that is far from what I want to have. Scout Southern Market is a beautiful store of blues and white with a little sweet tea bar in the back. Their specialty drink is a tea float, which you can have with sweet tea or unsweet tea, with lemon sorbet or peach sorbet. I don't like things super sweet when I'm hot so I went with lemon and unsweet. I had never had anything like it. As the sorbet breaks down, I ended up with what I can only describe as an Arthur Palmer slushie. I left Scout much cooler than I came into it. They also have regular tea and a few snacks to order.

Best sweets with a burger: Fat Patties (Port Royal, SC)


Down the road from Beaufort is a marine base on Parris Island. (All of Beaufort changes every Thursday night and Friday morning because about 300 marines graduate every Friday morning!) The nearby tiny town of Port Royal is a military family town. Fat Patties offers burgers of all kinds (you can even get a shrimp burger!) and homemade icecream. That homemade icecream can be made into milkshakes, even spiked milkshakes. I got the burned marshmallow milkshake and it was delicious.

Best Bakery: Beaufort Bread Company


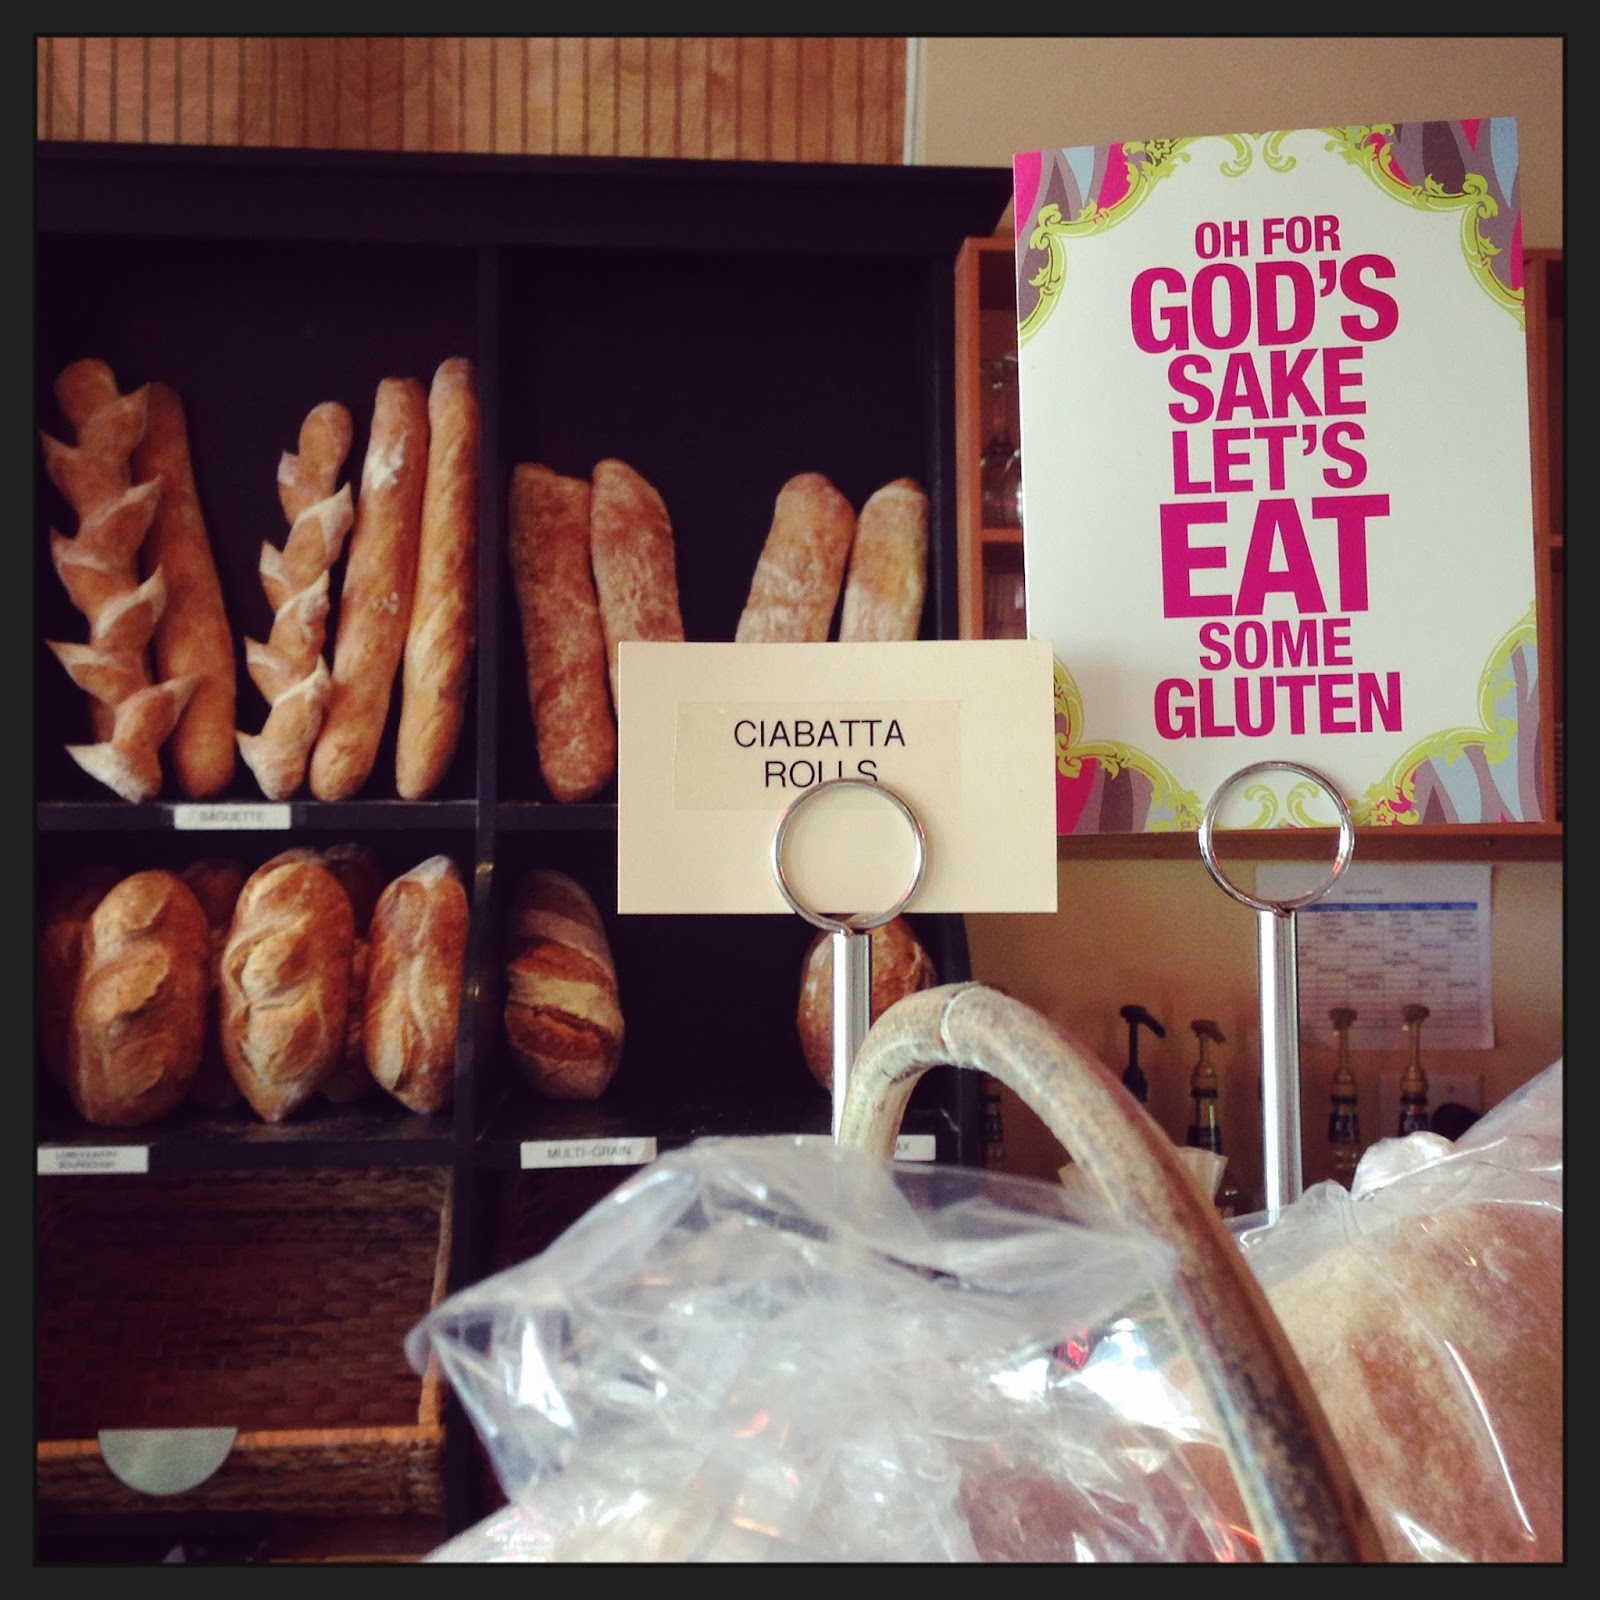
A quick drive over the bridge (the one used in Forrest Gump!) to Lady's Island and you will find the Beaufort Bread Company in a nondescript strip mall. Excellent artisan breads, unique pastries, and homemade sausages (?). We went here more than once, discarding other breakfast plans. Of what we tried, the raspberry croiffin and kouign amann were my favorite pastries. I wish this was my local bakery!

Sunday, July 12, 2015

JennyBakes' Low-Sugar Low-Carb Gluten-Free Single Serving Chocolate Chip Cookie

This is a spin on the microwave brownie I posted in January. Most of the carbs in the recipe come from the sugar free chocolate chips, so if you can use something else or eat the cookie plain, you'll come out even better. This really hits the spot if you are craving cookies, or if you happen to have egg yolks leftover from a recipe that you need to use (I find this to be a great excuse er I mean reason.)


JennyBakes' Low-Sugar Low-Carb Gluten-Free Single Serving Chocolate Chip Cookie
(this is my own recipe, so please link back if you post it, thanks!)

1 tbsp butter, melted
1 tbsp brown sugar Splenda or other lower carb sugar alternative
a few drops vanilla extract
pinch of salt
1 egg yolk
1/4 cup almond flour
1-2 tbsp sugar free chocolate chips

Mix together ingredients and spread in microwave safe ramekin or mug. Cook 45 seconds. Let cool before eating! 

Wednesday, July 08, 2015

Blueberry Ricotta Cake

I love ricotta in baked goods. From the day I tried making the Ricotta Thumbprint Cookies with Fig Jam, Honey & Pistachios from Very Small Anna (which I made the month after she posted them) to the time I had a ricotta filled doughnut from an Italian bakery in The Hill in St. Louis, I have been a huge fan. Ricotta doesn't have much flavor but it makes up for it in texture!

I'm not good at keeping up with blogs these days, in fact I don't think I've even glanced at my thousands of items in Feedly since November, which must have been my last day of actual down time.  But I do follow some great people in Instagram, including Food Librarian, a blogger I've followed forever because of her month-long celebrations of bundt cake that first caught my eye.

A few weeks ago she posted a raspberry ricotta cake and commanded her followers to make it immediately. It sounded good, and I wanted something simple to bring to work. The blueberries looked better than the raspberries so I whipped it up one morning before work. Super easy, super moist, highly recommended with any fruit combination! If I had been feeling incredibly patriotic I would have gone with red and blue. Also I believe the recipe says frozen berries but I used fresh and they were fine.


Ingredients

Servings: 8
  • Nonstick vegetable oil spray
  • cups all-purpose flour
  • 1 cup sugar
  • 2 teaspoons baking powder
  • ¾ teaspoon kosher salt
  • 3 large eggs
  • cups ricotta
  • ½ teaspoon vanilla extract (I used amaretto because I am always out of vanilla)
  • ½ cup (1 stick) unsalted butter, melted
  • 1 cup frozen raspberries or blackberries, divided

Preparation

active: 15 min total: 1 hour 35 min
  • Preheat oven to 350°. Line a 9”-diameter cake pan* with parchment paper and lightly coat with nonstick spray. Whisk flour, sugar, baking powder, and salt in a large bowl.
  • Whisk eggs, ricotta, and vanilla in a medium bowl until smooth; fold into dry ingredients just until blended. Then fold in butter, followed by ¾ cup raspberries, taking care not to crush berries. Scrape batter into prepared pan and scatter remaining ¼ cup raspberries over top.
  • Bake cake until golden brown and a tester inserted into the center comes out clean, 50–60 minutes. Let cool at least 20 minutes before unmolding.
  • Do Ahead: Cake can be made 2 days ahead. Store tightly wrapped at room temperature.
I used a 9x2 cake pan which actually wasn't quite big enough for all the batter. I think they are going for a 9x3 pan, maybe a 9" square, but I removed about a cup of batter and baked it in a separate ramekin for a shorter amount of time, and that was about right.

Sunday, June 07, 2015

Ukrainian Pancakes (Oladi or Oladushki)

My local book club read Mastering the Art of Soviet Cooking for the last read of the season. The author, Anya von Bremzen, had previously penned the James Beard Award winning cookbook, Please to the Table. I got it out from the library after successfully making her recipe for kulebiaka for Thanksgivukkah. Please to the Table is a far-reaching all-region-spanning Russian cookbook full of interesting sounding dishes I have never tasted.  This might be a book to own, if the rumors are tree that Georgian cuisine (the country, not the American state) is the next big thing. I love how there are articles of regional focus and suggested menus for things like Butter Day or Russian tea.

I came across what Anya calls "buttermilk fritters," or Oladushki. When I did a little looking online, almost the entire Internet calls these "Ukrainian pancakes."  I am calling them Ukrainian too! When she wrote the cookbook, the USSR was still in place, and I'm sure variations of these are throughout the land.  These are served more as an afternoon snack than breakfast, with sour cream or jam or honey.  These are not quite the same as blini, which tend to have a greater sturdiness or density to help hold up toppings such as caviar.  They are also tiny, perfect for snacking!

I have made pancakes from interesting places on this blog.  Check out the Finnish pannukakku, Icelandic pönnukökur, Papua New Guinean banana pancakes, the Danish ebleskiver, and what we call the German oven apple pancake.


Ukrainian Pancakes
aka "Buttermilk Fritters" in Please to the Table by Anya von Bremzen

2 eggs, separated
1 1/2 cups buttermilk
1 tbsp vegetable oil, plus additional oil for frying*
1 cup unbleached all-purpose flour
1 1/2 tbsp sugar
1/4 tsp salt
1/2 tsp baking soda

1. In a large bowl, combine the egg yolks, buttermilk, and the 1 tbsp vegetable oil. Mix well.

2. Sift the dry ingredients together and gradually add them to the buttermilk mixture, beating until well-blended. Let the batter stand for 1 hour.

3. Just before frying the fritters, beat the egg whites until they hold stiff peaks and carefully fold them into the batter.

4. Heat a scant tablespoon of oil in a large nonstick skillet over medium heat. For each fritter, drop about 1 1/2 tbsp batter into the skillet. You should be able to fit in 4-5 at a time. Fry on both sides until golden.

* I ended up adding butter to the pan for an improved texture. Just a personal preference.


Monday, June 01, 2015

Double chocolate flourless muffins (lower sugar, gluten free)

These were decent! I used coconut sugar in place of the honey and sugar free chocolate chips in place of the chocolate chips. A better texture than some of the almond flour or coconut flour muffins I've made, but probably higher in fat!

Flourless Double Chocolate Muffins
recipe from Running with Spoons (I have noted my changes below)

Ingredients
  • ½ cup almond butter* (I used peanut butter because I had it!)
  • 1 ripe medium/large banana
  • 1 egg
  • ¼ cup honey (I used coconut sugar)
  • ¼ cup unsweetened cocoa powder
  • 2 Tbsp. ground flaxseed (mine was golden)
  • 1 tsp. vanilla extract
  • ½ tsp. baking soda
  • ¼ cup chocolate chips, plus more for sprinkling on top (I used sugar free)
Instructions
  1. Preheat oven to 375F and prepare a muffin pan by spraying 9 cavities with cooking spray. Set aside. (I made 8 muffins in silicone cups.)
  2. Add all ingredients except for chocolate chips to a blender and blend on high until batter is smooth and creamy. Stir in chocolate chips by hand.
  3. Pour batter into prepared muffin pan, filling each cavity until it is about ¾ full.
  4. Bake for 10-12 minutes, until the tops of your muffins are set and a toothpick inserted into the middle comes out clean. Allow muffins to cool in pan for ~10 minutes before removing. Store in an air-tight container for up to a week.
Notes
* To make these nut free, simply replace the nut butter with soy nut or sunflower seed butter.

Monday, May 25, 2015

Cardamom Biscones for Strawberry Shortcake

I currently have the newest cookbook from Cheryl and Griffith Day checked out from the library: Back in the Day Bakery Made With Love. In it, they have a recipe for whole wheat biscones, a take on their "usual" biscones. A biscone is as it sounds - a hybrid between biscuit and scone. I hunted down a version of the original recipe because that sounded perfect to eat with the fresh local strawberries we picked up at the Travelers Rest Farmers Market.

I found the recipe on Pure Wow, but they took it from the original Back in the Day Bakery cookbook. I visited this bakery briefly when I was in Savannah, and if I remember correctly, my sister and I split a brownie. Their baking is very similar to my style - simple but delicious, nothing super fancy but everything tasty.

The biscones fit that description, and they were very tasty with strawberries and whipped cream!


Buttermilk Biscones
 (slight adaptations to directions by yours truly since the original had berries in the dough)
  • Makes 12 biscones
  • Start to Finish: 45 minutes
Ingredients 

1 1/2 cups unbleached all-purpose flour

1 1/2 cups cake flour (not self-rising)

1/4 cup granulated sugar

2 tablespoons baking powder

Salt

1/4 teaspoon ground cardamom (I love cardamom and used 1/2 tsp)

1/2 pound (2 sticks) cold unsalted butter, cut into 1/2-inch pieces

1 1/2 cups buttermilk, plus more as needed (I used whole milk + lemon juice)

1 large egg

3/4 cup confectioners' sugar

Zest and juice of 1 lemon

Directions 

1. Preheat the oven to 375° and line two baking sheets with parchment paper.

2. In a large mixing bowl, whisk the all-purpose flour with the cake flour, granulated sugar, baking powder, 3/4 teaspoon of the salt and cardamom until combined. Using a pastry cutter or two knives, work in the butter until you have various-size pieces ranging from sandy patches to pea-size chunks and some larger bits as well.

3. Gradually pour in the buttermilk and gently fold the mixture until there are no bits of flour remaining in the bottom of the bowl. If the dough seems dry, add a little more buttermilk until it is moist and slightly sticky.

4. Using a large ice-cream scoop, scoop mounds of the dough onto the prepared baking sheets, arranging them about 1 inch apart. Lightly tap down the tops of the biscones with the scoop.

5. In a small bowl, lightly beat the egg with a pinch of salt. Brush the tops of the biscones liberally with the egg wash. Bake for 20 to 25 minutes, rotating the baking sheets halfway through, until the biscones are golden and fully baked. Remove from the oven and let cool for 10 minutes.

6. Meanwhile, in a small bowl, whisk the confectioners' sugar with the grated lemon zest and juice until smooth and creamy. Drizzle over the biscones and serve immediately. (I skipped this step since I was using them as shortcakes.)

Monday, May 18, 2015

Blackberry Rhubarb Crisp - lower sugar, gluten-free

Everyone pairs rhubarb with strawberries, but sometimes I feel like strawberries are too sweet to really balance the tartness of the rhubarb.  I picked some mellow-tart blackberries to put with the rhubarb in this crisp.  This is my recipe, a conglomeration of and inspired by multiple recipes on the internet - Blackberry Rhubarb Crumble from The Kitchn, Strawberry Rhubarb Bourbon Cobbler with Ginger Oat Scones from The Bojon Gourmet, and Rhubarb Cobbler from The Pioneer Woman. I took their general ideas, made it lower-sugar and gluten-free, and called it crisp. I'm actually not sure of the difference between crumble and crisp but I've always called what this is crisp.

Now because I followed The Kitchn's baking time, my rhubarb was still crunchy. I would do what others have done and let the fruit cook by itself for 10-15 minutes and then add the topping. Nobody wants to be reminded that rhubarb started out looking like celery!

Blackberry Rhubarb Crisp

1 lb fresh blackberries, washed and picked over
1 lb - 1.5 lbs fresh rhubarb, washed and cut into 1/4-inch thick half moons
Juice from 1/2 lemon
1/3 cup coconut sugar
1 tsp ground cinnamon
1/2 tsp ground ginger
1/4 tsp salt

1/2 cup almond flour
1/4 cup coconut flour
1/4 cup old fashioned oats
1 tsp cinnamon
1/2 tsp ground ginger
1 tsp baking powder
1/4 tsp salt
1/3 cup brown sugar Splenda (may use coconut sugar again)
2 large eggs
1 tsp vanilla extract
8 tbsp unsalted butter (1 stick), melted

Heat the oven to 375°F and lightly grease a baking dish - 8x8 pan will work (I used a 10" oval casserole dish).

Toss the blackberries and rhubarb together gently with the lemon juice, coconut sugar, cinnamon, ginger, and salt. Spread in the prepared baking dish and bake without topping for 10-15 minutes.

In a medium bowl, whisk the flours and oats with the spices, baking powder,  and salt. Whisk in the brown sugar Splenda, breaking up any large clumps. In a small separate bowl, whisk the eggs with the vanilla. Pour the egg mixture into the flour mixture and use your hands to mix the eggs into the flour. Let the mixture vary in texture.

Drop the larger, wetter clumps of dough over the fruit. Shake the drier crumbs over top, distributing the dough evenly over the fruit. Pour the melted butter over everything.

Bake for 35 minutes, or until the top is golden brown and the crumble is baked through. Let sit for about 30 minutes before eating.

Monday, April 20, 2015

Raspberry Chocolate Clafoutis - Paleo, Low-Sugar, Gluten-Free


From time to time, I thumb through the cookbooks I have at home, looking for inspiration. I wanted to make an Easter dessert without going outside of our usual diet, so I consulted The Paleo Chocolate Lovers' Cookbook: 80 Gluten-Free Treats for Breakfast & Dessert.  The recipe for  chocolate clafoutis looked pretty good so I decided to give it a try.  Traditionally clafoutis is a batter that bakes up around fruit, usually more fruit than a coffee cake but less than a cobbler.  This isn't quite traditional in that way, but if you want to call it that, I can play that game.

We tend to be more interested in the low-sugar, lower-carb aspect of Paleo recipes so I will include the recipe below along with how I modified it based on what was in my pantry.  The end result is a fudgy-brownie type cakey dessert, quite tasty, not obnoxiously good for you.  Hey, sometimes that's saying a lot when you're trying to bake low-sugar.

Chocolate Clafoutis
from The Paleo Chocolate Lovers' Cookbook

Wet Ingredients
1 cup canned full-fat coconut milk
1/2 cup (about 8) soft, pitted Medjool dates
1/4 cup melted coconut oil (I just used vegetable oil)
3 egg yolks
3 whole eggs
3 oz dark chocolate, melted (I used sugar free chocolate chips)
1/8 tsp liquid vanilla stevia (can't stand the stuff, used vanilla extract, maybe 1/2 tsp)

Dry Ingredients
1 cup almond flour
1/4 cup cocoa powder
1/4 cup coconut flour
1/4 cup coconut sugar
1/2 tsp sea salt

Topping
Thinly sliced strawberries (raspberries looked better at the store)

1. Preheat oven to 350 F.
2. In a 12" cast iron skillet, add 2 tbsp melted coconut oil and set it aside. (I used butter, and a 9 inch pie plate. Cooking time was the same!)
3. In a blender, puree the wet ingredients - coconut milk, dates, coconut oil, egg yolks, whole eggs, melted chocolate, and liquid vanilla stevia.
4. Add the dry ingredients - almond flour, cocoa powder, coconut flour, coconut sugar, and salt - to the wet ingredients in the blender, and puree again.
5. Transfer the mixture to the prepared skillet.
6. Top with the sliced strawberries.
7. Bake for about 30 minutes or until a toothpick inserted into the center comes out clean, and serve warm.

Serves 8. 

Monday, April 13, 2015

Portlanders Standing in Line for Donuts, Episode 2 - Blue Star Donuts

Last week I posted about Voodoo Doughnuts.  Many Portlanders like to claim that "only tourists" go to Voodoo Doughnuts. I had heard that true Portlanders had shifted to a more upper scale place with interesting flavors called Blue Star Donuts.  (Although now that it's not such a secret, I'm sure Portlanders are hoping for another new place so they can leave Blue Star to the tourists!) The location we visited was only a few blocks from the legendary Powell's City of Books. Blue Star is easy to access, but still comes with a line.


Blue Star has a different vibe than Voodoo - more classy, with flavors that are intended for a more refined palate. They offer some vegan options but nothing gluten-free at this time. Each donut costs between 2.50 and 3.50 so our box of 4 was over $12. 


Flavors are interesting and it was very hard to choose.  They offer both yeast and cake, with the yeast either being glazed with interesting flavors or filled and dipped in powdery substances. We ended up with a blueberry-bourbon-basil glazed, a Mexican chocolate cake, a Hard Apple Cider Fritter, and a key lime-lemon curd filled powder sugar glazed donut.  The flavors I didn't try that I regret include the passion fruit cocoa nib, the blackberry jelly filled peanut butter powder yeast donut, and the valhrona chocolate topped one that you see in the upper left corner below.


Verdict - these were tasty, especially the Mexican chocolate cake donut, which I definitely could have devoured more of. The flavors that sounded so dynamic were actually quite subtle, arguably too subtle, and I was left feeling I'd prefer the flavors in a different kind of dessert - maybe an opera cake, or a tart. They are clearly using high-quality ingredients, and it shows. If I were local I'd probably peek in from time to time to see new flavor creations.


Sunday, April 05, 2015

Portlanders Standing in Line for Donuts, Episode 1 - Voodoo Doughnut

(In case you don't get the reference, the title is modeled after the brilliant show Comedians in Cars Getting Coffee featuring Jerry Seinfield and friends.)


I was recently in Portland for a conference and despite three weeks in Oregon last summer, I had neglected a visit to the tourist haven, Voodoo Doughnut. This doughnut shop (and extensions) is open 24 hours almost every day, and often doughnut buyers have to stand in line.


Despite the line, and the cash-only requirements, you can get in and out pretty quickly. I found the ordering stage to be a bit overwhelming because while the names of the doughnuts are grouped by type, the descriptions are only found on their website.  A poke around the website reveals doughnuts named after regions (Portland Cream, McMinnville Cream), people (Gay Bar, the Rapper's Delight trio - Old Dirty Bastard, Marshall Mathers, and Maple Blazer Blunt), and other elements of quirk or theme (Voodoo Doughnut, Diablos Rex, Cock and Balls.)

Other librarians at my conference had trekked to Voodoo before I had, and a conversation I overheard pretty much sums it up. "Well, they taste like doughnuts!" Well, exactly.  It isn't as if they've reinvented doughnuts. They've been cheeky about them, and added more things on top than most people do, and they are in prime real estate right off the Skidmore Fountain MAX stop and Portland Saturday Market.  But when you put cookies or cereal (or even bacon) on top of frosting, it gets soggy. And they're... really just doughnuts.  They're cheap, not fast food doughnut cheap but not as expensive as another doughnut-trend Portland place I will review in my next post.  They are more kitsch souvenir than gastronomic miracle.

But still. I had to do it. And that explains the lines of people who stand next to the glitter bricks, waiting for their chance.

Monday, March 23, 2015

French Silk Pie

I have a vague food memory from my childhood of going to a restaurant (probably The Chalet somewhere in Oregon) late at night with my family and being able to choose from what seemed like five hundred types of pie. I remember that after painstakingly considering every option, I chose French Silk Pie.  For years after, I would say that was my favorite type of pie, even though I don't think I had it again until working at a tearoom in Indiana.  At that tearoom, the idea of eating that pie made me nauseous (once you know how much butter is in each mouthful, it's a little hard to fathom.)

For Pi(e) Day I wanted to do something with the big block of chocolate I had on my counter from Trader Joes and ended up coming back to this very traditional French Silk Pie recipe on MarthaStewart.com. Traditional is not always bad! This is almost like how I remember it, but this nut press-in crust is far tastier than a normal pie crust would be.  I substituted hazelnuts for the pecans since that's what I had on hand, and people raved over the crust!


A few pointers for this pie and similar recipes - chill the crust in the freezer 30 minutes before baking and it will keep its shape. The butter for the filling MUST be at room temperature. Give it the time it needs, don't put it in the microwave but don't try to make it cold. On the other side of things, the melted chocolate must be completely cool to the touch. If not you will end up with a freckled pie instead of it fully incorporating with the butter. DO NOT SKIMP on the egg beating time. Yes the recipe says 5 minutes AFTER EACH EGG.  Do it.  And do not feed this pie to people of risky health (pregnant people, children, elderly) unless you use fully pasteurized eggs.


Jean Webster's French Silk Pie
Recipe credit: MarthaStewart.com

Ingredients 

For the Crust
  • 8 tablespoons (1 stick) chilled salted butter, cut into pieces, plus more for pan
  • 1/3 cup pecan halves
  • 1 1/3 cups all-purpose flour
  • 1/4 cup firmly packed light-brown sugar
  • 1/4 teaspoon salt
For the Filling
  • 12 tablespoons (1 1/2 sticks) salted butter, room temperature
  • 1 cup granulated sugar
  • 3 ounces unsweetened chocolate, melted and cooled
  • 1 1/2 teaspoons pure vanilla extract
  • 3 large eggs
  • Whipped cream, for serving
  • Chocolate curls, for serving
Directions
  1. Make the crust: Preheat oven to 325 degrees. Butter a 9-inch pie plate; set aside. Grind pecans in a food processor, or chop very finely with a knife. In a medium bowl, combine flour, pecans, sugar, and salt. Cut in cold butter with a pastry cutter until mixture resembles coarse meal. Press firmly into prepared pie plate. Bake until golden, 20 to 25 minutes. Transfer to a wire rack to cool.
  2. Make the filling: In the bowl of an electric mixer fitted with the paddle attachment, cream butter and sugar until light and fluffy, about 2 minutes. With machine running, gradually add melted chocolate and the vanilla. Add eggs, one at a time, beating at medium speed for five minutes after each addition. Pour filling into cooled pie crust. Cover with plastic wrap, and transfer to the refrigerator to cool for at least 4 hours and up to overnight.
  3. Just before serving, top pie with whipped cream, and decorate with chocolate curls. JennyBakes note: Cut in smaller pieces than usual pie. This is rich!
 

Monday, March 16, 2015

Lemon Cream Tart


This is a very popular little tart on the internet. It was one of the recipes the TWD (Tuesdays With Dorie) group made together as they were baking their way through one of the best baking cookbooks ever, Baking: From My Home to Yours by Dorie Greenspan.  It was featured on SeriousEats. And then Dorie herself improved on the recipe after doing some experiments in her own kitchen, when she discovered that many home bakers were struggling to get the cream to the right temperature. And here it is again, one of the stars of this year's Pi(e) Day.

You will have to indulge me if you have seen this recipe before! Dorie Greenspan was given the recipe by Pierre Hermé. It is similar to a lemon curd in ingredients but the technique turns it into a silkier, creamy divine mixture.  It didn't set up as much as I would have liked for a tart, but I was using a coffee thermometer... I really need to go buy myself another candy thermometer, one that isn't bothered by whisking like this one was.  There is a definite chance my mixture didn't make it to 180 as instructed.


The flavor, on the other hand, is amazing. If you have ever used any bath products that are lemon-sugar scented, this tastes like that smells.  Sweet and tart and creamy, wow. One very thin co-worker ate two pieces of the tart in one setting- that's when I know something is good!  Personally I'd rather find an excuse to just eat this by the spoonful than put it into a tart shell - I think it would be fabulous in a spring trifle or in between light white cake layers.

The recipe is in several of the links above, so I won't post it this time around. Seriously, invest in Dorie's cookbooks because she has never steered me wrong.  I also used her standard shortcrust recipe without nuts, because I knew lemon should be the star of the show.

Saturday, March 14, 2015

The Only Pi(e) Day

This post was published on March (3) 14th, 2015, at 9:26 am, for what should be obvious reasons.

I had great plans for Pi(e) Day this year, being the Pi(e) Day of all Pi(e) Days. I was going to have Pi(e) Month! Okay maybe Pi(e) Week! Well maybe I'll make a few pies.  That actually happened on Pi(e) Day Eve Eve Eve.


You still have time to make a pi(e) - anything round will do! The recipes for these will be posted on the next few Mondays on my regular posting time.

Monday, March 09, 2015

Concept: Banana Split Pancakes


Back on Shrove Tuesday, aka Fat Tuesday, aka Pancake Day, we had a day of ice. In South Carolina, ice means everything gets shut down and cancelled (and the ice in the picture is the thick layer on my outdoor furniture, not staged.) I spent half the day in web-based meetings, no real snow day for me, but I still had time to celebrate pancake day.

I don't exactly have a recipe for this because the pancake recipe I tried for this I ended up tweaking halfway through - it had no eggs, and I feel like that was a mistake in the recipe.  But the idea of it was good - banana bread pancakes!  So the pancakes themselves have pecans.

Then I added sliced strawberries, chocolate sauce (a melted ganache) and whipped cream.  Tasty! 

Monday, March 02, 2015

Mississippi Mud Bars

As part of my ongoing Around the USA baking project, I decided the time had come to make something from Mississippi. The opportunity came while reading The Sharpshooter Blues by Lewis Nordan, set on the Mississippi delta.  I have been exposed to some Southern writers I wouldn't have known otherwise through my participation in the On the Southern Literary Trail group in Goodreads. This was one of the picks for February.

Mississippi mud - the rich, goopy kind that happens when a river meets an ocean. Translated into a cake or a bar, you have to find something that oozes goo - so of course these have marshmallows.  These are very sweet, more sweet than chocolatey. I followed the recipe exactly.

Mississippi Mud Cake Recipe
from Southern Living, June 2004, via myrecipes.com

Ingredients
1 cup butter, melted
2 cups sugar
1/2 cup unsweetened cocoa
4 large eggs, lightly beaten 
1 teaspoon vanilla extract
1/8 teaspoon salt
1 1/2 cups all-purpose flour
1 1/2 cups coarsely chopped pecans, toasted
1 (10.5-ounce) bag miniature marshmallows
Chocolate frosting (see below)

Whisk together melted butter and next 5 ingredients in a large bowl. Stir in flour and chopped pecans. Pour batter into a greased and floured 15- x 10-inch jellyroll pan.

Bake at 350° for 20 to 25 minutes or until a wooden pick inserted in center comes out clean. Remove from oven; top warm cake evenly with marshmallows. Return to oven, and bake 5 minutes. Drizzle Chocolate Frosting over warm cake. Cool completely.

Chocolate Frosting

1 (16-ounce) package powdered sugar, sifted
1/2 cup milk 
1/4 cup butter, softened 
1/3 cup unsweetened cocoa
 
Beat all ingredients at medium speed with an electric mixer until smooth.


Monday, February 23, 2015

Cinnamon Chocolate Swirl Banana Bread from PaleOMG

A few weeks ago, I mentioned that I'm hooked on recipes from Juli at PaleOMG.  No, she's not paying for endorsement. I think it's because so many people who do alternative baking seem to have taken the joy out.  I need joy with my food, even when it's good for me.  I have a hard time compromising taste and texture; knowing it is healthy is not enough! Her recipes seem to demonstrate an understanding of this need, and I have found them to be vibrant and flavorful so far.

One Sunday, I had wanted to try her banana bread coffee cake, but my husband was uncertain. So I thumbed through similar recipes, and we landed on Cinnamon Chocolate Swirl Banana Bread.  I made this recipe pretty much exactly as described, even using honey instead of a substitute. (I always worry I will sacrifice texture when I use a dry sweetener for a wet, and it was only 1 tbsp.)  The chocolate chips I used were sugar free but not intentionally paleo, but like I've said before, I'm not going for paleo myself, just looking for recipes that aren't using traditional flour.


Cinnamon Chocolate Swirl Banana Bread
Source: PaleOMG (the second recipe from that site in a month - also her pictures are nicer)

 
Ingredients
For the pan
  • coconut oil, to grease the pan
For the banana bread:
  • 4 medium bananas (about 1 pound)
  • 4 large eggs
  • ¼ cup (½ stick) unsalted grass-fed butter, melted
  • ½ cup almond butter (I used peanut butter, which is not paleo, but it's what I had)
  • ½ cup coconut flour
  • 1 tsp baking soda
  • 1 tsp baking powder
  • 1 tsp vanilla extract
  • Pinch of fine-grain sea salt
For the swirl:
  • 2 tablespoons unsalted grass-fed butter
  • 2 tablespoons ground cinnamon
  • ½ cup mini chocolate chips (took out brand name since I used something else)
  • 1 tablespoon organic honey
Instructions
  1. Preheat the oven to 350°F. Grease a 9-by-5-inch metal loaf pan and line it with parchment paper. (I used glass with spray and it came out fine.)
  2. Combine the bananas, eggs, butter, and almond butter in a food processor or mixing bowl and mix until the ingredients are well blended. Add the coconut flour, baking soda, baking powder, vanilla, and salt and continue to mix until all the ingredients are well combined.
  3. In a double boiler over medium-low heat, mix together the swirl ingredients. Heat, stirring often, until the chocolate has melted. (I just used the microwave, much faster!)
  4. Pour the bread batter into the prepared pan and spread it out evenly. As soon as you pour the batter, pour the chocolate swirl directly on top and use a knife to swirl the chocolate throughout the loaf pan.
  5. Bake for 45 minutes, or until a toothpick comes out clean when inserted in the middle. Remove from the oven and let cool in the pan on a cooling rack for 15 minutes before serving. (Mine had to bake another 8 minutes.)

Monday, February 16, 2015

Tahini and Wholegrain Mustard Crackers from Eat Drink Paleo

I hope you aren't tired of paleo recipes because this isn't the end!  I had picked up some Snow Camp cheese from a localish dairy, Goat Lady Dairy, at our favorite local-organic market, the Swamp Rabbit Cafe & Grocery. Swamp Rabbit is my go-to place for non-traditional baking - they have a better special flour selection than Whole Foods, not to mention gluten-free and vegan pastries galore, really good lattes, cheese-making supplies, and Turkish pogacha.  Anyway, I can spend a lot of money there!

I bought this lovely cheese and as we drove home I said, "Huh, what we will eat the cheese with? Without croissants or crackers, I took to the internet to see if I could find a cracker recipe.  I had used up all the almond flour, so I needed a recipe that used coconut flour.

I found a few, but none so intriguing as the Tahini & Wholegrain Mustard Crackers recipe from Eat Drink Paleo.  Almost all the ingredients are just normal pantry staples at my house, and this was super easy to pull together.  Texture-wise I should have baked the middle a bit longer, as they were a bit soft, but cracker-like enough to spread with gooey local goat cheese.


Tahini & Wholegrain Mustard Crackers
Source: Eat Drink Paleo (the blog with the original recipe has ingredient substitution advice as well as step-by-step photos)

Ingredients

  • 3 tbsp tahini paste
  • 1 tbsp soft or slightly melted butter, ghee or coconut oil
  • 1 egg
  • 2 tbsp sesame seeds
  • pinch of salt
  • 1 tbsp wholegrain mustard
  • 2 1/2 tbsp coconut flour

Instructions

  1. Preheat oven to 170 °C/338 °F. (The closest I could get on my oven was 340)
  2. Mix tahini, butter, egg, sesame seeds, salt and mustard in a bowl until well combined. Add coconut flour and mix until thick, sticky mixture forms. (Do not merely substitute a different flour, coconut flour has very specific properties.)
  3. Roll the mixture into a ball and place on a slightly greased parchment/baking paper (about 40 x 40 cm). Flatten with you hands in the middle until it’s a flat pancake. Then cover with another piece of parchment paper of the same size and use a rolling pin to flatten the pancake into a thin dough layer, about 3-5mm. Roll it evenly in four directions starting from the middle. Finally using a knife make small incision marks vertically and horizontally to make it easier to break the crackers when cooked.
  4. Place on the middle shelf and cook for about 15 minutes. The outer edges will cook faster so I recommend taking the tray out of the oven when those start going golden brown and slicing those edges off first, then putting the tray back in the oven for a further 3-5 minutes. Alternatively, before you put the tray in the oven in the first place, slice the thin pancake into halves and spread them apart so there is some space between the halves. When you’re taking them out, you will notice that there is of oil bubbling away around the cracker and that’s fine. Set the cooked cracker layer to cool before breaking apart.
Preparation time: 10 minutes
Cooking time: about 15 minutes
Makes about 15 crackers


Sunday, February 08, 2015

Churro Waffles from PaleOMG

Sometimes when I find a blogger I really like, I get stuck making their recipes for a while.  (Stuck isn't a bad thing exactly, but might be boring for my readers!) This happened with Smitten Kitchen, and now PaleOMG.  I actually found Juli at PaleOMG first through a cookbook that I got for review (OMG. That's Paleo?) and only then poked around her blog.

Some people say that using baking soda makes a recipe not paleo, but I don't really care about paleo as much as I care about lower sugar, grain-free recipes. So if you are paleo, check the ingredient list and make a small change accordingly.


These were pretty tasty, and just different enough from our usual morning routine to make a nice change in taste and texture.  The picture on her blog is quite a bit darker, so it's possible that mine are underbaked.  I made four almost-whole waffles with this recipe.  I will indicate when what I did differed from her recipe.

Churro Waffles
Source: PaleOMG (check out her other recipes!)

Ingredients
  • 1 1/2 cups almond meal/flour
  • ½ teaspoon baking soda
  • ½ teaspoon cinnamon
  • pinch of salt
  • ⅓ cup canned coconut milk (I used full-fat)
  • 2 eggs, whisked
  • 1 tablespoon honey (I used coconut sugar and added a bit more coconut milk)
  • 1 teaspoon vanilla extract
  • 3 tablespoons grass fed butter, melted (or coconut oil if you don’t do butter)
  • ¼-1/3 cup coconut sugar
Instructions
  1. Place almond flour, baking soda, cinnamon and salt in a bowl and whisk together.
  2. Then add coconut milk, eggs, honey, and vanilla extract and mix well.
  3. Place mixture into hot waffle iron and cook until cooked through. I used a non stick waffle iron but you may want to grease it just in case.
  4. Melt butter in a wide bowl and place coconut sugar in another wide bowl.
  5. After waffles are cooked through, place each other into the melted butter, soaking it on both sides, then place them into the coconut sugar to coat.
  6. Then eat!
Notes
Made 6 small waffles. Should make 3-4 large waffles

Monday, January 26, 2015

Low-Carb Low-Sugar Gluten-free Microwave Single Serving Brownie

Well, you know, lower-carb. Lower-sugar.  I am not sure where the line is really drawn to call something actually low. I started with the recipe on the No. 2 Pencil blog, which makes a tasty regular one-serving microwave brownie. 


JennyBakes' Low-Sugar Low-Carb Gluten-Free Single Serving Microwave Brownie
  • 2 tbsp butter
  • 1-2 tbsp brown sugar splenda (6-12 carbs)
  • pinch of kosher salt
  • 1 egg yolk
  • 4 tablespoons of almond flour (5 carbs)
  • 1 tablespoon of Hershey’s unsweetened cocoa powder (3 carbs)
  • 1 tablespoon of sugar free chocolate chips (optional, 9 more carbs)
1. Melt the butter in a microwave safe container.
2. Stir in brown sugar splenda and salt.
3. Stir in egg yolk.
4. Mix in almond flour and cocoa powder.
5. Spray nonstick cooking spray on ramekin or custard cup or mug. Spread in batter.
6. If using, sprinkle chocolate chips on top and press into the batter. It will be very thick.
7. Microwave for 45 seconds.

Sunday, January 18, 2015

Mini Cocoa Pavlova

In my attempts to make sweets from Southeast Asia and Oceania, I would be remiss to overlook Australia! Pavlova is a standard Australian and New Zealand dessert, one I've made several times. There was the time I went searching for a cloud-themed dessert and made a pavlova topped with passion fruit, whipped cream, and fresh fruit. Then there was the time that I had to make the cover recipe from the amazing Wintersweet cookbook - the Cocoa Pomegranate Pavlova. Pavlova isn't new, but I had egg whites to use and an Australian book on the horizon - something by Richard Flanagan, most recently awarded the Man Booker Prize.

This recipe is a mashup of the cocoa pomegranate pavlova, Nigella Lawson's mini pavlovas, and an attempt to use a sugar replacement to make this lower in sugar and carbs.  It was very tasty but the texture wasn't quite right. Perhaps I could have baked them longer or left them out to dry a bit overnight. Sugar really is integral in establishing the structure of a pavlova; I should be applauded for not including it.  Ha.

<b>Lower Sugar Cocoa Mini Pavlova</b>

6 egg whites, room temperature
pinch salt
3/4 tsp cream of tartar
1/3 cup Brown Sugar Splenda
2 tsp corn starch
1 tsp vanilla
1/2 tsp Balsamic vinegar
2 tbsp cocoa powder
Sugar free whipped cream
Fresh fruit, raspberries ideal
  1. Preheat oven to 250 F. Line a cookie sheet with parchment paper.
  2. Beat the egg whites, cream of tartar, and a pinch of salt until they start to hold a bit of shape.
  3. Mix the splenda and corn start together. You can even whiz it in a grinder to make it finer, but I just mashed it until it was powdery. Add the mixture 1 tbsp at a time to the egg whites, letting it incorporate.
  4. Beat whites until stiff peaks form. In the last minute, add Balsamic vinegar and vanilla.
  5. Take off beater. Sift cocoa powder over surface and gently fold in.
  6. Spoon circles, 8-10, onto cookie sheet. Make well with back of spoon.
  7. Bake 60-75 minutes, until outer shell has a bit of a crunch. Turn off oven and leave an additional hour.
  8. Remove and let cool completely.
  9. If you put in an air tight container, they may soften. This is not what you want!
  10.  Serve with whipped cream and berries. If you're feeling extra special, melt down some sugar free dark chocolate and coat the bottom of each pavlova first - outside or inside.
 

Monday, January 12, 2015

Baking Around the World: Banana Pancakes (Papua New Guinea)

For the past few years, I have been involved with a marvelous reading group in Goodreads called The World's Literature. In 2012, we read books from Japan, in 2013 it was Turkey, and this past year we focused on Iceland.  I learn so much during these group reads, whether I read a long with a book everyone is reading, or select my own books to read from the country or region.

This year, we are focusing on the large swath of the globe from Southeast Asia down to New Zealand, and all the tiny islands making up the South Pacific and Oceania in between.  There are a lot of different names for it, and a lot of places I've never read about before.  We are starting the year with a group read of Four Corners: A Journey into the Heart of Papua New Guinea by Kira Salak. 

I have never been to Papua New Guinea, but I spent a semester in an independent study on world music my junior year of college, where I did a research project on music composition among the Kaluli, one of the highland peoples in PNG.  I was *this* close to spending the summer there with a Wycliffe ethnomusicology internship, but that didn't come together in time.

Trying to find recipes from PNG and other similar places can be difficult, because most of the cuisine in places like this has to do with what can be grown or caught.  Pork is used a lot for ceremonial dishes, but can't be eaten daily. Much of the traditional cuisine is vegetarian!  And there are a lot of bananas.  Banana leaves are used to cook the food, particularly in the special mumu dish I kept coming across, but then you also have bananas galore. So it shouldn't be too much of a surprise that I am making banana pancakes.  I still balk somewhat at the authenticity of it, but I read an interesting article about the "banana pancake trail" claiming that bananas may have originated in PNG.  (You'll have to read the article for the origin of the banana pancake.)

And of course there is a song all about banana pancakes by Jack Johnson, but I have to warn you that his music sounds nothing like music from the highlands of Papua New Guinea!

In Four Corners, fried bananas are often served to the author in times of high stress.  This either speaks to bananas as a comfort food or their sheer number, but regardless, I took note of this fact - when the women were trapped by the rascals on "payday" inside the YWCA ("to help distract us, one woman prepares a snack of fried bananas"), and when she meets with the head of the OPM, the guerilla resistance movement working against Indonesia.  Phew!  Eat some bananas.  I'm taking fried bananas up to being friend inside a batter, but I figure it's close.
This isn't very much outside my comfort zone taste-wize, but it definitely has some strong connections to my new region of the world.


Banana Pancakes
recipe from Food.com


Ingredients:
Servings: 4
  • 2 cups self raising flour
  • 1/4 teaspoon baking powder
  • 1 cup milk
  • 2 tablespoons honey
  • 45 g butter, melted
  • 2 -3 bananas, very ripe, mashed 
Directions:

  1. Sift flour and baking powder into a bowl.
  2. Make a well in the middle.
  3. Combine the remaining ingredients, add flour and beat until free of lumps.
  4. Heat frypan with a little extra butter or oil.
  5. When the pan is hot spoon in desired amount of mixture.
  6. When bubbles start to appear in the batter, flip over and cook the other side.
  7. Eat with more bananas sliced on top and drizzled with Honey or with fresh fruit, or a squeeze of lemon/lime and sprinkle of Sugar. (I added pecans.)

Monday, January 05, 2015

Paleo Low-Sugar Pumpkin Chocolate Chip Cookies


I kept forgetting to post these cookies, but now that all of you are brimming with new year's resolutions, this recipe couldn't come at a better time.  This is pretty versatile as far as the bits you add, and I started with a sweet potato recipe, using pumpkin instead.  Just to clarify, pretty sure cavemen weren't running around eating sugar free chocolate chips, but most of the time I'm starting with a paleo recipe and turning it into a low-sugar recipe instead.  They are close but not exactly.

The recipe originates in Paleo Magazine, with credit to everydaypaleo.com, but the recipe below is my tweaked version.  To use their recipe, use maple syrup for the Splenda, nuts or dried fruit for the chocolate chips, and sweet potato for the pumpkin.

Pumpkin Chocolate Chip Cookies, low-sugar

1 cup almond meal
1 cup canned pumpkin (not pumpkin pie filling)
1/2 cup sugar free chocolate chips
1/3 cup coconut milk
1 egg
4 tbsp brown sugar splenda
1 tbsp cinnamon
1/2 tsp baking powder

1. Preheat the oven to 400 F.
2. Stir together all the dry ingredients.
3. Add egg, pumpkin, and coconut milk and mix well.
4. Line a cookie sheet with parchment paper. Scoop cookies about 1 heaping tablespoon per cookie.
5. Bake for 10-20 minutes (recipe in magazine says 20 but this is too long! watch them before that please.)

Thursday, January 01, 2015

Baking Around the USA: Brown Sugar Pecan Cookies (Georgia)


It has been a while since I made a baked good to pair with a book I had been reading, but that's about to change around here!  I only have 12 states left in my Around the USA reading challenge, and my World Lit group is tackling Australia/New Zealand/Oceania/Southeast Asia.  Tasty treats will be essential!

I binge-read Flannery O'Connor short stories.  If you aren't familiar with her, she is one of the quintessential southern writers, from Georgia.  Do you know what else is from Georgia?  No, don't say peaches.  (Stephen Colbert begs to differ.)  Pecans!  Yes!  My inlaws gave me some Georgian pecans and I had been pondering what to make ever since.  As I read these stories, my brain was demanding something southern, something sweet, and I remembered a recipe I'd had pinned for a few years.

I took this recipe from a guest post on the Tator Tots and Jello blog.  I didn't change a thing, except to clarify that it is only if you make the cookies 1" that you will end up with 5 dozen. I used a regular cookie scoop and had exactly 2 dozen. The icing was perfect for that number, and I topped mine with chopped pecans.

These are delicious, but like many southern baked goods, very very sweet.  The nuts help to balance the sweetness a little, but grab a big glass of milk or sweet tea!

Brown Sugar Pecan Cookies
  • 1 cup unsalted butter, softened
  • 1/2 cup sugar
  • 1/2 cup firmly packed brown sugar
  • 1 egg
  • 1 tsp vanilla
  • 2 cups flour
  • 1/2 tsp baking soda
  • 1/4 tsp salt
  • 1/2 cup finely chopped pecans
  • Brown sugar frosting (see below)
  • Pecan halves (or chopped pecans) for topping
  1. Preheat oven to 350 degrees.
  2. In a large mixing bowl, beat butter at medium speed until creamy. Add sugars and beat until smooth. Add egg and vanilla and beat until well combined.
  3. In a separate bowl combine flour, baking soda and salt. Gradually add flour mixture to butter mixture and mix well. Stir in chopped pecans. Cover and chill at least 30 minutes.
  4. Shape dough into 1-inch balls and place 2 inches apart on ungreased cookie sheet. Bake for 10 to 12 minutes. (If making larger cookies, add an extra 1 to 2 minutes to baking time.) Cool 2 minutes on pan and remove to wire racks. Cool completely before frosting.
  5. To frost, spread about 1 tsp of the brown sugar frosting on each cookie (more for larger cookies) and top with a pecan half or more chopped pecans. Yields approximately 5 dozen.
Brown Sugar Frosting
  • 1 cup firmly packed brown sugar
  • 1/2 cup half and half
  • 1 T unsalted butter
  • 1 1/4 to 1 1/2 cups powdered sugar
  1. Combine brown sugar and half and half in a saucepan. Cook over medium heat, stirring constantly, until mixture comes to a boil. Boil for 4 minutes.
  2. Remove from heat and stir in butter. Add 1 1/4 cups powdered sugar and beat at medium speed with an electric mixer until smooth. Consistency will seem thin but will thicken as it cools. If frosting seems too thin, add enough of the remaining powdered sugar to desired consistency.